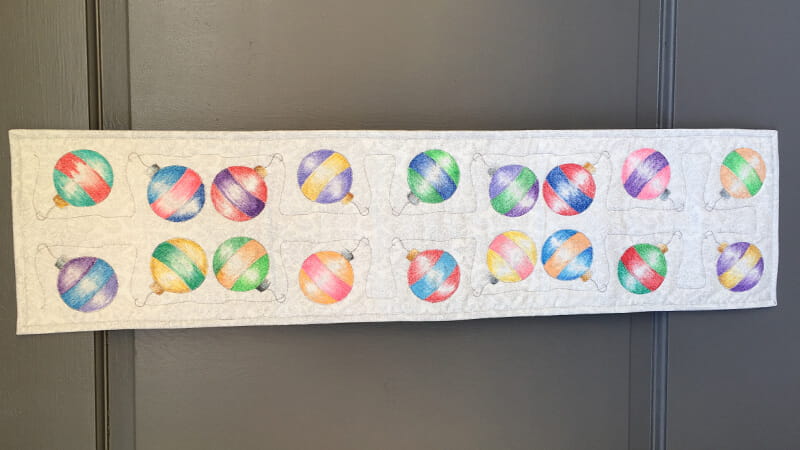
Holiday Ornament Wall Hanging: Quilt & Color
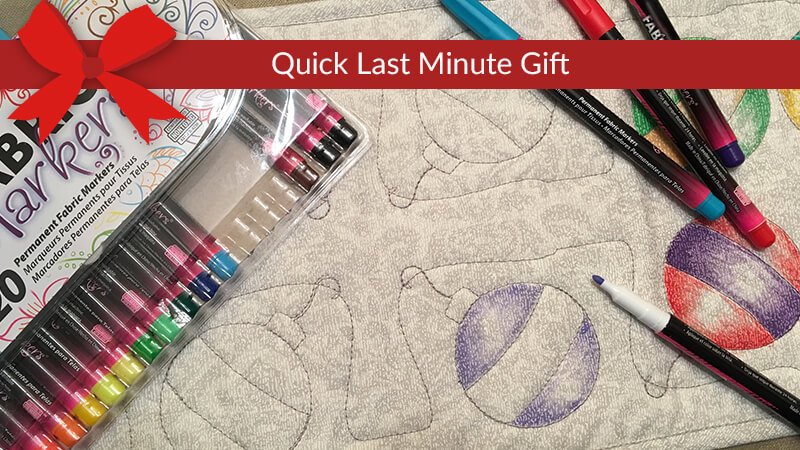
A little fabric and a little time are all you need to add a bright spot of color to your holiday décor. If a long and skinny hanging isn't what you want, just vary the number of motifs to create a square or rectangular pillow. For the quickest of projects, arrange just four ornaments on a hot-pad sized square for a gift ready in no time. When the Christmas season is past, browse the other motifs in THE Dream Motion™ PRO’s library to decorate a project with cats, teddies, or abstract designs. The hanging sews out very quickly, so once you've created the design file in THE Dream Motion™ PRO Software why not stitch several? Size: 8" x 36"
Machine/Equiptment/Software:
THE Dream Quilter™ 15THE Dream Fabric Frame
THE Dream Motion™ PRO Software
Materials
- Yardages are based on 45"-wide fabric.
- 1 yard of white or light-colored fabric*
- 10" x 40" piece of batting
- Quilting thread
- Sewing thread
- Fabric markers
3 strips, 2 1/4" x width of fabric

Programming the Quilting
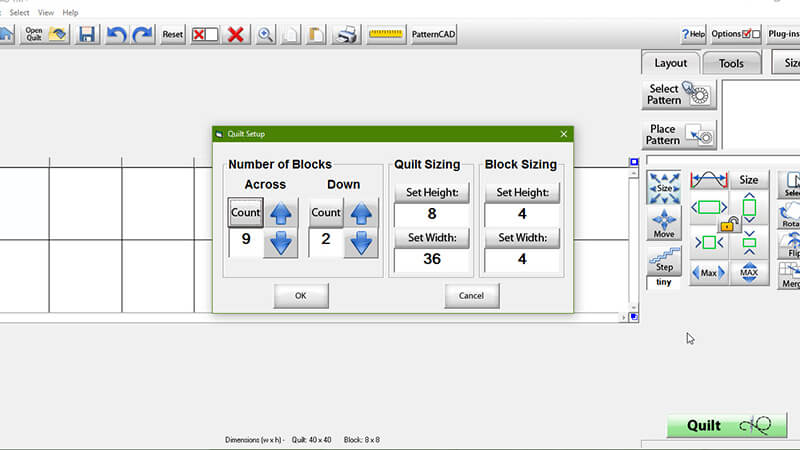
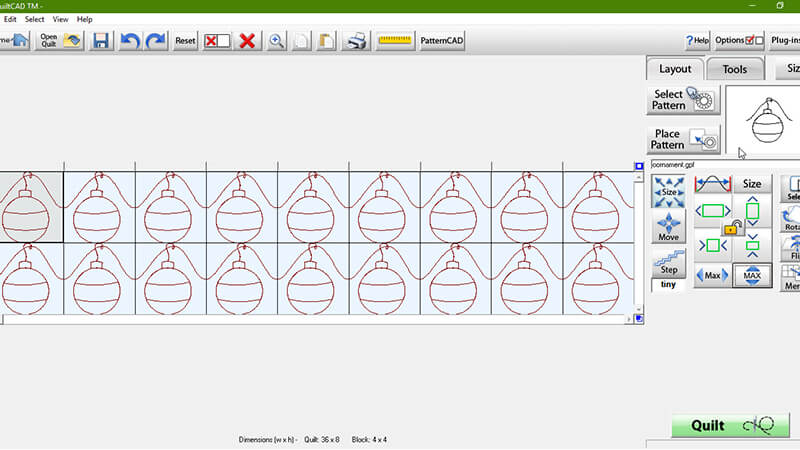
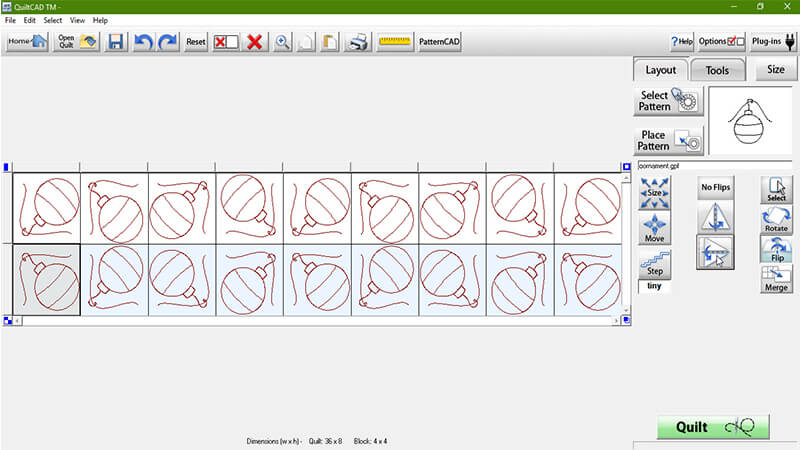
- Open THE Dream Motion™ PRO Software and click on QuiltCAD™. Click the Size tab and set the Number of Blocks to 9 Across and 2 Down. Type 4 into both settings for Block Sizing, which will also set the Quilt Sizing as needed. Click OK.
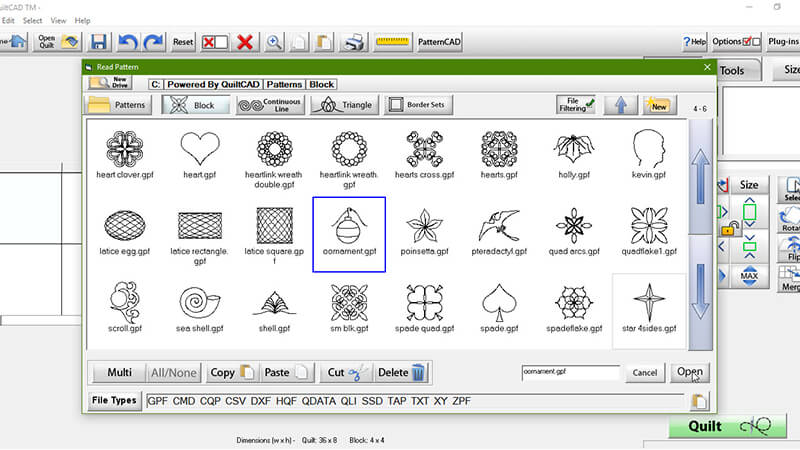
- Click Choose Pattern and select oornament.gpf from the Block tab Click Open.
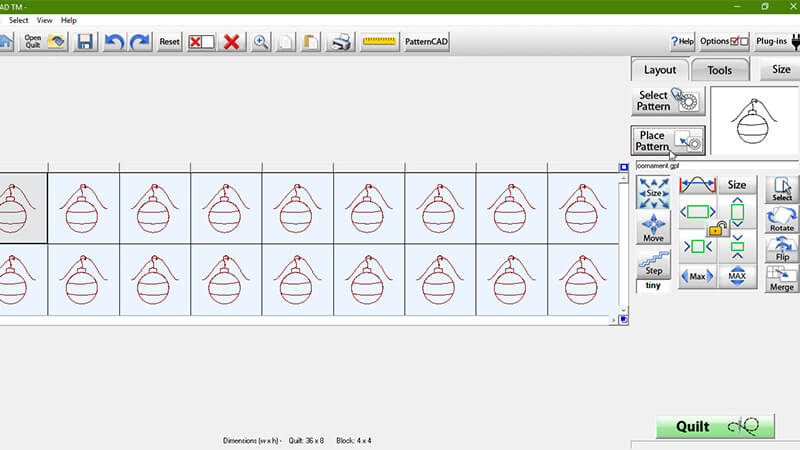
- Select all of the blocks in your quilt and then click Place Pattern.
- Click both MAX icons on the lower right to increase the size of the motifs so that they fill the blocks.
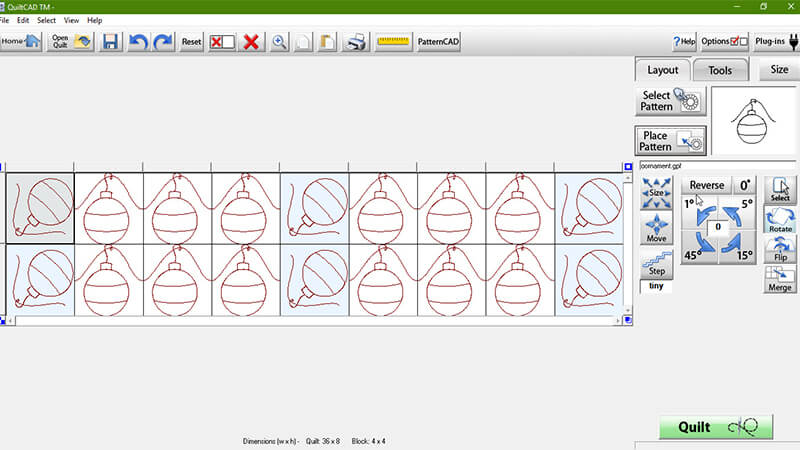
- Deselect all of the blocks and then select the first, fifth, and ninth columns. Use the Rotate function to turn those ornaments in 45-degree increments so that their hangers are in the bottom left corners of the blocks, as shown.
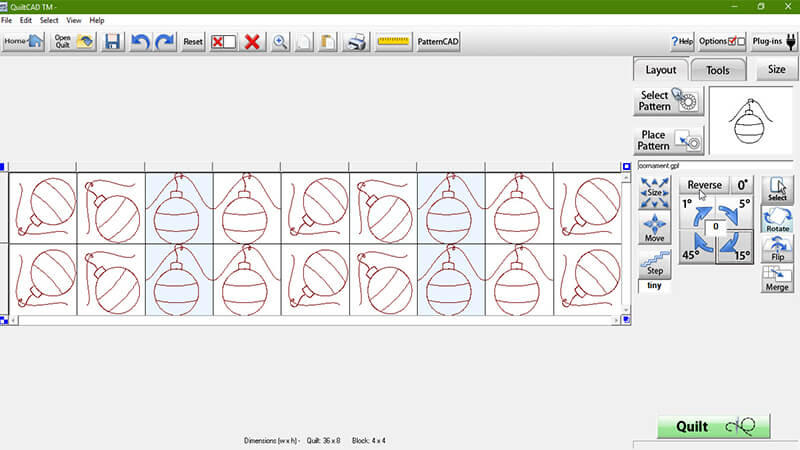
- Deselect those six blocks and select the second and sixth columns. Rotate those ornaments so that the hangers are in the upper left corners of their blocks. Move on to the third and seventh columns. You can click the Reverse icon to change the rotation direction, making it a bit simpler to rotate those blocks to position the hangers in the upper right corners.
- Rotate the ornaments in the fourth and eighth columns so that their hangers are in the lower right corners of the blocks.
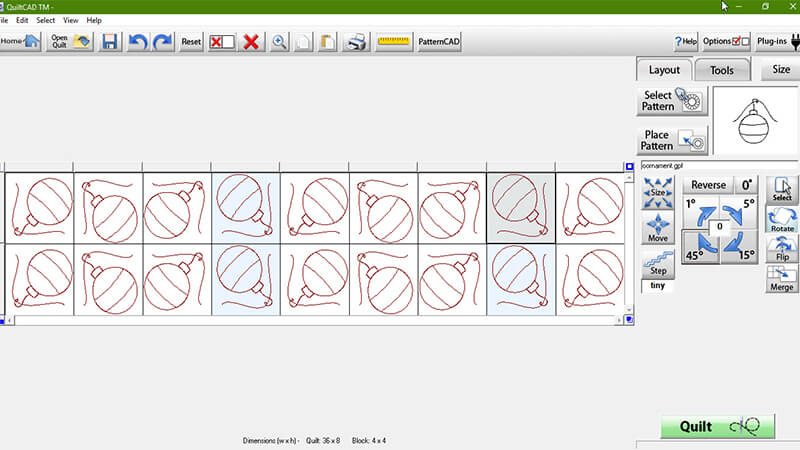
- Select the bottom row of blocks and use the Flip tool to mirror those ornaments from top to bottom, creating squares and crosses with the ornament strings.
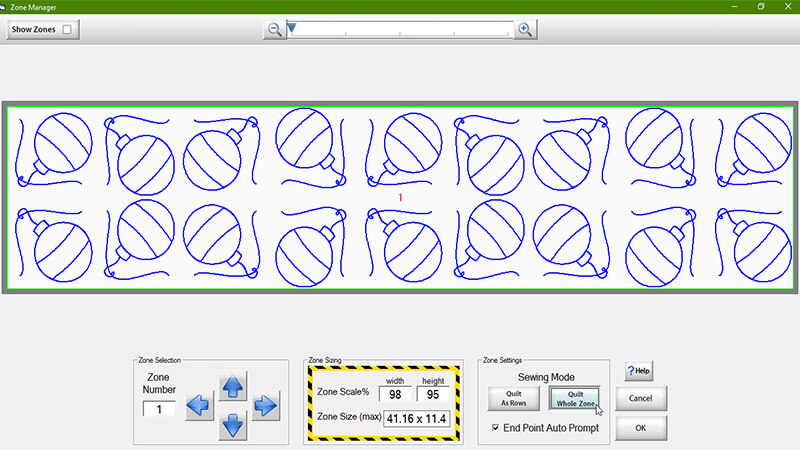
- Click the Quilt icon. Open the Zone Manager. Be sure the Sewing Mode is set to Quilt Whole Zone for THE Dream Quilter™ 15. If you are stitching with a VQ2400, you will work with one row at a time, and will need to alter the specific instructions that follow.
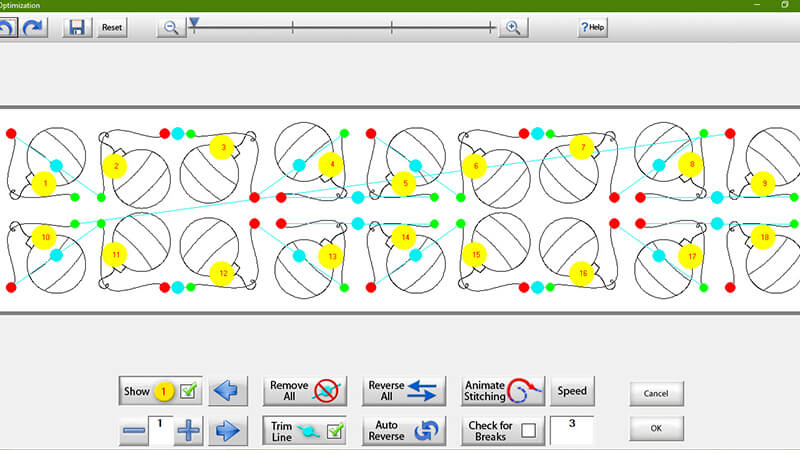
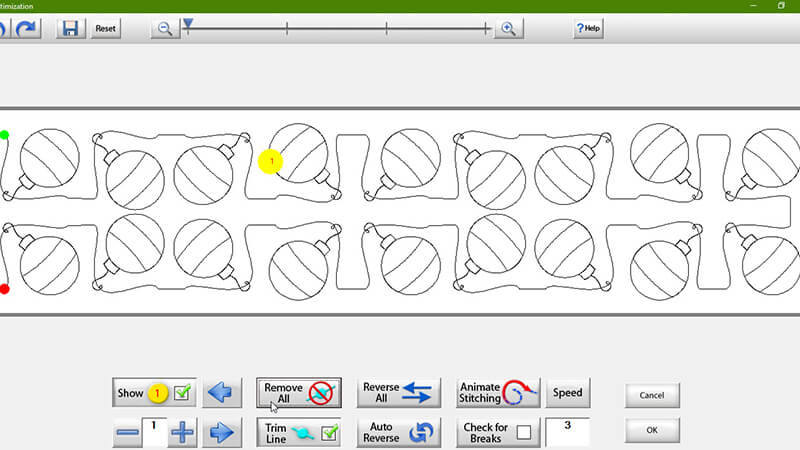
- Click OK to exit the Zone Manager and click the Optimize icon. On this screen, we'll join the separate motifs to make one continuous line of quilting. The design will sew out with maximum speed and efficiency. The numbered yellow circles show that we currently have 18 designs that will sew out in numerical order, including a very long jump between rows. The green dots are the start points for each motif; the red dots are the end points; and the blue dots are the trims, or jumps, between motifs.
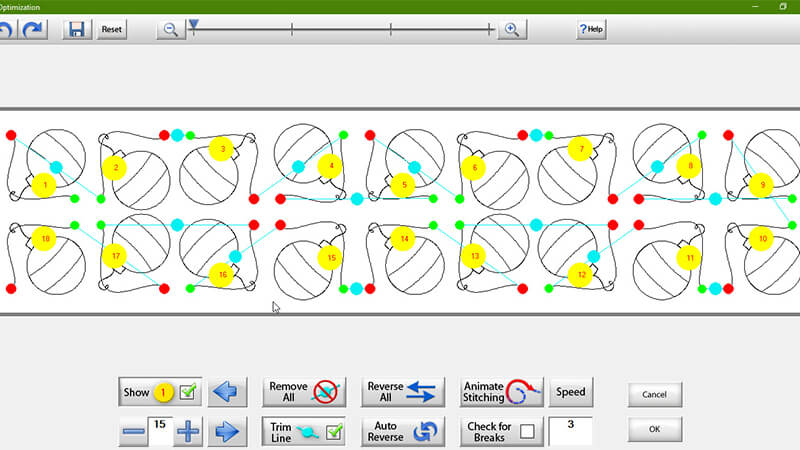
- To begin optimizing, enter the number 10 in the lower left corner of the screen, or click the + repeatedly to scroll up to 10. Next, click on the yellow circle at the right on the bottom row of motifs (currently 18). The number will change to 10; ignore other changes for now. Click the next yellow circle, moving left across the bottom row, to change it to 11; you don't need to enter a new number each time, as the numbers will increase automatically. Continue across the row until its numbers are in order from right to left. Once you click 13 or 14, the remaining numbers may all fall in line automatically.
- Click Auto Reverse. The start and end points will change so that the trims are all small and close together.
- Click Remove All. If the software asks whether you want to connect the beginning and ending points, choose No. The trims are replaced by lines of stitches so that the design can stitch as an unbroken whole.
- Close the Optimize screen by clicking OK and then SAVE YOUR PROJECT.
Assembling the Holiday Ornament Wall Hanging
Seam allowance is 1/4".- Layer the fabric rectangles and the batting to create a quilt sandwich. Using header cloths as necessary, mount the quilt on your Dream Fabric Frame. Quilt the optimized design you created in the steps above.
- When the quilting is complete, trim the hanging to measure 8 1/2" x 36 1/2", keeping the design centered.
- Join the 2 1/4"-wide strips into a continuous length and bind the hanging.
- Use fabric markers to color each ornament on the hanging. For a dimensional appearance, shade the colors darker along the edges of the ornaments and leave an irregular band along the vertical center of each ornament without color or very lightly shaded. Don't forget to color the ornament caps as well.
Related Projects
Stay Connected
* Required fields