Lacey Heirloom Bonnet Tutorial
Few sights bring more admiring looks than a baby in a smocked or heirloom sewn bonnet. Common components of this classic infant accessary are heirloom lace, hemstitching, embroidery, feather stitching, and lace beading threaded with satin ribbon. Most of those techniques, time consuming techniques, can now be done not only faster, but more precisely with THE Dream Machine 2 by Brother.
Features such as My Custom Stitch (MCS), scanner, perfect hemstitching, laser line, laser dot, knee lift, and more make creation of that classic look a joy.
Materials and Supplies:
- White linen - ¾ yd.
- Heirloom lace insertion or beading ½” wide - 10”
- Heirloom lace edging 5/8” wide - 2 and 5/8 yds.
- Lt weight paper-like stabilizer for MCS and pinstitch and tearaway for floral embroidery
- THE Brother Dream Machine 2
, Quattro, Duetta or other Brother embroidery machine with My Custom Stitch capability, 4x4 or larger frame - Pattern: Simplicity 8024 (view F)
Disclaimer: Simplicity pattern #8024 (View F) is part of the Simplicity Creative Group. Brother International Corporation makes no representations or warranties regarding such product.
Downloads:
Threads:
- For MCS zig zag feather stitch: 50 wt. cotton thread
- For floral embroider: 40 wt. thread
- For hemstitching: fine cotton thread
Needles:
- For MCS stitching: #75 or #80
- For hemstitching (entredeux and pinstitch): #100 or #120 wing or #100 sharp
- For construction and floral embroidery: #65, or #70
- For hand sewing back lining: fine hand sewing needle
Notions:
- 5” of 3/8” elastic
- 12 inches of 1/8” pink satin ribbon if using beading---1 yard of 1” pink satin ribbon
- 2 decorative pearl buttons for ribbon ties, fray block
Sequence:
- Front band
- Crown
- Back
Band Preparation:
- Starch and press .75 yds. White linen.
- Download MCS design, single flower, and lace loop design to memory stick.
- Load MCS design to machine. Open Character Decorative Stitch menu.
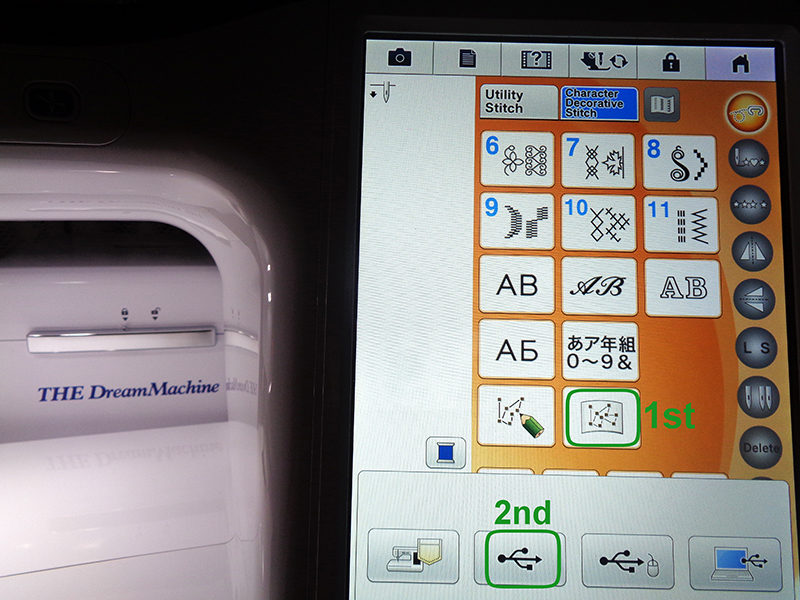
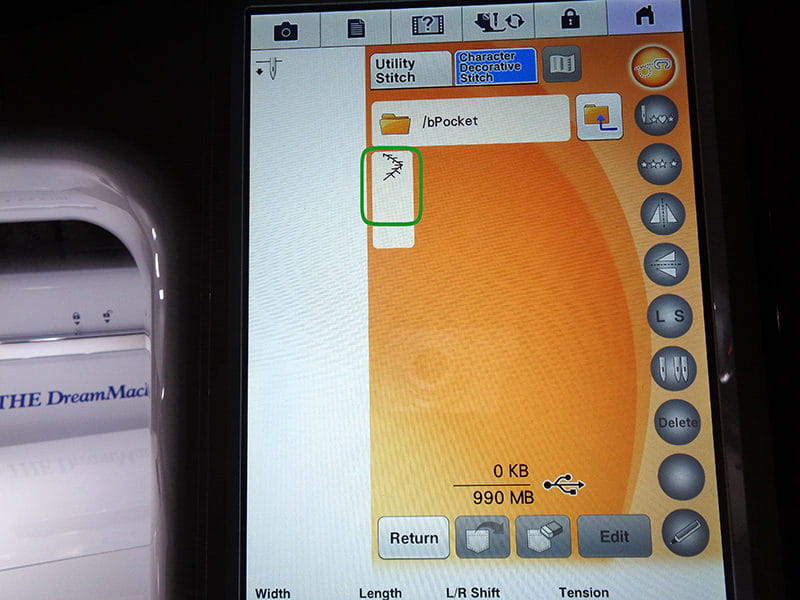
- Select MCS pattern first then select memory stick second.
- Click on MCS feather stitch.
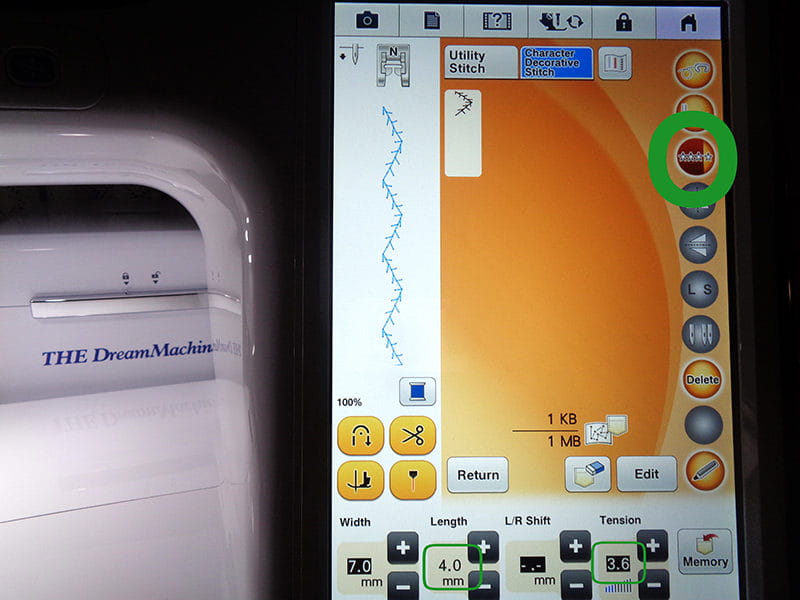
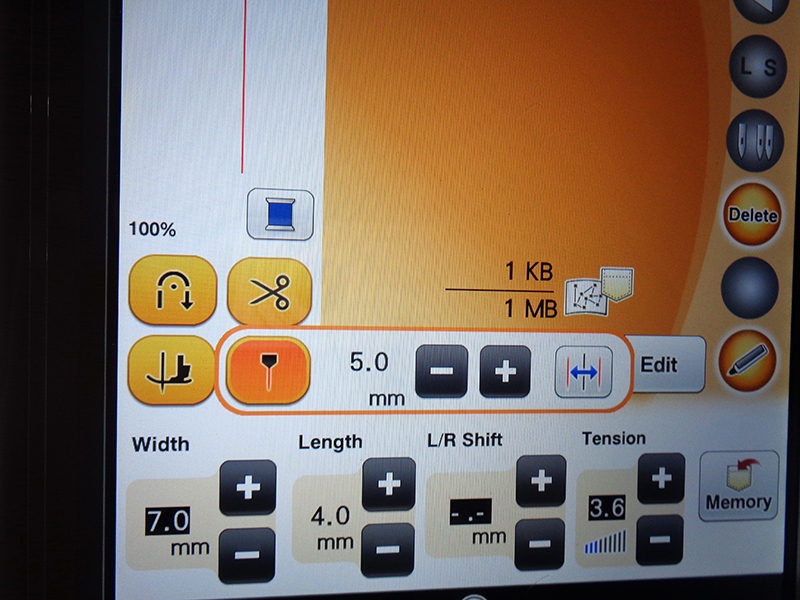
- Change default settings: width 4.0, tension 3.6, pattern repeat.
MCS Embroidery on Bonnet Band
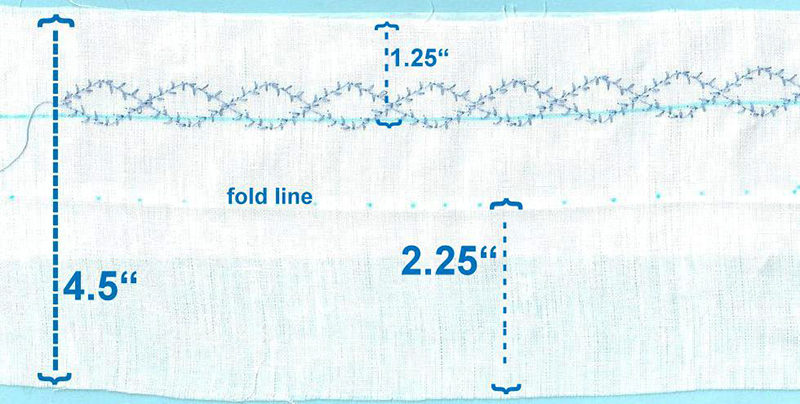
My Custom Stitch (MCS) is a fabulous sewing side feature, exclusive to top-of-the-line Brother machines. It enables you to enter, save and sew your name or any stitch up to 7 mm wide.- Cut bonnet band NOT ACCORDING TO PATTERN but 4.5” x required measurement + 4”. For instance, size small band pattern is 14.25” long. Actually, 15” will be needed. The pattern is for a boy folded over band. This girl version is different.
Note: Extra length allows for pattern placement adjustment, so the diamonds can be complete at either end. Also, any less than perfect diamonds outside the required length can be eliminated. I made a lot of mistakes and have learned ways that often can compensate for them.
Note: Finished diamonds will not be centered on center line.
- Attach J foot, not N foot as indicated, and insert #80 needle.
- Thread needle with 50wt. thread and bobbin thread in the bobbin. Pull out long thread tails for hand tying later.
- Work first side of diamonds with left edge of J foot on blue line.
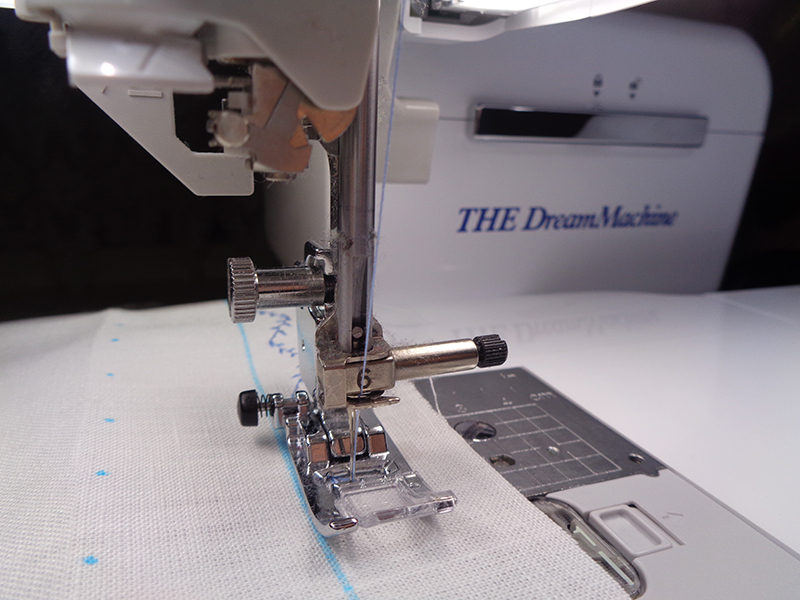
- Change setting to single pattern as you approach the last pattern. See image # in step 6.
- Activate laser. Move to align with blue line. My setting was 5.0. Maintain setting at single pattern.
Note: MCS designs cannot be mirrored or rotated. So the diamond shape must be created by stitching down one side, pivoting and stitching down opposite side.
- Pivot with needle in fabric.
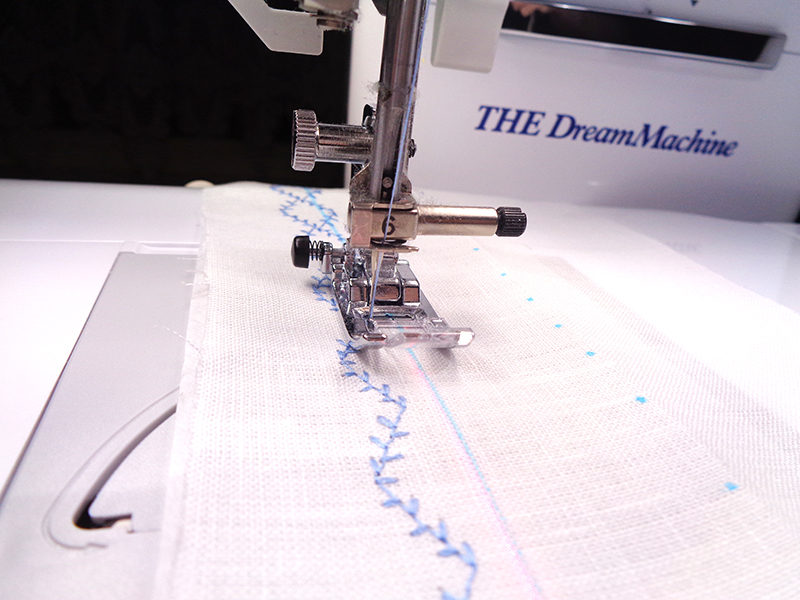
- Continue MCS stitch with center of J foot on blue line/laser with single pattern. You will need to move the needle to its new position with J foot in alignment with laser/blue line.
- Stitch first pattern. Check alignment with each opposite zig zag pattern and reposition if necessary. Continue ONE REPEAT at a time until end of piece.
Note: It is not imperative that the points touch but the second pass must be a mirror image of the opposite pattern. The flower embroidery will cover any discrepancies.
- Start over OR correct misshapen diamonds.
Note: In this pattern on the first pass, the long tail of the linen got caught and created a stunted half diamond. It was noticed, of course, during the second pass when the pattern did not line up. The blue thread of mismatched second diamond half was picked out, the pattern reset from the beginning, taking care to set length to 4.0. Then it was carefully positioned to begin in the proper spot. The following pattern also had to be reset. The flower embroidery will cover this clumsy meeting of points.
Note Update: This oops fell out of the required measurement. I didn’t have to embroider the flower or adjust for it. Whew!

- Continue to the end of the first pass. Leave thread tails long enough to pull to the back hand tie.
Floral Embroidery on Bonnet Band
- Hoop lightweight stabilizer and band strip. The 4.5” strip will only be caught in the frame at the top and bottom.
Note: Two 5 x 7 hoopings will allow all flowers to be embroidered.
- Load single flower design from USB memory stick.
- Engage camera to scan embroidery frame.
- See scanned image with single flr design.
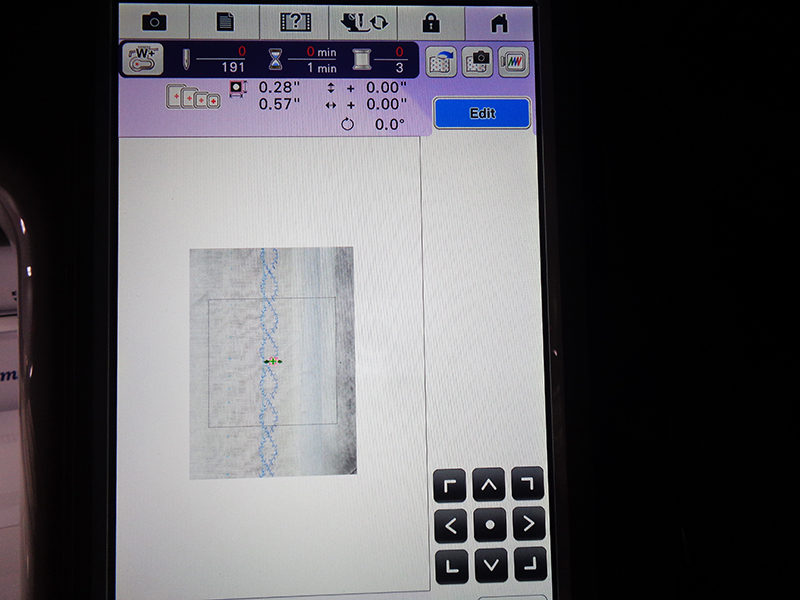
- Note that the flower is not placed properly. You can use arrows at the bottom of the screen or your stylus to drag it into place. It’s hard to see if it is perfectly placed when the design is small. Use the icon circled in yellow.
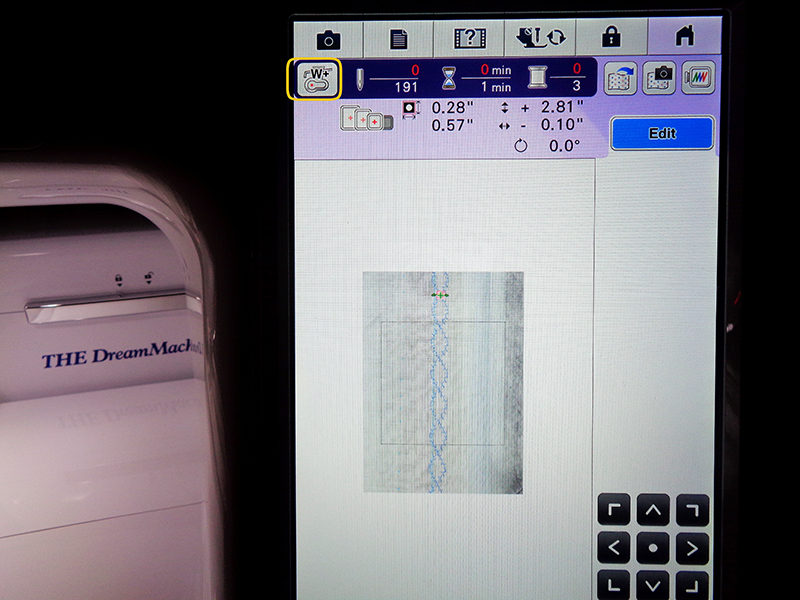
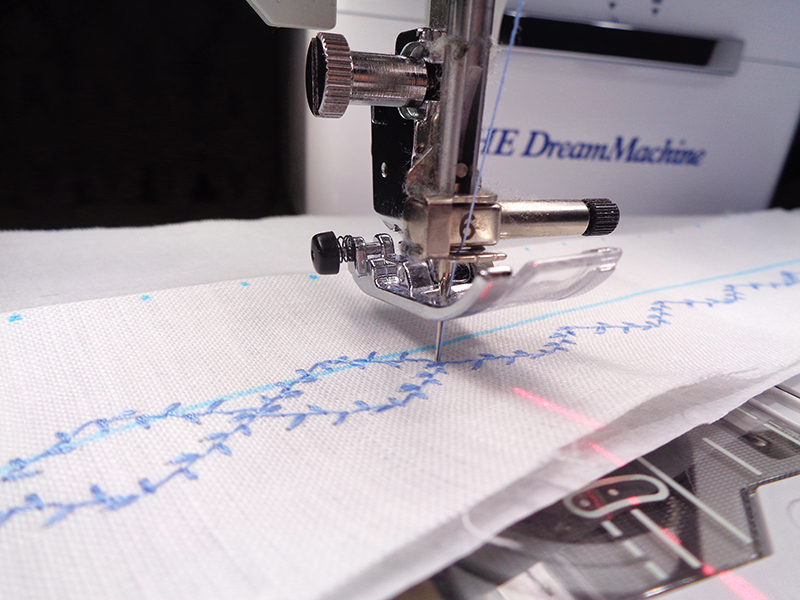
- See the red laser dot is projected at the design center position.

- Drag design in place. Embroider single flr at each intersection.
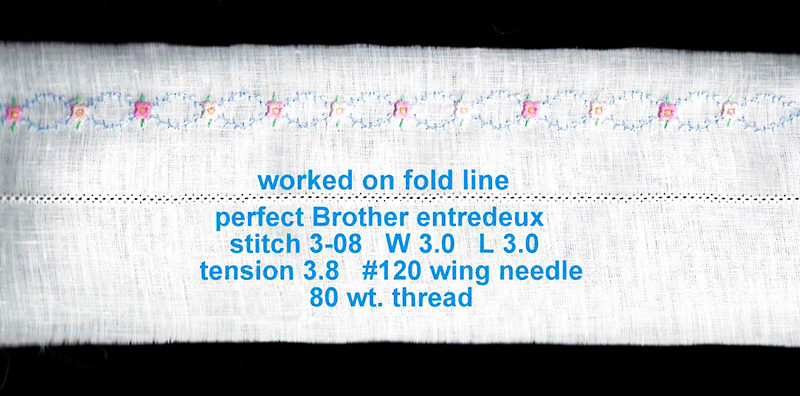
- Mark fold line with water soluble pen. Insert wing needle, use fine thread in needle and bobbin. Select entredeux stitch and change settings from default to those shown below.
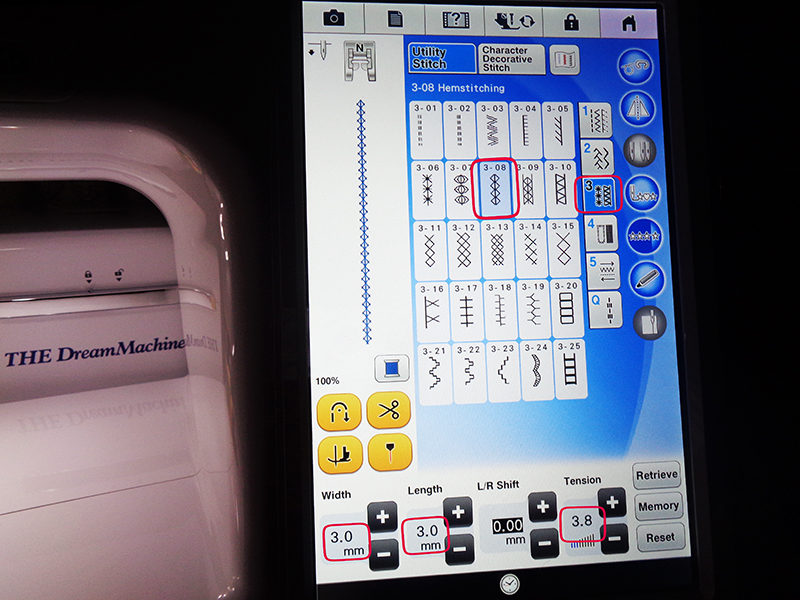
- Stitch entredeux on fold line.
- Mark band to size listed on pattern.
- Gather 5/8” wide lace 1.5 times the length of the suggested band length. Butt gathered lace edge to entredeux, toward feather stitch diamonds.
- Repeat with gathered lace butted to opposite side of entredeux, toward unembellished half of band.
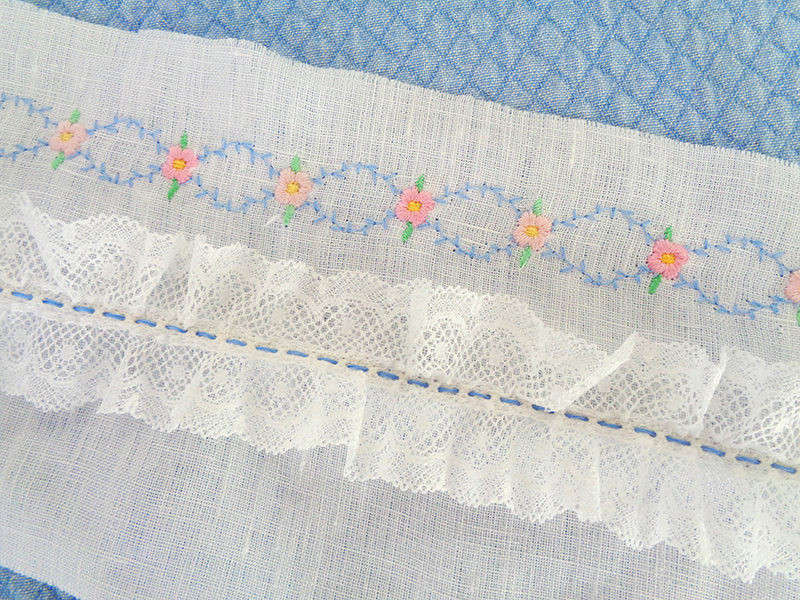
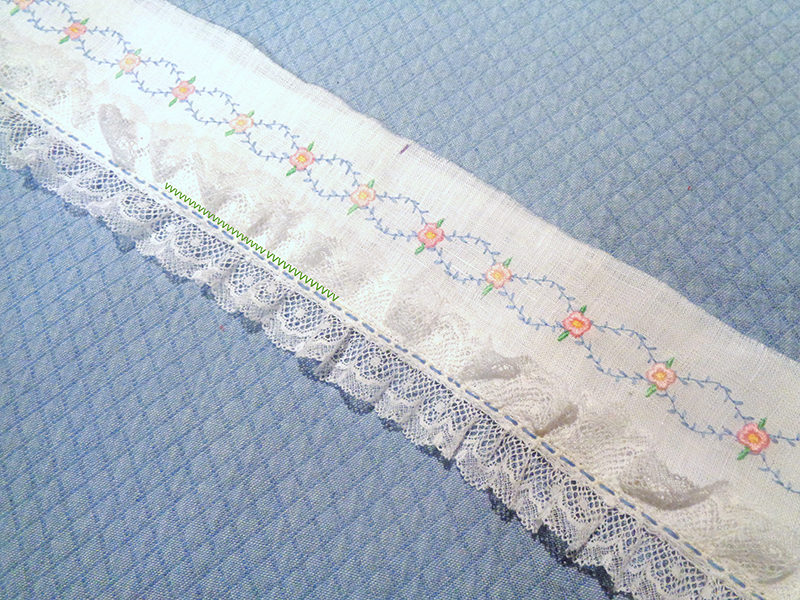
- Thread tapestry needle with 4 strands of thread used for MCS design. Weave through entredeux holes for extra color.
- Fold and press band with entredeux exposed. Use open toe foot to stitch tiny zig zag W 1.5, L 1.4 next to entredeux.
Join Band to Bonnet Crown
- Measure band width. Cut away width of your band from the crown. Be sure to cut from the straight side, not the slightly curved edge which will be joined to the back.
- Place bonnet band on single bonnet crown with wrong side of embroidery facing up. Match notch marks. Join with ¼” seam and short stitch length. Press seam away from band.
- Stitch entredeux along seam line with wing needle and fine thread. Use settings as before, W 3.0, L 3.0, tension 3.8.
- Place second crown, trimmed as the first, on the other, right sides together. Butt raw edges together and join with 1/4” seam just below entredeux. Trim lining seam to 1/8”. Turn right side out and press.
- Join gathered lace to entredeux. Baste sides of both lining and top. Mark line 5/8” from raw edge on each side.

- Weave 4 strands of MCS thread through entredeux, as before.
- Gather and baste lace to each side, mitering the front lace to the side lace at the corner.
Back
- Starch and press 18” lengthwise of grain x 9” linen. Starch and press again.
- Trace view F (boy version) bonnet back in center of linen. Include all markings. Do not cut out. If you do it will not fit in the frame.
- Crease along marked fold line. Measure width and mark vertical center. Open fold and mark for design placement with snowman 3” above fold line.
- Transfer lace loop design to machine.
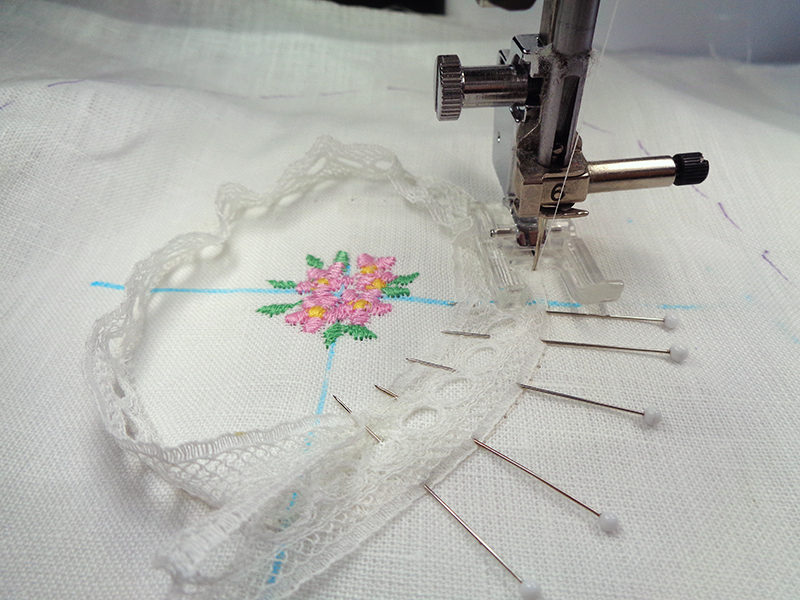
- Insert stabilizer and linen into 4x4 frame and embroider.
Note: The first color is a light beige. It is simply the placement line for the lace. It needs to be just barely visible.
- Pin 5/8” lace insertion or beading to outside of placement stitches. Leave a tail to match up around raw ends.
- Pull gathering thread from either end to shape loop. Trim lace tail until just long enough to fold over the other end. Stitch across that join and then around inside of lace loop.
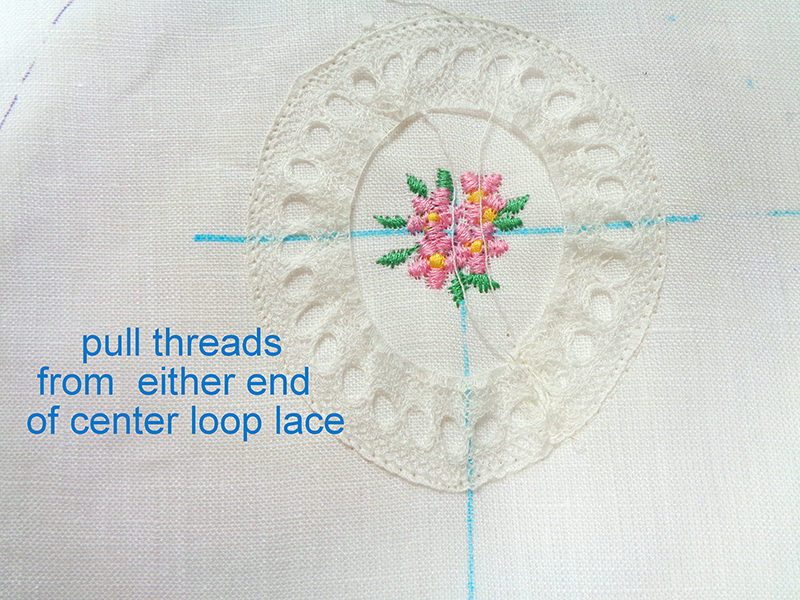
- Work pin stitch #304 W 2.0 L 3.0 on outside and inside of lace loop.
Note: Use of knee lift makes all this pivoting so much quicker and easier. Weave ribbon through holes if using beading. Leave long tails and tie into bow. Secure bow with bar tack on knot.
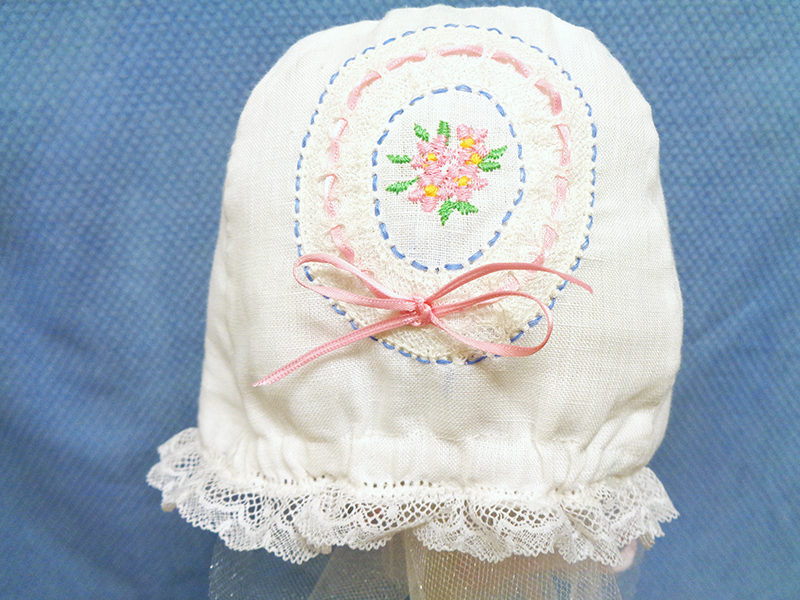
Note: The curve is very steep, causing the ribbon to twist. To hold it in place, a few back and forth stitches were worked in the beading between the ribbon exposure. With super fine thread, the stitches do not show, and the ribbon stayed in place.
- Fold back in half, pressing crease at fold line. Straight stitch ½” above fold for elastic casing.
- Follow pattern instructions for joining back to crown.
Note: Sides are still unfinished. Mark 5/8” seam allowance and leave that seam allowance extended when joining the backs.
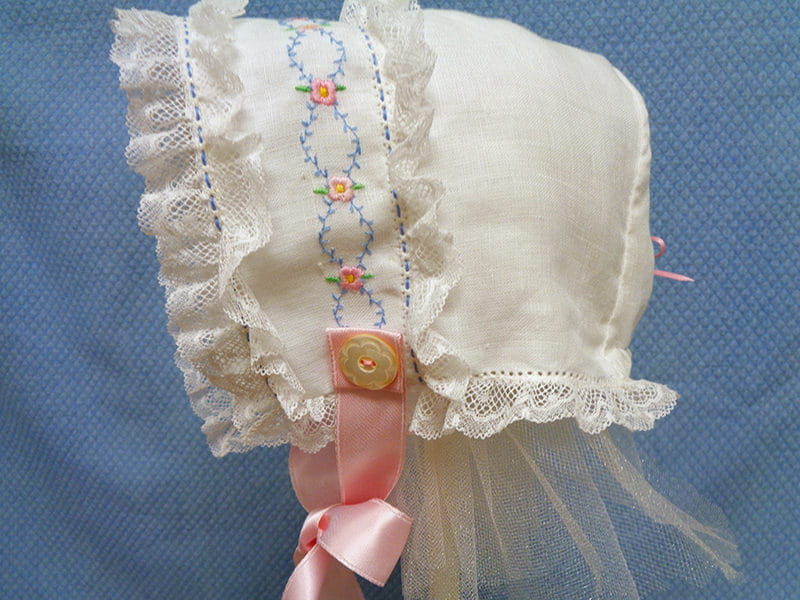
- Cut 27” lace and mark center. Gather lace gently and pin to bottom edge of bonnet, beginning at center back. Pin just barely above fold. Straight stitch in place, continuing along the 5/8” drawn line.
Ribbon Ties
- Cut 1” pink ribbon into two 18” lengths. Treat ends with fray block.
- Fold ends over 1” twice and stitch at base of MCS stitching.
- Sew decorative button on folded ribbon.
 Hurrah! All done! Now you have a beautiful, lacey, heirloom bonnet for a special baby and you have learned about MCS and other techniques.
Related Projects
Stay Connected
* Required fields