~Joanne Banko, Brother Sews Ambassador
The
Brother BES4 Dream Edition
software program gets a lot of use in my embroidery world. The built in MY LOVE font is perfect for personalizing gifts made with love. Follow along in this tutorial, and you’ll learn tips and tricks for using this special font.
Steps to Create Custom Lettering with MY LOVE Font
1. Open program and select create new design.
See Figure #1.
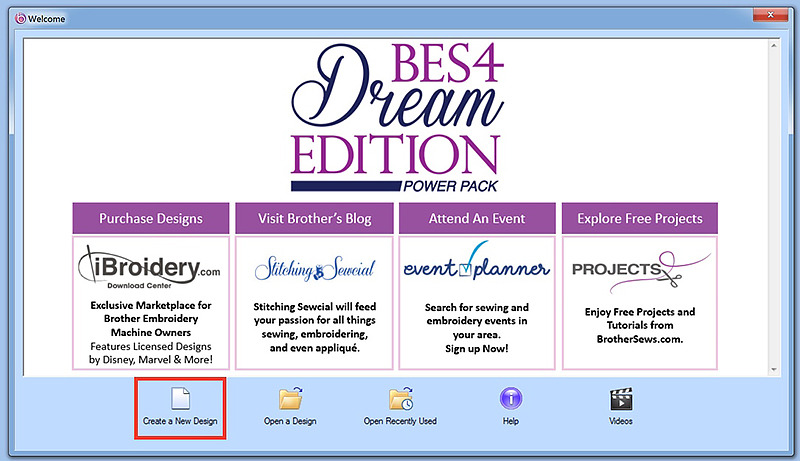 Figure #1
2.
 Click on the Normal text tool, then click the empty design window. In the Properties box, click the drop-down arrow in the space to the right of the word Font. Scroll down to select font style MY LOVE. Click in the empty text box area and type love_is_. Hit the return key to create the next line of text and type sweet_.
Note: Typing the
underscore key on your keyboard
after each word closes the heart at the end of a word or sentence. Type 1.00 in the box for Height. Click
Apply at the bottom of the Properties box to generate the lettering in the workspace.
See Figure #2a and Figure #2b.
 Figure #2a
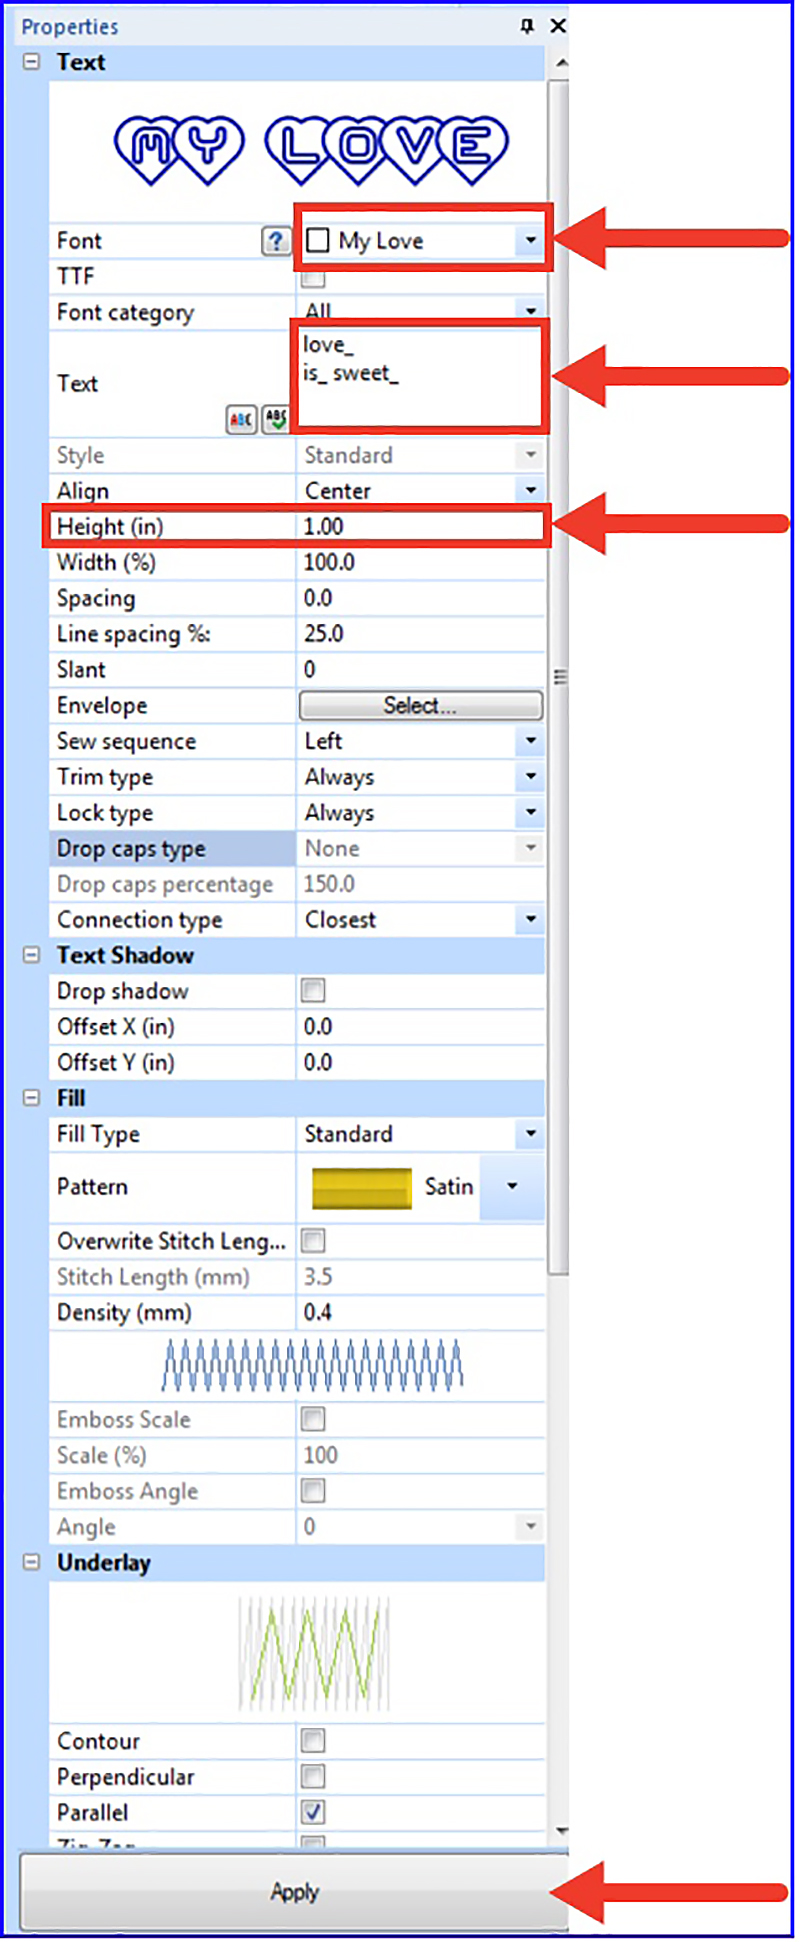 Figure #2b
3.
 To see the design in the 5” X 7” hoop, click on the drop-down arrow below the Hoop icon, and click on Select Hoop. Select a 5-inch X 7-inch hoop size, (130mm X 180mm, form the menu and click OK.
See Figure #3a and Figure #3b.
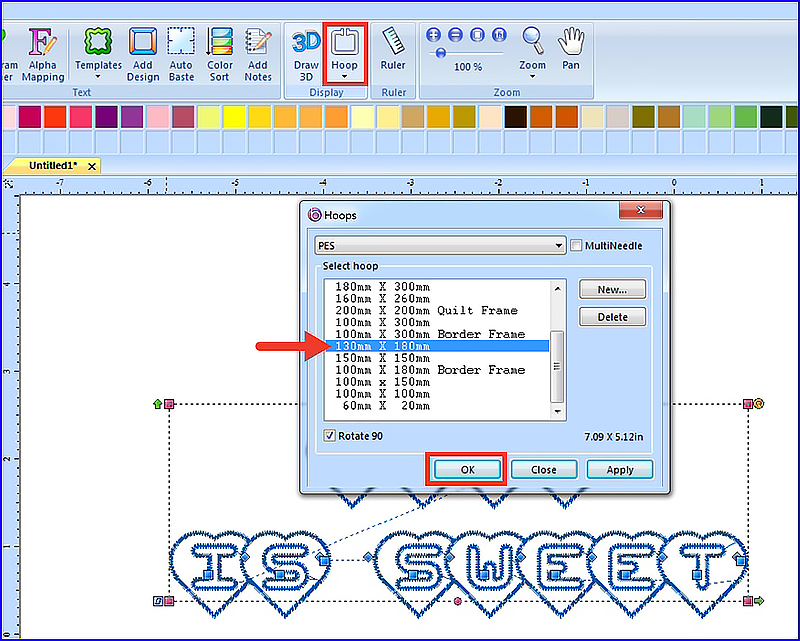 Figure #3a
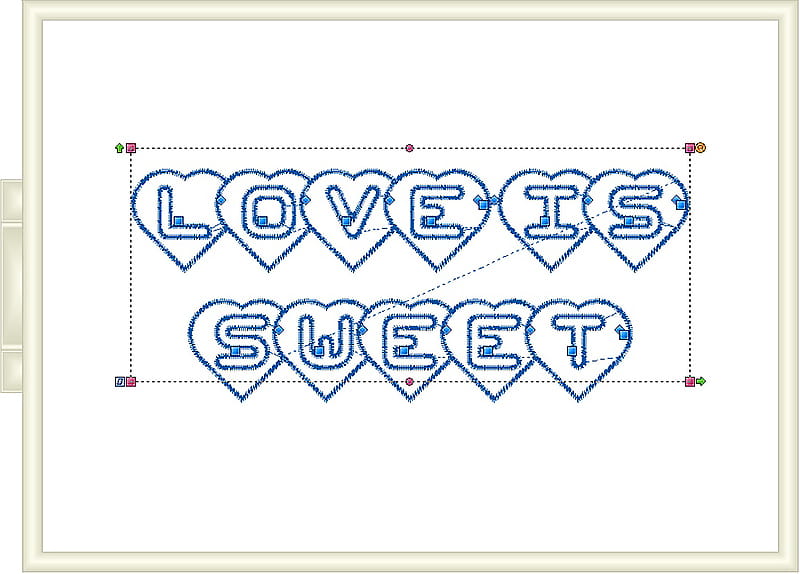 Figure #3b
Tip
Figure #3b
Tip: The lettering design is automatically centered when selecting the hoop.
4. To change the thread color of the entire selected design, choose your desired color by clicking on the desired color box shown in the color palette.
See Figure #4.
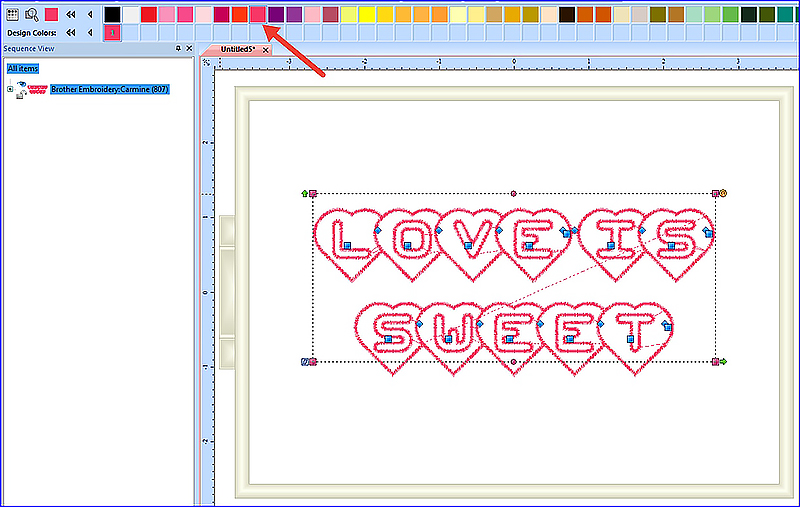 Figure #4
5
Figure #4
5. To view the design on a fabric background, click on View, then click on the drop-down arrow below Background to bring up the Select Fabric option. Scroll down to choose from the many fabrics available in the software and click Open. I choose pink posies. Go back to the Home tab on the top menu, select the 3D icon, and then click in a blank space in the hoop area to view the lifelike design.
See Figure #5a, Figure #5b, and Figure #5c. Note that you can choose a simple color background instead of fabric.
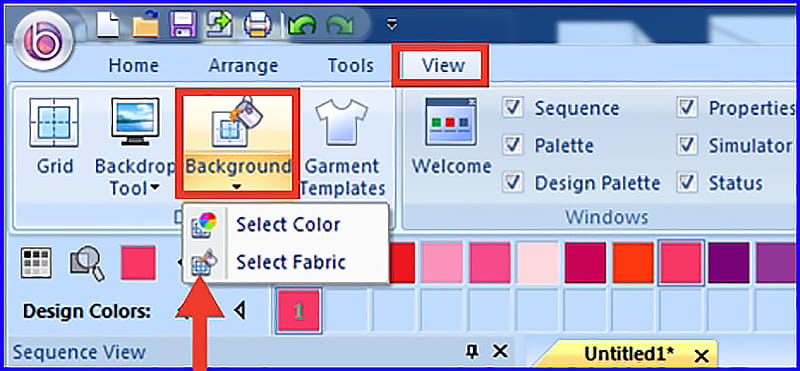 Figure #5a
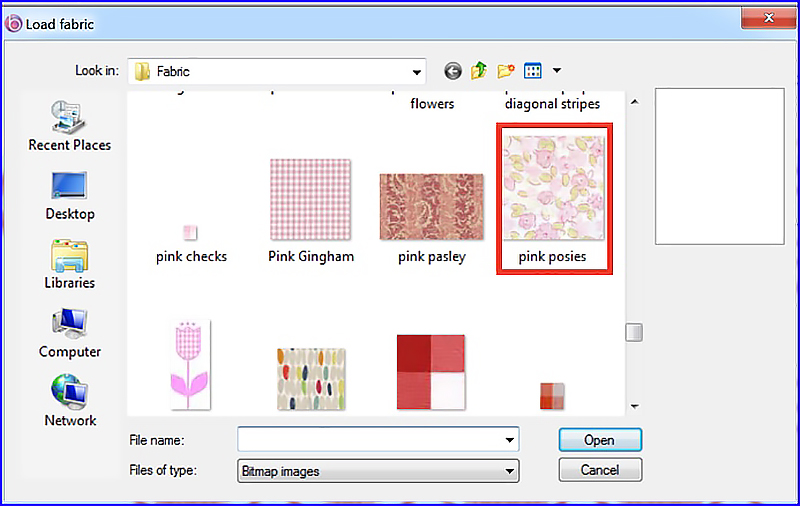 Figure #5b
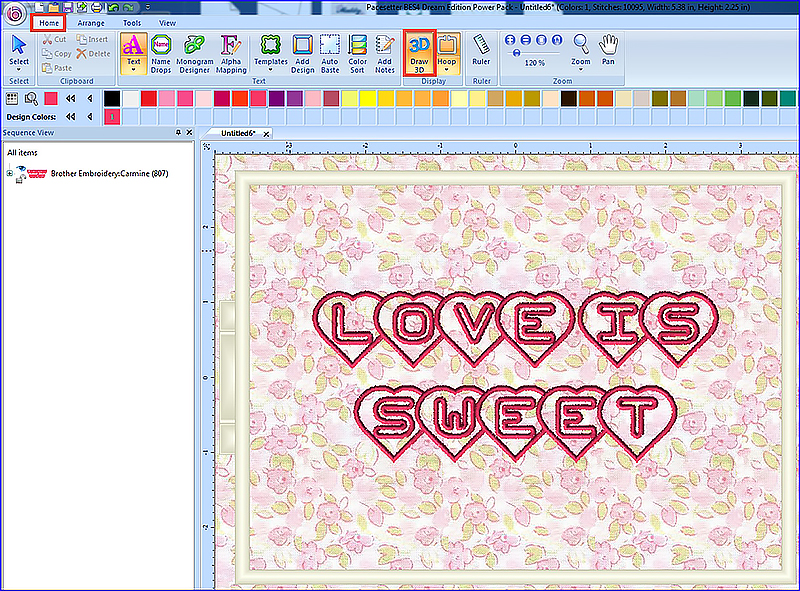 Figure #5c
6.
 To add another fun twist to your lettering design, let me show you how to convert the individual hearts and letters to stitch with a multi-color effect. Click on the design segment shown in the Sequence View window to select the design. Click on the multi-color icon in the Text properties window, then click Apply at the bottom of the window to generate the multi-colored letters. S
ee Figure #6a, Figure #6b, and Figure #6c.
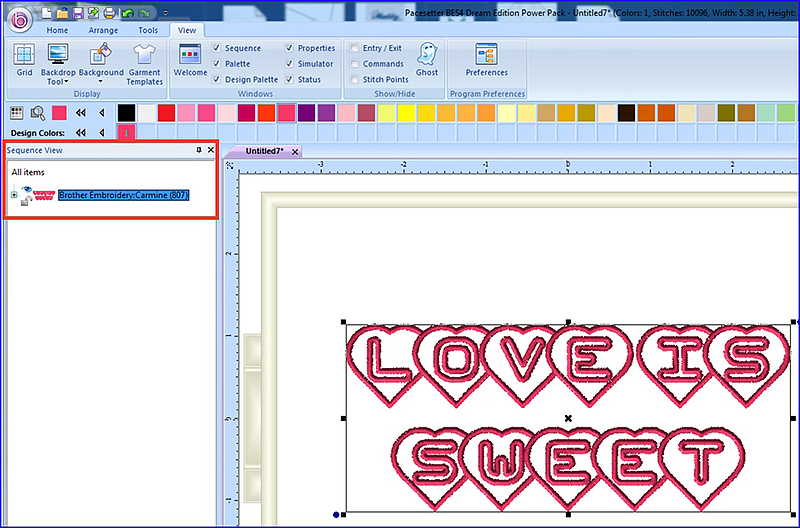 Figure #6a
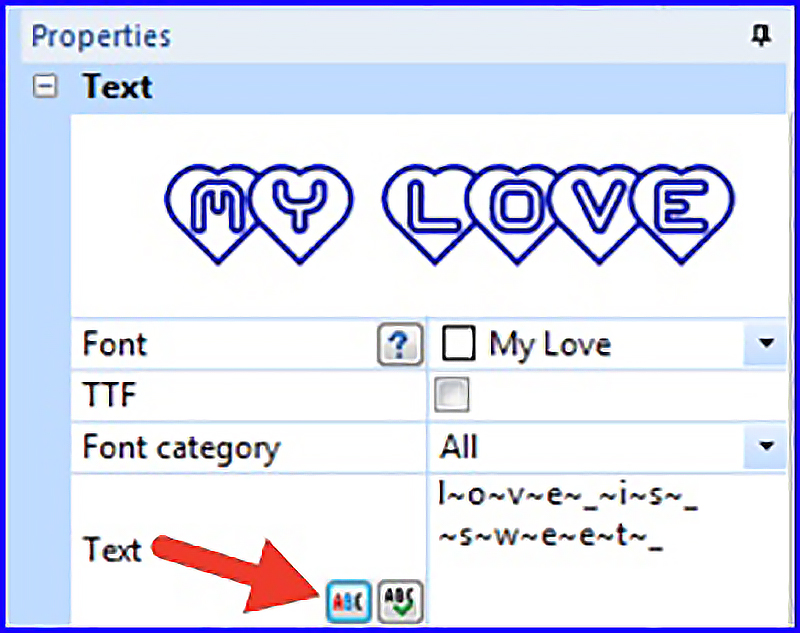 Figure #6b
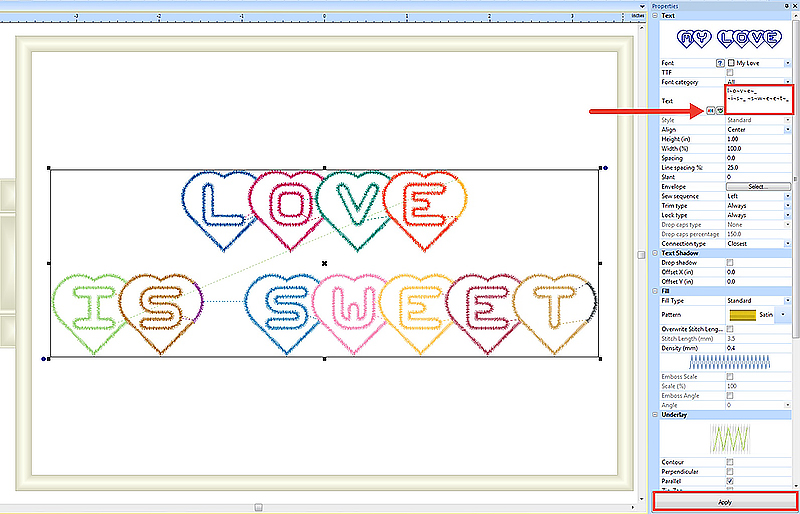 Figure #6c
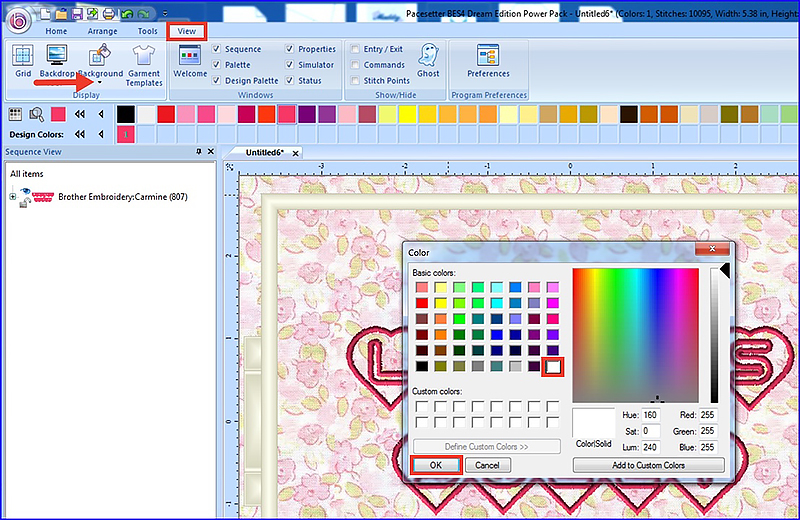
Note that I went back to a white background before completing steps for a multi-colored design. See image below showing selection of a white background:
 7.
7. Remember when we used the underscore key to close the hearts at the end of each word? Now let’s make each of the closed pieces of the heart match, so each entire heart and letter combination is the same thread color. We’ll work through the ones that need changing one at a time. First, find the color by hovering the cursor over the numbered color. We want to change color number 5 to color number 4.
See Figure #7a and Figure #7b.
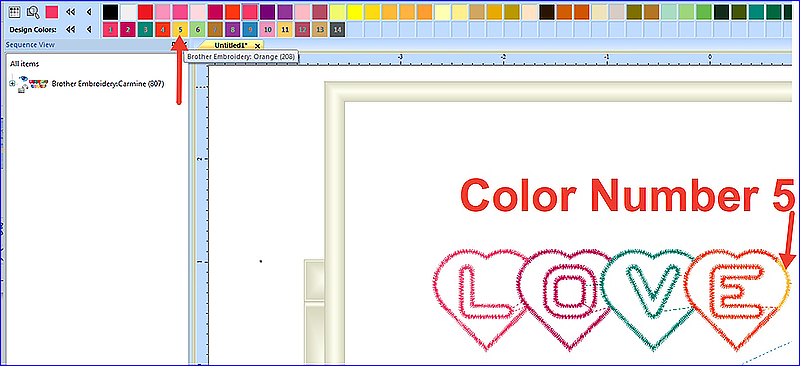 Figure #7a
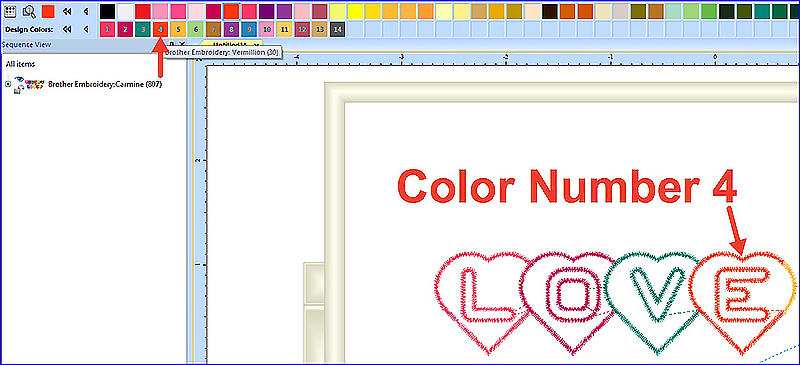 Figure #7b
Color number 4 is Vermillion, so find the color tab for Vermillion and click on it. A menu will drop-down with each color listed. Click on color 5 to change it to Vermillion and the entire heart will match.
See Figure #8a, Figure #8b, and Figure 8c.
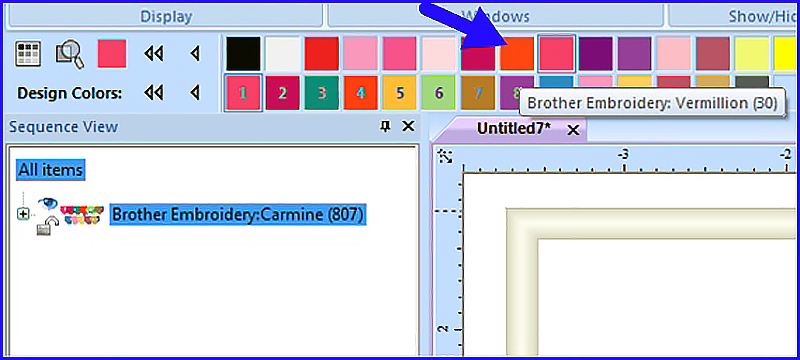 Figure #8a
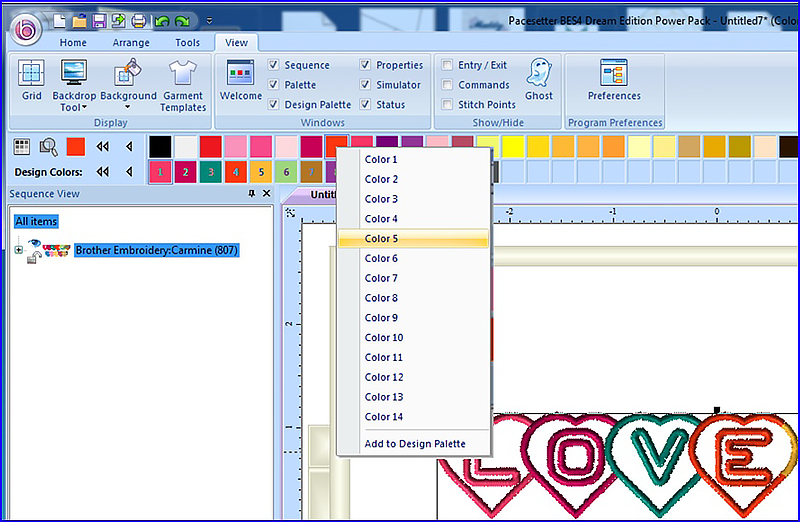 Figure #8b
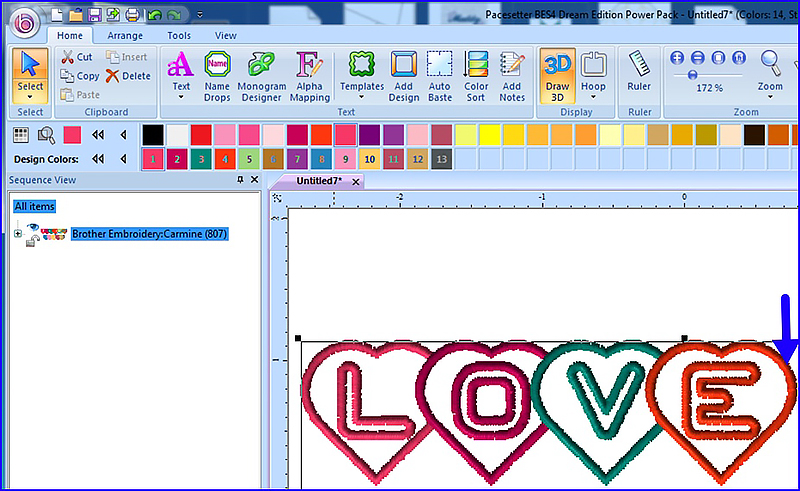 Figure #8c
Continue using the same method to change each of the pieces closing hearts. See final design in
Figure #9.
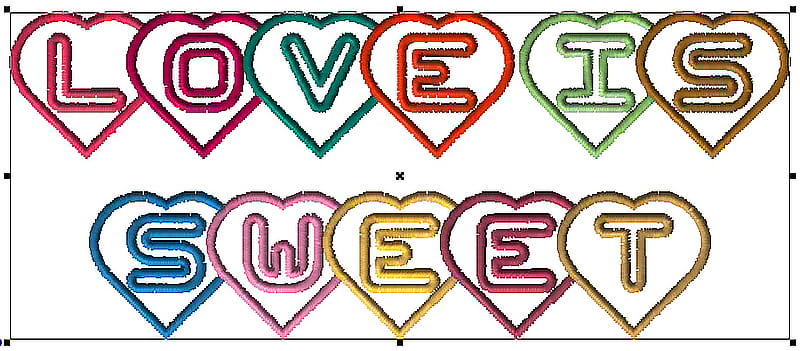 Figure #9
8.
 To save the finished design, click on the “B” Pacesetter icon in the top left-hand corner of the screen. Save the design as a .brf file if you want to edit it in the future. Save the finished combination as a .pes file to send it to the machine.
Options and Ideas:
Use this design to decorate a gift bag or fabric for gift wrapping a box of chocolates, or for wrapping a large-sized chocolate bar as a quick gift.
CLICK HERE FOR PDF!
 Figure #1
 Figure #2a
 Figure #2b
 Figure #3a
 Figure #3b
 Figure #4
 Figure #5a
 Figure #5b
 Figure #5c
 Figure #6a
 Figure #6b
 Figure #6c
 7. Remember when we used the underscore key to close the hearts at the end of each word? Now let’s make each of the closed pieces of the heart match, so each entire heart and letter combination is the same thread color. We’ll work through the ones that need changing one at a time. First, find the color by hovering the cursor over the numbered color. We want to change color number 5 to color number 4. See Figure #7a and Figure #7b.
 Figure #7a
 Figure #7b
 Figure #8a
 Figure #8b
 Figure #8c
 Figure #9

