Majestic Embroidered Masks for Kids
Brother Sews Blogger
I’m relatively new to embroidery. It’s been about two and a half years since I got my first embroidery machine and it seems like the creative possibilities with one are endless. I recently discovered hoop mask making and my kids are loving this discovery. With schools closed and kids home we are looking for creative ways to spend our time. My kids love playing with these new masks I made for them, and today I’m going to show you how, as well as give you some tips for working with faux leather in your embroidery machine.
● Brother Computerized Sewing & Embroidery Machine LB5000
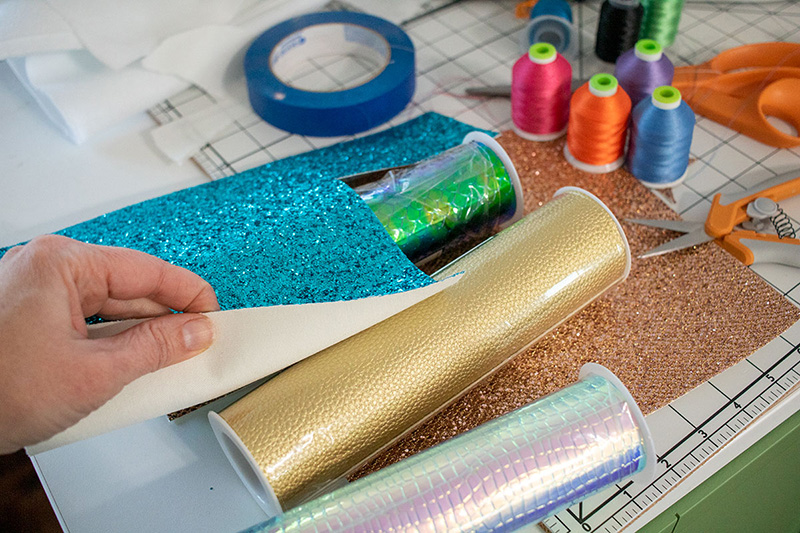
● Faux leather sheets ● Embroidery Thread ● Sticky Stabilizer ● Mask Pattern: Dragon
Unicorn
Disclaimer: The mask patterns are from Happily After Designs and Brother International Corporation makes no representation or warranties regarding this product.
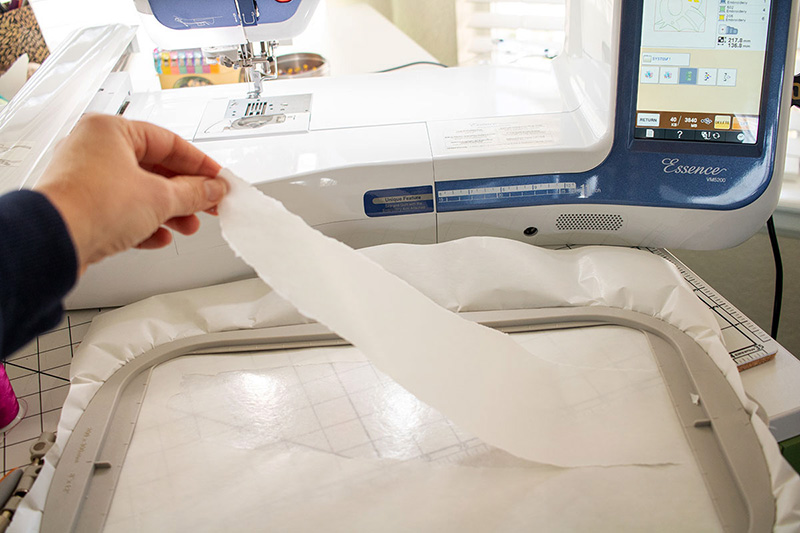
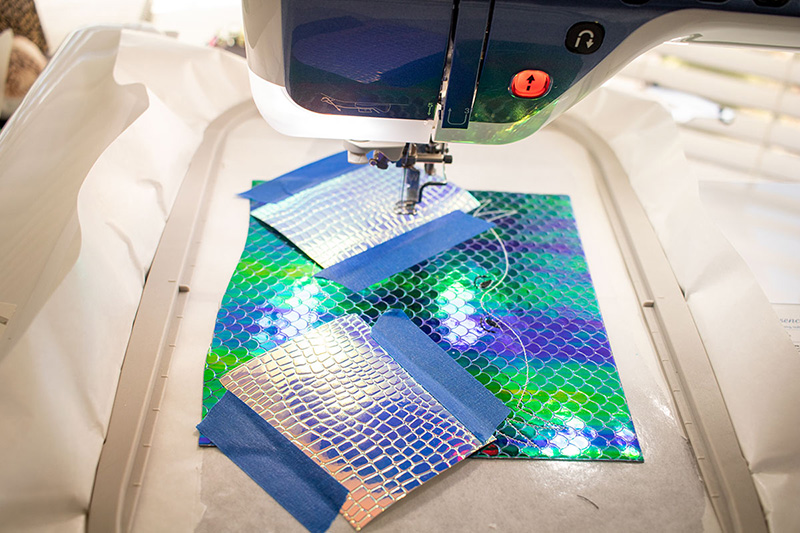
 The easiest way to put faux leather in your hoop is with sticky stabilizer. Hoop a sheet of it with the paper side up and then peel away the paper to reveal a sticky patch large enough for your pleather piece.
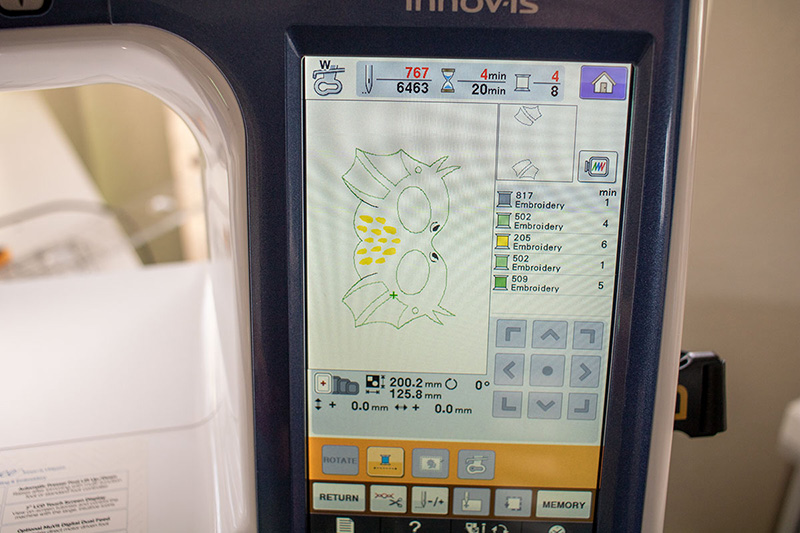
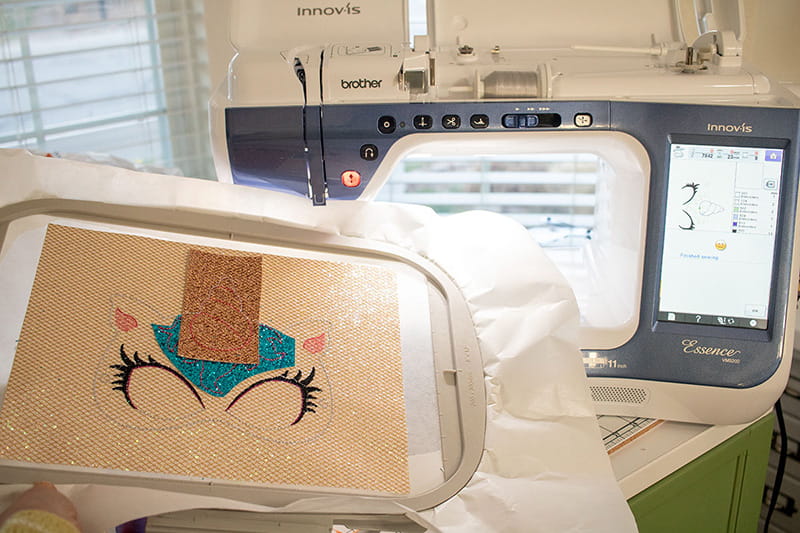
 Use the grid and sizing on your machine to make sure your faux leather is centered and large enough for your mask design. Resize if necessary, also taking into account the size of the child you are sewing for.
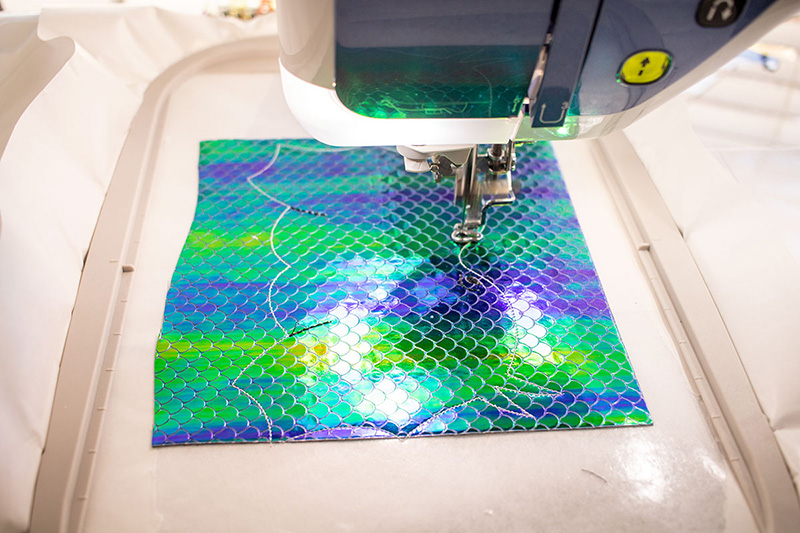
 The machine will outline the mask {and each part of the mask} before doing the actual embroidery. This gives you an outline to work with as well as shows you where to place each additional layer for the mask pieces. The design will guide your thread choices, but for the outlines I didn’t really worry about using the exact color. Each outline will be covered with other stitching or piece of pleather.
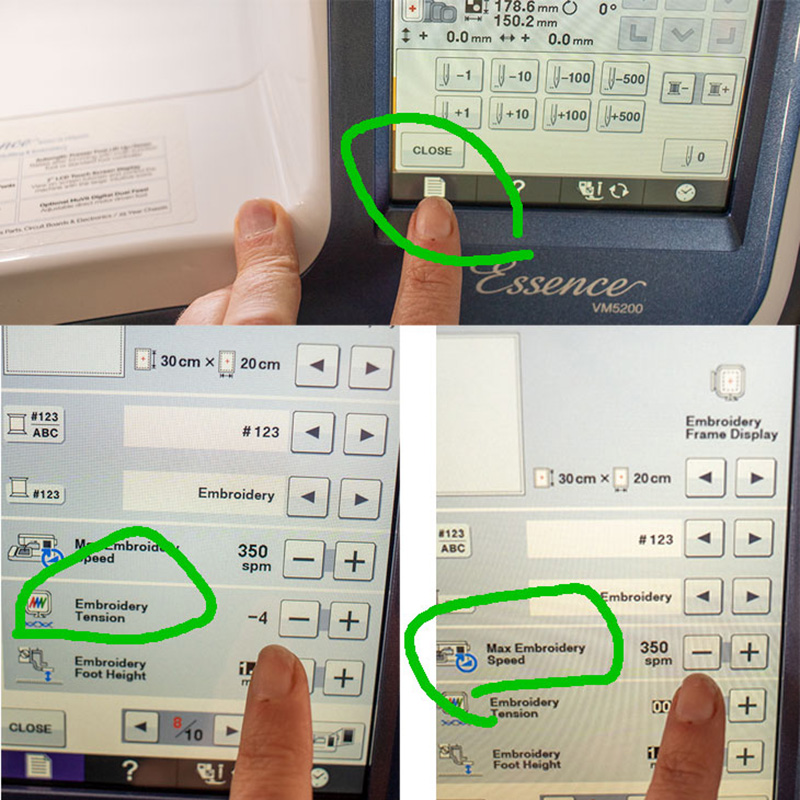
 Note: If your thread is breaking or tension seems off - adjust now {as these stitches won’t be seen anyway} I slowed my stitches way down {350} to help the thread and needle go through the thick material without breaking. I also had to tighten my embroidery tension.
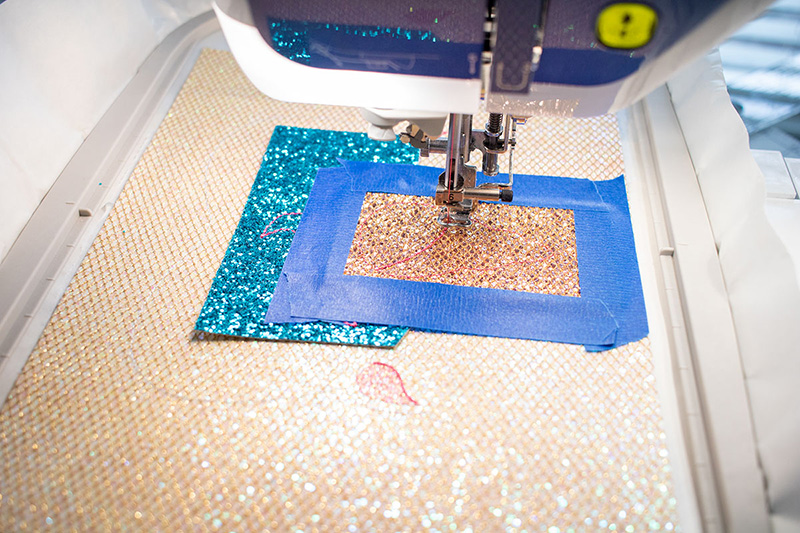
 After the outline is created look at the first part of the mask to be sewn. It may be embroidered, or you may want to add another color of faux leather. If you are adding another layer of material use painters tape to attach exactly where it will be stitched. You do not need to cut out the exact shape, we will trim after sewing.
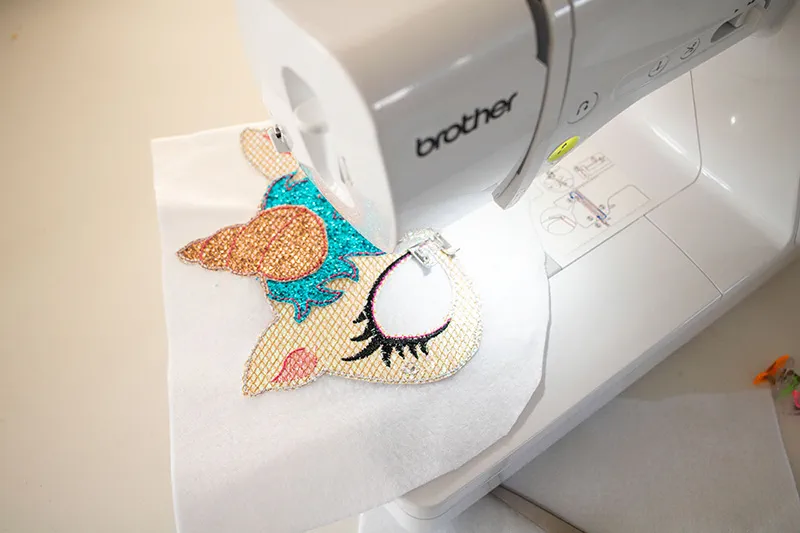
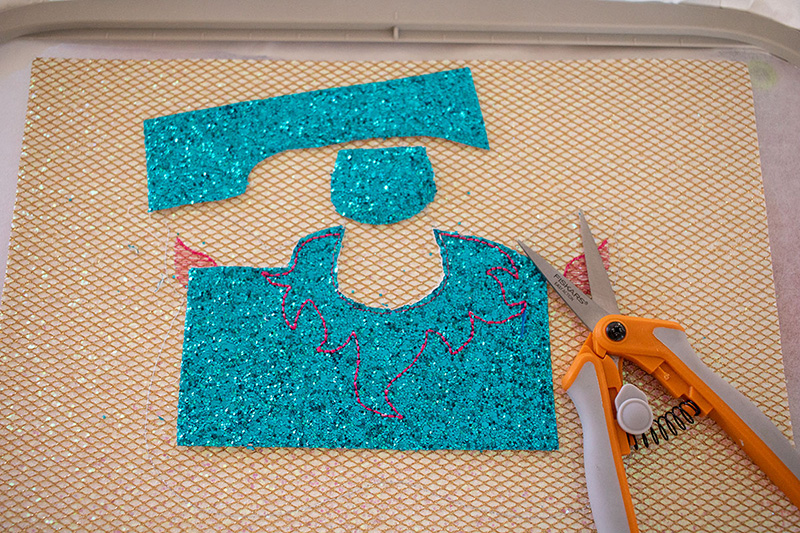 When several layers are needed, I did trim between layers to avoid too much bulk. The faux leather will not fray, so I just used tiny sharp scissors to trim the layers close to the seam.
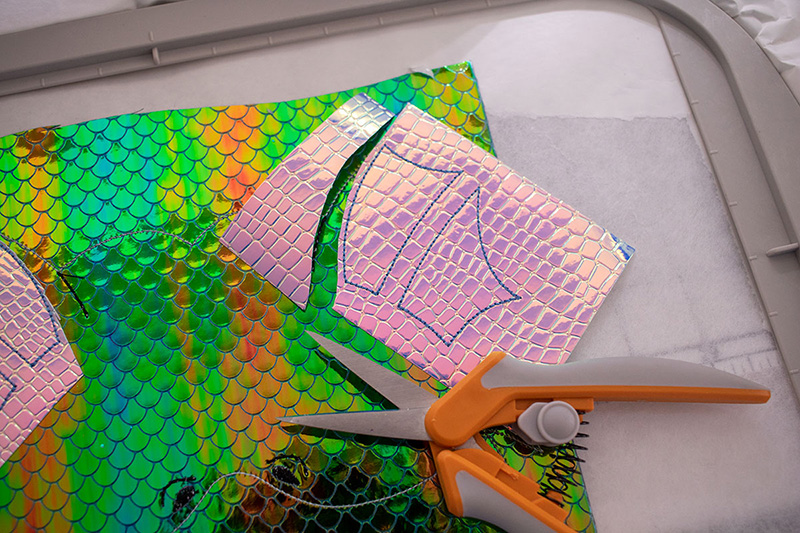
 You can see my layers of fabric and embroidery on this design here. Refer to the design on your machine to help see what layers and embroidery are coming next in the design to choose your thread and material.
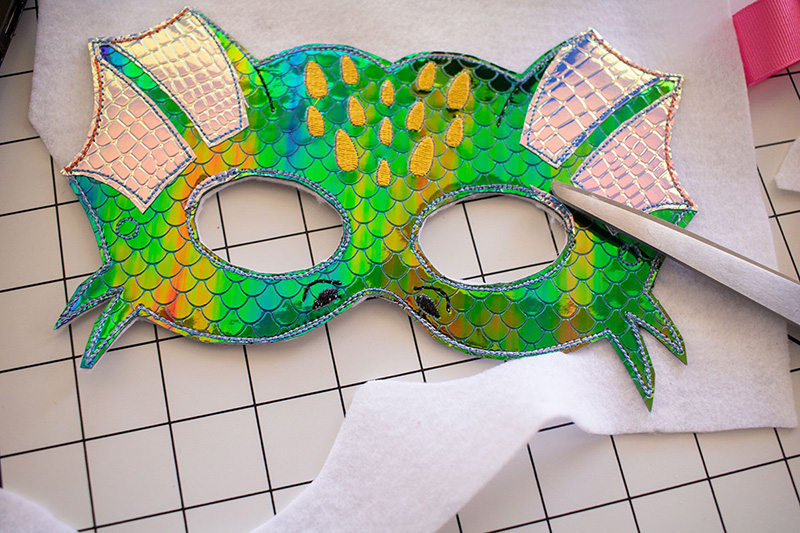
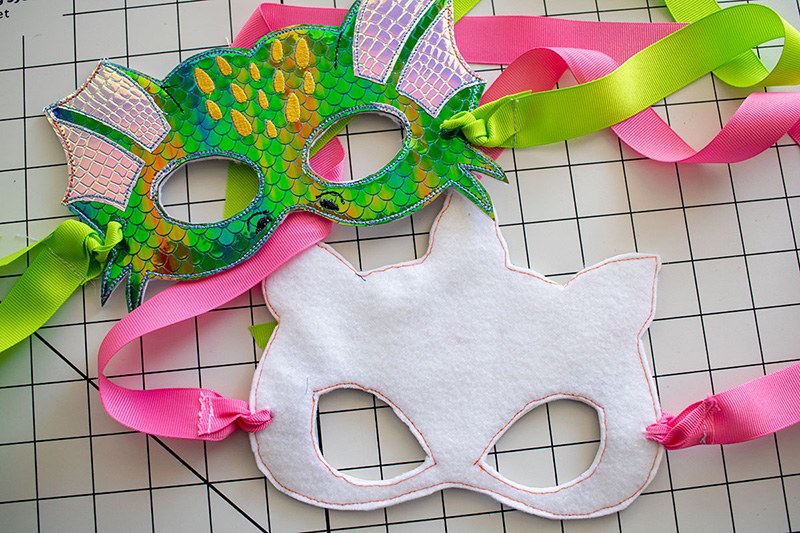
 When the embroidery has finished you can remove from the sticky stabilizer and the hoop. Trim all the layers of faux leather on the mask and cut out the mask itself. I decided to back the mask with felt. Place on a piece of felt and use any regular sewing machine to stitch around the outside and eye holes of the mask.
 Trim the felt close to your stitches and also cut open the tie holes on the side of each mask {these were part of the original design}
 Attach elastic or ribbon for ties and enjoy!
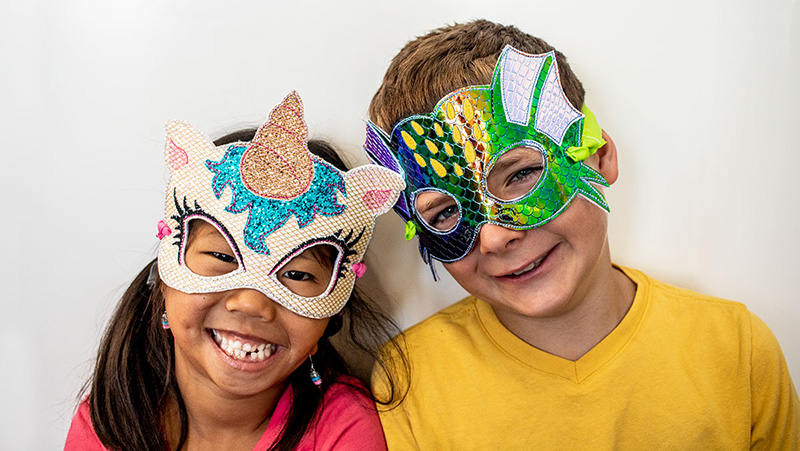
 So many hours of imaginative play with endless mask options!
I’m relatively new to embroidery. It’s been about two and a half years since I got my first embroidery machine and it seems like the creative possibilities with one are endless. I recently discovered hoop mask making and my kids are loving this discovery. With schools closed and kids home we are looking for creative ways to spend our time. My kids love playing with these new masks I made for them, and today I’m going to show you how, as well as give you some tips for working with faux leather in your embroidery machine.
Here is what you will need to make your own gorgeous embroidered masks.
● Brother Embroidery Machine Essence 5200● Brother Computerized Sewing & Embroidery Machine LB5000
● Faux leather sheets ● Embroidery Thread ● Sticky Stabilizer ● Mask Pattern: Dragon
Unicorn
Disclaimer: The mask patterns are from Happily After Designs and Brother International Corporation makes no representation or warranties regarding this product.
The easiest way to put faux leather in your hoop is with sticky stabilizer. Hoop a sheet of it with the paper side up and then peel away the paper to reveal a sticky patch large enough for your pleather piece.
Use the grid and sizing on your machine to make sure your faux leather is centered and large enough for your mask design. Resize if necessary, also taking into account the size of the child you are sewing for.
The machine will outline the mask {and each part of the mask} before doing the actual embroidery. This gives you an outline to work with as well as shows you where to place each additional layer for the mask pieces. The design will guide your thread choices, but for the outlines I didn’t really worry about using the exact color. Each outline will be covered with other stitching or piece of pleather.
Note: If your thread is breaking or tension seems off - adjust now {as these stitches won’t be seen anyway} I slowed my stitches way down {350} to help the thread and needle go through the thick material without breaking. I also had to tighten my embroidery tension.
After the outline is created look at the first part of the mask to be sewn. It may be embroidered, or you may want to add another color of faux leather. If you are adding another layer of material use painters tape to attach exactly where it will be stitched. You do not need to cut out the exact shape, we will trim after sewing.
When several layers are needed, I did trim between layers to avoid too much bulk. The faux leather will not fray, so I just used tiny sharp scissors to trim the layers close to the seam.
You can see my layers of fabric and embroidery on this design here. Refer to the design on your machine to help see what layers and embroidery are coming next in the design to choose your thread and material.
When the embroidery has finished you can remove from the sticky stabilizer and the hoop. Trim all the layers of faux leather on the mask and cut out the mask itself. I decided to back the mask with felt. Place on a piece of felt and use any regular sewing machine to stitch around the outside and eye holes of the mask.
Trim the felt close to your stitches and also cut open the tie holes on the side of each mask {these were part of the original design}
Attach elastic or ribbon for ties and enjoy!
So many hours of imaginative play with endless mask options!
Related Projects
Stay Connected
* Required fields