Make Your Own Clutch Purse with Invisible Zipper
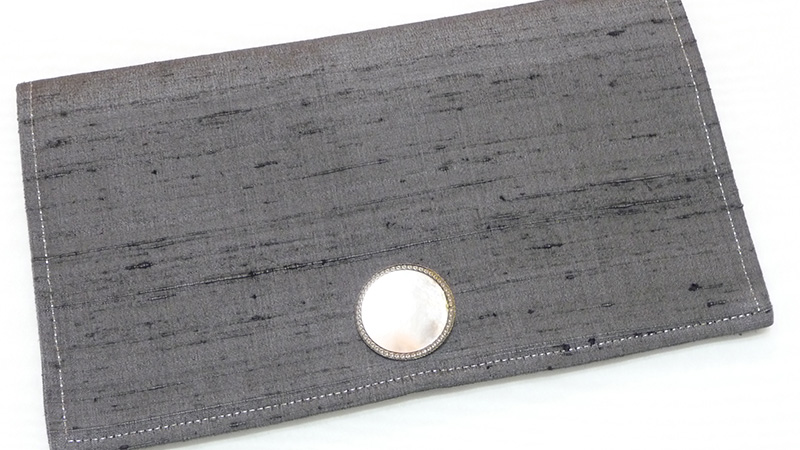
Make Your Own Clutch Purse with Invisible Zipper
Create a clutch purse to match a dress you’ve sewn or to coordinate with other garments in your wardrobe. This purse has a simple fold over style and features a concealed/invisible zipper pocket inside. It’s easy to make the pocket when you use a concealed zipper and the Brother foot of the month, the concealed zipper foot. No need for a commercial pattern. You can make this is an afternoon with complete instructions for cutting and sewing provided here.Materials and Supplies
- Brother Sewing Machine
- SA128 the Brother Concealed Zipper Foot
- Topstitch needle size 14 for topstitching Purse
- Brother Metallic Embroidery Thread, MT997, Light silver for topstitching outside of purse.
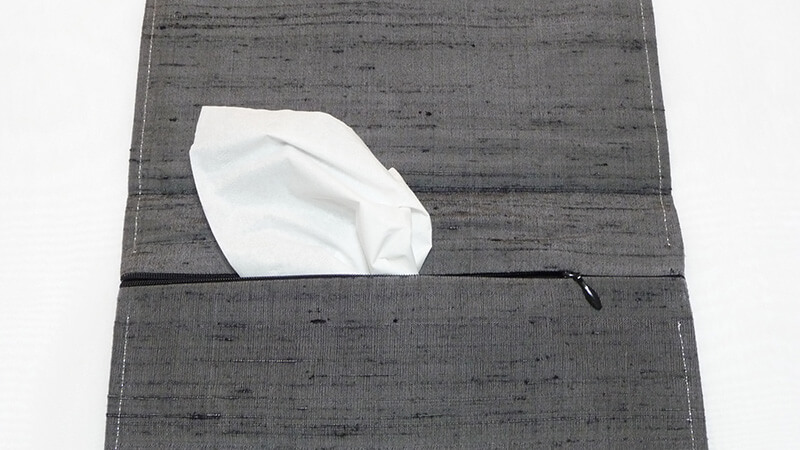
Note: This is optional but adds a bit of sparkle to the outside of the purse.
- Basic sewing notions including thread to match fabric for sewing purse.
- Seam sealant for treating clipped corners inside.
Note: It’s always a good idea to test seam sealant on scrap fabric to be sure it does not leave a stain.
- One decorative button for front of purse
- One 14-inch long concealed/invisible zipper to coordinate with fabric.
Tip: When it comes to matching your fabric the most important part of the zipper is the zipper pull tab. When sewn properly the rest of the zipper does not show.
Fabric Requirements:
Fashion fabric for purse inside and outside, plus firm, thin inner lining, and fusible interfacing. See a complete description and cutting instructions below.Instructions for Fabric Selection and Cutting Pieces
Select a fashion fabric for the outside and inside of purse, choosing something that is not heavy or stiff. Use the same fabric on both the outside and inside of the purse. This example features medium weight silk dupioni dress weight fabric. Cut the following pieces from fashion fabric:- Cut one piece measuring 12-inches wide X 14-inches long for outside of purse.
- Cut one piece 12-inches wide X 9 ⅝-inches long for inside piece A and one piece 12-inches wide X 5 ⅝-inches long for inside piece B.
- Cut one piece measuring 12-inches wide X 14-inches long for outside of purse.
- Cut one piece 12-inches wide X 9 ⅝-inches long for inside piece A and one piece 12-inches wide X 5 ⅝-inches long for inside piece B.
 Figure #1
Select a firm but thin woven fabric for inner lining of purse. Cut the following pieces from inner lining fabric:
- Cut one piece measuring 12-inches wide X 14-inches long to match outside of purse.
- Cut one piece 12-inches wide X 9 ⅝-inches long and one piece 12-inches wide X 5 ⅝-inches long to match inside pieces A and B.
Optional – for a more padded purse cut a piece of thin, fusible fleece 11-inches wide X 13-inches long. Center it on wrong side of 12-inch X 14-inch outside purse piece and fuse.
Steps to Create Purse
- With wrong sides matching, layer inner lining pieces with inside purse pieces A and B. Serge finish or zigzag around all raw edges.
- Read Concealed Zipper Tip section below and then prepare zipper as follows:
- Fully open zipper and press to flatten coils, pressing from the wrong side with an iron set for low heat or synthetic fabric setting. Keep zipper open after pressing.
- Get ready to stitch zipper in place by placing inside purse pieces A and B on a flat surface with right sides facing up.
- With excess zipper at each end, pin right side of zipper to edge of piece B with zipper coils along the ⅝-inch stitching line. See Figure #2.
 Figure #2
Tip: Baste zipper by hand if you like and then remove pins.
Concealed Zipper Tip: Concealed zippers are also known as invisible or hidden zippers. Observe that this type of zipper has a right side, (the side where the pull tab is located when the zipper is closed), and a wrong side, (the side where the zipper coils show and zipper stop is located when zipper is closed). This type of zipper is designed to hide in the seam when the zipper is closed. Therefore, the coils need to be pressed flat so they lay directly on the seamline when the zipper is stitched. Your specially designed Genuine Brother foot makes it easy to stitch this type of zipper easily and accurately. Once you have sewn this type of zipper you will likely agree it is the easiest type of zipper to sew!
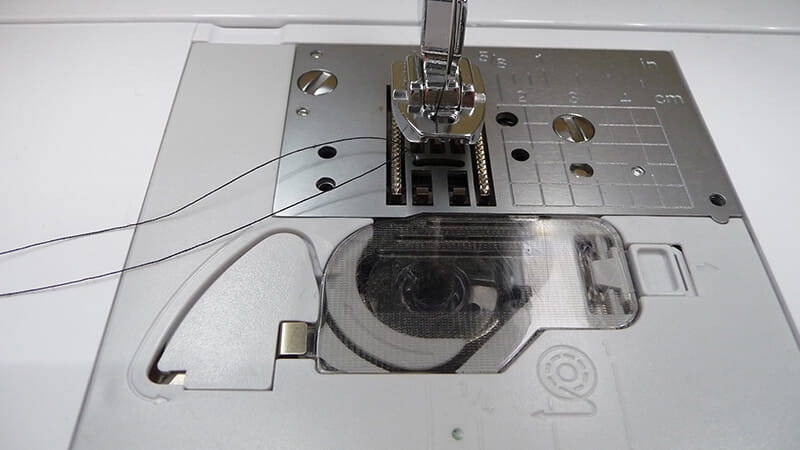
- Attach concealed zipper foot to machine and select a center needle straight stitch. Turn hand wheel to lower, and then raise needle and bring needle thread underneath the foot.
- Position zipper coils under the left groove on the foot and stitch the first side in place.
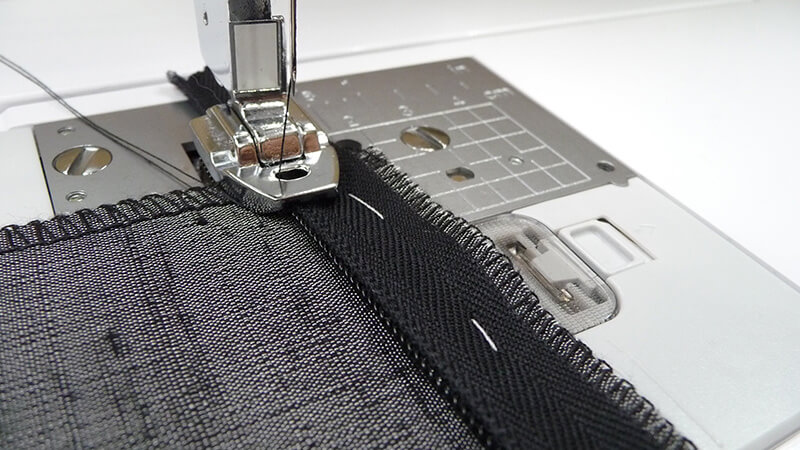
Tip: Observe that the needle should always stitch to the right of the coils. On thicker fabrics you may need to adjust the position of the needle, moving it slightly so the stitch forms a little further away from the coils. This allows for the bulk of the fabric when the zipper is opened and closed. If you are unsure if this is necessary, simply machine baste first, test to see if your zipper opens and closes easily, and adjust as necessary before permanently stitching in place.
- Next, pin right side of opposite zipper tape to long edge of piece A, again having zipper coils along the ⅝-inch stitching line. You will see that the zipper looks twisted at the bottom opening but this is correct. Remember that the coils need to go along the seamline and the right side of the zipper faces the right side of the fabric. See Figure #5a and #5b.
 Figure #5a
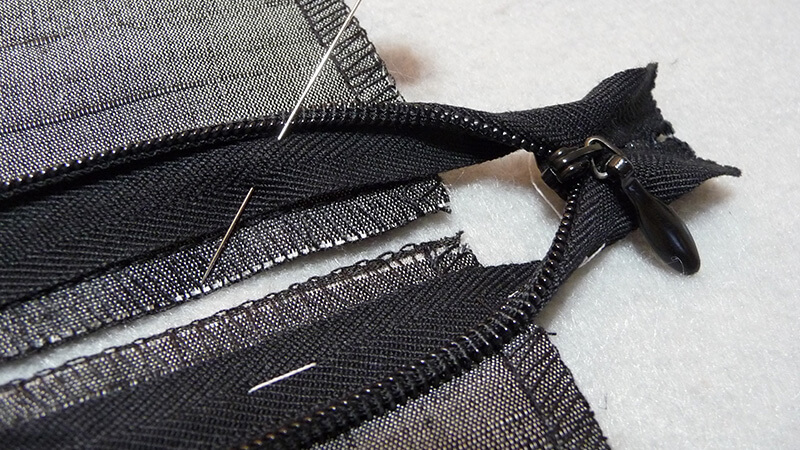
Figure #5b
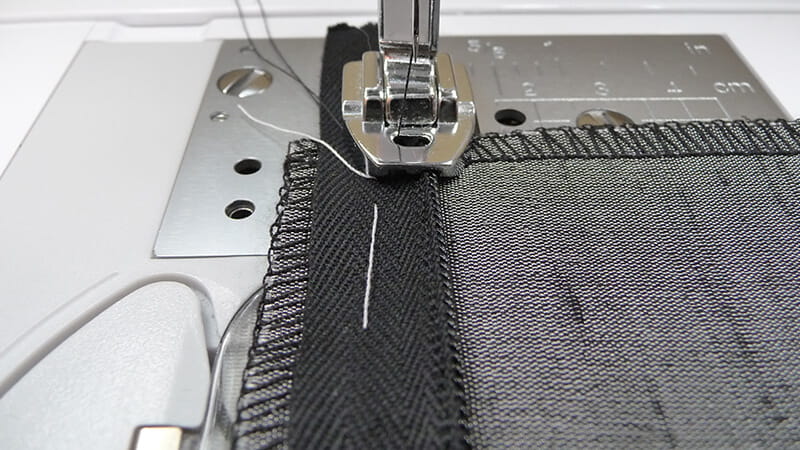
- Baste zipper by hand if you like and then remove pins. Switch to opposite channel in foot to sew second side of zipper..
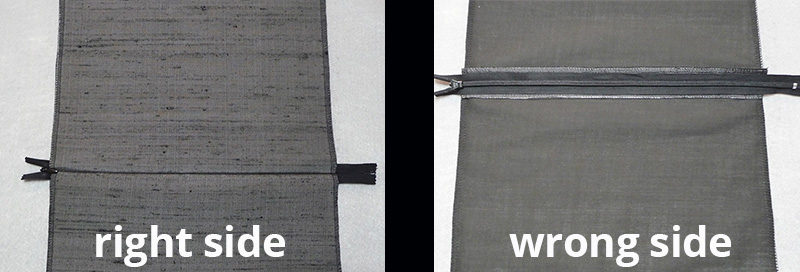
- Flip fabric so zipper is no longer twisted, remove any basting, and zip up zipper. Ends should match and zipper should open and close smoothly. Below you can see what the inside piece looks like with the zipper closed on both the right and wrong side of the piece.
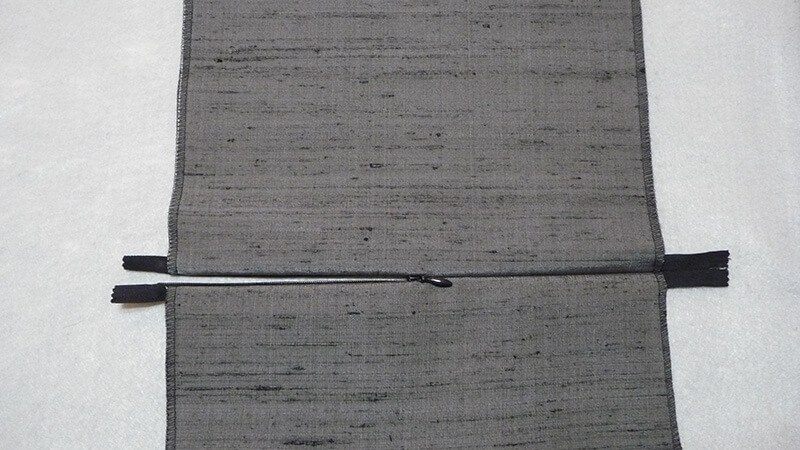
- You are ready to sew the purse together. Open the zipper half way to finish constructing the purse.
- Place outside purse piece on top and check to make sure the pieces are the same size. Trim outside purse piece if necessary and be sure to trim matching the inner lining piece as well so all pieces match. With wrong sides matching, layer the inner lining piece with outside purse piece and serge finish or zigzag around all raw edges.
- Place outside purse piece over inside piece with right sides matching and pin to prepare for stitching.
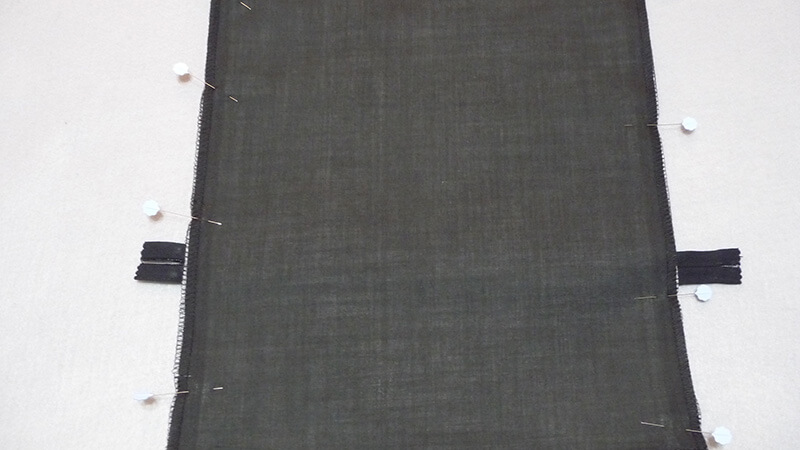
- Switch to standard foot. Stitch the two long edges using a ½-inch seam allowance, taking care to pinch the zipper coils together at the opening. Tip: It is perfectly okay to sew over the zipper coils but you will want to sew more slowly and carefully in these areas.
- Next, stitch short sides and reinforce corners with a second line of stitching. Clip corners, and treat raw ends lightly with seam sealant to prevent raveling. Let dry before you proceed.
- Turn purse right side out and press. Fold purse in half lengthwise and press the fold line. Mark and sew a line of straight stitching along the fold line, stitching from end to end to divide the pocket and the flap portion of the purse.
Tip: if you don’t want to mark on your fabric you can use low tack tape and simply sew along the edge.
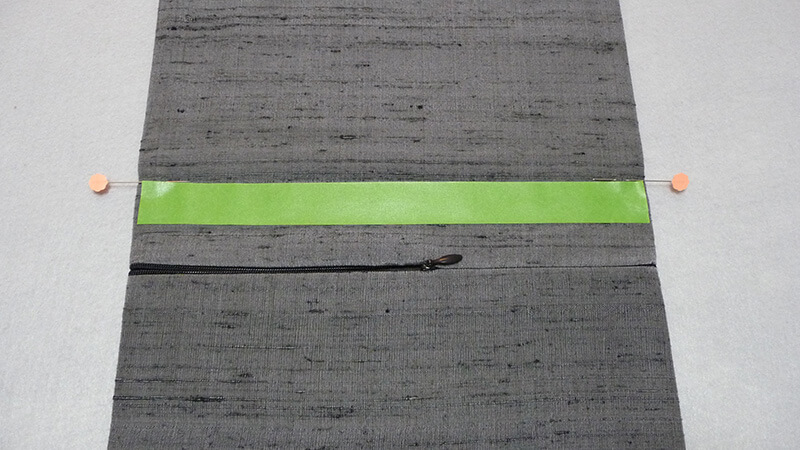
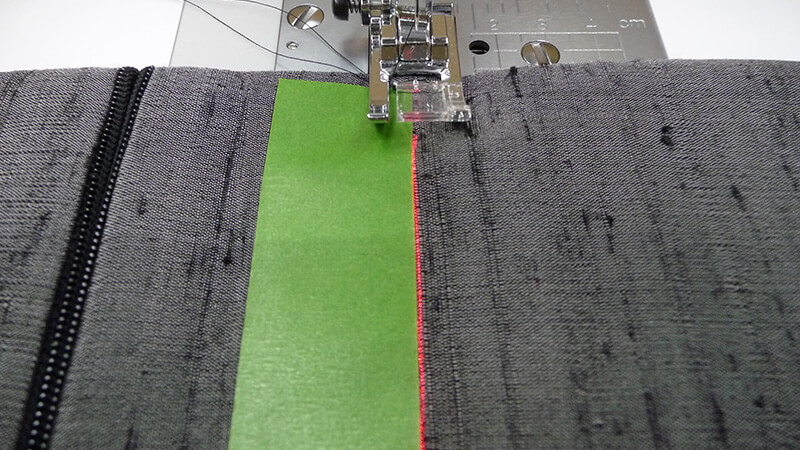
- Finish by topstitching ¼-inch from finished edge of purse, taking care to leave approximately one inch free around the bulk of the zipper at each end of the purse.
- Hand sew button to flap for a decorative accent.
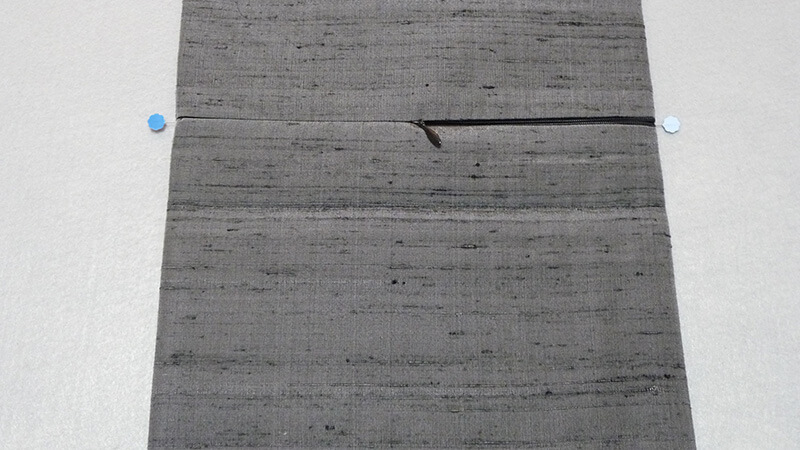 You are finished. Enjoy!

