Mother's Day Handmade Flower Pots

DIY Mother’s Day flowerpots you’ll love sewing together!
Nothing says “I love you” like a thoughtful, custom gift you crafted with your sewing machine for Mother’s Day.
Brighten Mom's Day with these colorful and creative flowerpots this Mother's Day. Follow our step-by-step guide using your Brother sewing machine and a touch of creativity to craft something she’ll cherish.
Here’s what you’ll need to get started
Materials:
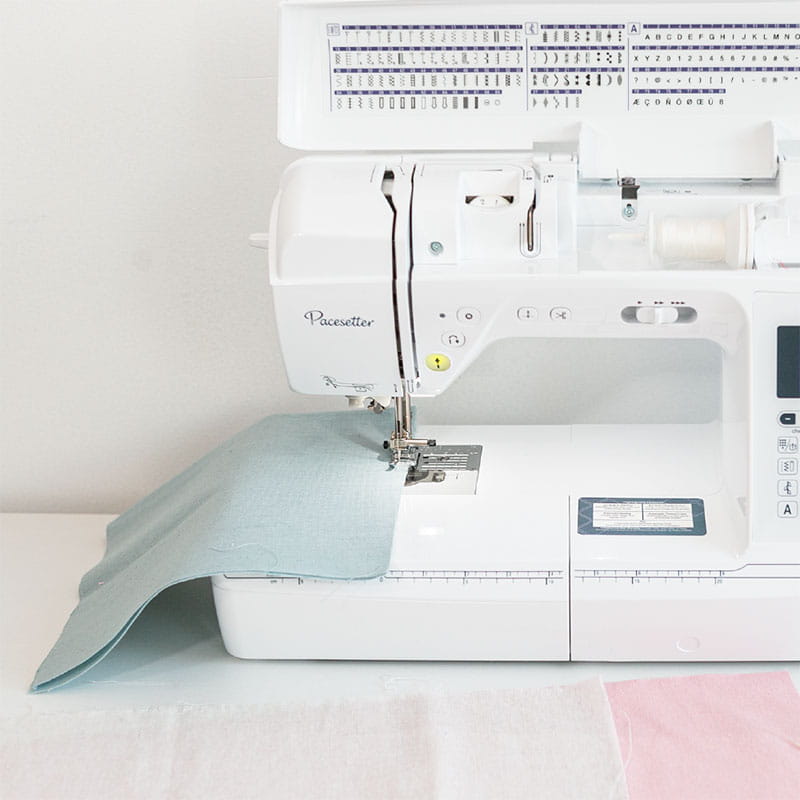
- Brother sewing machine (the Brother Pacesetter PS500 was used for this project)
- 2 coordinating fabrics (enough to wrap around your flowerpot)
- Scissors
- Brother thread
- Measuring tape
- Iron
- Flowerpot

7 steps to create a fabric flowerpot
1. Prepare your fabric
First, measure the flowerpot. You’ll need to know the circumference (distance around the widest portion of the pot), the height, and the diameter (distance across the top or bottom of the pot).
Mark these measurements down, you’ll need to adjust them slightly before cutting your fabric.
- To determine the length of your fabric piece, double the height measurement and add the diameter plus another 4” for the cuff.
- To determine the width of the fabric piece, divide the circumference in half and add 2” for seam allowance and ease.
With measurements complete, mark and cut out a rectangle (example size: 9.5” wide x 19” long). Iron your fabric before cutting for the best results. Cut one rectangle for each flowerpot.
2. Sew the pocket
Fold the rectangle in half with the right sides together. Sew along two sides with a ¼" seam allowance. Leave the top open to create a pocket.
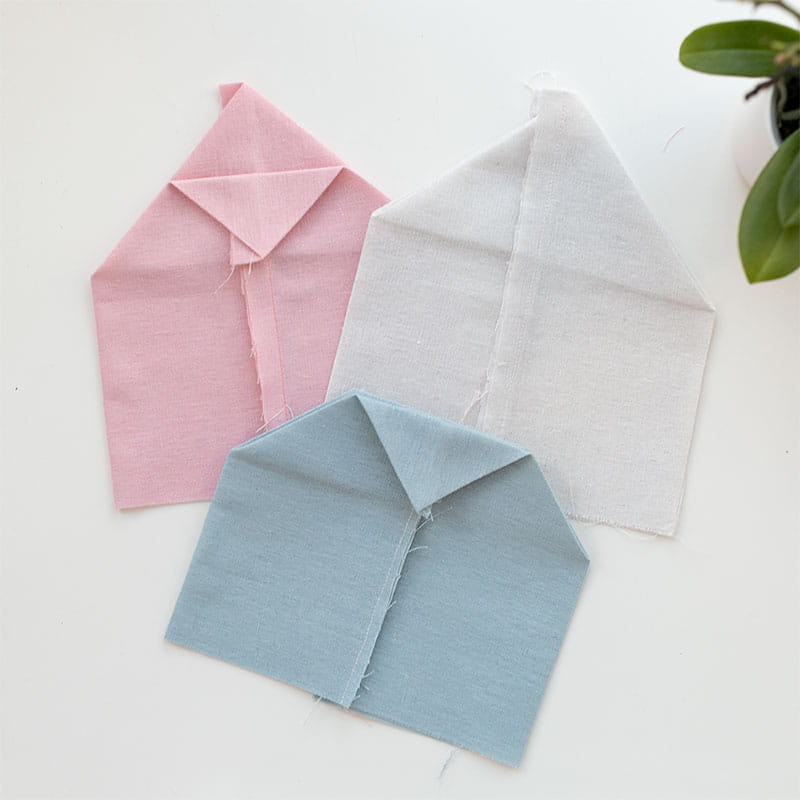
3. Shape the base
To create a flat base for the flowerpot, pull the fabric from the middle of the pocket so that the seams are centered on top of each other. This will create a triangle shape at the bottom.

4. Secure the base
On one side seam, fold down the top of the triangle and sew a seam across its bottom edge. Press down the fold with an iron to hold its shape. Repeat to sew across the second triangle.
5. Finish the pocket
Place the triangle side down as the pocket’s base. Turn the pocket right side out.
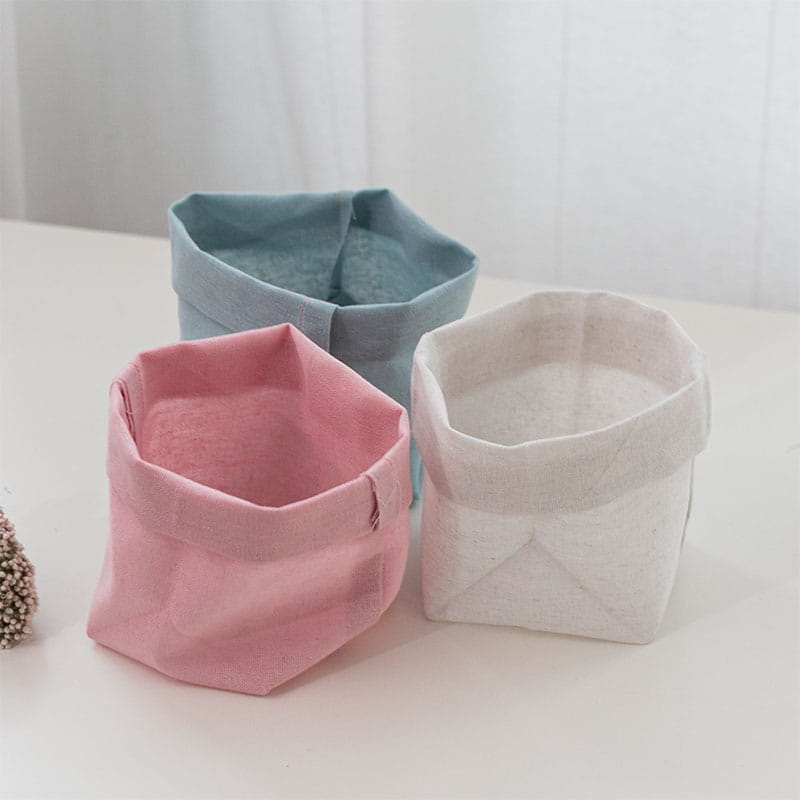
6. Polish the edges
Trim the corners for a neater look. Fold the top edge over twice to create a cuff, giving the flowerpot a crisp finish.
7. Repeat for additional pots
Create as many flowerpot covers as you'd like using this method. Slip the fabric pocket onto the pot, and your handmade flowerpot is ready!

Sew your way to mom’s heart with these DIY flowerpots
This Mother’s Day, show your love with a custom sewn gift that’s as unique as she is. These custom flowerpots are practical and the perfect canvas for your creativity. Paired with your mom’s favorite blooms, they’ll brighten her space and remind her of you whenever she looks at them.
Want to take your sewing to the next level? Explore our free project tutorials and sewing tips. Interested in more Mother’s Day sewing projects? Check out this monogrammed envelope or this DIY canning jar bouquet. Share your creations using #BrotherSews and join a community of creative makers just like you.
Happy sewing!
FAQs
Q: Can I use other types of fabric for this project?
A: Absolutely! While cotton works best for ease of handling, feel free to experiment with different textures like linen or canvas for a unique touch.
Q: How do I know what size fabric to cut?
A: Measure the circumference and height of your flowerpot, then cut your fabric slightly larger to allow space for folding and seams.
Q: What type of beginner sewing machine should I use for this project?
A: Brother offers a wide selection of beginner sewing machines like the ST150HDH or the SM3701 sewing machine. Brother sewing machines are particularly user-friendly and reliable for beginners and seasoned crafters alike.
Q: Can I decorate the fabric before sewing?
A: Yes! You can customize the fabric by adding embroidery, paint, or other embellishments before starting the project.
Related Projects
Stay Connected
* Required fields