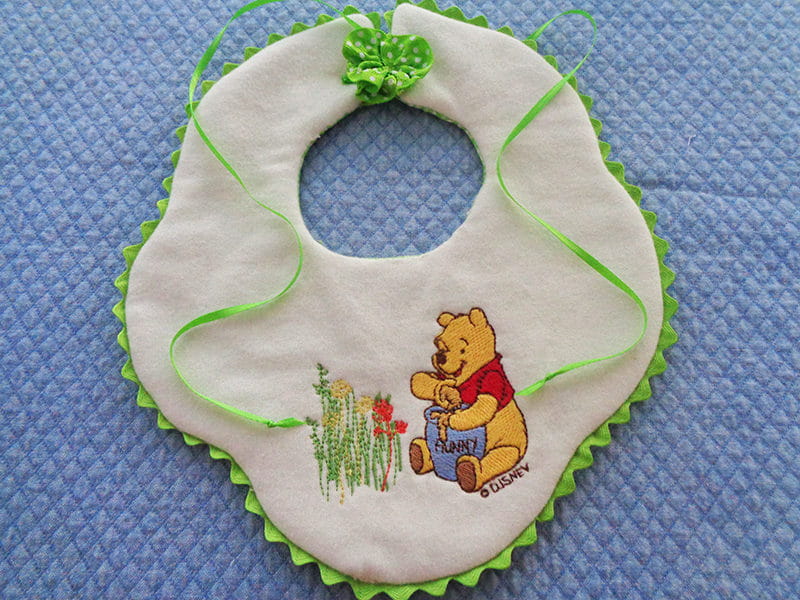
Part 2: A Winnie the Pooh Inspired Bib
For generations, Disney's Winnie the Pooh has been everyone’s favorite bear. On this little bib, he enjoys his favorite treat, “Hunny,” while your baby gobbles their favorite sweet potatoes. With THE Dream Machine
or another Brother Disney machine, you can make this simple, practical item very special. A previous post detailed Pooh’s burp cloth
and an upcoming post will feature a coordinating Winnie the Pooh blanket. What a sweet three piece set this will make!
Requirements:
- Fabric: flannel: 10 x 10”, green gingham check: 10 x 10”. Fusible batting 10 x 10”
- iBroidery designs: Tall Grass and Flowers
and Pooh with Hunny Pot - Threads: embroidery, construction, water soluble, monofilament, bobbin
- Notions: glue stick, waste cardboard approximately (for glue stick application), 9” green 3/8” rick rack, 22” green ribbon for ties, tearaway stabilizer, #75 needle, spray adhesive, and a gathered ribbon rosette.
- Brother Disney embroidery/sewing machine
with 5x7 frame NOTE: This could also be embroidered in the 4x4 frame by rehooping. - Feet: open toe foot,
J multipurpose foot, W embroidery foot - Simplicity pattern 2900-bib

Disclaimer: Pattern 2900 Bib is a product of Simplicity Pattern Company Inc. and Brother International Corporation makes no representations or warranties regarding such products.
Instructions
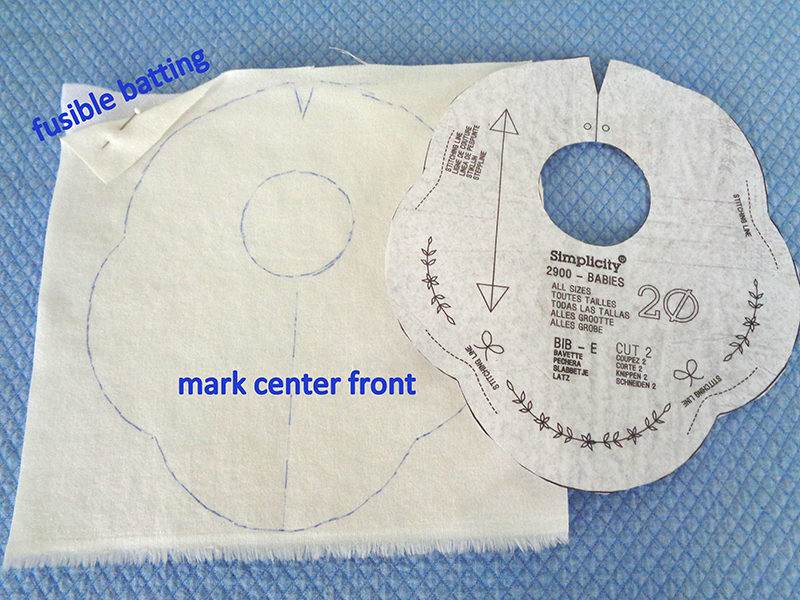
- Copy or trace bib pattern piece #20 and cut out.
- Bond fusible batting to flannel. Trace outline and neck opening to flannel. March vertical center.
- Transfer Pooh with Hunny Pot from memory stick to machine. Open and resize down to 1.61 x 2.61 in order for a better fit on the little bib. Save in memory.
- Open Tall Grass and Flowers design
in your software and split the two clumps of greenery into two separate designs. This can be done easily in PE-Design 10. - Save each of the two Tall Grass designs on your memory stick. Open in your machine and save each to memory.
- Hoop tearaway in 5x7 or 4x4 frame and apply spray adhesive lightly.
Note: The 4x4 will work because the design is no larger than that. But the 5x7 frame gives you more “wiggle” room in placement.
- Place traced flannel/batting piece on stabilizer. Open reduced size Pooh with Hunny Pot
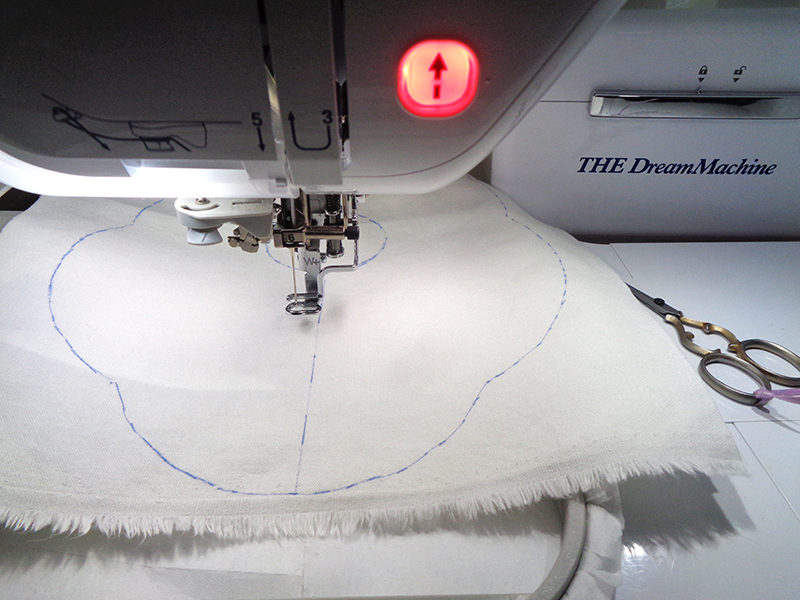
- Baste flannel to frame – again see Pooh burp cloth post for detailed instructions.
- Open resized Pooh design from memory.
- Scan with camera feature (detailed instructions in Pooh burp cloth post).
- Use stylus to temporarily move Pooh to the right of center.
- Add left Tall Grass design
and use stylus to drag it to the left of Pooh. Continue arranging the two designs until you are satisfied.
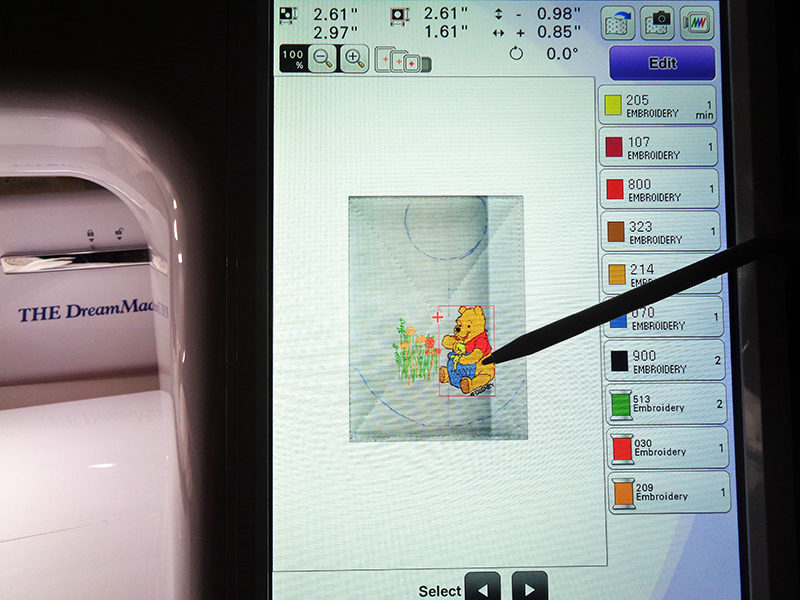
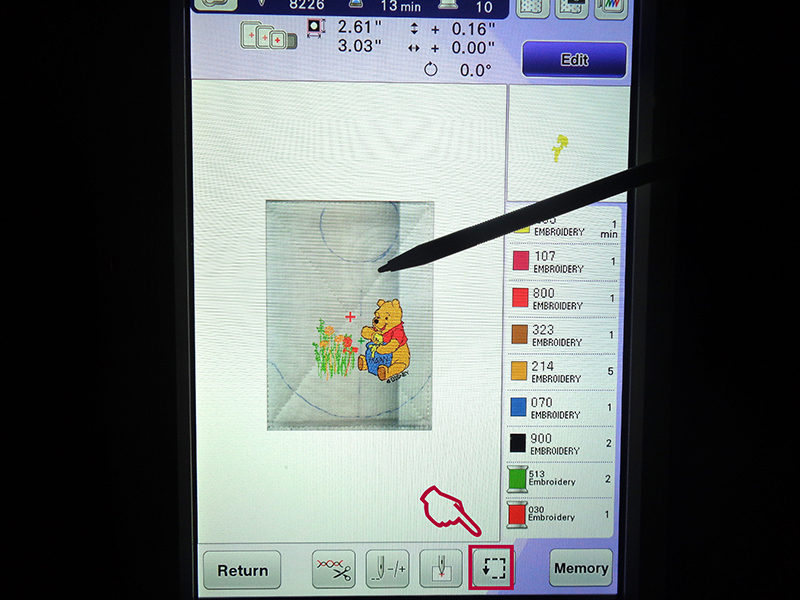
- Use “trial,” boxed in red, to be certain placement is where desired, not too close to seam or neck line. Remember that neckline calls for 3/8” seam allowance.
- Embroider design.
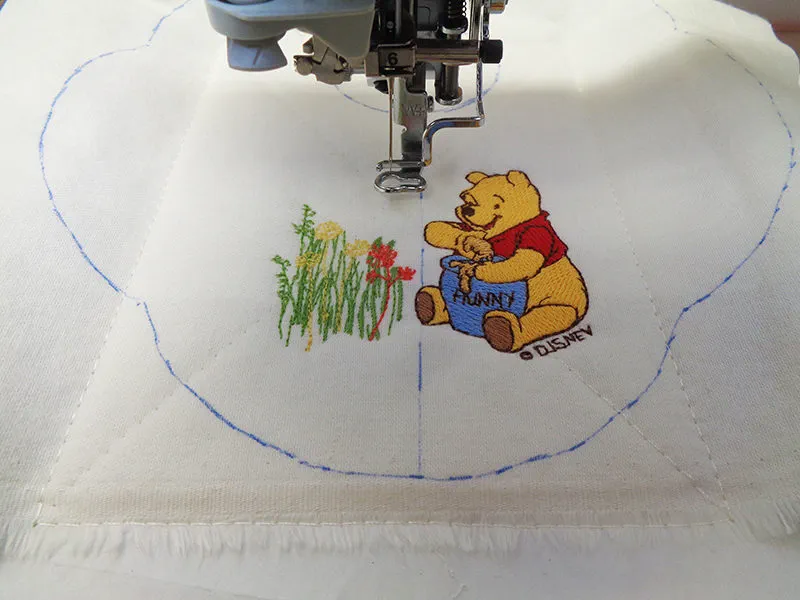
Construction
- Remove bib from hoop, remove stabilizer and stitch rick rack to bib’s outer edge. Line up peak of rick rack with marked cutting line and straight stitch close to the valley nearest the marked line.
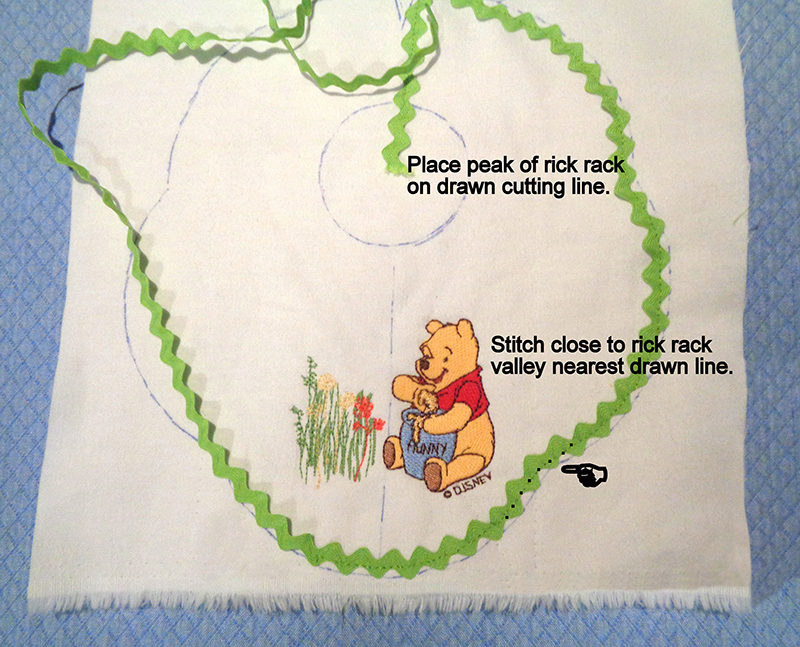
- Place bib against gingham lining, batting side up. Pin in place.
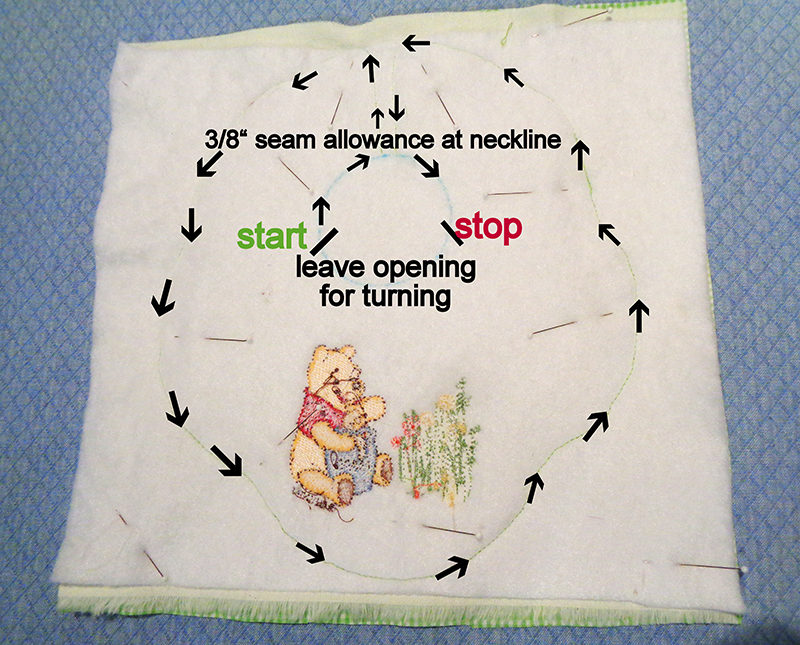
- Sew directly on stitched rick rack line EXCEPT at neckline where there is a 3/8” seam allowance.
- Trim excess fabric a scant ¼” from stitching line.
Note: The bib will turn right side out more smoothly if the batting and rick rack are trimmed close to the seam line.
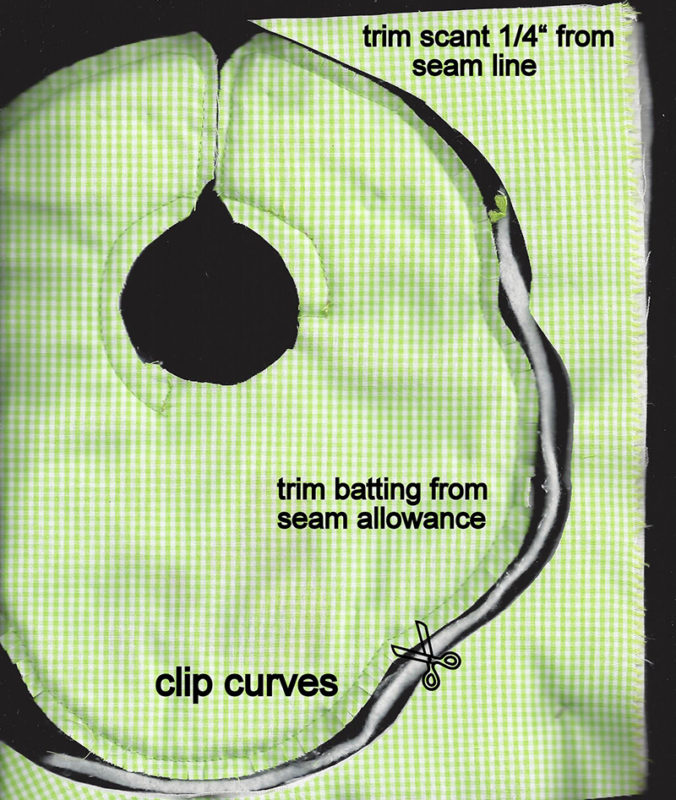
- Clip curves and turn right side out through opening.
- Press and close opening by hand.
- Attach ribbon at each side of back neckline.
- Gather ribbon for a single rosette. Attach at the back, above one tie.
