Pooh and a Field of Flowers Tutorial
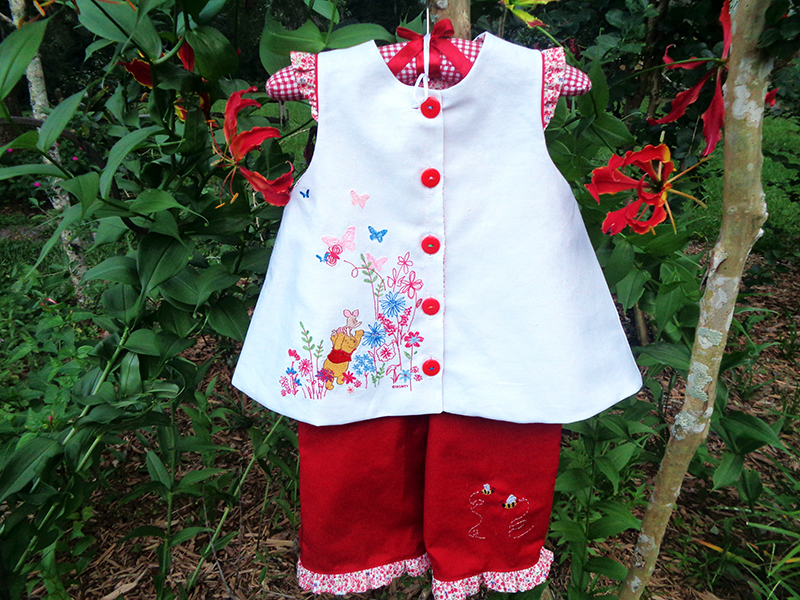 Summer, Pooh, flowers and cool, comfy play clothes—that’s what sewing this time of year is all about. The easy-to-sew, fully lined tunic with coordinating capris is a joy to stitch on THE Dream Machine
or a Quattro. The design is built in on these machines. Alternatively, the design can be purchased at iBroidery.com.
So, pull out a few summer fabrics, a pattern and get comfy in front of THE Dream Machine by Brother
for a fun project. This Pooh outfit will make any little girl smile!
Note: This is a large design. To make it fit the size 4, the tunic pattern had to be lengthened so the butterfly did not get cut away. If the dress pattern had been used, the design would fit.
Requirements:
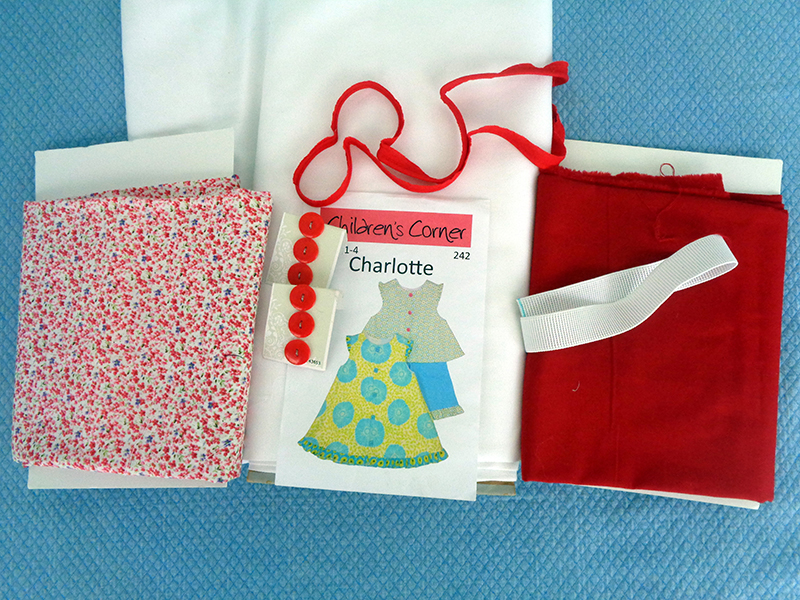
- Patterns: Children’s Corner “Charlotte” or any button front, sleeveless A-line swing top and any capri
- Fabric: For top: white cotton twill, floral print cotton. For shorts: red bottom weight
- Thread: embroidery thread to coordinate with colors in print fabric, thread for construction
- Notions: piping, elastic, buttons
- Feet: edge stitch foot SA191,
quarter inch foot
Embroidery designs:
- Bees for Capri Leg (iBroidery Item Number: BIC-ATGNA020)
- Pooh in Field of Flowers (iBroidery Item Number: exd03 01)
- Cut one much, much larger piece of white twill (or whatever you are using) than needed for the design. Because you cannot print a template, the only way to be certain of placement is to stitch out a practice piece or embroider a very large piece of fabric over which you can lay the front pattern piece.
- Pin the pattern in place over embroidered piece, taking care to place embroidery as desired.
- Cut out a second white front as well as two front print lining pieces.
- Cut out 1 white twill back and one print lining back.
- Stitch shoulder seams of each with allotted seam allowance. Press seams open.
- Cut out 2 ruffles. For a size 4, this pattern offers an oval which is 12.5” x 2.75”. Fold in half lengthwise and press. Mark the center at half the length.
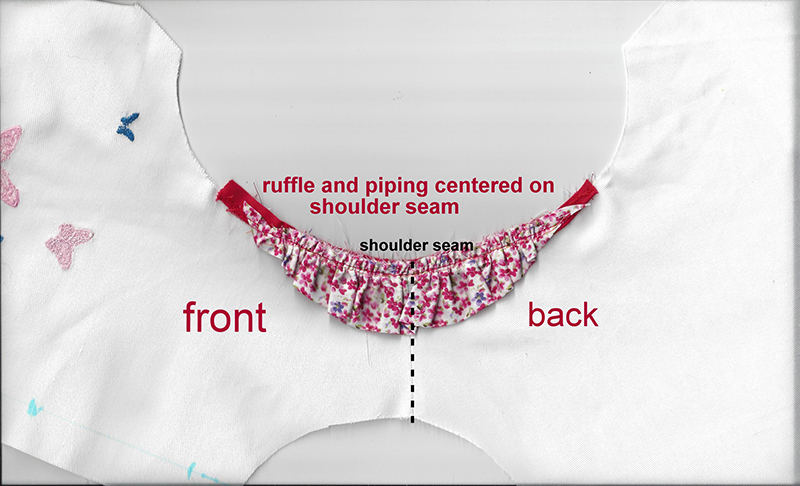
- Run gathering stitches along both layers of the curved raw edge. Gather ruffles to half their original length, i.e. from 12.5” to 6.25”.
- Optional: Apply 7” red piping to front armholes, centered on the shoulder seam.
- Stitch gathered ruffle to armholes, aligning halfway mark with shoulder seam.
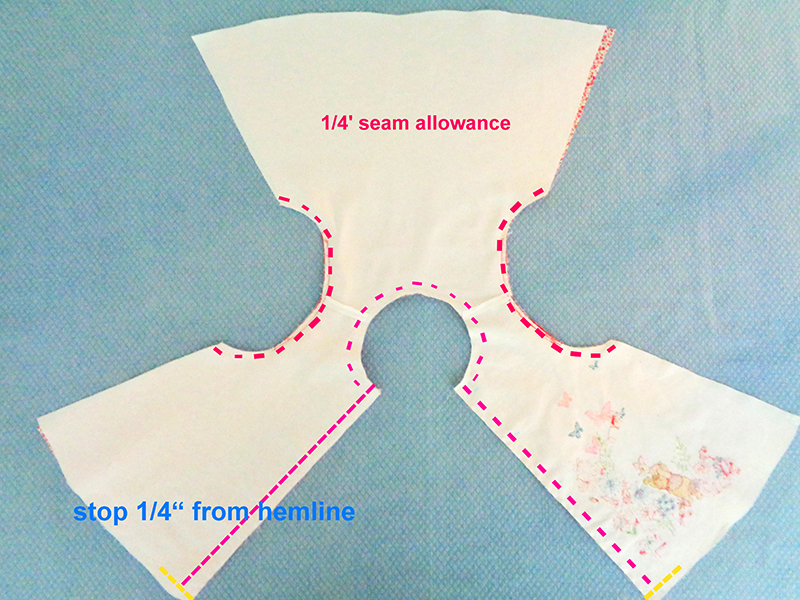
- Place the white fabric on top of the lining, right sides together. Stitch up the front, around the neckline and down the other front. Then stitch the armholes.
- Stitch side seams of white fabric, stopping ¼” (or pattern’s seam allowance) before hemline.
- Turn right side out and press.
- Flip garment front on top of lining.
- Pin white front to white back at side and stitch seam, stop stitching ¼” (or 1 seam allowance) at hemline, as when stitching front seams.
- Repeat stitching on second side seam but leave a 6” opening in the middle of the lining. This opening will be used to access the hemline and turn the garment right side out.
- Mark the center of each front and the back, both the white and the print lining.
- Reach into the 6” opening in the lining seam and grasp the far corner. Pull both lining and white fabric through the opening and pin, matching the center front line and the side seam. Stitch this quarter of the hem.
- Continue pinning and stitching the hem ¼ at a time, from the side seam to the center back, then to the next side seam. Stop there.
- Turn the garment right side out, through the 6” opening. Pull the last ¼ section (side seam to front seam) through the opening. Turn the two hem pieces right side together. Stitch that final section.
- Turn right side out and press.
- Close the 6” opening by hand sewing.
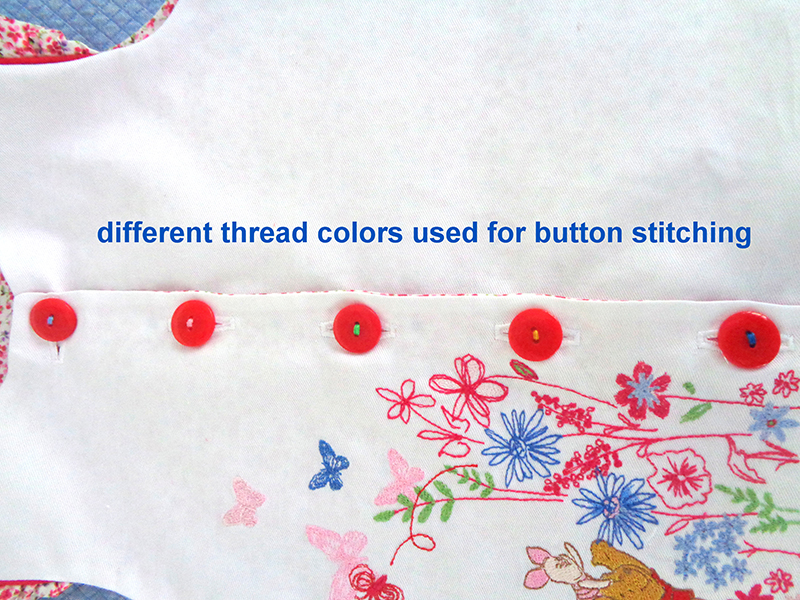
- Stitch buttonholes on right side. Add buttons to other side.
- Use capri pattern of choice and cut out red fabric.
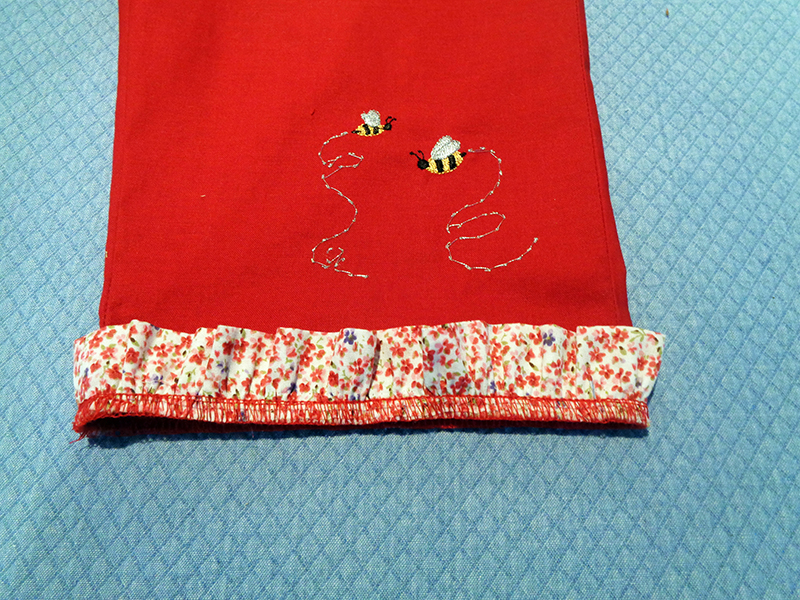
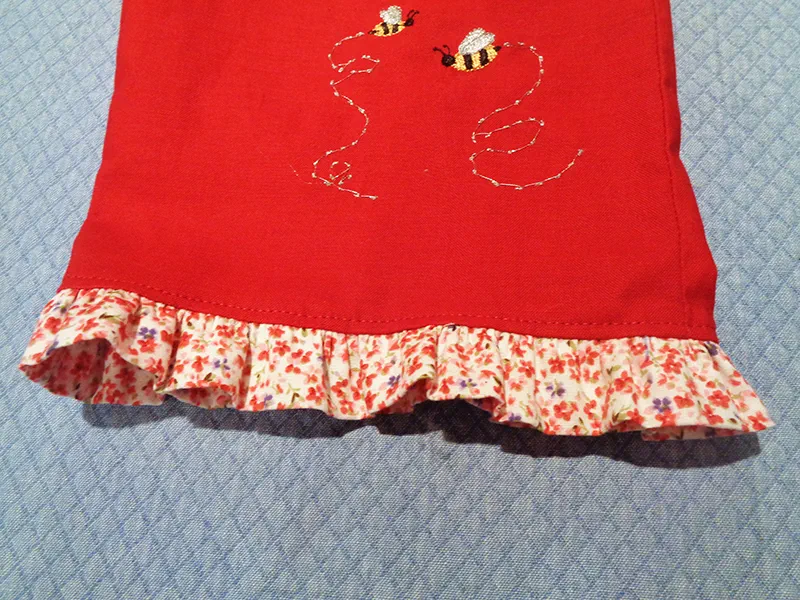
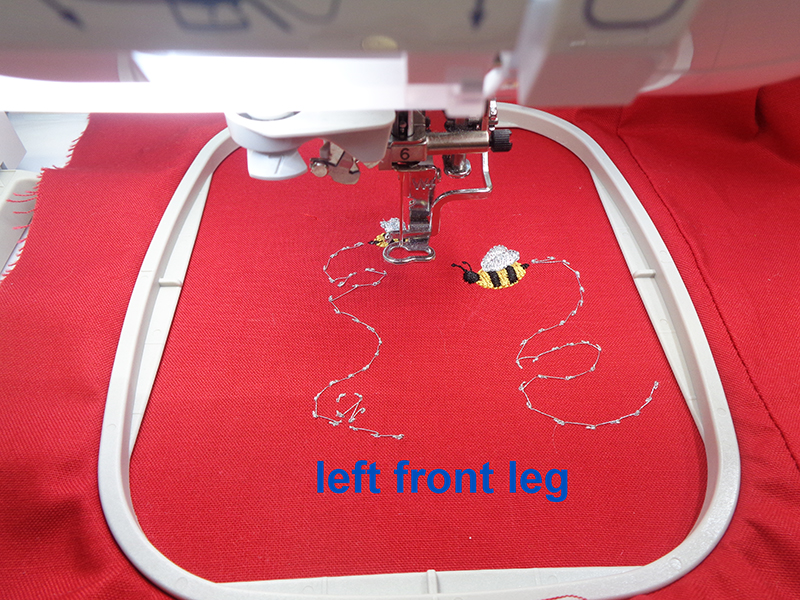
- Embroider bees on front of left leg.
- Stitch the remaining seams and clean finish the raw edges.
- Cut two 2” strips of print fabric 1.66-1.75 time the width of the pant leg. Fold in half lengthwise and seam short ends with straight stitch, creating a circle.
- Run two rows of gathering threads on doubled raw edge. Draw up to fit capri hem.
- Pin with gathered raw edge even with capri hem edge. Join ruffle with 3/8” seam.
- Clean finish the gathered inside edge with zig zag, overcast stitch or serging.
- Use edge stitch foot SA191 to top stitch ¼” above seam to hold ruffle in place. Press seam toward pant leg.
- Slide leg into free arm and run the edge stitch foot blade “in the ditch.” Move needle 4 positions to the left and straight stitch, holding the ruffle upright. Straight stitch in place.
- Stitch waistline casing as per directions and insert elastic.
- Delight a little girl with Pooh and Piglet in the wildflowers.
 With Children’s Corner name on pattern[/caption]
OR
[caption id="attachment_15773" align="aligncenter" width="800"]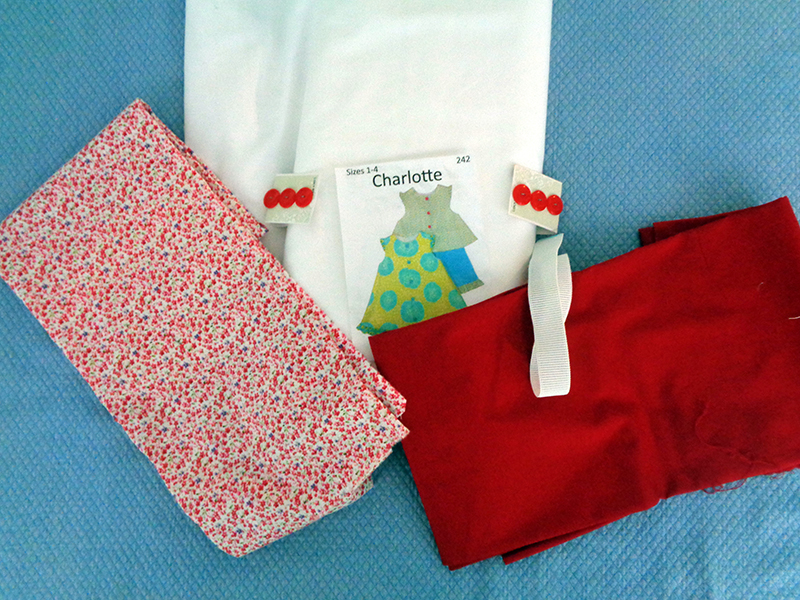 Without Children’s Corner name on pattern[/caption]
Note: Instructions are for size 4. Adapt measurements as needed for other sizes.
Note: The seam allowance for the pattern shown is ¼”. Adjust the instructions to the seam allowance on your pattern if it differs, i.e. substitute 5/8” or whatever for every ¼” instruction. Use ¼” foot if it meets the seam allowance requirement.
Note: If the design is too wide for the front in your chosen size, you could place the pattern piece so that the blue butterfly is in the armscye and thus eliminated.
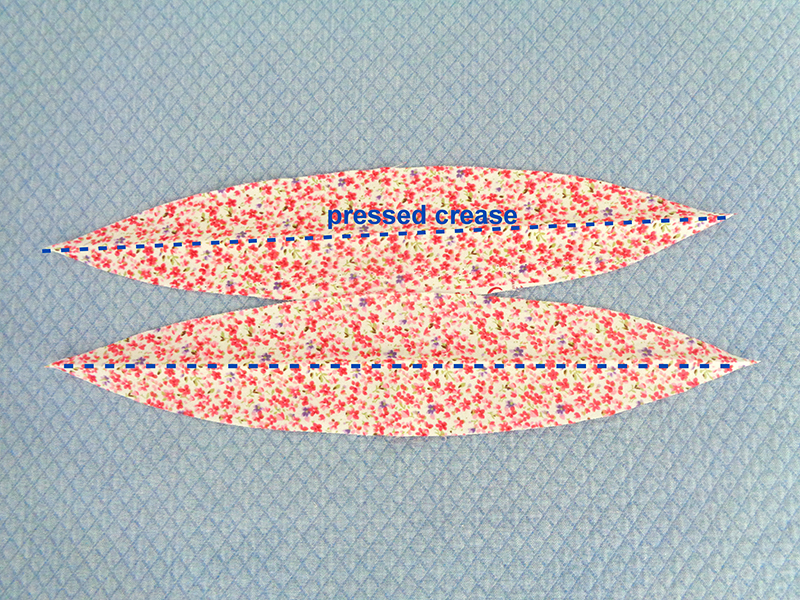
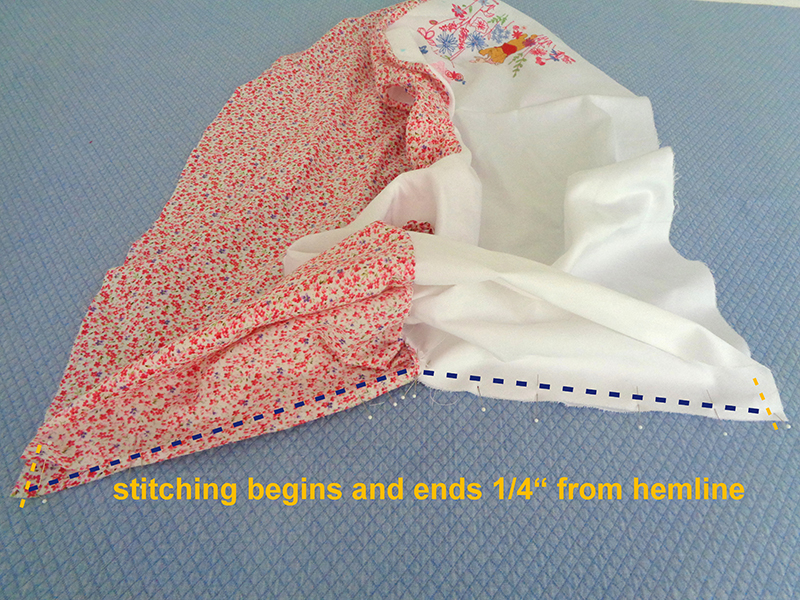
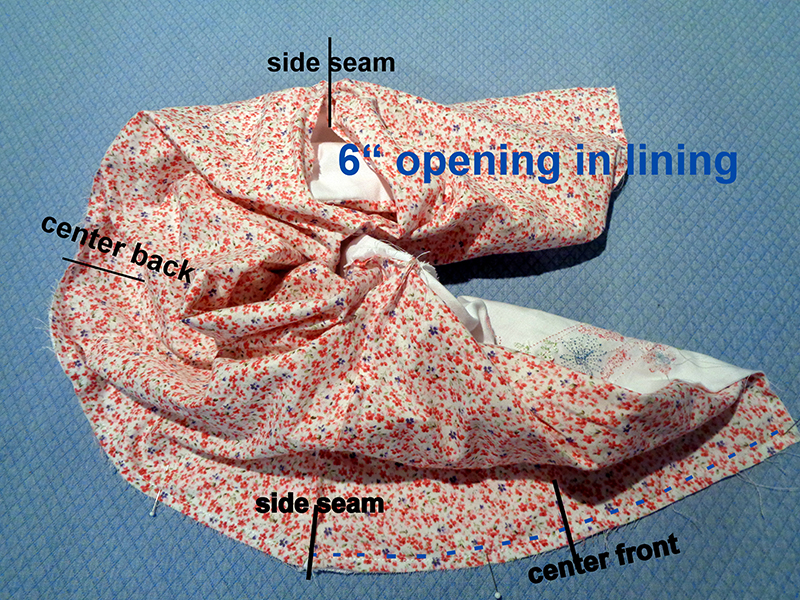
Note: Pinning and stitching just ¼ of the hem at a time makes it is less likely that the hem will stretch.

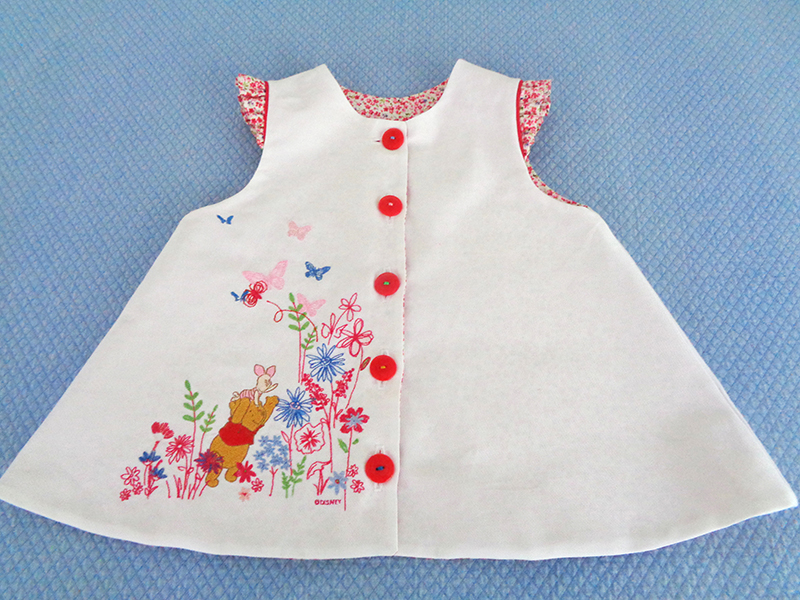
Note: For a fun detail, different thread colors were used for each button.
Capris
Note: The side cutter works well.
