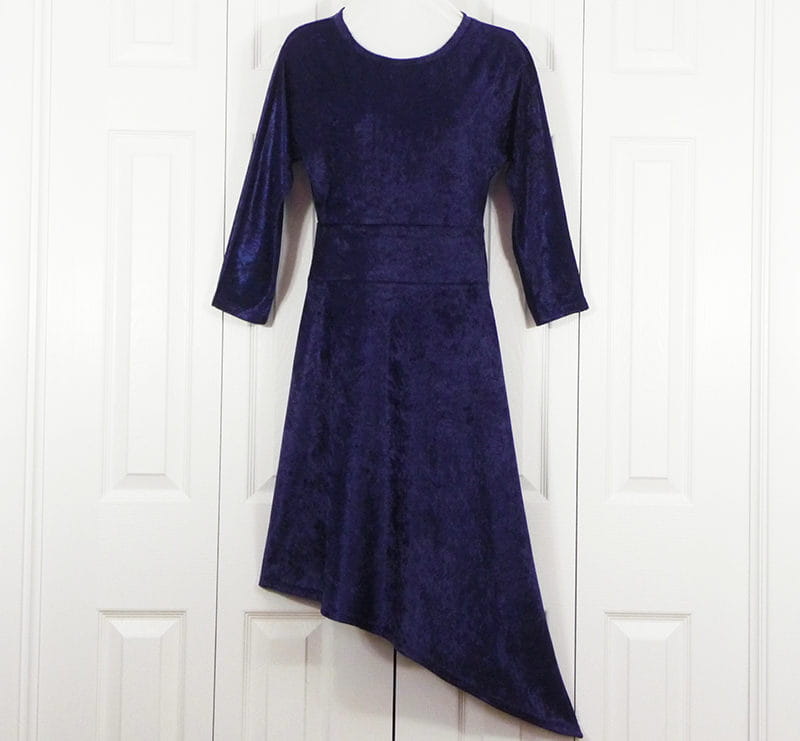
Sew and Serge a Knit Dress
When used in tandem with one another, your Brother sewing machine and serger make a powerful pair in your sewing space! While sergers are fantastic for speedy sewing and a finish that matches ready-to-wear, the sewing machine shines when it comes to more precise and detailed sewing. This knit dress is an example of a project that benefits from assets that both machines provide. Follow along as I guide you with some tips, tricks, and techniques for making a knit dress in little more than a day. A knit dress in a simple style is great for time saving sewing. Pick a knit that has some sheen for a dress that’s perfect for parties, date night, and more! Are you ready? Let’s go sew!
Materials and Supplies
- Brother Sewing Machine.
- Brother Serger, the Brother 5234PRW
is used in this example. - SA538
Brother adjustable seam guide for accurately stitching hems. This is optional but helpful and you can also use it to set seam allowances on the sewing machine. - Three cones of good quality serger thread for serging seams and finishing edges.
- Basic sewing notions including a wash out marker or chalk, ball point pins, and thread to match fabric.
- Stretch needle size 11 for sewing knit fabric seams on the sewing machine.
- 4mm twin needle specifically for stretch fabrics. This is recommended for stitching sleeve and bottom hems on the sewing machine.
- Pattern for a pullover knit dress, plus fabric and notions as per pattern envelope. Please see additional tips for selecting fabric and pattern below:
Choose a pattern with minimal seams for a knit dress that is quick to complete. A dress that can be slipped on without the need for a zipper closure will speed up the sewing process. It’s very important to pick a knit that is suitable for your intended pattern. Be sure to check the envelope for specific stretch requirements. Important note: If you’re unsure of the fit, it’s best to make a trial garment. Adjust pattern as needed and then cut and sew from your selected fashion fabric.
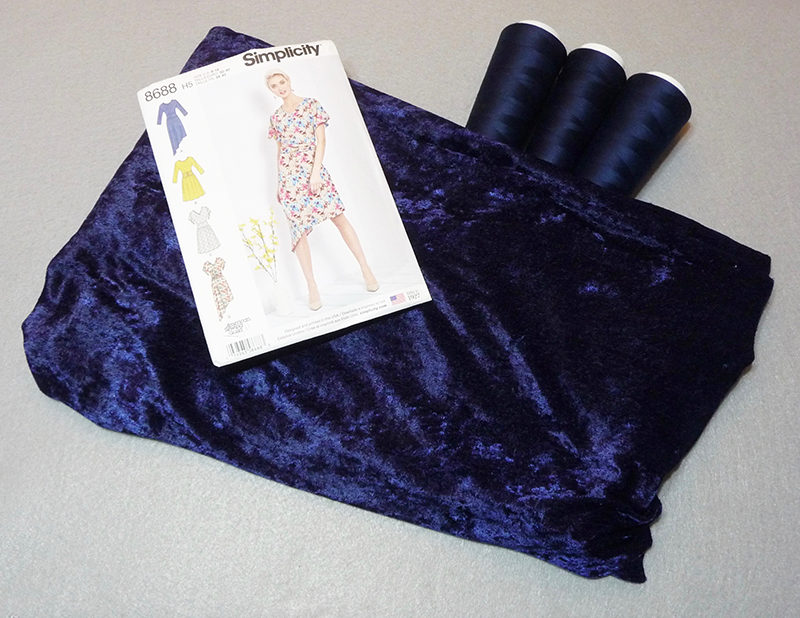 Figure #1[/caption]
Guide to Creating a Serge and Sew Knit Dress
- Cut fabric using required pieces and mark as per pattern directions.
- Prepare to construct the dress. Thread serger for a three-thread balanced wide stitch. See Figure #2a.
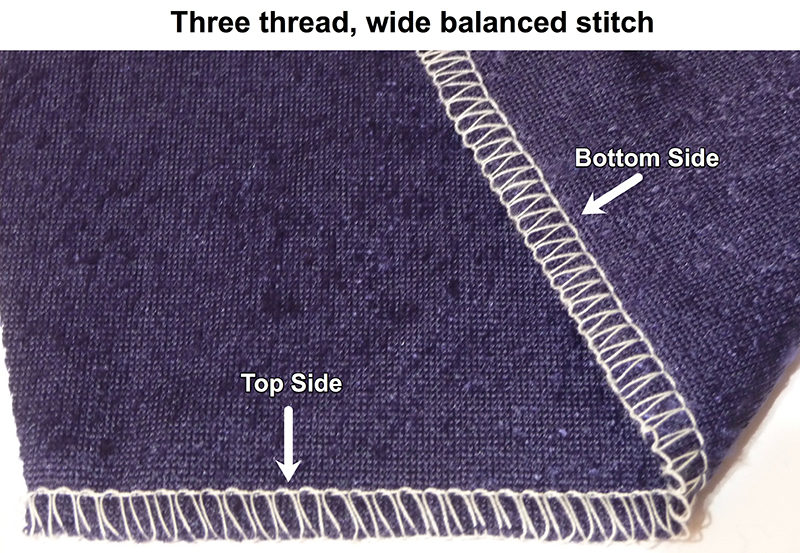 Figure #2a[/caption]
I prefer a stitch length set between 3 and 4. Depending on the style of your dress and the fabric itself, you may need to set the differential feed for a number higher than the number one. See Figure #2b.
[caption id="attachment_18200" align="aligncenter" width="800"] Figure #2b[/caption]
Standard seam allowance on commercial pattern is 5/8-inch for most seams. When you use the serger to stitch a 5/8-inch seam, you will want to trim approximately 3/8-inch and have the needle line of the serger stitch fall on the 5/8-inch line. There are markings on the serger to indicate the distance for seam allowance. However, if you make adjustments with the cutting width dial, this position could change. For this very stretchy knit, I used a cutting width setting of six. Once I had the cutting width adjusted, I measured a distance of 5/8-inch from the needle on the serger and put a piece of sticky paper on the cover plate to use as a guide for the raw edge of fabric. See Figure #2c.
[caption id="attachment_18201" align="aligncenter" width="800"]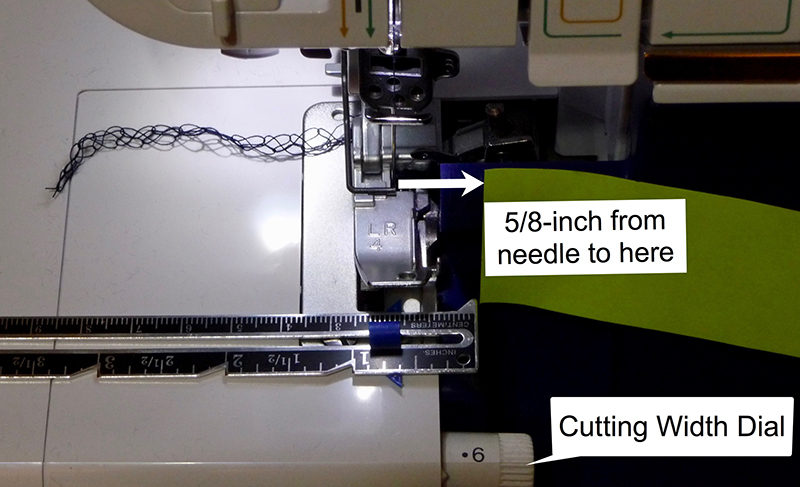 Figure #2c[/caption]
3/8-inch of seam allowance is trimmed away when raw edge of fabric follows this marked guideline. This leaves a final serger seam measuring approximately 1/4-inch wide. See Figure #2d.
[caption id="attachment_18202" align="aligncenter" width="800"]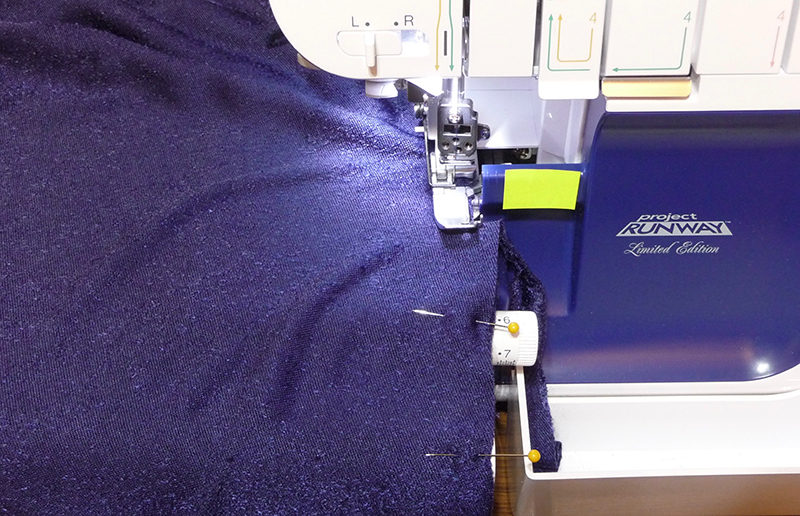 Figure #2d[/caption]
Prepare the sewing machine for sewing. You can sew knit seams with a standard straight stitch, the triple stretch stitch, or my favorite stitch which is the stem stitch. I like to call this the lightning stitch as it resembles a lightning bolt. The slight slant of this stitch gives it flexibility. You can press these seams to one side or press them open. See seam and settings in Figure #3.
[caption id="attachment_18197" align="aligncenter" width="446"]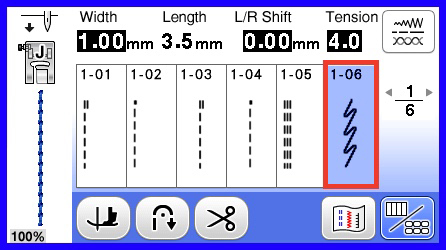 Figure #3[/caption]
- Sewing order for constructing dress will vary depending on your pattern. With knits it’s a good idea to sew as many pieces as possible while they are still flat. My dress pattern includes dolman style sleeves, so the shoulder seam and top sleeve seam is stitched in one continuous seam. Here is an example of the construction order I generally follow for a knit dress with a neckband such as the one featured here:
- Serge each shoulder seam and press toward back. My dress pattern includes dolman style sleeves, so the shoulder seam and top sleeve seam is stitched in one continuous seam. If your pattern has set-in sleeves, you can sew sleeves into each armhole next, or sew sleeves after you apply the neckband. You can use the serger to sew these seams if the sleeve cap is very flat. If there is more shape to the sleeve or it needs to be eased slightly, I prefer to use the sewing machine first, and then serge finish the seam, trimming excess seam allowance so seam finishes at approximately ¼-inch. Press set in sleeve seams away from shoulder.
- Sew neckband seam(s) on sewing machine. Press seam(s) open.
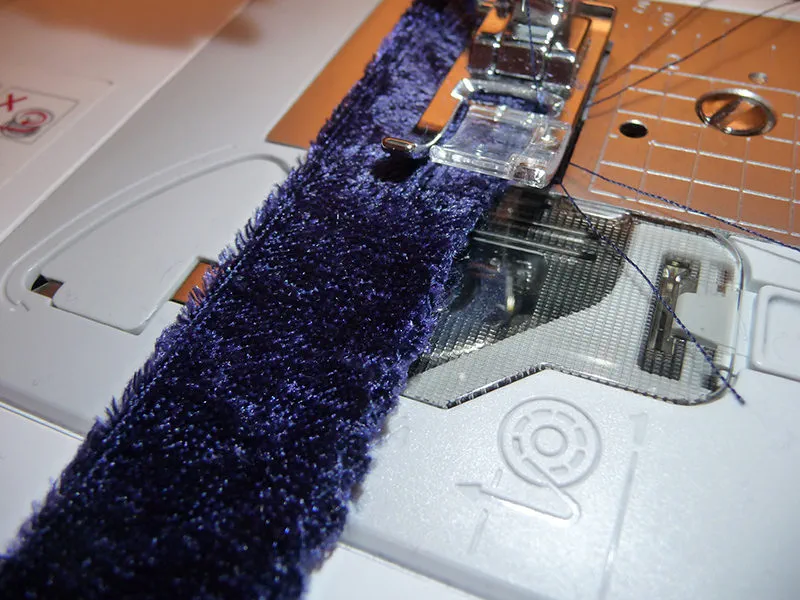 Figure #4[/caption]
- Sew band to neckline, matching all pattern marks and stretching band to fit. The neckband seam allowance is usually 3/8-inch. I prefer to sew this seam on the sewing machine first, and then use the free arm option on the serger to trim a scant 1/8-inch and finish off seam allowance. See Figure #5a and Figure #5b.
 Figure #5a[/caption]
[caption id="attachment_18205" align="aligncenter" width="800"]
Figure #5a[/caption]
[caption id="attachment_18205" align="aligncenter" width="800"]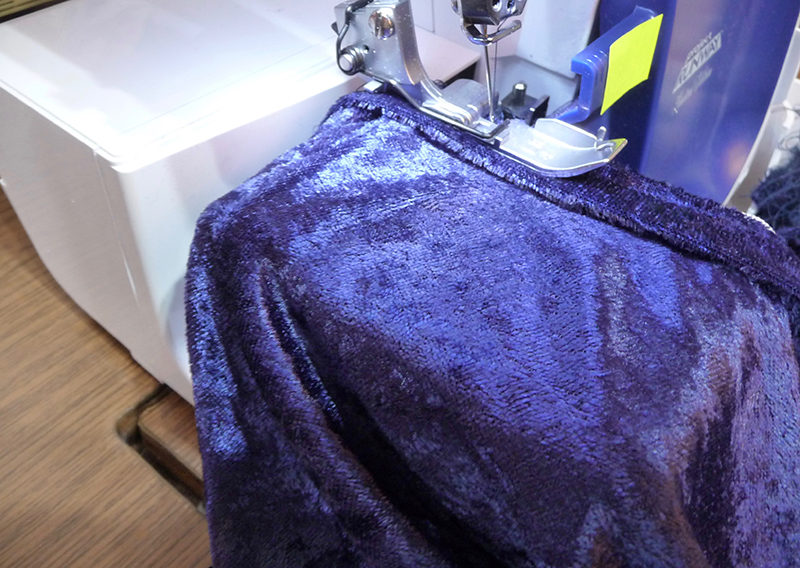 Figure #5b[/caption]
- Press neckband seam toward bodice. Serge sleeve seams and side seams. If your dress pattern is all one piece you can serge this seam from the wrist all the way to the hem.
- Select two spools of matching thread and a 4mm twin needle. See Figure #6.
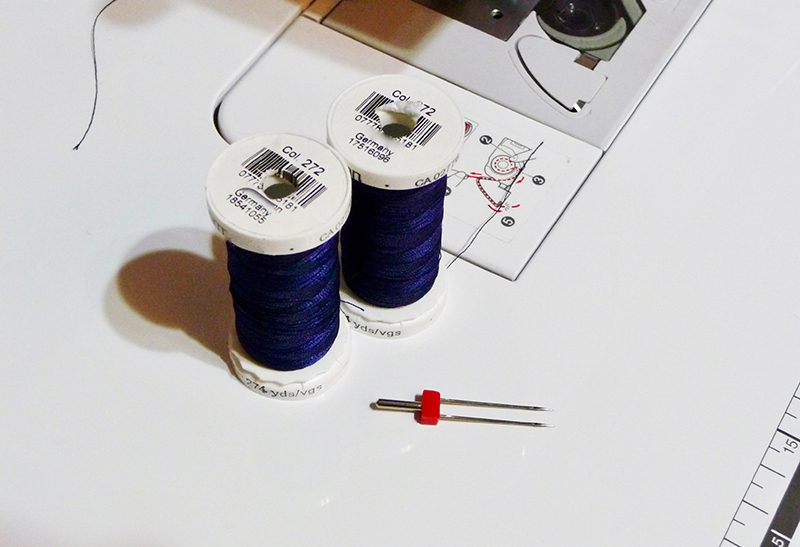 Figure #6[/caption]
Set machine for twin needle straight sewing following instructions in your machine manual.
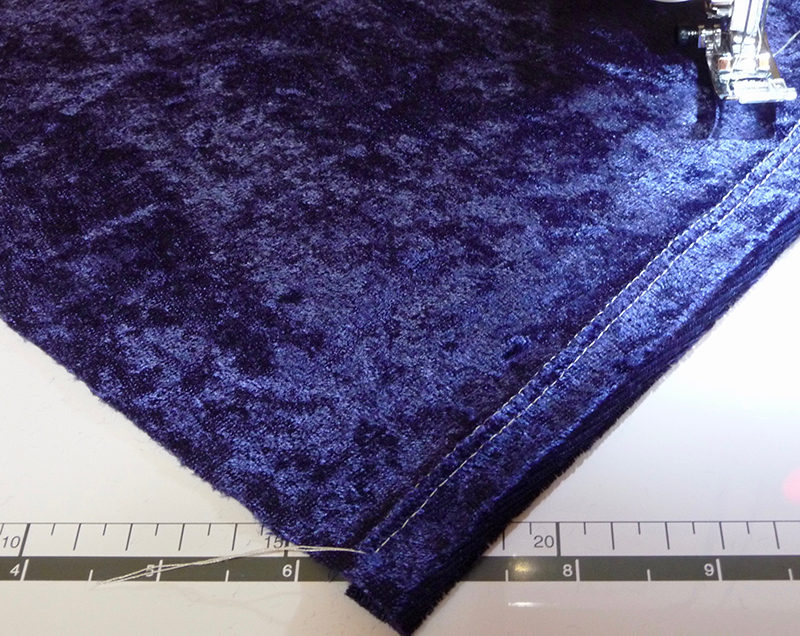 Figure #7[/caption]
To complete dress, press up sleeve and bottom hems and topstitch hem using a twin needle on the sewing machine.
 Figure #8a[/caption]
[caption id="attachment_18209" align="aligncenter" width="800"]
Figure #8a[/caption]
[caption id="attachment_18209" align="aligncenter" width="800"]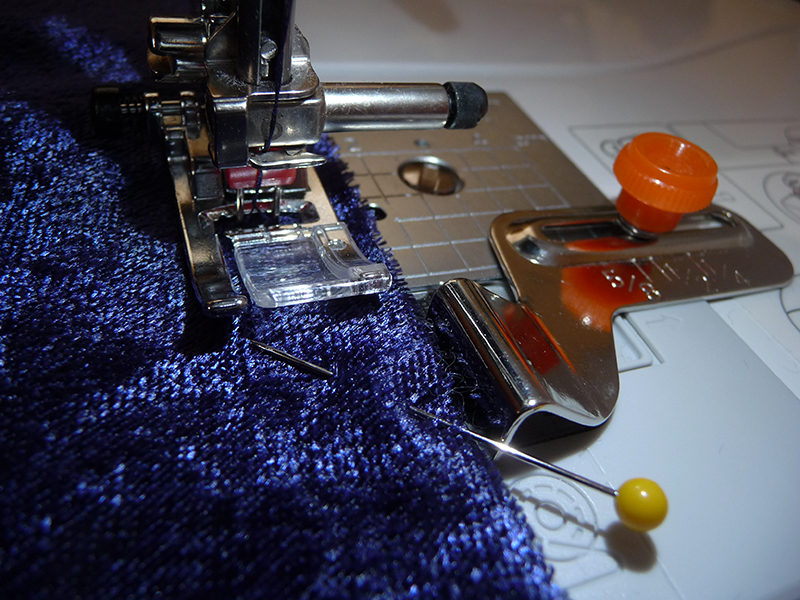 Figure #8b[/caption]
When your hemming is complete you are finished! Enjoy your beautiful new dress!
Figure #8b[/caption]
When your hemming is complete you are finished! Enjoy your beautiful new dress!
See closeup of bodice and hemline below:

Related Projects
Stay Connected
* Required fields