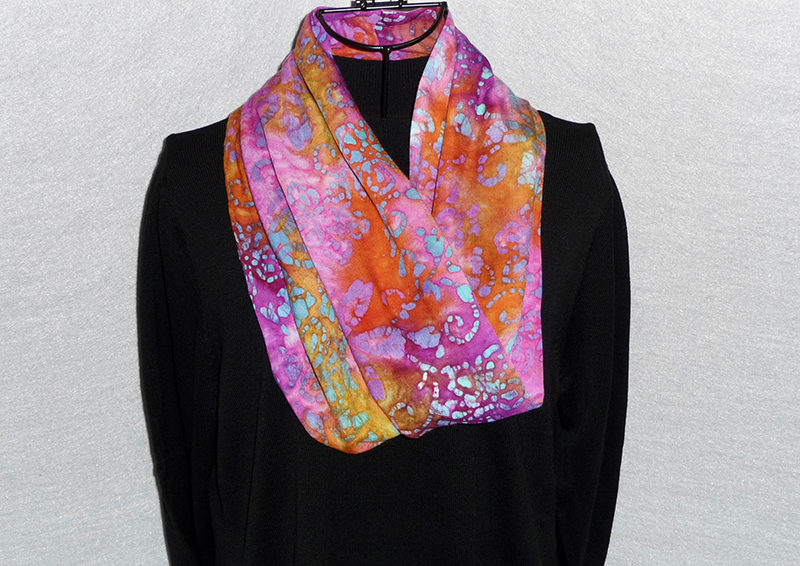
Foot of the Month: Circle Scarf with a Twist
An attractive scarf can update your wardrobe in a flash! Select a fabric print with bold colors combined with earthy hues and you have the perfect transitional piece to take you from summer into fall. This style is commonly known as an infinity scarf. With just one continuous loop, this one is scaled down just a bit from other scarves of this type, making it ideal for those who prefer a little less bulk. You’ll find this scarf simple to sew and perfect for gift giving! In this project we are featuring the standard foot for the Brother serger as our featured Foot of the Month. In addition, we featured the two-thread overcast stitch for finishing raw edges of the fabric.
Materials and Supplies
- Brother Sewing machine
- Brother Serger
such as Model 5234PRW
with two thread capability. Other options included in the instructions below. - Serger thread to match or blend with fabric, two spools for a two-thread stitch, three spools for a three-thread stitch.
- Sewing notions including thread to match or blend with fabric and multi-colored pins with large heads.
- Fabric for scarf: Light & soft fabric with draping qualities such as chiffon, silks, rayon challis, and rayon batik such as the fabric featured here. You will need one strip of fabric measuring 24-inches wide X 32-inches long.

Fabric Tips: If your fabric looks similar on both right and wrong sides be sure to temporarily mark the wrong side with a piece of low tack tape. Trim away selvedge edges of fabric. Reserve fabric remnants for testing the serger stitch.
Instructions for Making Scarf
- Set up serger for sewing an overcasting stitch with two threads. See Figure #1 and follow guidelines below:
- Left needle inserted.
- Standard foot attached.
- Standard stitch finger in place.
- Attach thread change assembly for a two-thread stitch.
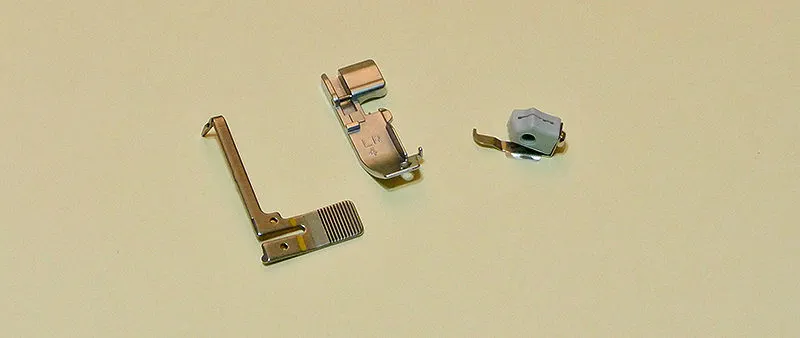 Figure #1[/caption]
- Thread machine using left needle and lower looper. See Figure #2 for a close up look at the attached thread change assembly on the machine. Adjust tension as needed.
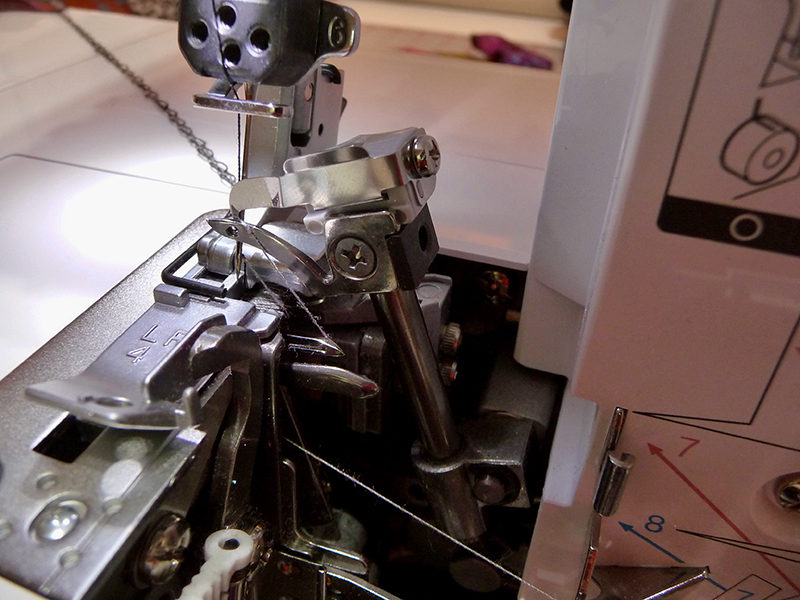 Figure #2[/caption]
Note: For a two-thread stitch, the needle tension is quite loose and the lower looper tension is considerably tighter than normal. The two-thread stitch produces a lighter weight seam finish as compared to a three-thread stitch and is ideal for soft and lightweight fabrics. From the topside, the looper thread runs evenly from the needle to the raw edge. On the bottom side, the needle thread forms a “V” that stretches from the needle line to the raw edge. See example of a balanced two-thread overcast stitch in Figure #3.
[caption id="attachment_16945" align="aligncenter" width="800"]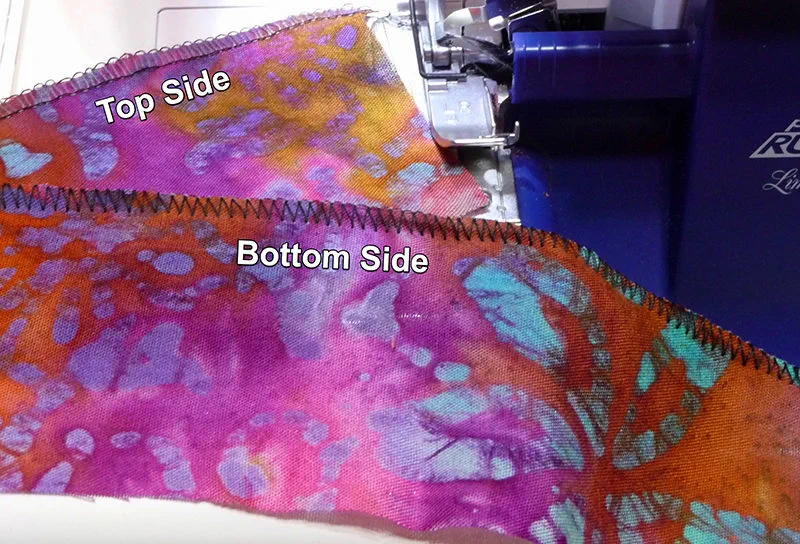 Figure #3[/caption]
- As an alternative you can use a three-thread stitch or overcast the seam allowances using a three-step zig zag on your sewing machine.
- Serge finish each 32-inch edge. Fold strip in half lengthwise, with right sides together. Sew a 3/8-inch seam on the sewing machine, leaving a 5-inch opening a few inches from one end of the strip. See Figure #4.
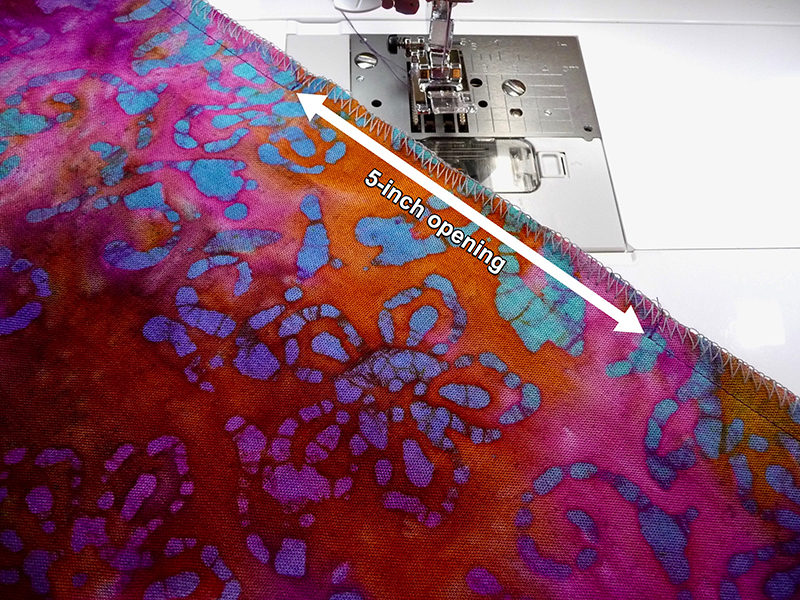 Figure #4[/caption]
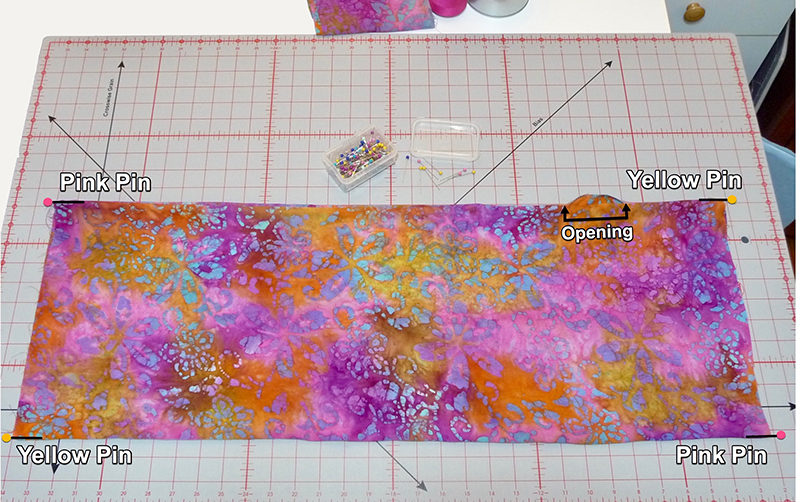
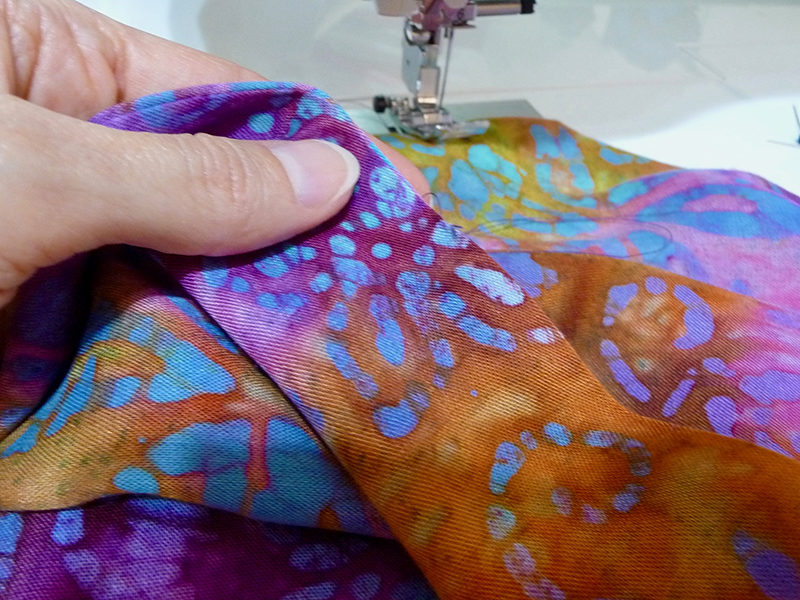
- Press seam to one side along the entire long edge. Turn piece right side out. Now it’s time to sew the ends with a twist that allows the scarf to fall in soft folds, similar to a cowl neckline when worn. Begin by smoothing out the strip, placing it on a flat surface. Use colored pins to mark the seams and folds at each end, using two different colors at opposite ends. See below:
- Next, bring one short end to the other, twisting one end so you can match pins by their colors. Securely pin at the location of each set of matching pins. Example: Yellow to yellow and pink to pink. See Figure #5a.
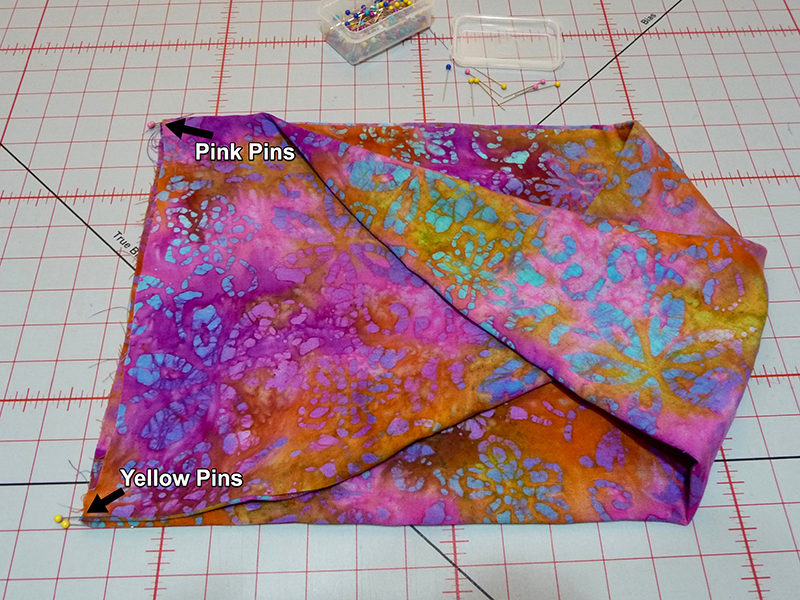 Figure #5a[/caption]
- Gently turn piece to the wrong side by reaching through the opening, and then pin the remaining raw edges of the entire circle together. This will become the center back seam. See Figure #5b.
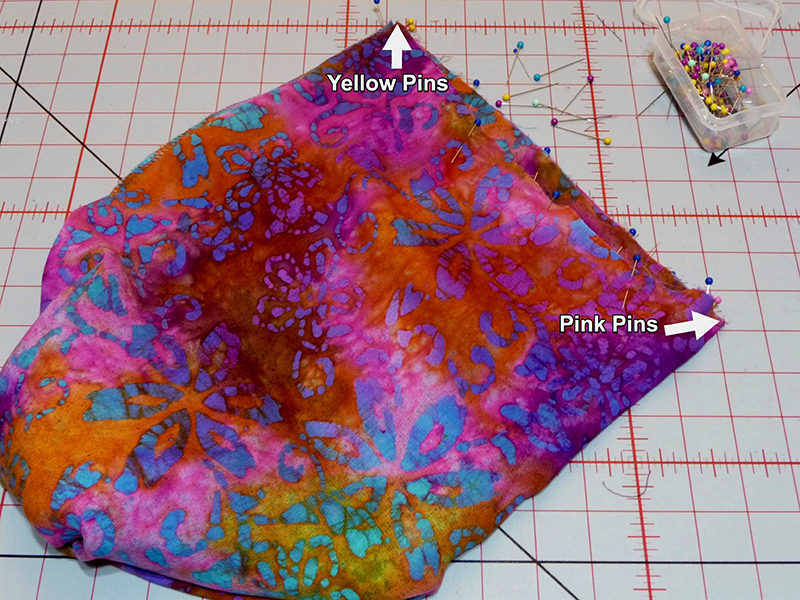 Figure #5b[/caption]
Note: In order to avoid confusion, this example features yet another color of pins, (BLUE) for pinning the rest of the seam.
- Sew the circle together using a 3/8-inch seam. Serge finish raw edges, serging layers of seam together. See Figure #6a and Figure #6b.
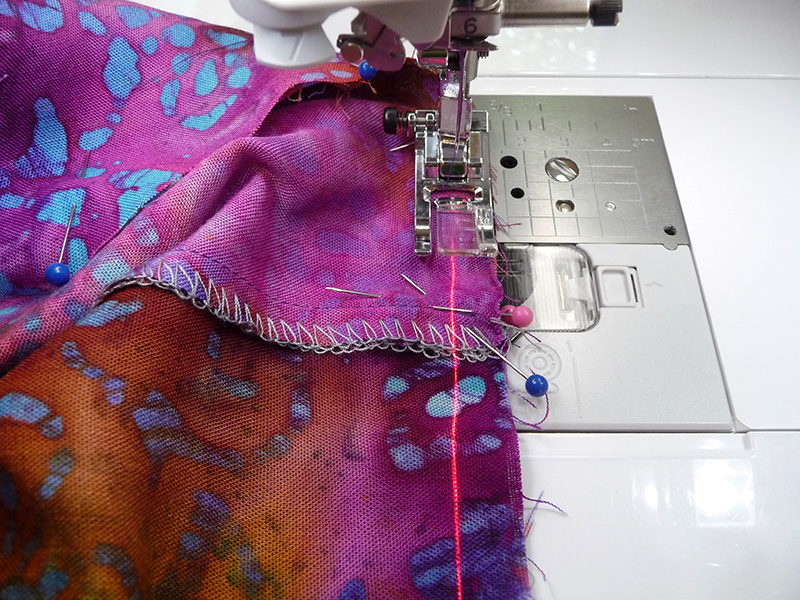 Figure #6a[/caption]
[caption id="attachment_16950" align="aligncenter" width="800"]
Figure #6a[/caption]
[caption id="attachment_16950" align="aligncenter" width="800"]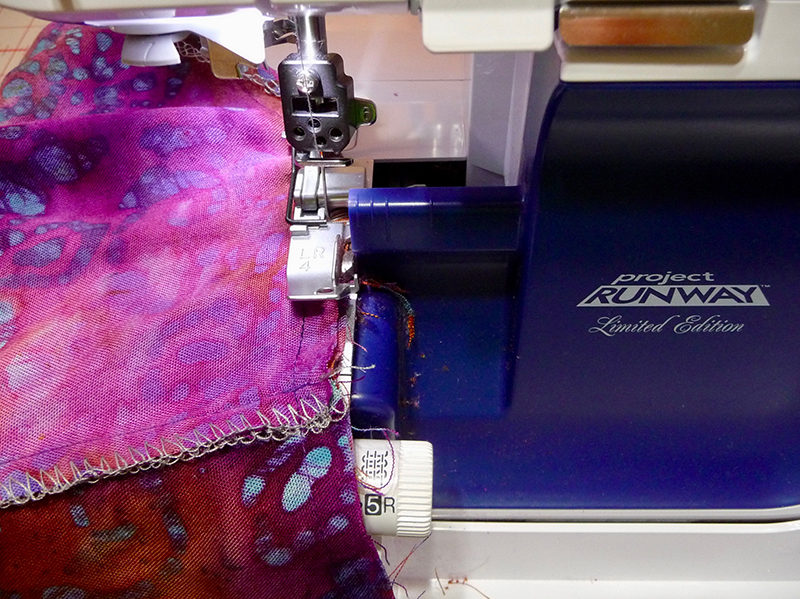 Figure #6b[/caption]
- Reach through the opening to turn the scarf right side out. Close the opening with small hand stitches.
- Press finished scarf by slipping it over the end of an ironing board, pressing a small area at a time.
Enjoy wearing your beautiful new scarf!
Related Projects
Stay Connected
* Required fields