Stipple Fill Stitches
- Brother Sews Blogger
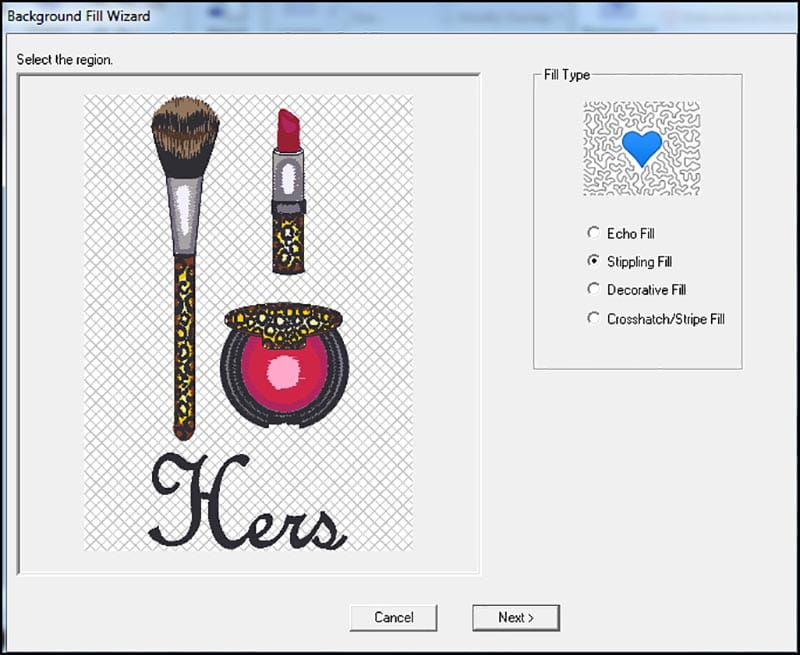
With Brother PE Design 11 software and the Background Fill Wizard, it’s easy to add the look of hand quilted stipple fill stitches to your embroidery designs. With just a few clicks you can transform embroidery designs into quilted blocks. This technique is fun, fast, and easy! Are you ready? Let’s go sew!
Steps to add Stippling Fill with Background Fill Wizard:
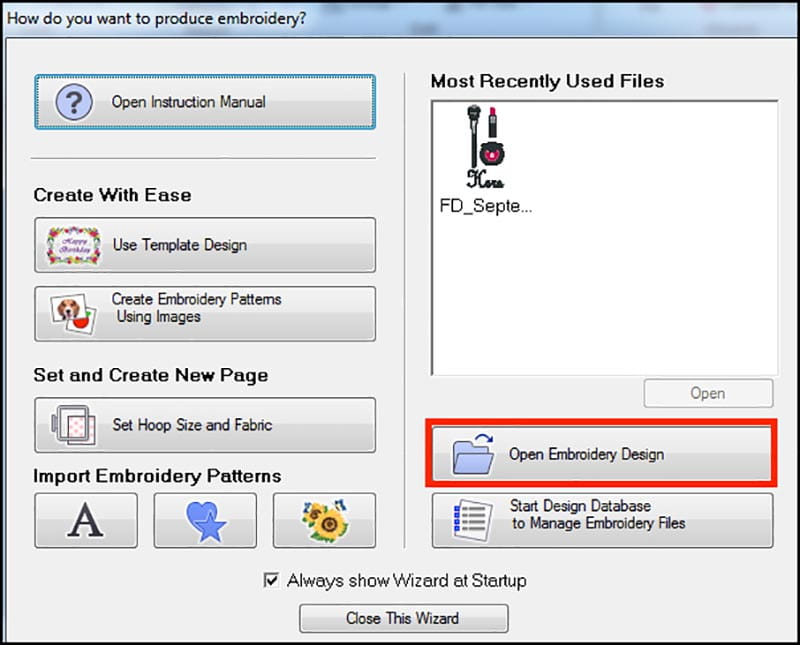
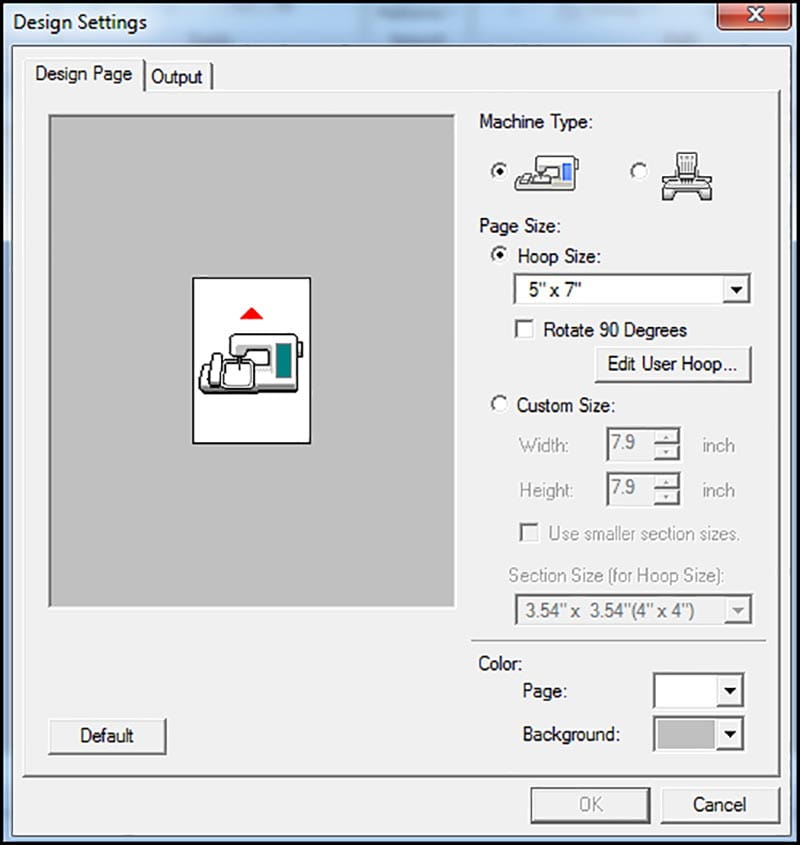
- Open PE Design 11 software to bring in your embroidery design. Tip: The Startup Wizard is a great way to open or import designs and access multiple items and features. Among other options, you’ll get a preview of recently used designs. Another great feature the wizard provides is the opportunity to select your hoop size and fabric selection before choosing your design. You can always return to the Startup Wizard by clicking on the PE 11 icon. If you leave the box checked it will always show when you start the program. For this project you’ll need to select the specific hoop size you plan to use, so the software fills the entire hoop area around the design. See Figure #1a and Figure #1b.
- Next, select Background Fill icon to add special fill stitches surrounding the design. See Figure #2.

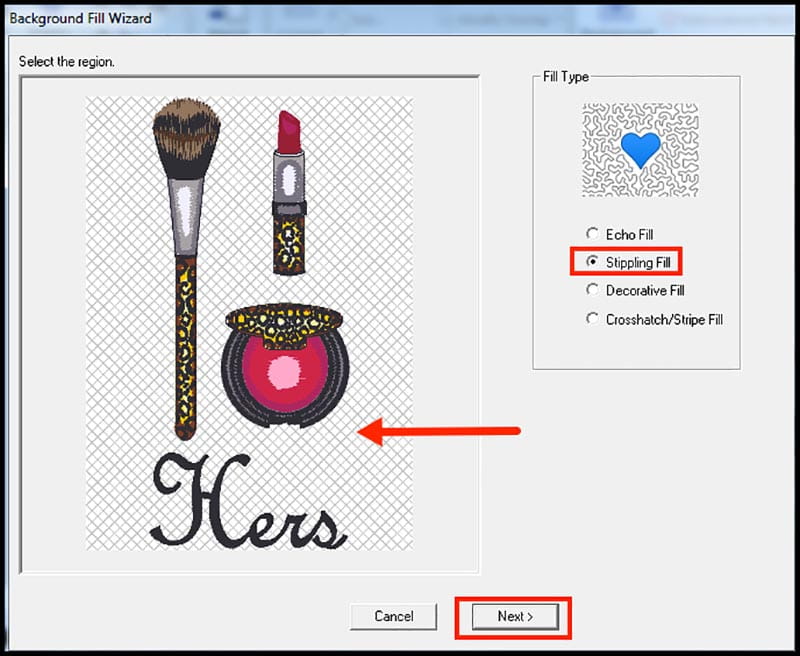
In this example I used stippling fill. Click within the blank space indicated by the red arrow to select the region for adding stipple fill. Click Next. See Figure #3.

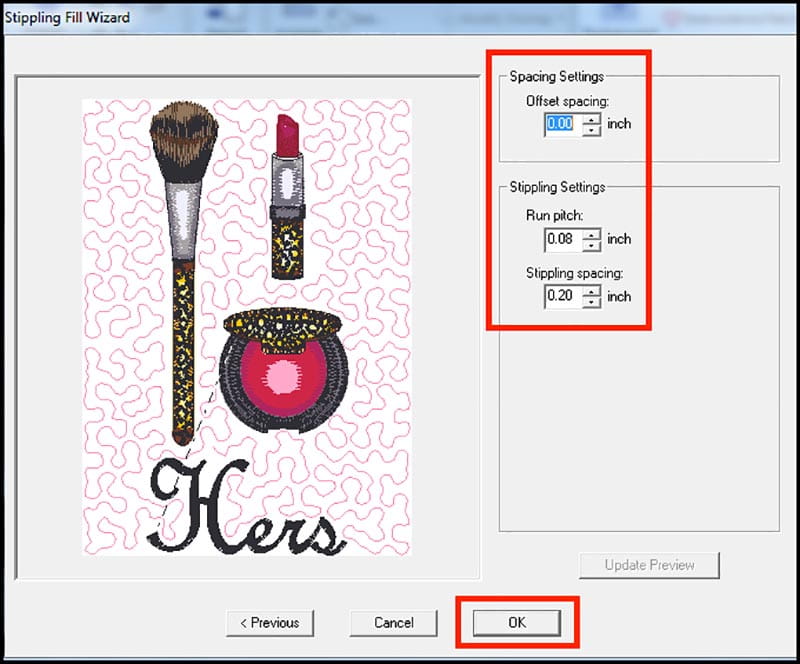
- Change spacing, run pitch, and stipple spacing if desired. Note: I used default settings for my final design shown in Figure #4.
Feel free to change any of the stipple fill settings as desired. Below you’ll find a description of the options:
Offset Spacing: Determines at what distance the fill starts outside of design. A higher number will place stitches further away from the edge of the embroidery.
Run Pitch: This indicates stitch length for fill pattern stitches. Higher number means longer stitches, smaller number means shorter stitches.
Stippling Spacing: Changes to spacing create more or less space between stitches, making the resulting stippling pattern rows closer together or further apart.
You can change the numbers and preview the changes but I would suggest making a note of all changes so you can revert back to a previous setting.
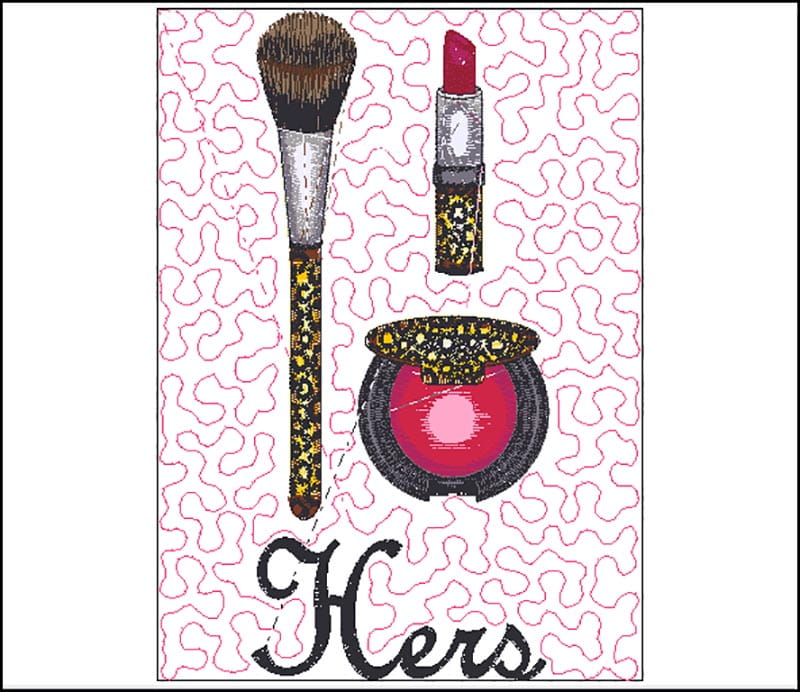
Use a thread color that picks up one of the colors in your design for a more showy effect, or select a thread color that matches your background fabric for a more subtle effect. Take a look at my completed design in Figure #5.
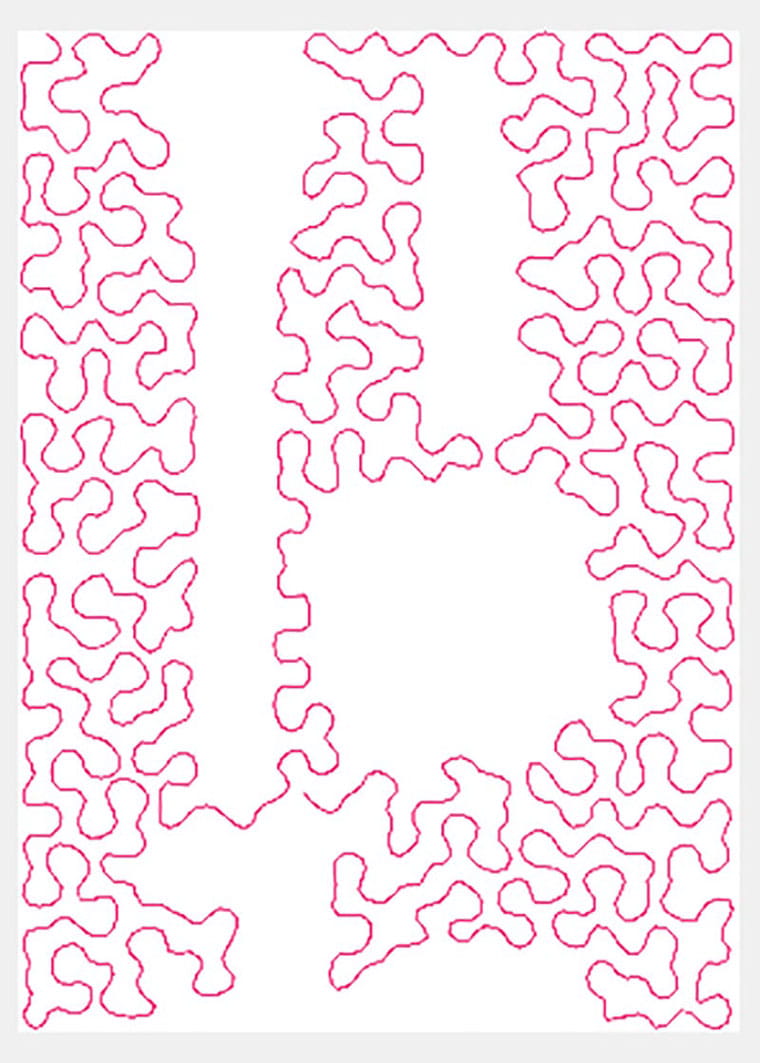
Notice how the fill stitches go around the design but not under it in Figure #6.
Other fill options with the Background Fill Wizard include:
- Echo Fill
- Decorative Fill
- Cross hatch/Stripe Fill
Watch for future Brother blog posts with more information on these additional special fill stitch options.
