Trial Feature for Lettering Along Trim
~Joanne Banko, Brother Sews Ambassador Sample towel stitched using the Brother NS1750D
Sewing Machine. The Trial Key built into your Brother sewing machine is a wonderful tool for perfecting embroidery placement! Use this embroidery feature to fine tune the placement for lettering combined with trim. In this handmade fingertip towel example, I’ll show you how easy it is to get a professional finish. Are you ready? Let’s go sew! First, a little bit about the embroidered towel: Adding trim to towels helps tie a color scheme together, provides a boundary for lettering or design motifs, and gives your towel an upscale look. Simply add strips of grosgrain ribbon to a plain towel, and then choose embroidery thread to match for a stylish accent on an otherwise ordinary item. You can substitute other washable trims or even fabric strips in place of ribbon if you choose. I encourage you to follow the steps outlined in this example and apply the principles to similar projects. Additional Towel Tips: For best results with standard lettering, choose towels with low nap such as velour type towels. Select a font with bold lines so stitches stand up on the nap of the towel. I used font style 06 from the built-in menu of the Brother NS1750D. My favorite stabilizer combination for most of my towel projects is as follows: One layer of Brother SA5810
medium weight tear-away hooped with the towel and a layer of Brother SA520
lightweight water-soluble stabilizer covering embroidery area on top. Hoop a full piece of water-soluble stabilizer or securely tape a piece to the towel using low tack tape. Make sure the water-soluble does not move or it will catch in the foot during embroidery. Carefully remove tape immediately after embroidering.
Creating The Towel: Step 1. Attach two rows of ribbon, making sure the ribbon is in a position that allows you to hoop the entire towel. Space the ribbon rows to allow for the lettering you want to add, with a bit of extra room for adjusting the design position. My final design combination measures 1 ½-inches high X 3 ¾-inches wide. I spaced my ribbon rows 2-inches apart, with the bottom row 3-inches from the finished edge of the towel. Step 2. Mark the center point and hoop with center marking in the center of the hoop. It’s important that the towel is hooped straight. See Figure #1.
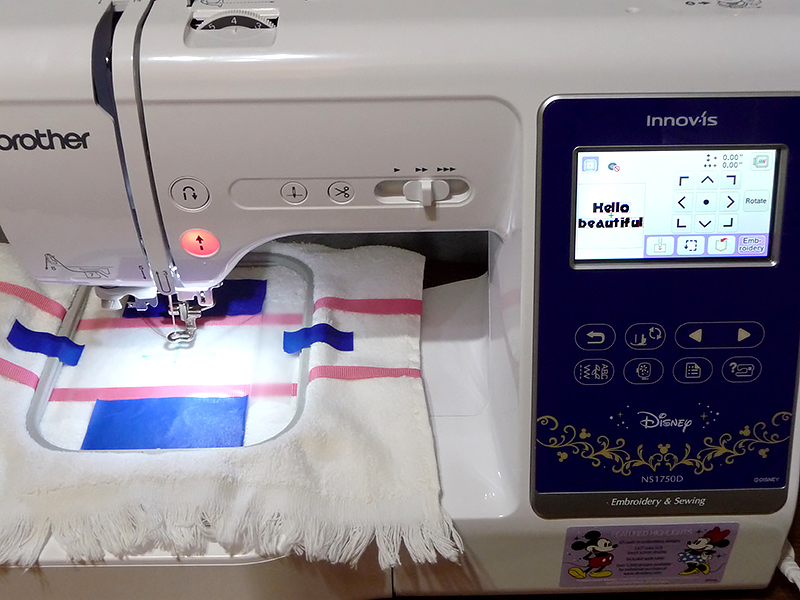 Figure #1
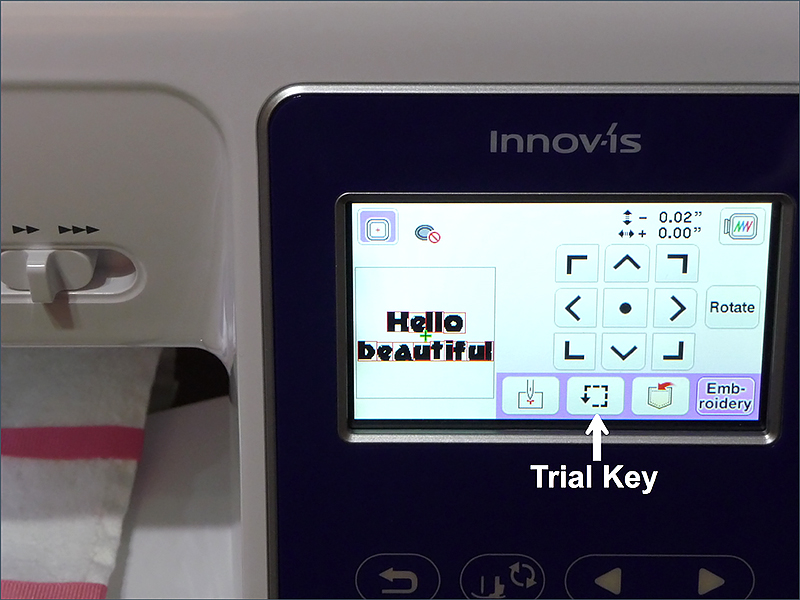 Figure #2
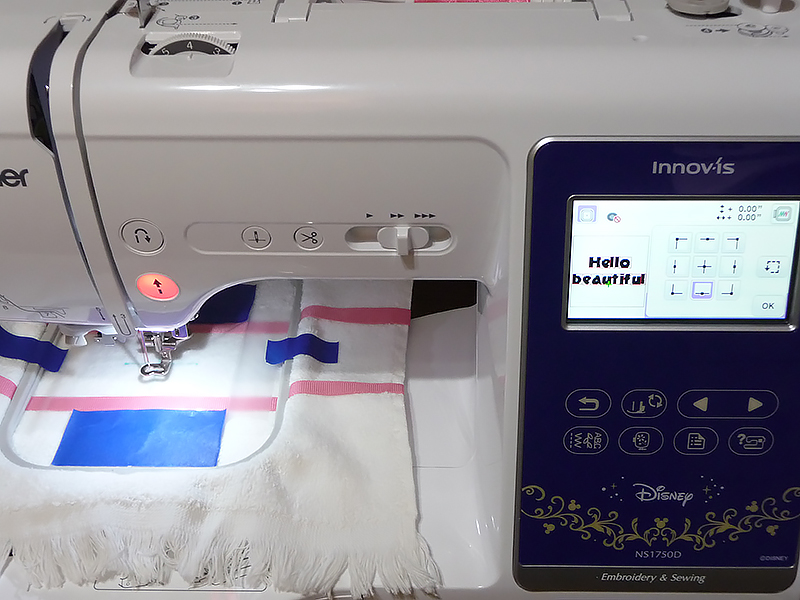 Figure #3a
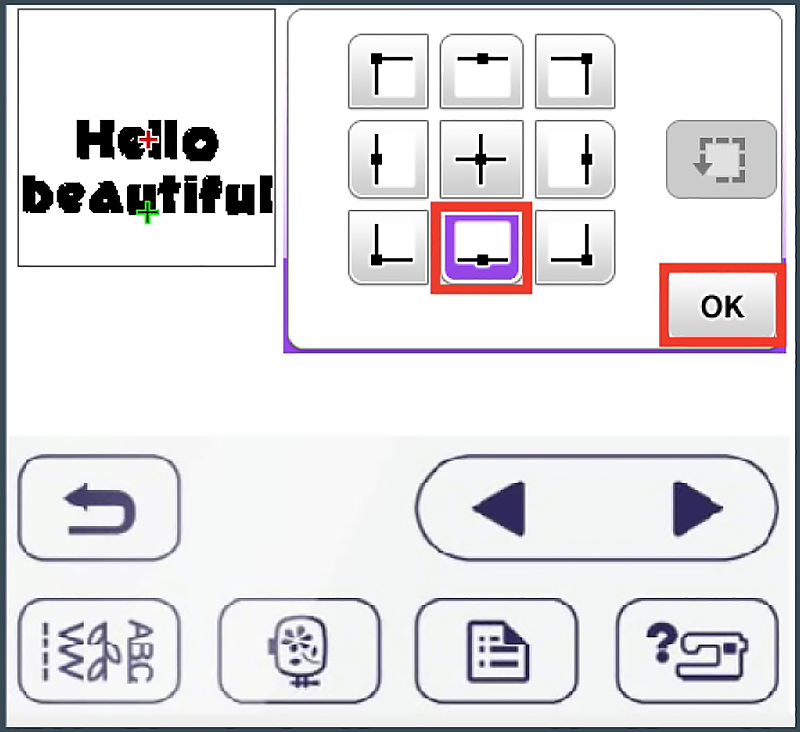 Figure #3b
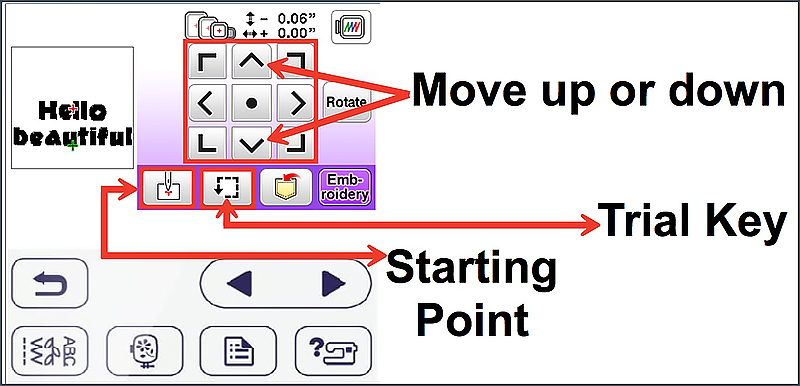 Figure #4
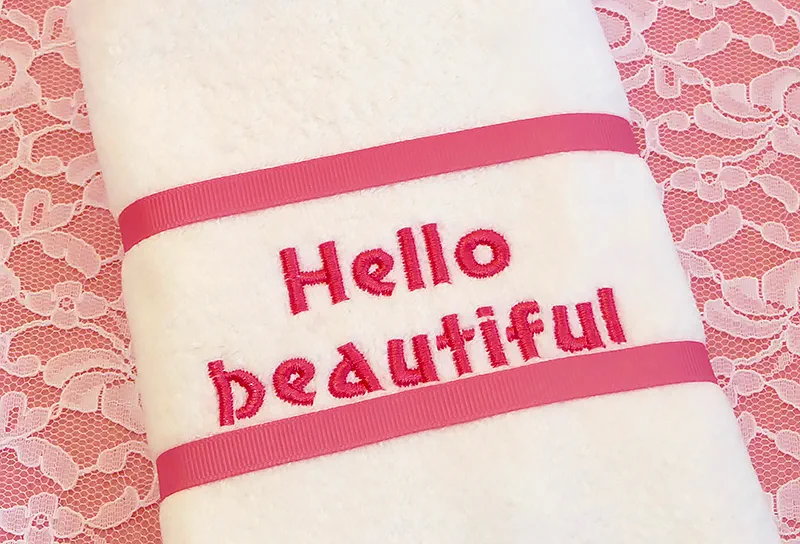 Figure #5

