Foot of the Month for June: Embellished Wedding Guest Book Cover Project.
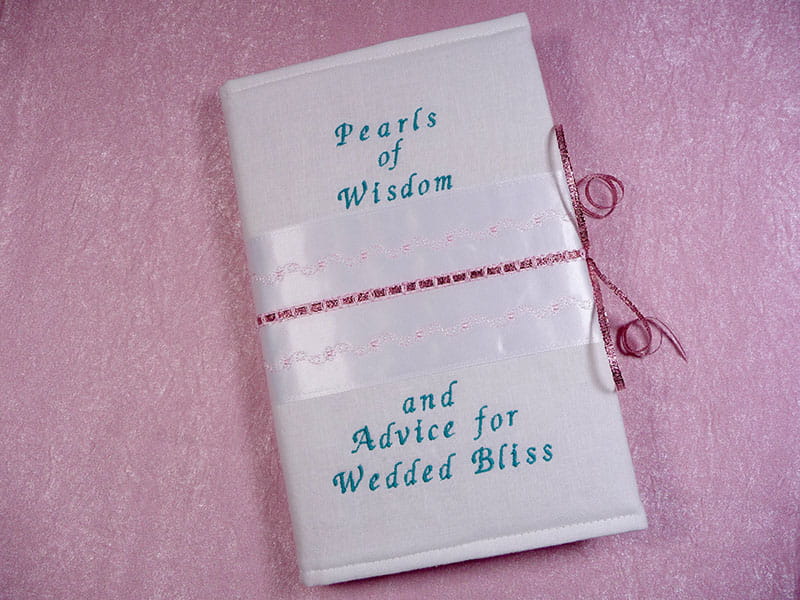
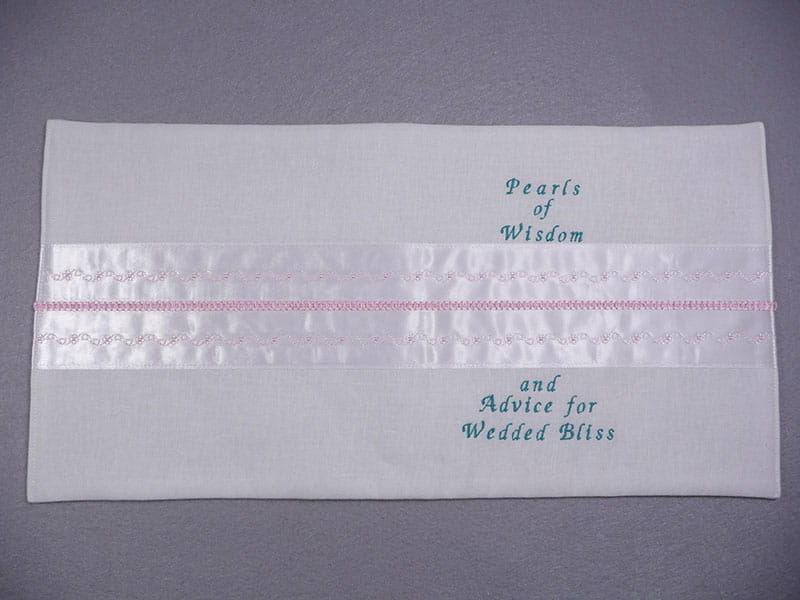
Brother is here to help you make creative use of the accessories available for your machine! This project is designed to show you how to create beautiful embellishment on a wedding guest book using the new Spanish Hemstitching attachment. This book cover is made from cotton, with embroidery and added ribbons. Coordinate the color scheme with wedding flowers or attendants clothing for a custom look. A special guest book is ideal for wedding guests to leave their good wishes and advice for a happy marriage when they attend the wedding. This is such a beautiful way to capture precious memories at the wedding event!
With the SA220 Spanish Hemstitching attachment, you can use a variety of bridging stitches built into your machine to join strips of fabric and ribbon. The space left in between creates an open lacy look. I chose to use a ladder style stitch, then wove ribbon over and under the stitches to create a casing for closing the book with a bow. Are you ready? Let’s go sew!
Note: This project was created with the Luminaire XP3 machine, using ScanNCut DX SA446, an 8-inch hoop for embroidering. You can complete this project on any Brother machine that uses the Spanish Hemstitching accessory. Simply modify the project for your available hoop size or consider adding lettering from your sewing machine if you don’t have embroidery capability. You’ll find an archived blog post, Stitching Multiple Lines of Built In Lettering, that shows detailed instructions for using built-in lettering.
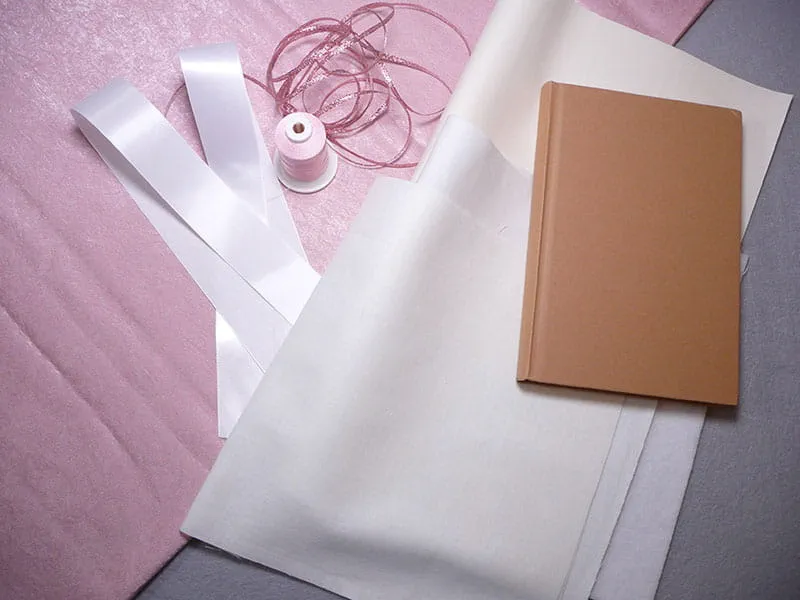
Materials and Supplies for Embellished Wedding Guest Book Cover
- Brothersewing and embroidery machine.
- SA220Brother Spanish Hemstitching attachment. You’ll find a video and the instruction manual for this accessory on the Brother Support site HERE.
- SA5815 Brother medium-weight adhesive backed tear-away stabilizer for embroidering book cover after ribbon trim is added.
- Embroidery threads in desired colors, bobbin thread, and size 11 embroidery needle for embroidering.
- Basic sewing notions, including thread to match fabric and a large eyed tapestry needle to weave ribbon under stitches.
- Paper or pattern tracing cloth to make book cover pattern.
- Blank book measuring approximately 5-inches wide 8-inches high. My book measured 5.5-inches x 8.3-inches and included 120 blank pages.
- 1 ½-inch wide satin ribbon for Spanish Hemstitching technique. Note: Your custom pattern will determine how much ribbon you need. Once ribbon has been cut, fuse 1 ½-inch wide strips of medium weight interfacing to wrong side of ribbons to keep them firm during stitching process.
- Approximately one yard of 1/8-inch wide ribbon to weave under stitches and use to tie book cover closed. The amount will vary based on the size of your book cover.
- Fabric and fusible fleece:
- Quilt weight cotton, linen, or linen blend fabric for book cover. You’ll need fabric for the front and fabric for the lining. For a neatly finished look, I suggest using the same fabric for both pieces. See instructions for making a custom pattern to use for cutting exact size pieces.
- Thin fusible craft fleece for backing front piece of book cover.
Note: Prepare a few extra pieces of wide ribbon for testing stitches.
Please read through all instructions before beginning this project. Basic steps are as follows:
- Measure the book to create a paper pattern and use it to cut fabric and fleece.
- Embellish ribbons using Spanish Hemstitching attachment and decorative stitches.
- Sew ribbon trim to book cover.
- Embroider the front of book cover above and below ribbons.
- Construct book cover following step by step instructions.
All Steps to Create Embellished Wedding Guest Book Cover:
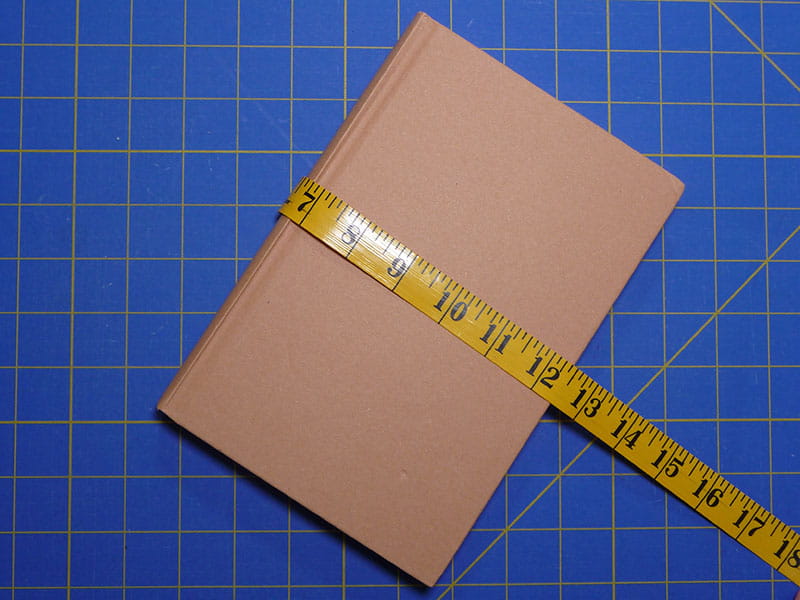
- Measure book height top to bottom and width from front to back. See Figure #1a and Figure #1b.
- Use the pattern to cut pieces from the fabric. Select the front fabric piece and fuse a matching piece of fusible fleece to the wrong side. Cut two pieces of ribbon 4-inches longer than the width of your pattern piece.
- Gather items from the package and select the right bobbin case cover for your machine. You’ll find two kinds to fit a wide variety of machine models. See Figure #3.
- Gather all your supplies. You’ll see that I color matched my thread and ribbon to the blush pink bridal party fabric. See Figure #4.
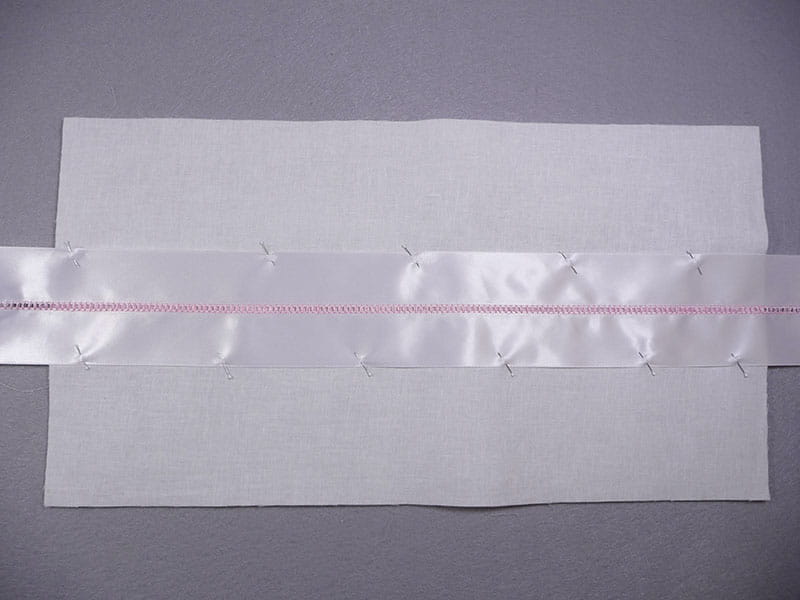
- Lightly press the ribbon, then pin it to the horizontal center of the book cover piece. See Figure #7.
- Press the front piece, then wrap around the book, tucking flaps to the inside and having the flap measurement the same on both the front and back of the book. Mark off the front area so you can align the lettering at the center of the front of the book. See Figure #10.
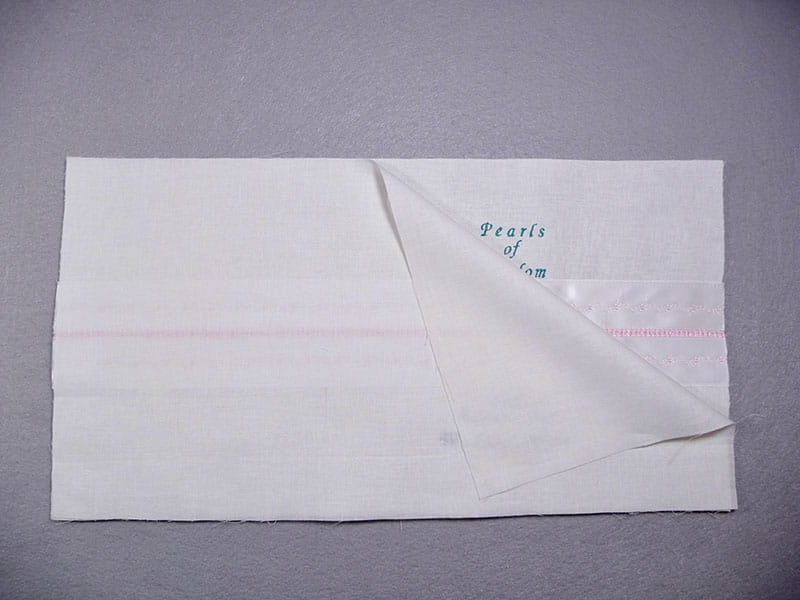
- Remove from hoop and tear away excess stabilizer. Layer embroidered piece right sides together with lining piece. See Figure #12.
- Insert the book into the flaps by opening the book with the covers bent backwards. See Figure #16.
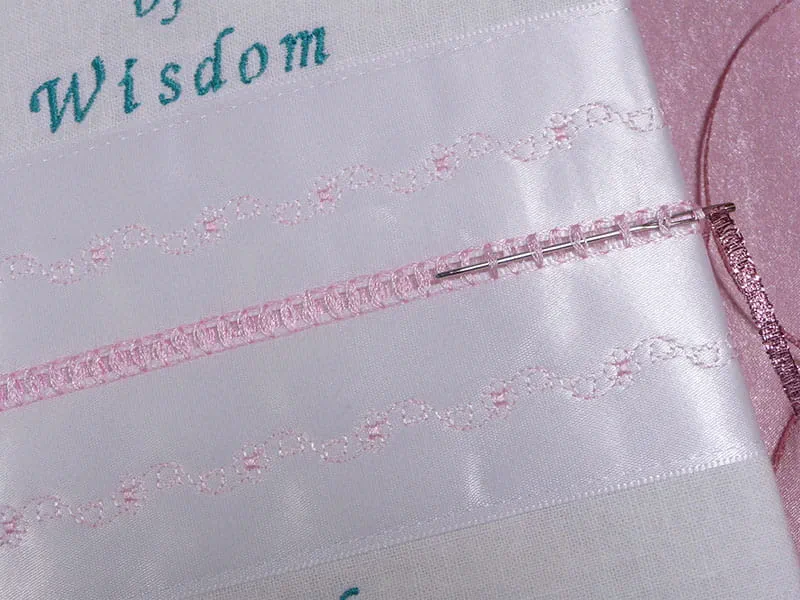
- Thread tapestry needle with ribbon and weave through the ladder stitches, weaving thread over and under each set of threads in the center. See Figure #17.
- Continue all the way around to the back of the book. Tie ribbon into a bow to keep book closed, then trim any excess ribbon, cutting ribbon at an angle to reduce raveling. You are finished! Enjoy!
Figure #1a
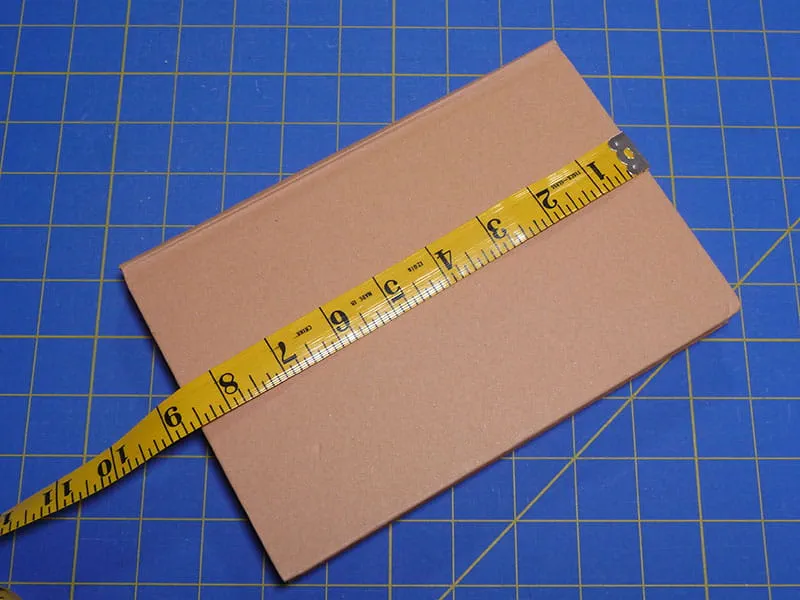
Figure #1b
Add 2-inches to height and 6-inches to width and make a paper pattern using these measurements. Note that this pattern includes ½-inch seam allowance. See Figure #2.
Figure #2
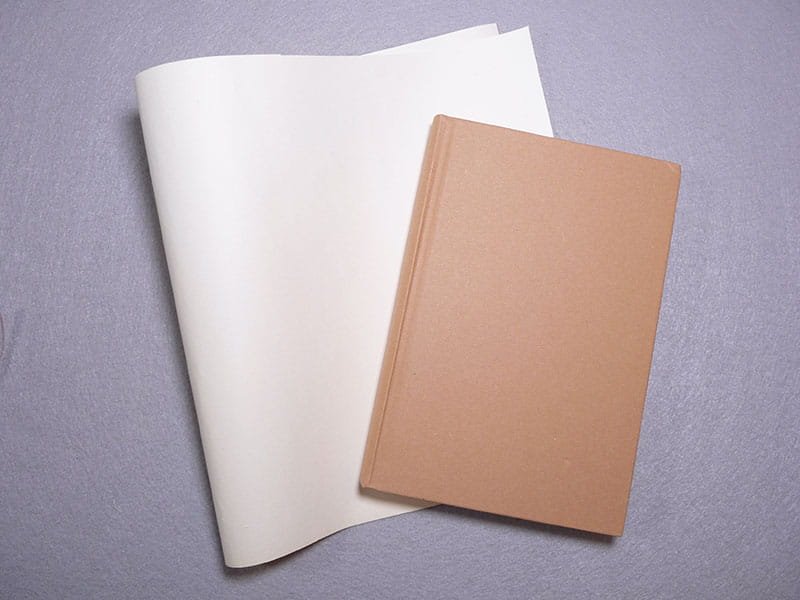
Figure #3

Figure #4
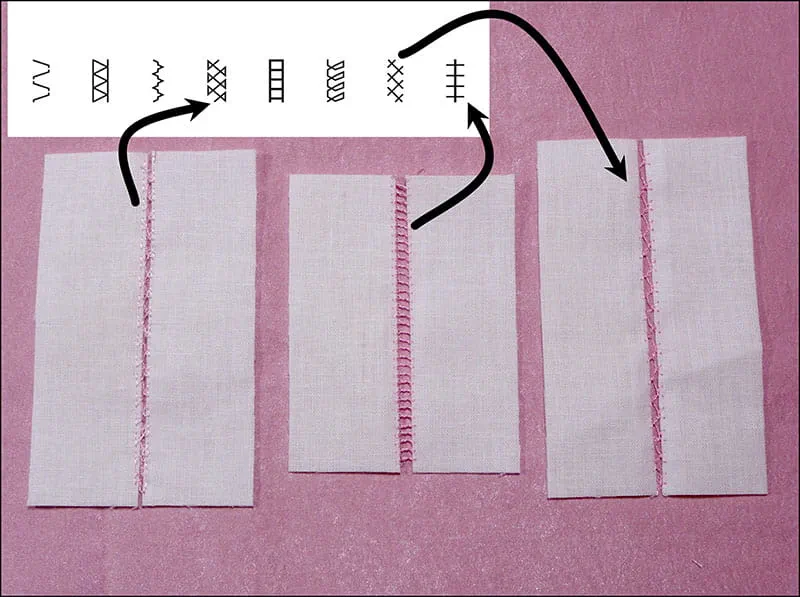
Set up your machine for using the attachment with the open toe clear foot as described in the instruction leaflet. I used embroidery thread on the top and bobbin, but you can use regular sewing thread if you choose. Embroidery thread has more sheen. It’s a good idea to test stitching various stitches shown in the instruction leaflet. You can also use this attachment to connect two pieces of fabric with folded edges facing each other or use ribbon with finished edges like the ribbon featured in this project. See examples of a few of my favorite bridging stitches with folded fabric pieces in Figure #5.
Figure #5
To attach the two pieces of ribbon together, I used a stitch that looks like a ladder, as shown in the manual for the attachment. This is stitch #3-20 on the XP3. Tip: The manual recommends loosening the top tension as necessary to produce an attractive stitch. My settings were as follows: Stitch width: 7.0, stitch length: 4.0, and tension: 2.8.
Notice how easy it is to keep both sides of the ribbon against the guide in the center. This piece also has a channel for feeding ribbon or cording up to 3mm wide. For this project, I chose to weave narrow ribbon under the stitches as a last step, making it into a closure for the finished book cover. See Spanish Hemstitching on Ribbon in Figure #6a and Figure #6b.
Figure #6a
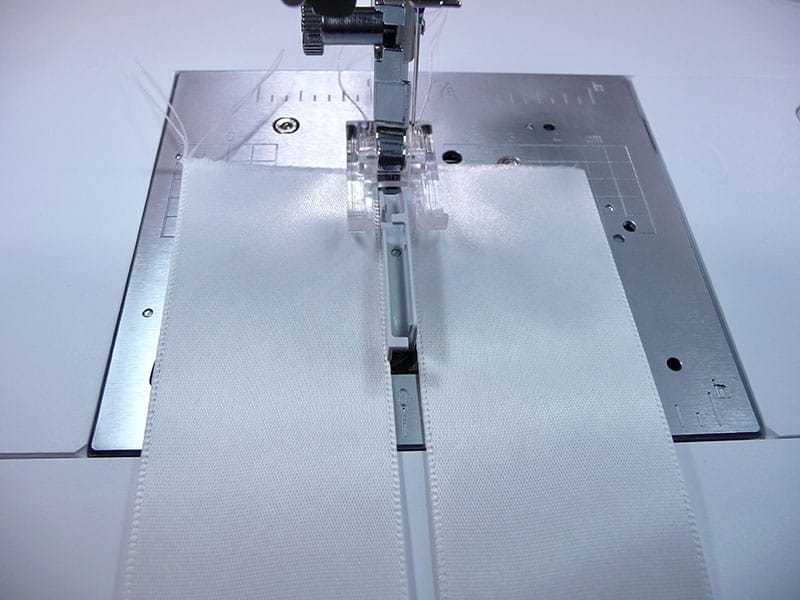
Figure #6b

Figure #7
Next, use regular thread to topstitch close to ribbon edges on each side, securing it to the book cover piece. Tip: I used the guideline marker, setting it with the main line along the edge of the ribbon to help me sew straight along ribbon edges. See Figure #8.
Figure #8

Stitch a row of decorative stitching to add more embellishment to the ribbon. I used stitch no. 10-33 on the XP3. If you’re using the XP3, use the main guideline along with the sub guideline grid to keep your sewing aligned with decorative stitching centered on strip. See Figure #9.
Figure #9
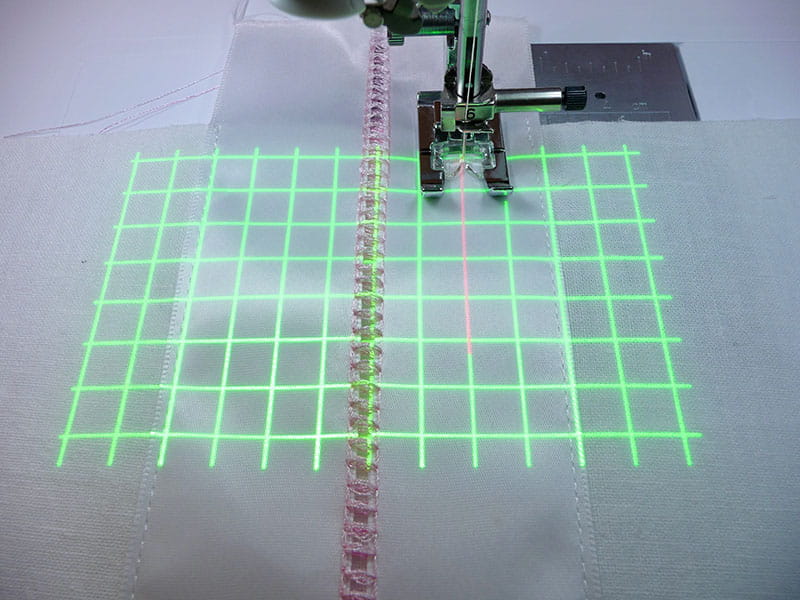
Figure #10
Tip: I used pins to avoid marking directly on the fabric. Take care that you do not stitch over any pins.
Set up machine for embroidery, then program and embroider your desired wording above and below ribbon. I hooped adhesive tear away stabilizer in the 8-inch hoop to embroider both phrases in one hooping, programming and then stitching each one separately, centering the words above and below the ribbon. Tip: Use whatever alignment methods you have on your machine to help you position the words above and below ribbon. With the XP3 you can use the projector for accurate alignment of words. I also made use of the trial function key and the droplight laser to test the area before stitching. See embroidery in Figure #11.
Figure #11
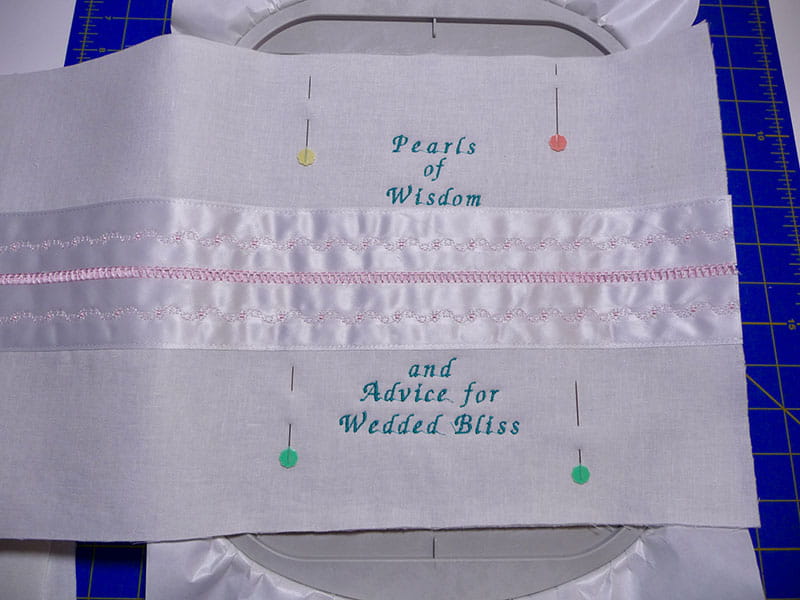
Figure #12
Thread your machine with thread to match fabric. Using a ½-inch seam allowance, sew long edges, then short edges, leaving a 3 to 4-inch opening on short edge opposite the embroidery for turning piece right side out. Trim corners to reduce bulk, turn right side out, and press, pressing open edges under in the process. Edgestitch along each short edge to close the opening and flatten edges. See Figure #13.
Figure #13
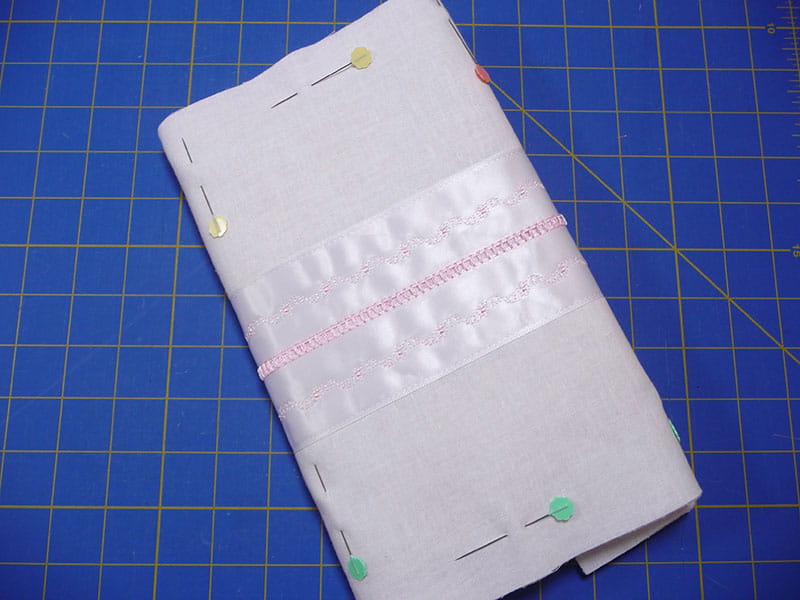
Press the finished piece. Next, center the book on the finished piece and wrap the flaps around the front and back book covers, adjusting so the amount of each flap is even. Pin flap and make sure book will easily open and close to lay flat once flaps are stitched into place. See Figure #14a and Figure #14b.
Figure #14a
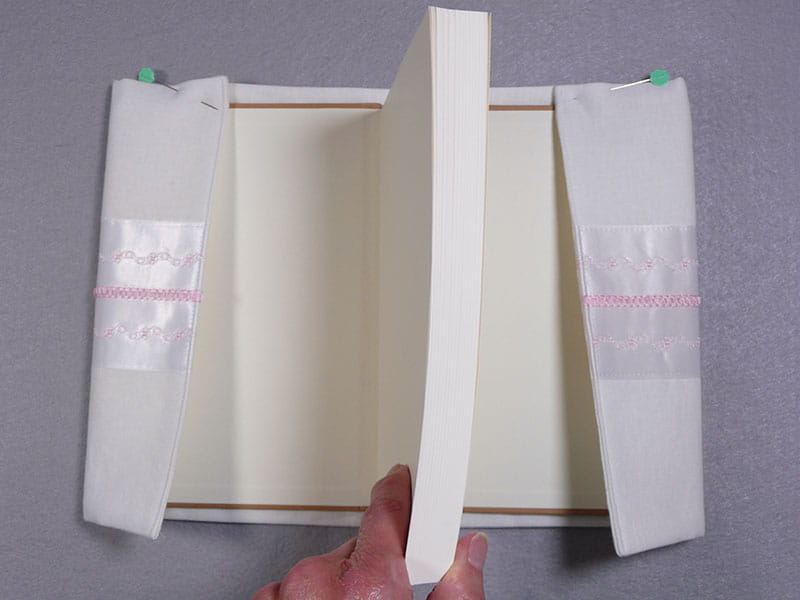
Figure #14b
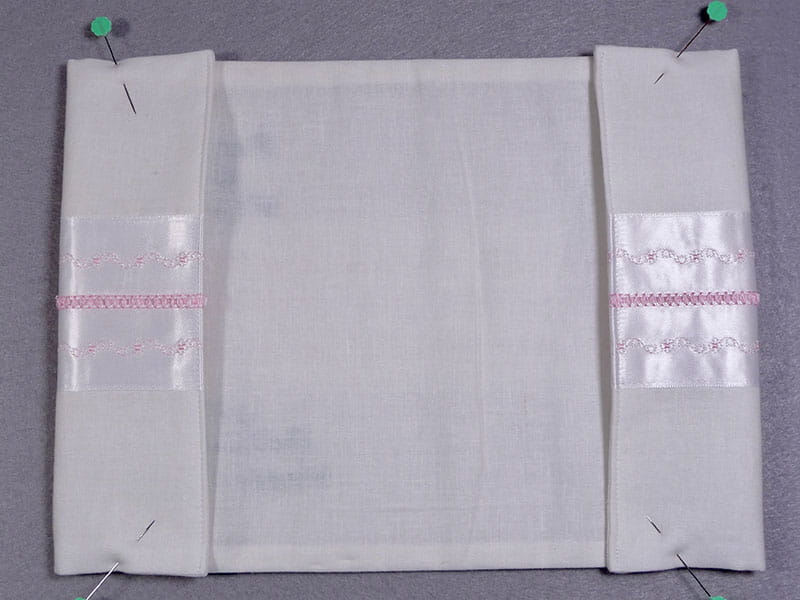
With the flaps carefully pinned and folded to inside, topstitch ¼-inch from finished edge at the top and bottom edge of the book cover. See inside of cover in Figure #15a and outside of cover in Figure #15b.
Figure #15a
Figure #15b
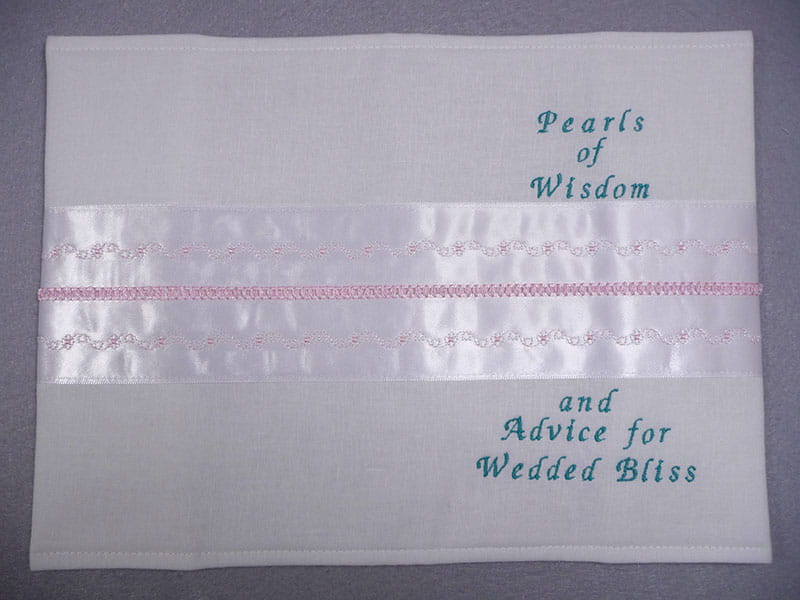
Figure #16
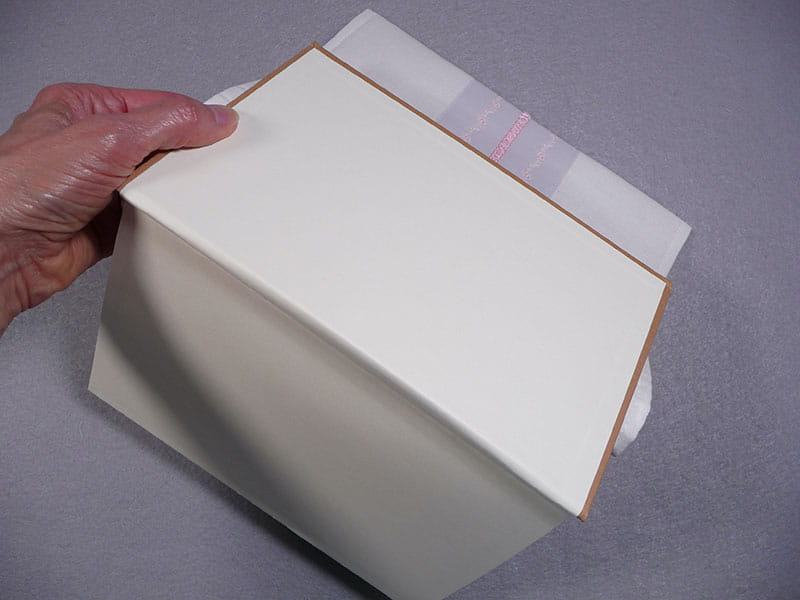
Figure #17
Related Projects
Stay Connected
* Required fields