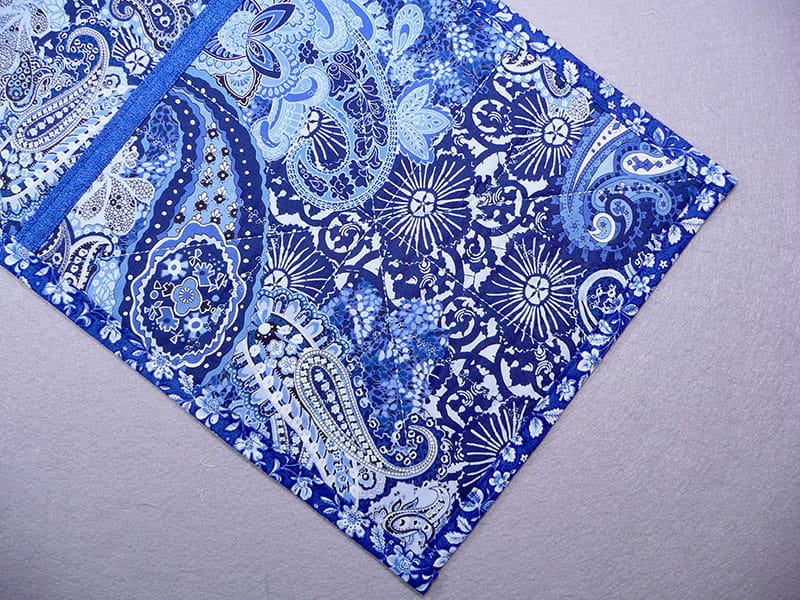
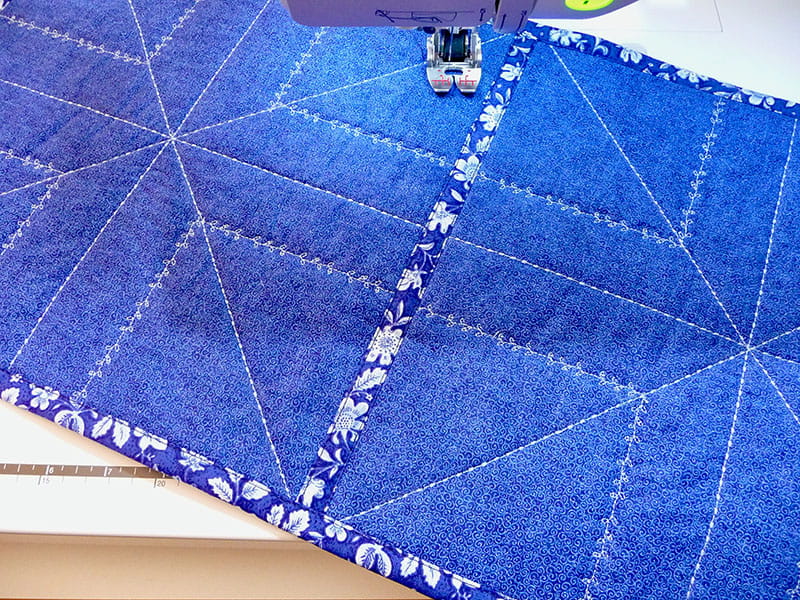
Foot of the Month: Quilt As You Go Table Runner created with SA209, the Brother Compact Dual Feed Foot

Brother is here to help you make creative use of the accessories available for your machine!
Note: Finished size 12-inches X 36-inches.
This project features SA209, the Compact Dual Feed Foot, also known as the MuVit foot! I like to describe this foot as a walking foot with superpowers! As listed on the Brother site, it can powerfully feed fabric with all that power packed into an amazingly compact body! This digitally controlled, direct motor driven accessory foot was designed for projects which require special handling. Dual feed power and the adjustability of this accessory makes it ideal for sewing tricky layers on a range of fabrics like leather, vinyl, faux fur, silkies and slippery lining, polar type fleece, minky type fabrics, and more! Of course, it’s also perfect for quilted projects like the one I designed for this post.
You’ll find this foot included with some Brother models and available as an optional accessory for others. The newly configured Compact Dual Feed Foot makes it easy for smooth feeding of fabrics with bulk, such as the medium loft batting used for this table runner.
Currently, this foot has several accessory options, including a couching attachment for embellishment with cording and yarns, an open toe sole, a 1/4-inch sole with guide, and a stitch-in-the-ditch sole. You'll also find quilt guides that attach to the foot. We’ll use a few of these attachments in this project. I encourage you to explore previous Brother blog posts to learn more about optional accessories for the Dual Feed Foot. You’ll learn even more about this very special accessory throughout these instructions.
Are you ready? Let’s go sew!
Materials and Supplies for Quilt As You Go Table Runner
-
Brother sewing machine.
-
SA209 Brother Compact Dual Feed Foot
-
SA204 Stitch in the Ditch Dual Feed Foot
-
SA205 Dual Feed ¼-inch Guide Foot or SA185 ¼-inch Piecing Foot with Guide.
-
SA238 Brother Adjustable Seam guide. This is optional but helpful.
-
Basic sewing notions including optional wash out fabric glue, thread to match fabric for sewing seams, contrasting thread for decorative stitching, removeable marker, and topstitch needle size 12 for decorative stitching and constructing project.
Note: You can also opt to use a size 11 embroidery needle for decorative stitching and a sharp size 12- 14 needle for construction. I chose to use a size 12 topstitching needle for the entire project.
-
Rotary cutting tools for cutting blocks and strips.
Tip: It’s helpful to have a ruler for cutting accurate square sizes.
-
Fabric for Quilted Blocks - Cut the following oversized squares:
-
Fabric #1 for quilt top pieces, cut three 12 ½-inch squares.
-
Fabric #2 for quilt backing pieces, cut three 12 ½-inch squares.
-
Medium loft batting for quilt filler, cut three 12 ½-inch squares.
Note: Medium loft is approximately ½-inch in depth. Batting will compress slightly from pressing. You can opt for lower loft batting for this project if you desire.
-
-
Sashing strips are cut as described in instructions:
- Fabric #3 for top sashing strips and quilt binding.
- Fabric #1 for back sashing strips.
Please read through all instructions before starting. Feel free to add blocks and sashing strips to create a longer table runner. Note that you’ll need to customize the binding measurements to fit your new size. Basic steps to create table runner are as follows:
- Quilt each of the three oversized blocks using the Compact Dual Feed Foot.
- Trim blocks to size.
- Join blocks with sashing strips.
- Add binding to short and long edges to finish table runner.
Directions
-
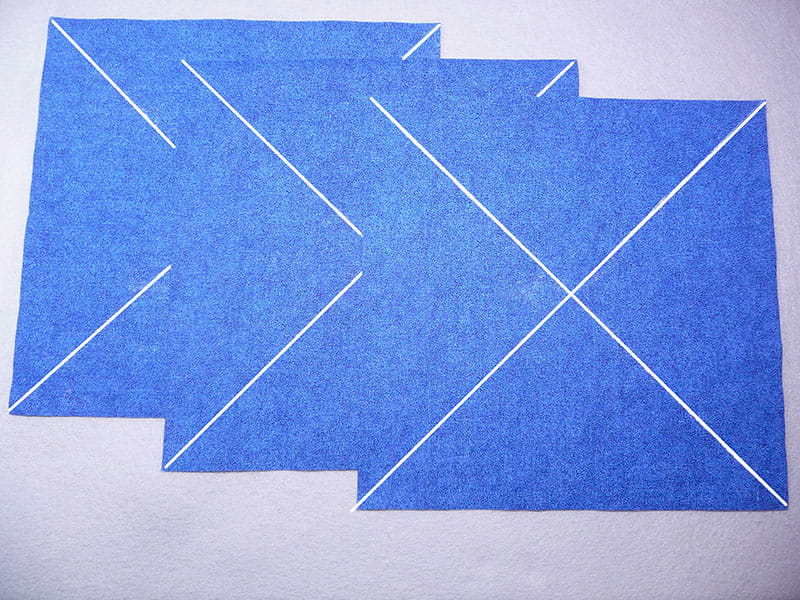
Gather batting and fabrics for quilt squares. Prepare top fabric pieces for quilt stitching with the dual feed foot as follows: Use a removeable marker to mark an “X” on each of the quilt top squares, marking the line from point to point diagonally. See batting in Figure #1a, backing in Figure #1b, and marked top pieces in Figure #1c.
Figure #1a
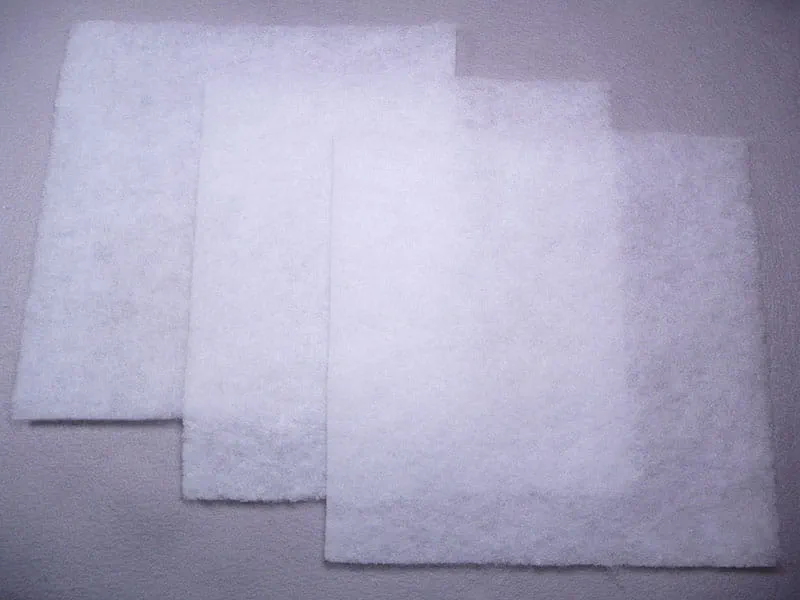
Figure #1b
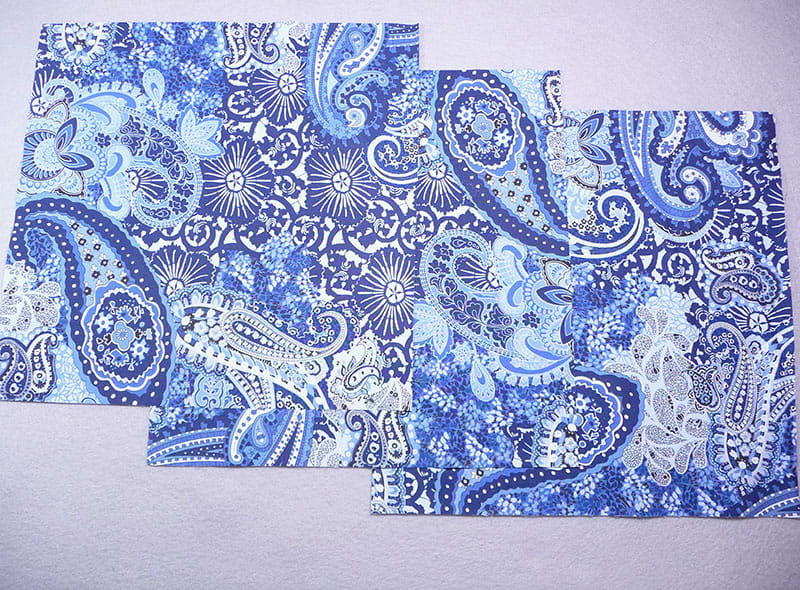
Figure #1c
-
Select the first set of squares, then layer top and backing with batting sandwiched in between. See Figure #2.
Figure #2
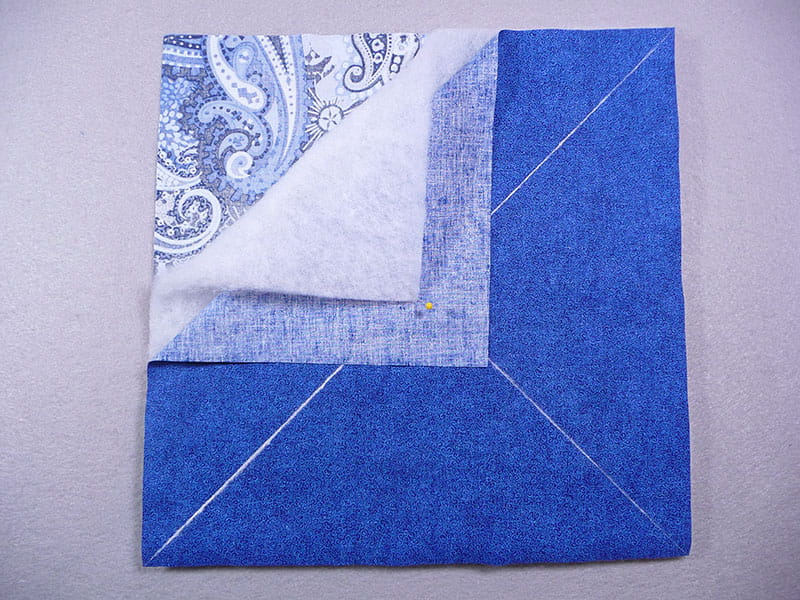
Tip: You can use pins or spray temporary basting adhesive on the wrong side of top and backing to keep layers secured together.
-
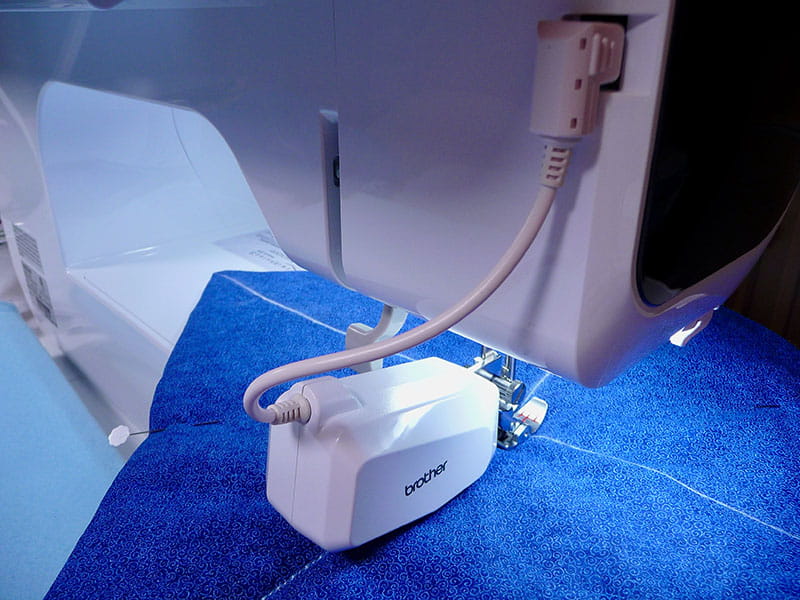
Attach Compact Dual Feed Foot with regular sole to the machine. Since this foot has its own shank, you’ll need to remove the standard foot holder and attach the foot with the screw. Be sure to align it properly and tighten up the screw so it is snug. Next, plug the foot into the machine. See Figure #3.
Figure #3
Once the foot is plugged in it can be controlled digitally via the set mode on the machine. Default setting is 00. See Figure #4.
Figure #4
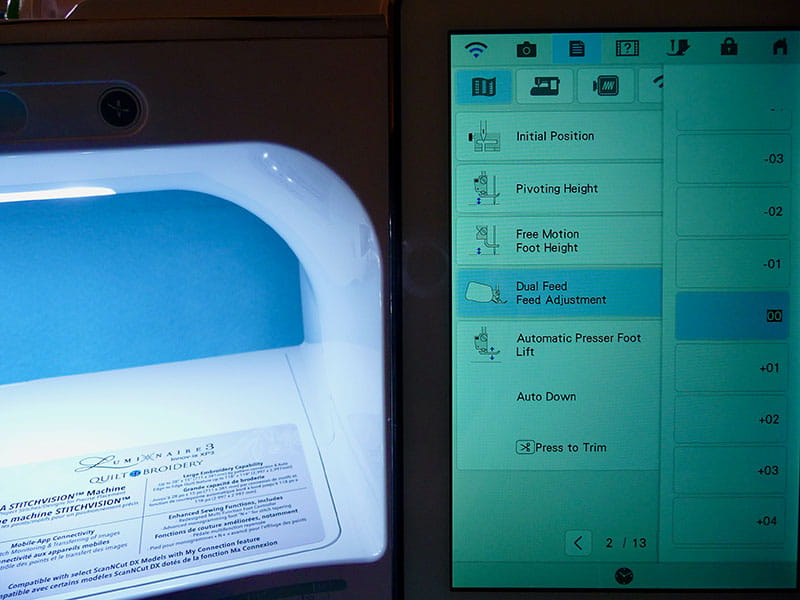
Tips: It is possible to adjust the foot to ease fabric layers more or less or stretch fabric layers more or less, using a positive number for more and a negative number for less. It takes some experimentation to see what adjustments may be necessary. Testing fabric layers beforehand can help determine settings, or you can observe the fabric as you sew and then adjust as you go. If you feel that the fabric needs easing, then you can adjust toward the positive side little by little. In contrast, if you feel that the fabric needs to be pulled taut you can adjust toward the negative side little by little. Different fabrics and fabric combinations will produce different results.
Before sewing, make sure the lever on the side is in the down position. Note that the lever is there for you to disengage the belt feeding action of the foot temporarily if desired. I sometimes use this feature to help slide the fabric under the foot when positioning or removing thicker fabric layers at the start or end of stitching.
The configuration of the Compact Dual Feed Foot allows for plenty of clearance when sewing over bulky fabrics!
-
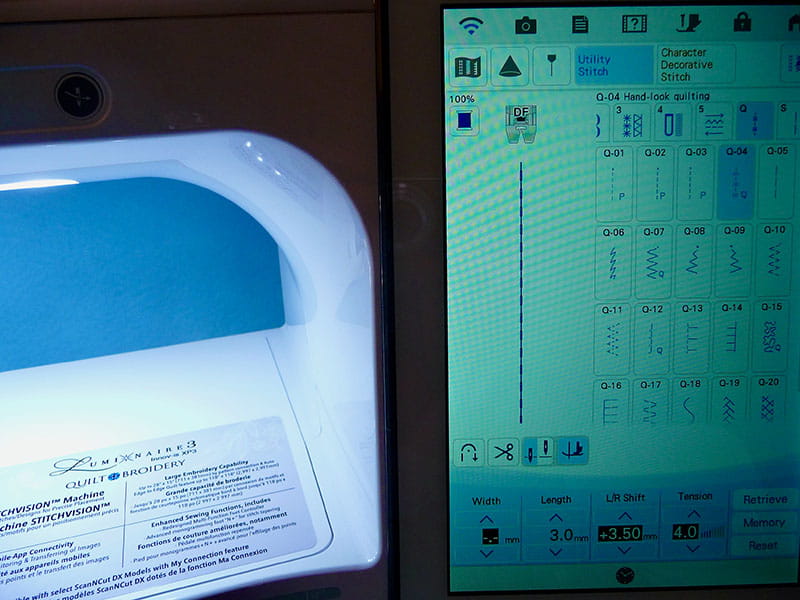
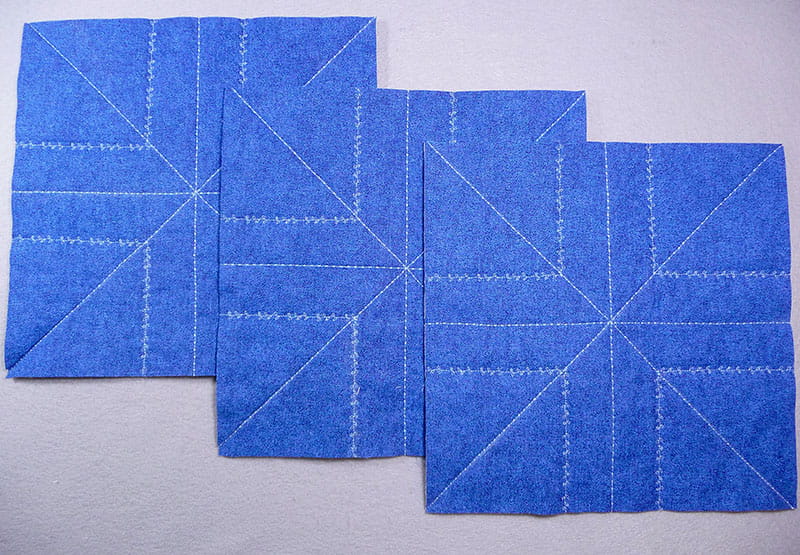
Use a combination of straight stitches and decorative stitches to quilt each of the three blocks before assembling. I used the hand look quilting stitch with a stitch length set for 3.0 for straight stitching lines marked with an X, then used the same stitch to stitch intersecting lines vertically and horizontally. See example of hand look quilting stitch in Figure #5.
Figure #5
-
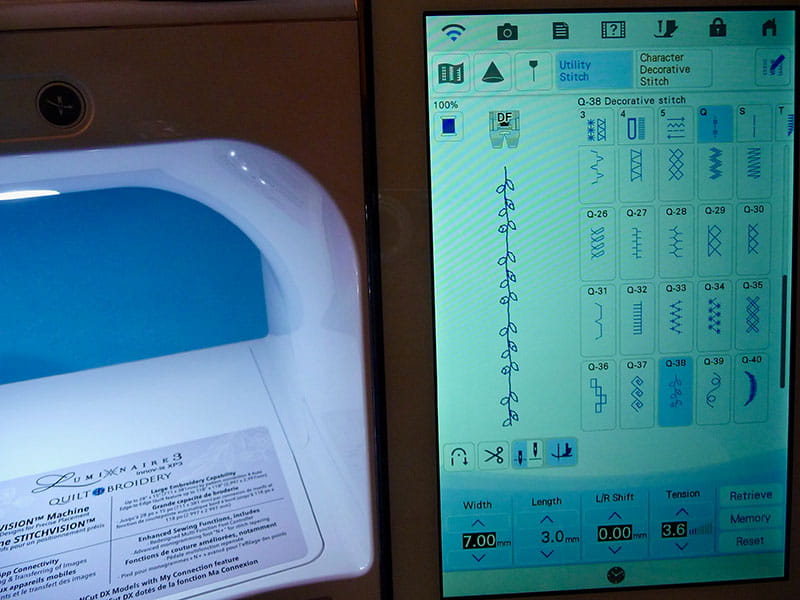
Once those lines were completed, I marked additional lines 1 ½-inches from straight stitched lines, then sewed rows of decorative stitching to form an attractive pattern. See example of decorative stitch in Figure #6.
Figure #6
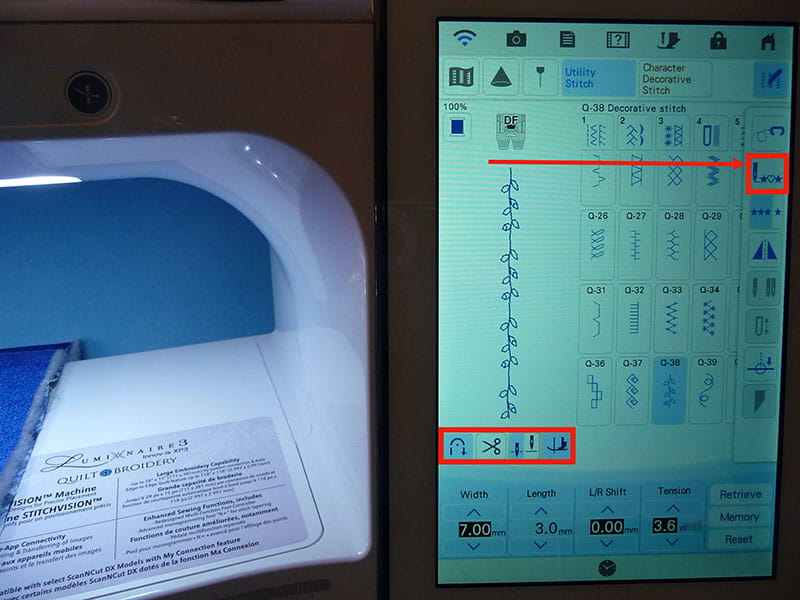
Tips: Decorative embroidery thread is ideal for quilting the blocks. You can opt for regular sewing thread if you like, but the sheen of decorative thread gives the stitches a special look. Proper selection of decorative stitches is foolproof with the Compact Dual Feed Foot plugged in. Any unacceptable stitches are greyed out and not accessible. I used the following features to help make the project easy and fun: Pivot function and automatic tie off, along with the back to beginning feature each time I started a new row of decorative stitching, working from the center of the block to the edge for each line of stitching. See example of settings in Figure #7 below.
Figure #7
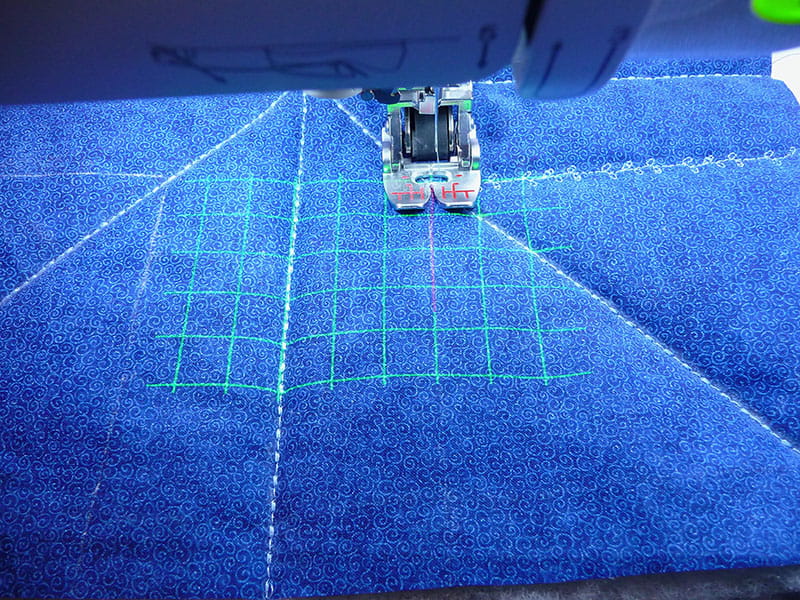
Consider using the grid projection feature in place of drawn lines for alignment of decorative stitches if you’re creating this project on a Brother Luminaire. See Figure #8.
Figure #8
Lightly press blocks, then trim to equal exactly 12-inches square. See decoratively stitched blocks in Figure #9.
Figure #9
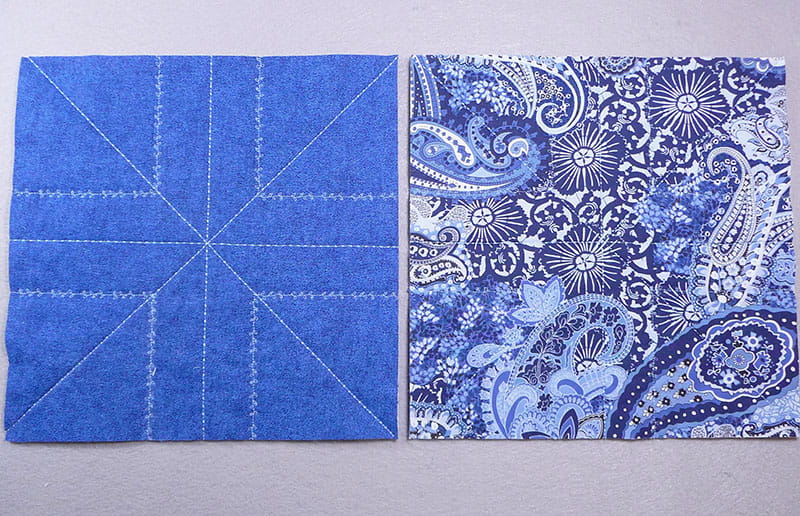
You’ll see the top of one quilted block and back of one quilted block in Figure #10.
Figure #10
-
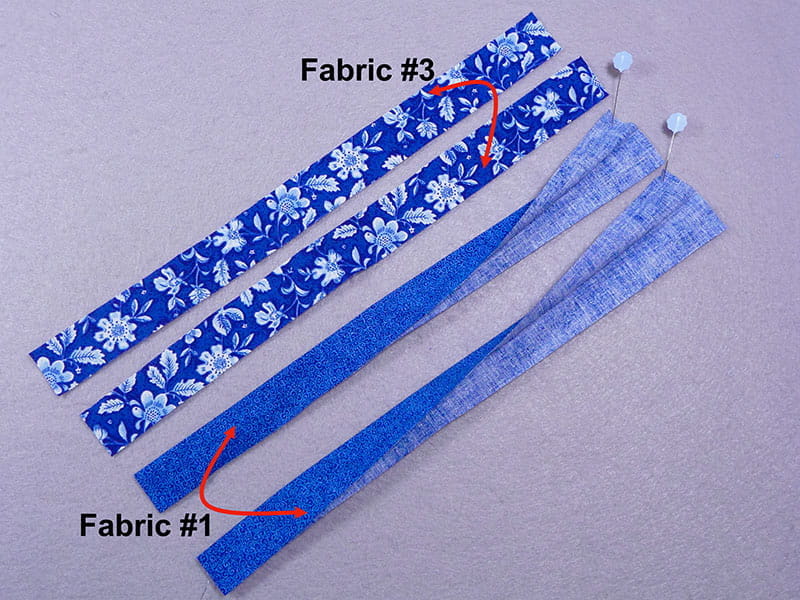
Cut and prepare the following strips for vertical sashing: Cut two top sashing strips measuring 1-inch wide X 12-inches long from Fabric #3. Cut two back sashing strips measuring 1 ¾-inches wide X 12-inches long from Fabric #1. Fold and press backing strips in half lengthwise. See Figure #11.
Figure #11
-
It’s time to join the three blocks together with a sashing strip in between on both top and back. We’ll be using a unique quilt as you go method, connecting the blocks with sashing strips for a clean, neat, and completely machine stitched finish. Follow one step at a time and you’ll be amazed at how easy this technique is to join pre-quilted blocks together. Layer pieces in the following order:
-
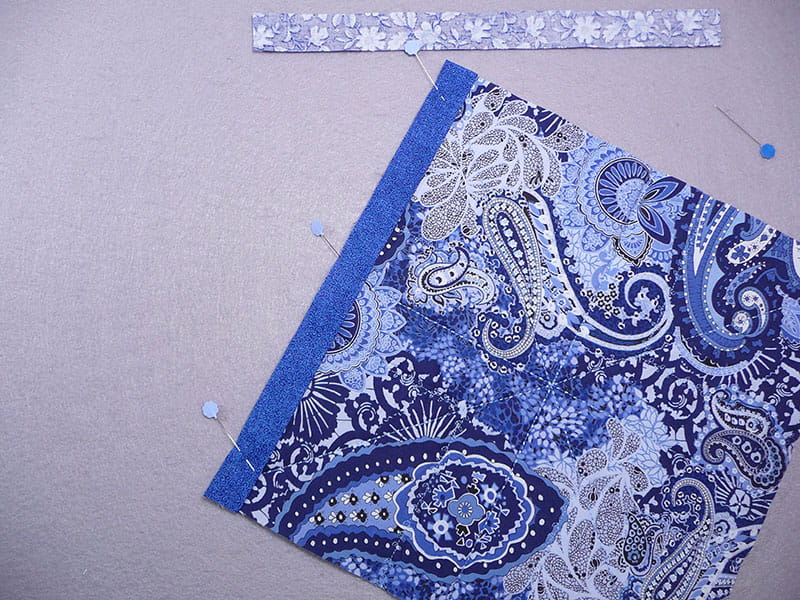
Select the first quilted block. Layer back of block and backing strip with right sides together and raw edges matching. Note that folded edge is opposite raw edge. See Figure #12.
Figure #12
-
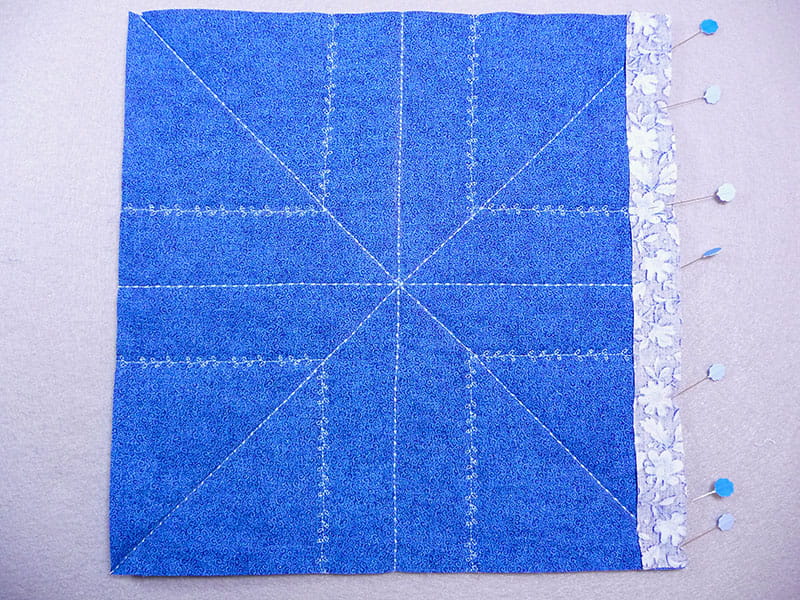
Next, layer top sashing strip on the top side of the block with right sides together and all raw edges matching. Securely pin together the quilted block with single layer top sashing strip on the top and folded back sashing strip on the back. See Figure #13a and Figure #13b.
Figure #13a
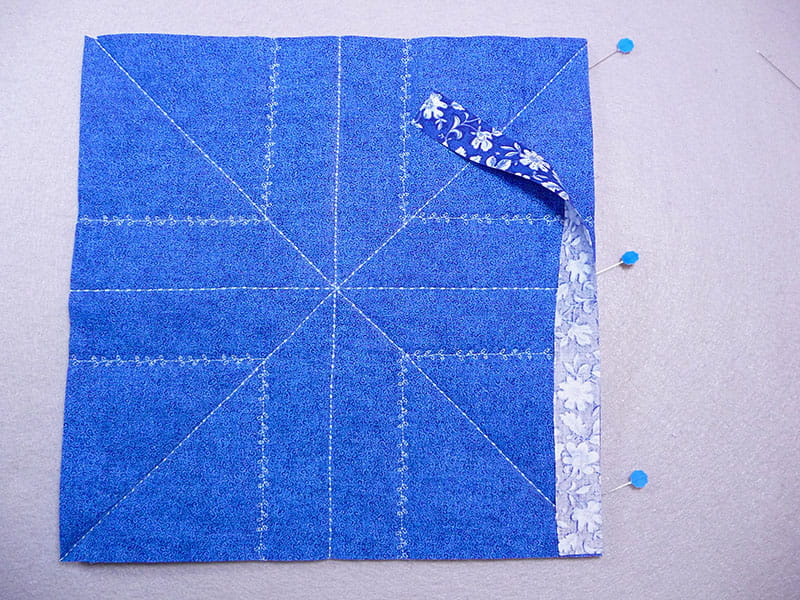
Figure #13b
-
Sew layers together using a precise ¼-inch seam.
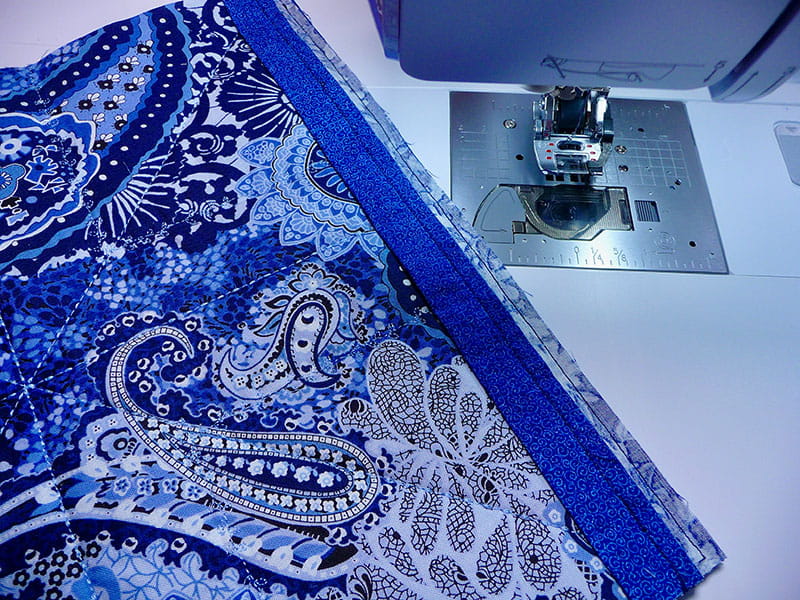
Note: I used SA205, the ¼-inch dual feed sole, but you could opt for SA185, the ¼-inch quilting foot with guide. It’s important that all raw edges are aligned when stitching the ¼-inch seam. See stitching with guide in Figure #14a. See completed seam in Figure #14b.
Figure #14a
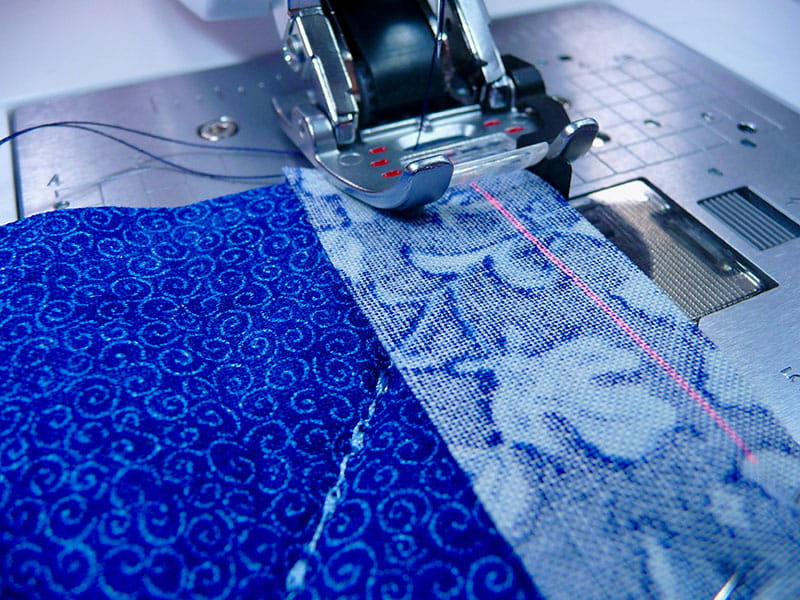
Figure #14b
-
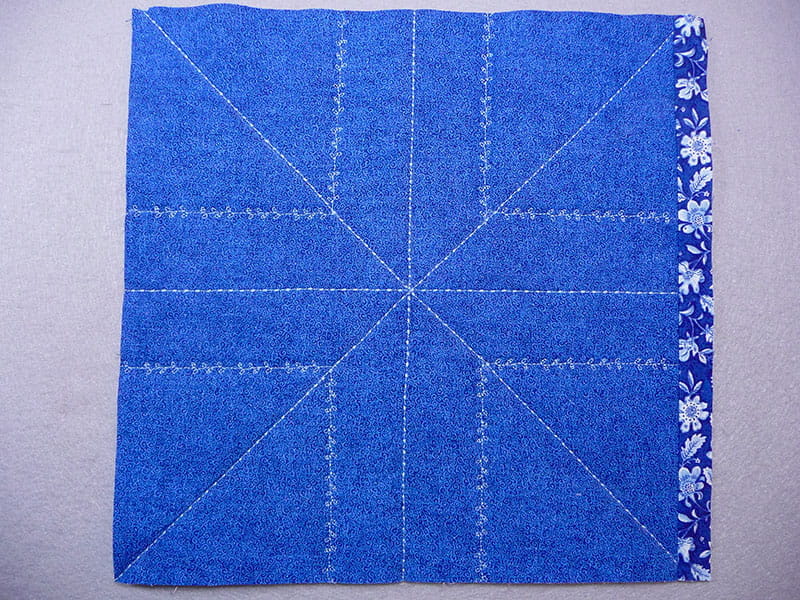
Next, flip and press top sashing piece so right side is facing up. See Figure #15.
Figure #15
-
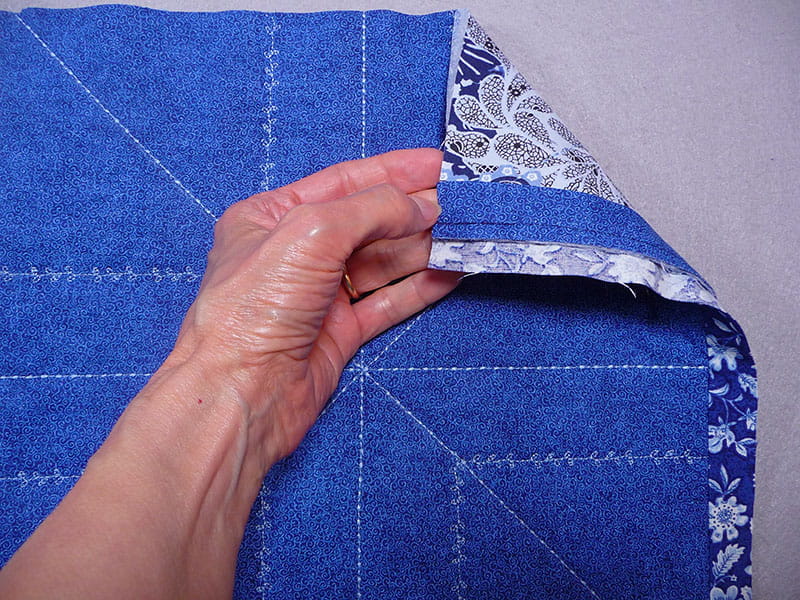
Leave backing strip as-is for now. See Figure #16.
Figure #16
-
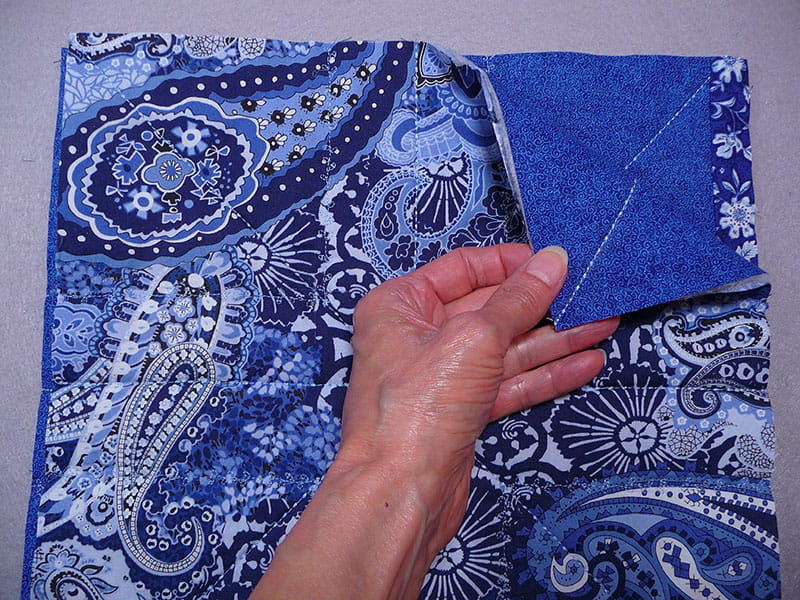
Next, select a second block and layer with top side of second block facing top sashing piece, having top sides facing and raw edges even. Pin together. See layered pieces in Figure #17.
Figure #17
-
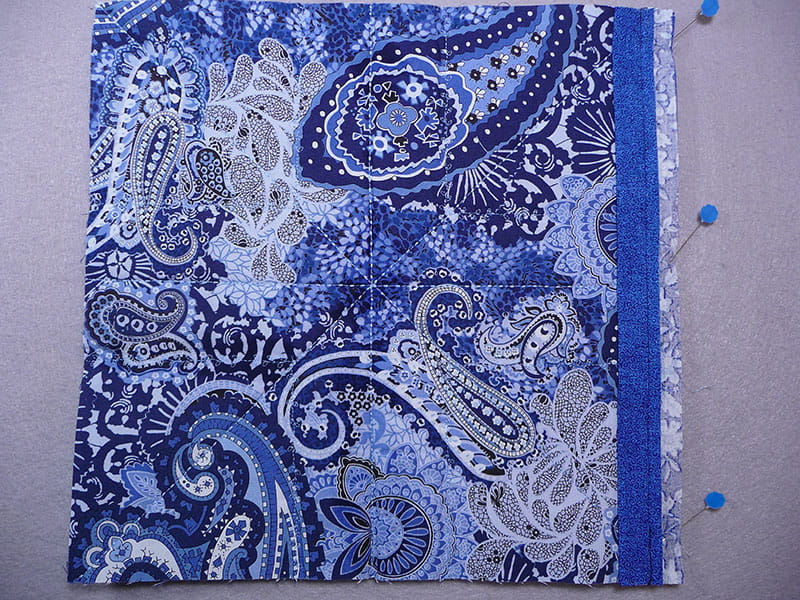
Turn block over so that side with back sashing strip is facing you. See Figure #18.
Figure #18
-
Sew a precise ¼-inch seam to join top sashing piece to second block. Note that you are only stitching through the layers of the second block and the single layer top sashing strip in this step. See stitching with guide in Figure #19a. See completed seam in Figure #19b.
Figure #19a
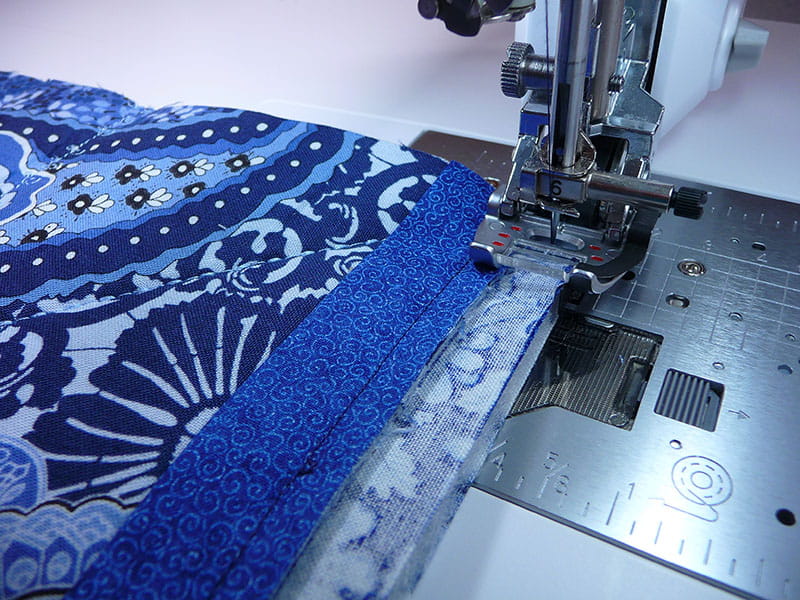
Figure #19b

-
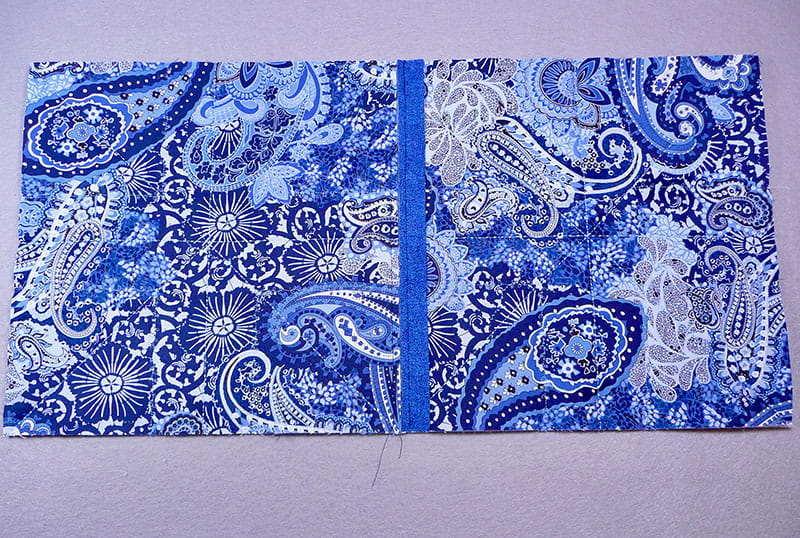
Open out the joined blocks. Looking at the back side, you’ll see that the stitched seams are now facing each other, with the raw edges and batting just touching. With this quilt as you go method the combination of seam allowance and batting fills the area under the sashing strips, creating a smooth flow of batting across the quilted blocks. See Figure #20.
Figure #20
-
Now, flip the back sashing piece so it covers the exposed raw edges. Smooth and press flat. See Figure #21.
Figure #21
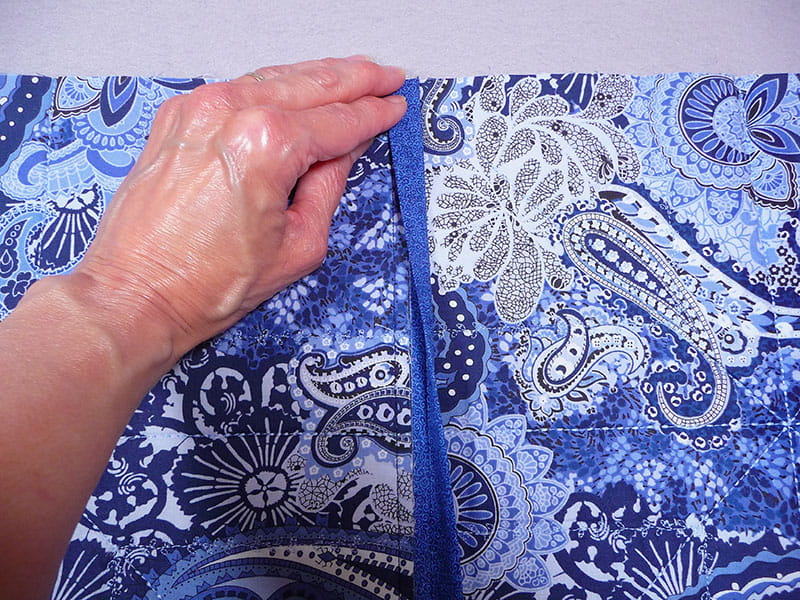
Tip:You may find it helpful to use a bit of fabric glue to help keep the back sashing strip in place. Be sure to let glue dry completely before stitching.
-
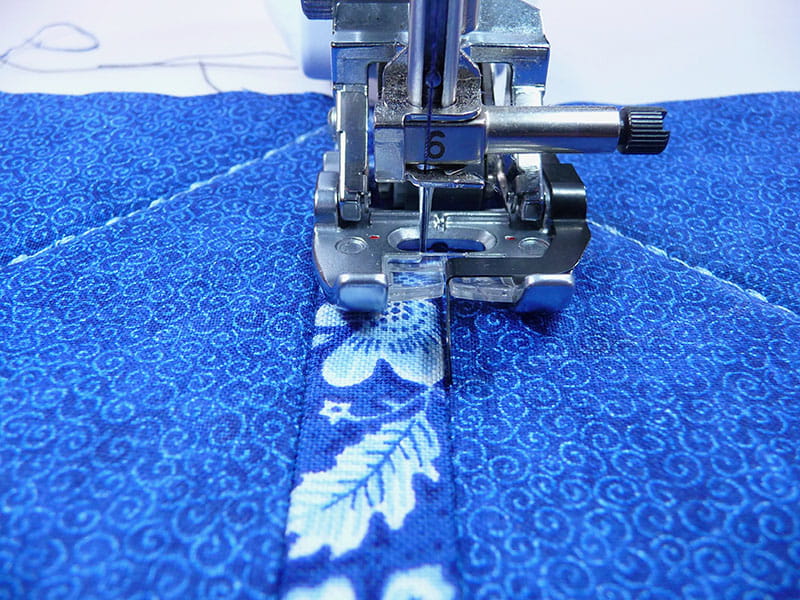
Flip the set of blocks to the top side. Using a straight stitch set for a length of 3.0, astitch along each inside edge of the top sashing strip, anchoring folded edge of back sashing in the process.
Tip: I used SA204, the dual feed Stitch in the Ditch sole and shifted the needle position, aligning it to stitch on the inside edge of the sashing strip while guiding the ditch quilting guide right along the seam. You could choose to stitch right in the ditch if you like, but I prefer to have my stitching show, instead of “hiding” it in the ditch. See stitching with guide in Figure #22.
Figure #22
-
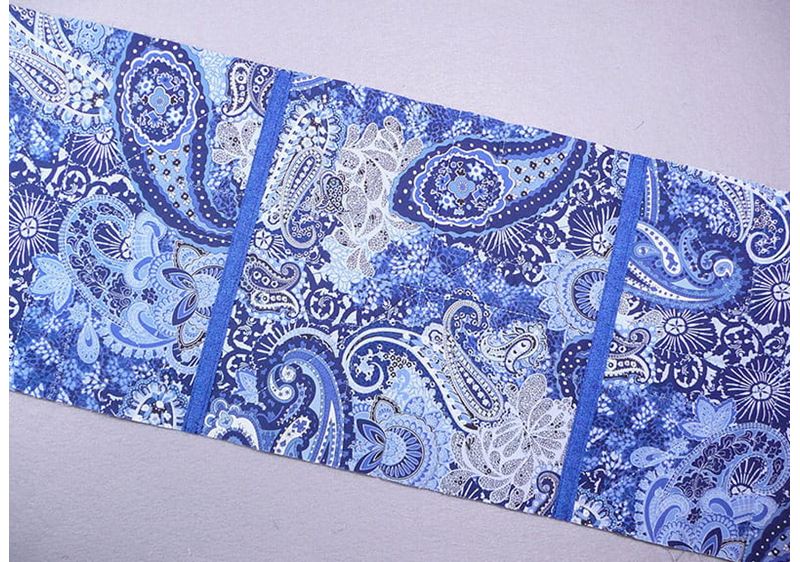
Repeat steps to join the remaining block with sashing strips. See top side in Figure #23a and back side in Figure #23b.
Figure #23a
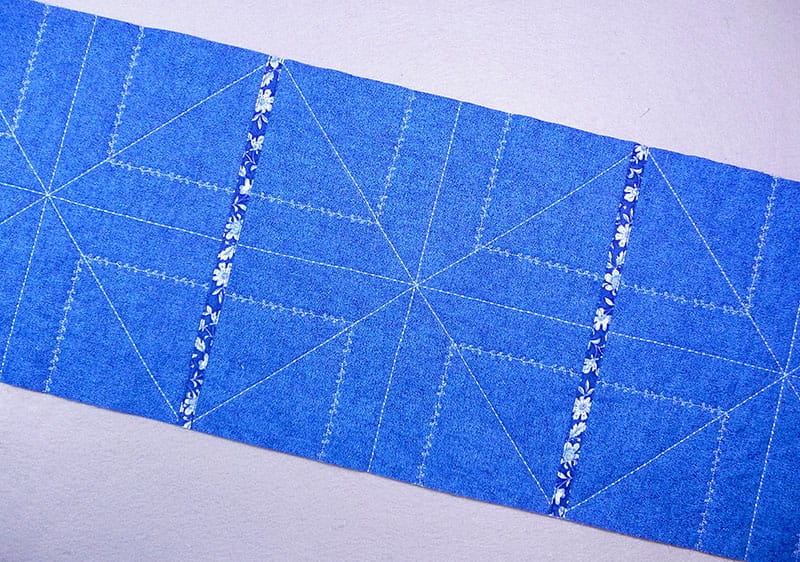
Figure #23b
-
-
Use your favorite binding technique to bind all edges with Fabric #3 or use my method for wrapped right angle (no miter) corners as described below:
-
Cut two binding strips to equal 12-inches long X 2 ¼-inches wide for short edges. Cut two binding strips to equal 38-inches long X 2 ¼-inches wide for long edges.
-
Layer short strips along top side of block and sew a 1/2-inch seam with right sides facing and raw edges matching. Turn and press strip to wrong side, wrapping strip over the seam allowance and folding long raw edge under ½-inch.
-
Stitching from the top side, sew along inside edge of binding catching the folded edge in the process.
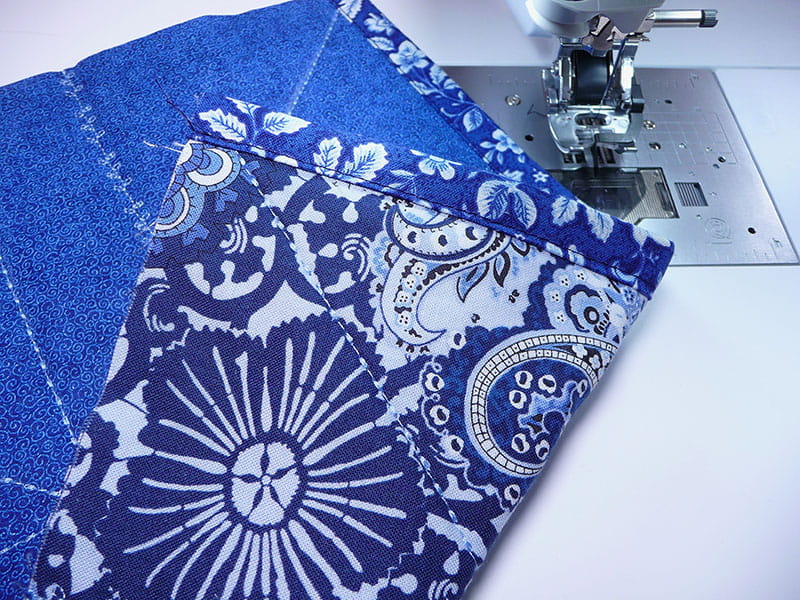
Tips: The adjustable seam gauge comes in handy for sewing accurate ½-inch seams. I used the Stitch in the Ditch foot and the same technique for topstitching as I did for anchoring the sashing strips. See example of finished short edge in Figure #24.
Figure #24
To sew binding on long edges you’ll follow the same basic steps as you did for the short edges, with the addition of turning raw ends under at each end to fully enclose raw edges.
See steps below:
- Begin by layering strips with 1-inch extending at each end. Sew a ½-inch seam with right sides facing and raw edges matching.
-
Trim ends so ½-inch extends beyond raw edge. Fold and press under the ½-inch extensions, then fold and press under ½-inch along long edges on the back side. See steps in Figure #25a through Figure #25e.
Figure #25a

Figure #25b
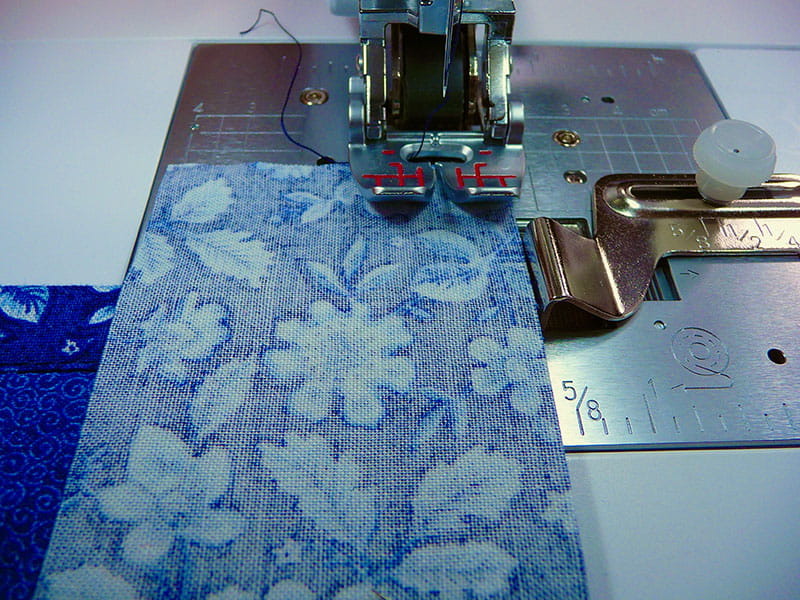
Figure #25c
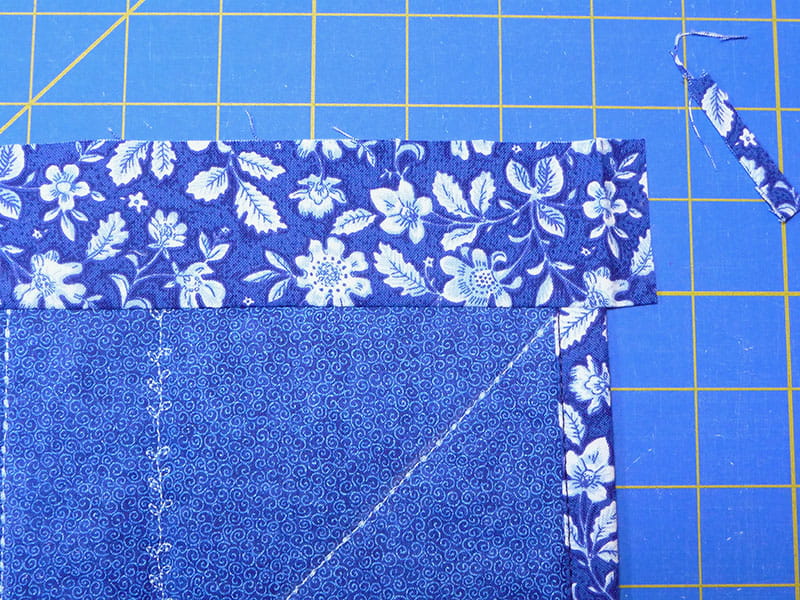
Figure #25d
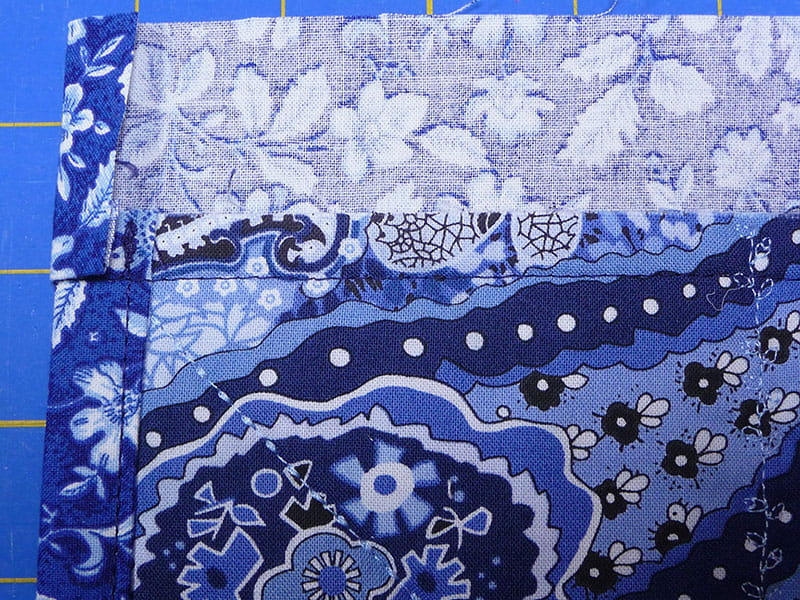
Figure #25e
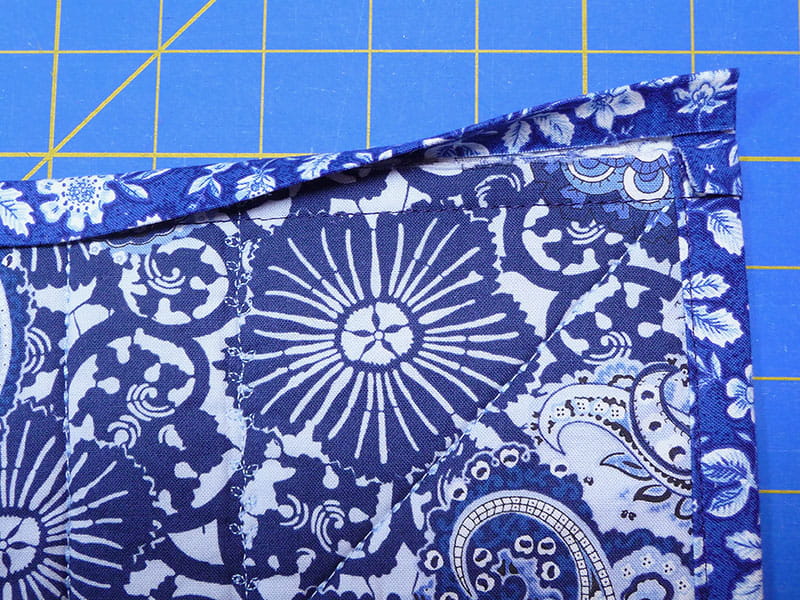
-
Stitching from the top side, sew along inside edge of binding catching the folded edge in the process. You are finished! Enjoy! See completed binding in Figure #26a and Figure #26b.
-
Figure #26a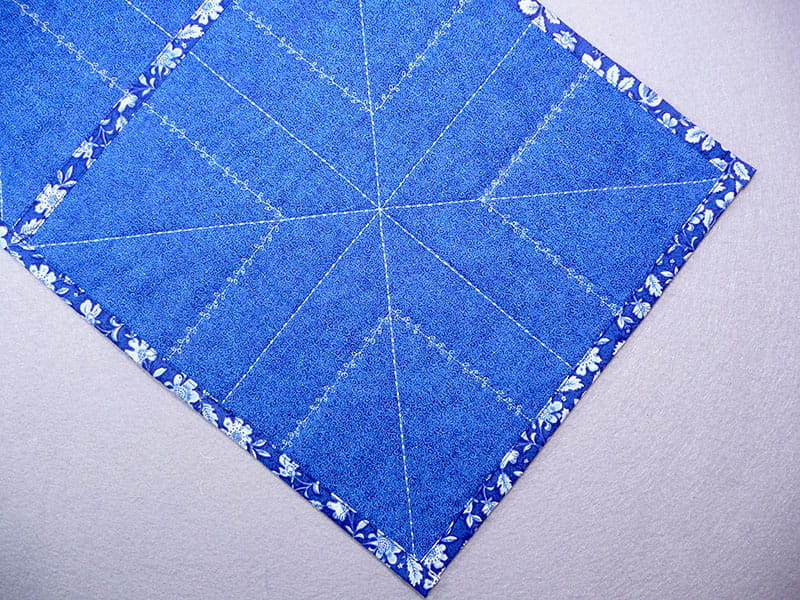
Figure #26b