Winnie the Pooh’s Birthday Book Pillow
Winnie the Pooh is everyone’s favorite bear and this month is his birthday! Celebrate by making this pillow which combines a youngster’s love of the popular bear while nurturing a love of reading. The pocket keeps a favorite book handy and the pillow offers a comfy place to lay a little head while listening to the story. With your Brother sewing/embroidery machine you can stitch one for a grandchild’s sleepover, for a birthday gift, for a get-well comfort or for no reason at all. Select novelty fabric with special appeal to the child and personalize the pocket with the built-in text fonts in your embroidery machine. The reading pillow is such a versatile project, with so many embellishment variations available on your Brother sewing/embroidery machine—quilt it, couch a name, scan and embroider a picture of a beloved pet. The options are limitless. Save a few minutes and download the free “Let’s Read” embroidery design, with Pooh’s signature bee or the grammatically correct apostrophe. Warning: these book pillows are addictive.
Requirements
- 16” pillow form
- Fabric: Winnie the Pooh print: 18” square for front, 10.5 x 1.5” strip for handle embellishment, (2) 17x 13” rectangles for back envelope closure.
- Pooh bear gold: 22 x 16” for embroidered pocket front to enable hooping in 9.5 x 14” frame, later trimmed to 17 x 11.5”. Smaller embroidery frames may be used and will require less fabric but will also require more than one hooping.
Note: If using directional fabric, take care that the pattern is facing the same direction on both rectangles.
- Red gingham: 17 x 11” for pocket lining, 10.5 x 7.5” for handle
- Generic fabric: 18” square to back the batting (this will be inside, against the pillow form and will not show)
- Batting: lightweight cotton, 18” square for pillow front, 22 x 16” for pillow pocket
- Notions: adhesive spray, glue stick
- Thread: embroidery, monofilament for free-motion quilting, cotton for construction
Embroidery Designs from iBroidery.com
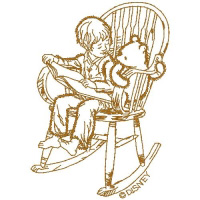
- Item Number: 200811147 Classic Pooh
 And free downloadable text file(s)

Instructions
• All seam allowances are ½”. • All basting allowances are ¼”. There are four parts to the reading pillow; 1. The pillow front (Pooh print) 2. The pillow pocket (solid gold with embroidery lined in red gingham) 3. The 2-piece Pooh print envelope back 4. The handle. The parts may be made in any order and then the pillow will be assembled.Pillow Front
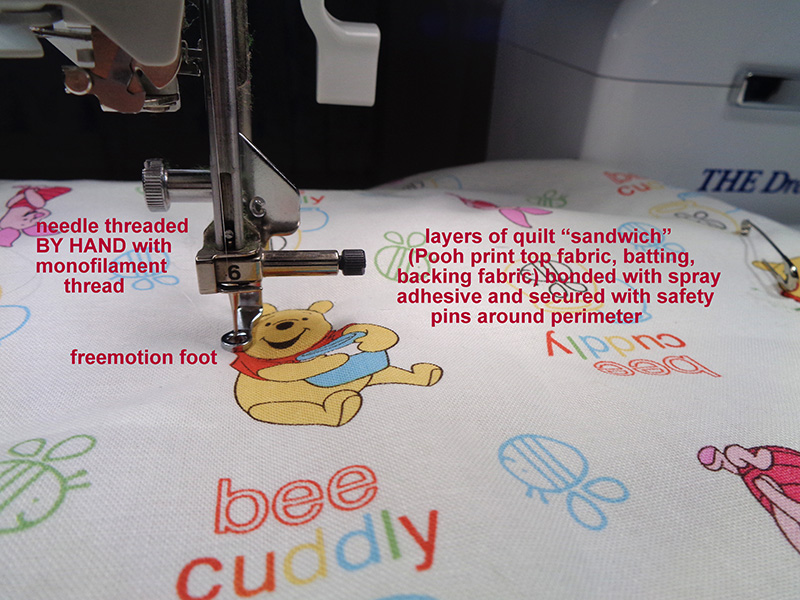
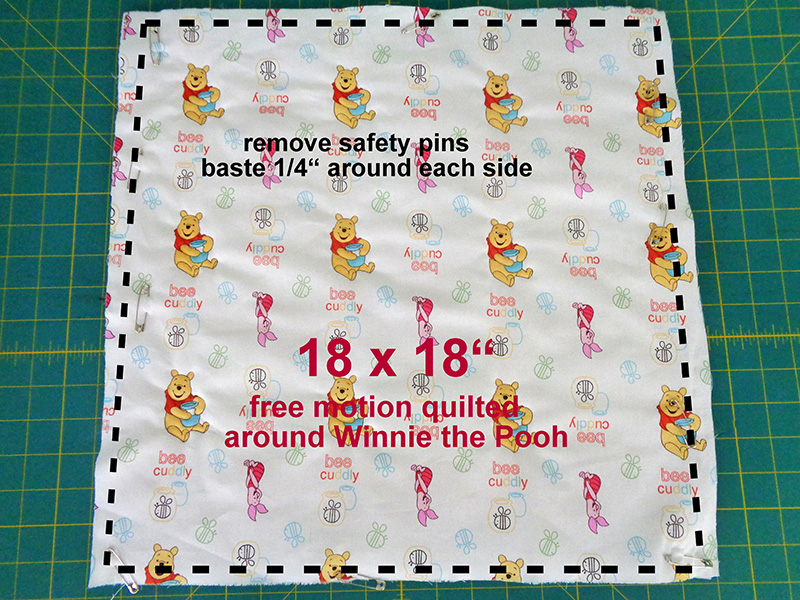 1. Use spray adhesive to bond generic fabric backing to batting. Repeat to bond front Pooh fabric to batting. It is helpful to add safety pins around the perimeter for extra security.
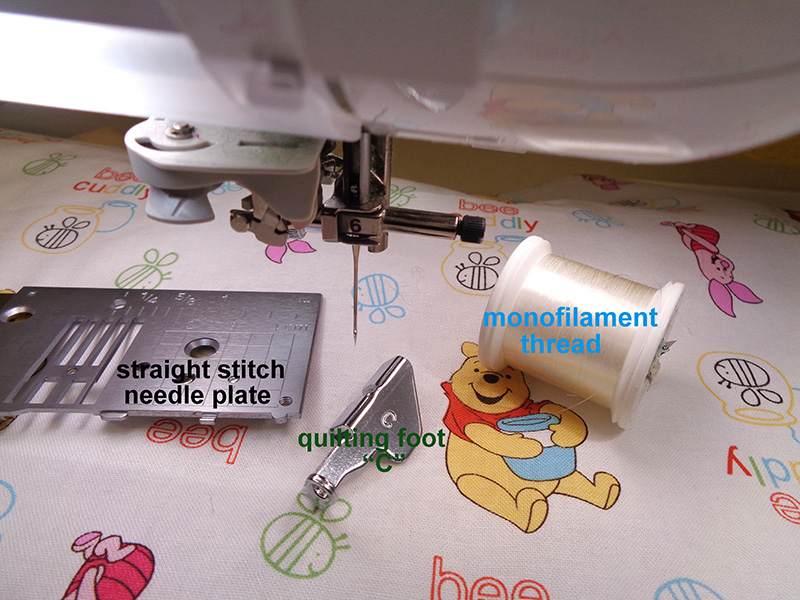
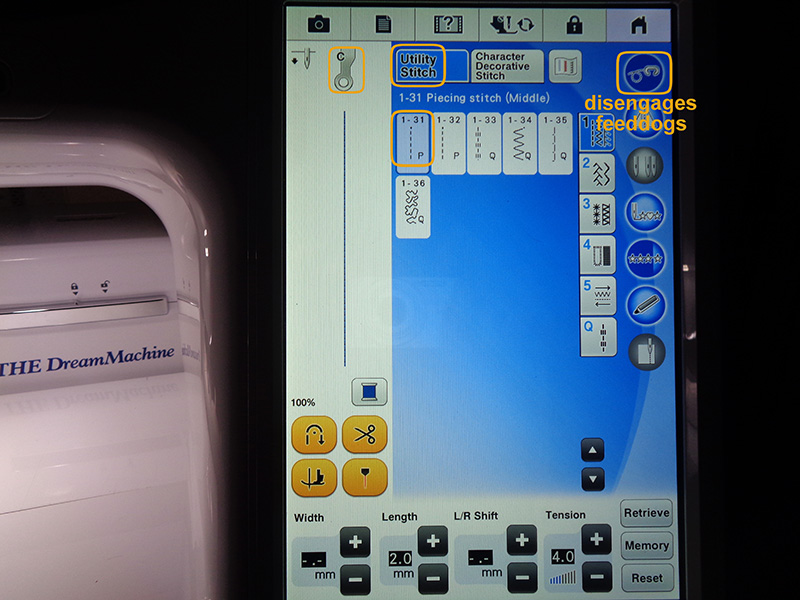
2. Quilt the layers together with free motion or grid quilting. Insert monofilament thread in needle (follow instructions in THE Dream Machine manual for using monofilament thread.).
FOR FREE MOTION: This is a very brief overview of one method detailed in THE Dream Machine instruction manual.
a. Insert the straight stitch needle plate.
b. Attach quilting foot “C”
c. Thread needle BY HAND (gentle reminder) with monofilament thread.
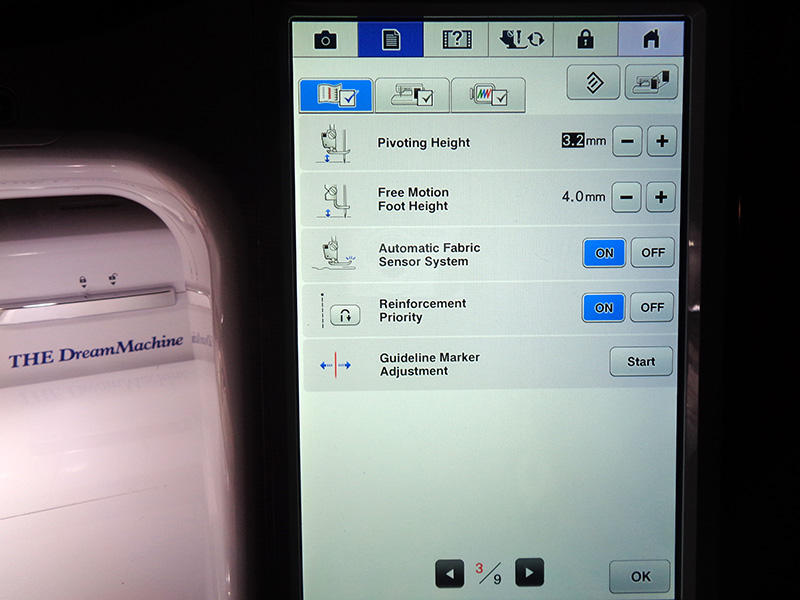
 d. Open machine setting screen key (lined page at top of screen). Go to page 3. Select settings for your quilt.
 e. Set machine for free motion sewing mode.
 4. Begin at the center to free motion quilt Winnie the Pooh figures.
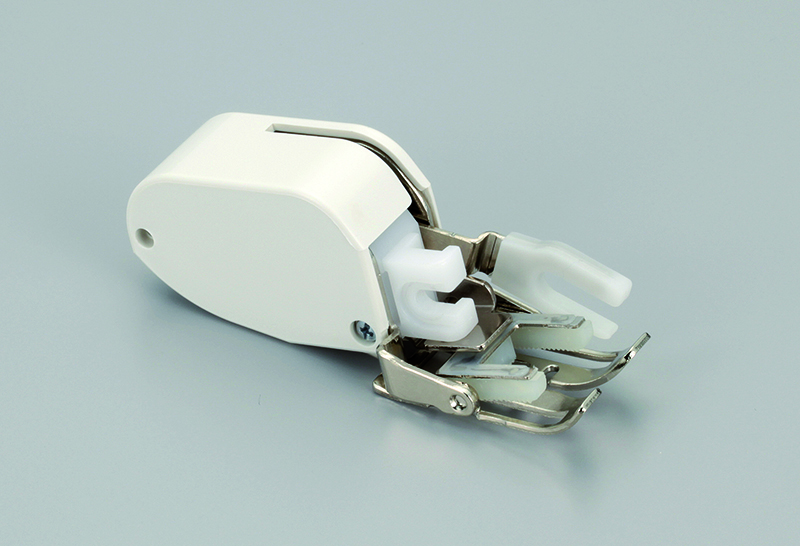
 5. FOR GRID QUILTING: Attach the SA188 Brother walking foot
and very helpful quilting guide.
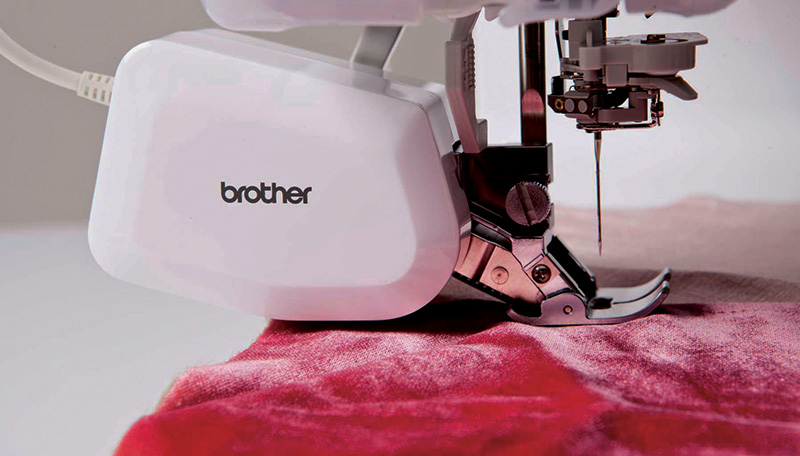
 Or the Brother MuVit Digital Dual Feed Belt Drive Foot,
which is much more than a walking foot.
 6. Trim quilted pillow front to 17” square.
7. Remove safety pins. Use walking foot or MuVit to baste layers together ¼” from all 4 sides.
Pillow Pocket
The pocket as shown was embroidered in one hooping in the 9.5 x 14” hoop from THE Dream Machine and then lined on the sewing side. The iBroidery.com design default size is 2.65" x 3.76" and could be stitched in the 4 x 4 frame. It can also be resized in increments up to 4.5 x 3.18. With PE-Design or BES 4, text can be recreated in any size or embroidered from the free downloadable design in a 5 x 7 frame.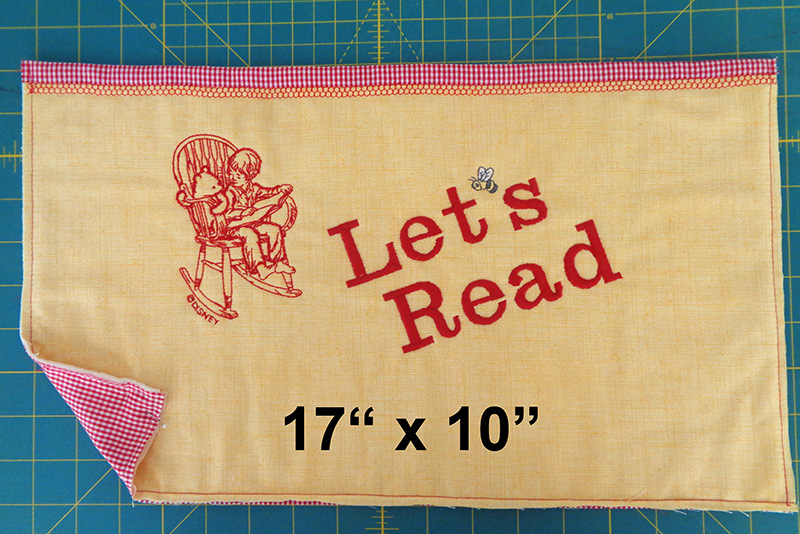 8. Hoop 22 x 16” gold fabric bonded to batting in 9.5 x 14” THE Dream Machine frame.
9. Load both text and Classic Pooh designs into machine.
10. Open the tan Classic Pooh design. Edit the color to RED.
11. Enlarge to 4.28 x 3.02 or desired size. Rotate the design clockwise 90 degrees.
12. Mirror the design. Save in memory.
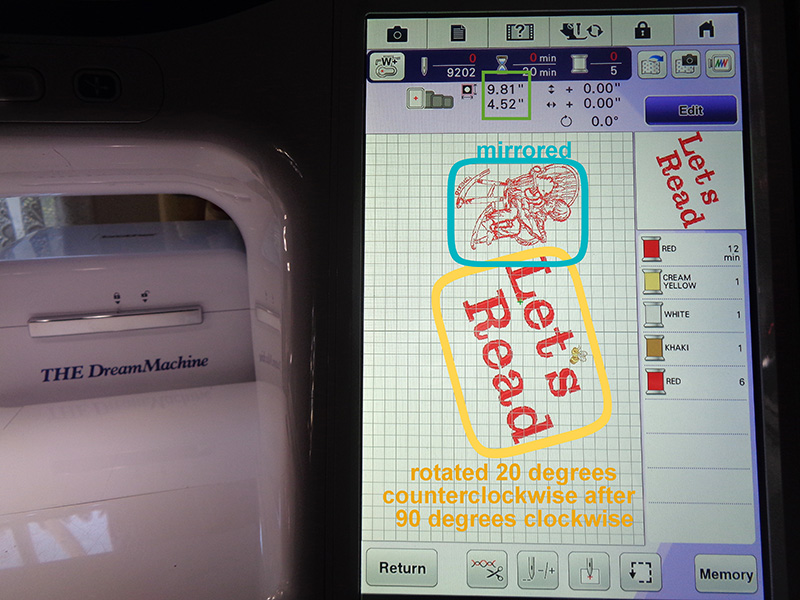 13. Open text file. Rotate clockwise 90 degrees and if desired angle 20 degree counterclockwise (as shown on the sample). Add edited Classic Pooh design.
14. Embroider.
15. Trim pocket embroidery to 17” x 10”, leaving 1 1/2" above top of rocker.
Add Pocket Lining
16. Stitch gingham pocket lining to top of pocket front with ½” seam allowance. Press seam allowance toward gingham. 17. Press gingham fold at top of pocket. 18. Spray batting with spray adhesive. Smooth gingham over batting, matching bottom raw edge of gingham to bottom raw edge of gold pocket front. 19. Stitch around both sides and bottom of pocket with scant ¼” seam allowance. 20. Select decorative honeycomb stitch #7-049 just below gingham with red thread.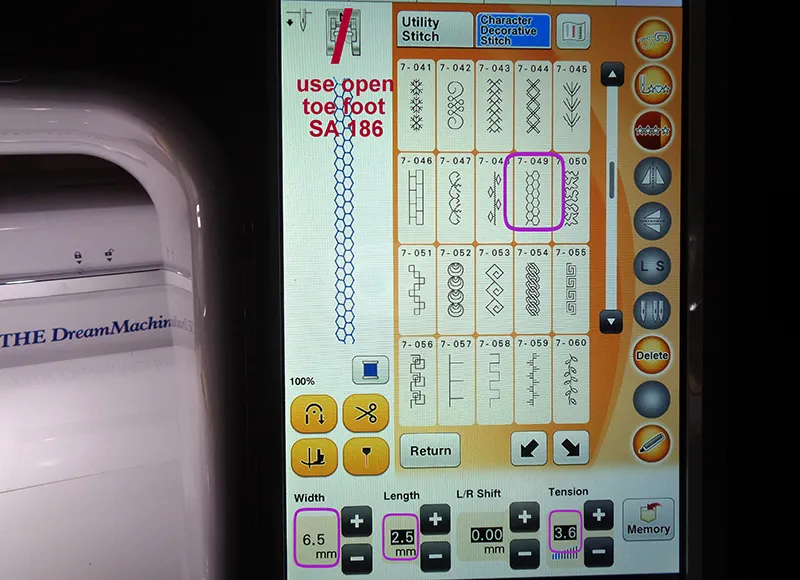 21. Attach open toe foot. The Brother metal open toe foot (SA186)
offers excellent visibility for exact placement of this stitch. I love this stitch-it’s like the bee just left the honeycomb.
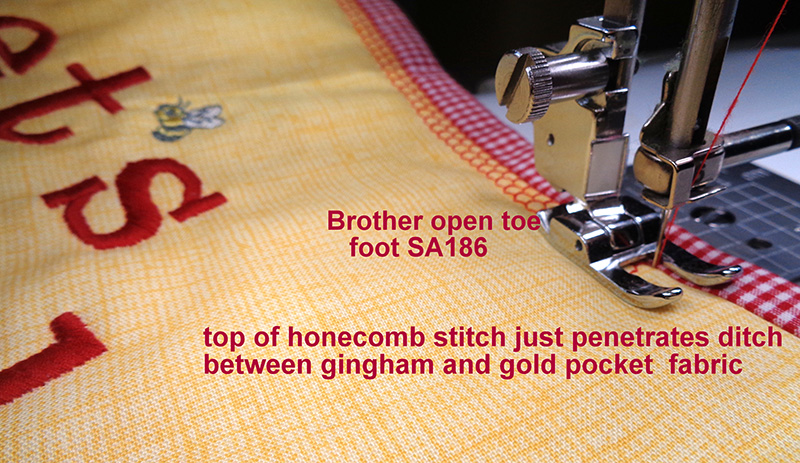 22. Trim pocket to 17 x 10”.
Envelope Back
Note: If using directional fabric, take care both pieces are facing north.
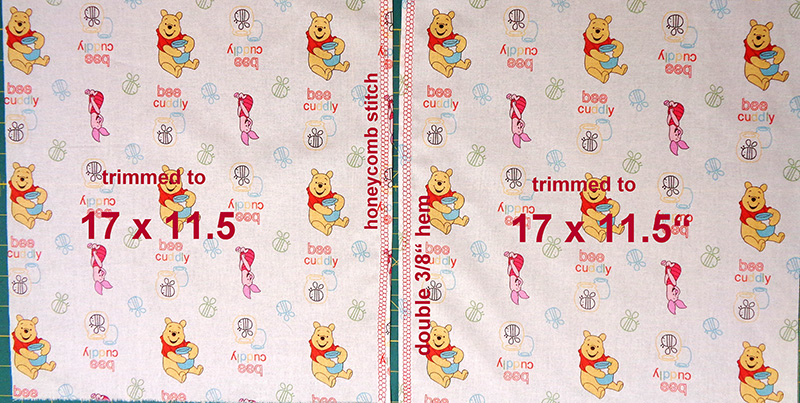 23. Press 3/8” doubled hem on the left edge of one back and on the right edge of the other back.
24. Straight stitch close to folded edge.
25. Work honeycomb stitch over doubled hem.
Note: Envelope backs are cut with extra width. If your double hem varies or if you are unsatisfied with your honeycomb stitching or choose another stitch, you can cut it off and have enough fabric to redo it. I had to. Twice!
26. Trim envelope backs to 17” x 11.5”.
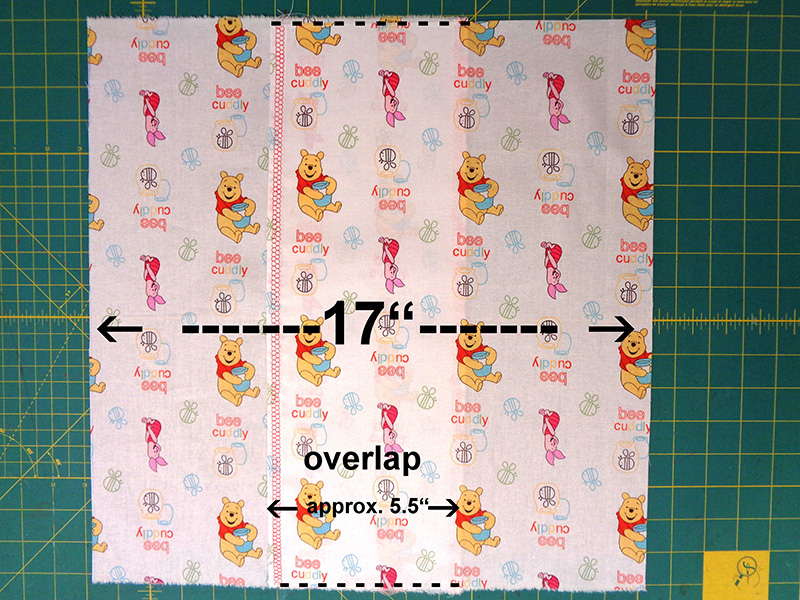
27. Overlap backs so that outer edges measure 17” side to side. There will be a 4 to 5 ½” overlap depending on number of double hem do-overs. Baste along top and bottom of overlap ¼” from raw edge.
Handle
28. Press 10.5” gingham vertically. Open and fold raw edges toward center, pressing folded edges. Fold again encasing raw edges in center, creating the strap.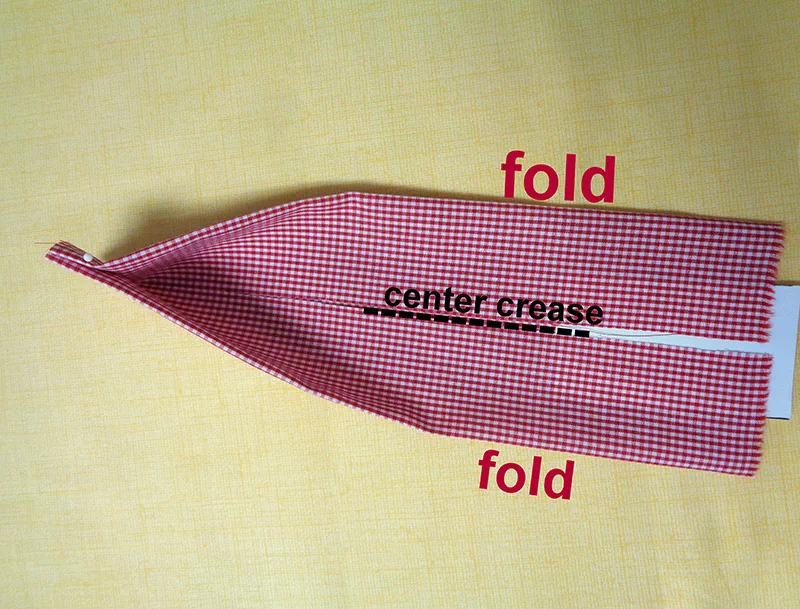 29. Topstitch each folded edge.
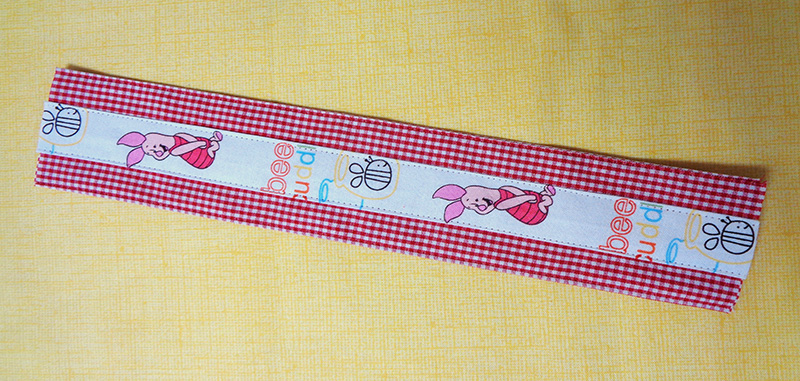
30. Fold 1.5” Pooh character strip in thirds, with raw edges meeting in the center wrong side. Secure in center of gingham with glue stick. Then topstitch each side. Ends are raw.
Construction
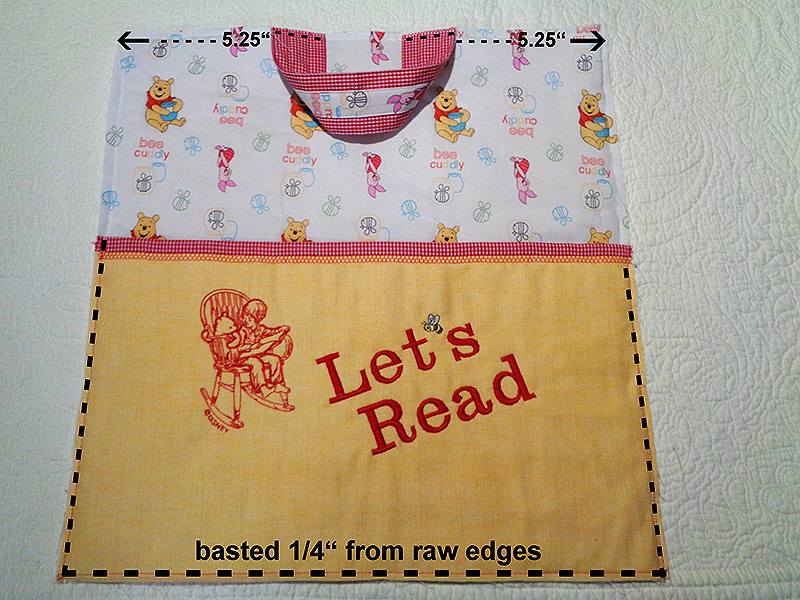 31. Place finished pocket at bottom of pillow front. Baste on three sides ¼” from raw edges.
32. Place handle facing down, centered about 5” apart on pillow front. Baste in place ¼” from top raw edge.
33. Stack envelope backs right sides to right sides on the pillow front and pocket. Pin in place.
34. Stitch around all four sides with ½” seam allowance and shortened stitch length (2.0). Reinforce stitches across handles, at sides of pocket, and at top and bottom of envelope backs.
35. Mark diagonal line ½” across each corner. Stitch across this diagonal line, then stitch around the perimeter of the pillow again going across these diagonal corners. This rounds the corner, reducing the floppy “dog-ear” often seen on square pillows.
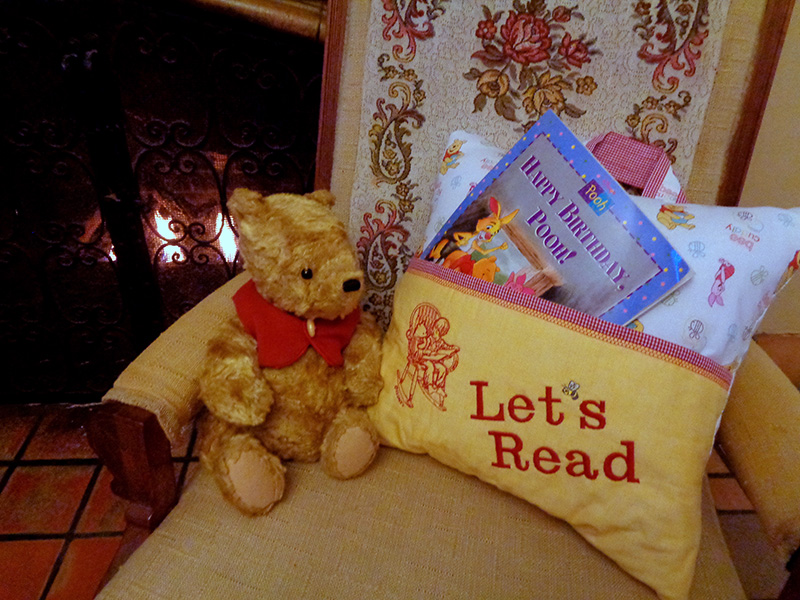
36. Turn the pillow cover right side out and stuff with a 16” pillow form. Now it’s ready to delight a child.
Other Ideas:
- This precious birthday Classic Pooh design would be delightful on a birthday party tablecloth or it would charm any child when embroidered on a birthday shirt. It’s available here on iBroidery > Classic pooh 200811116
- The book pillow isn’t just for children. Adults and teens would be happy to have their current book handy with a pillow to snuggle up to as they read. An ailing friend or a shut in would enjoy a book pillow with a new book. And so, would you. Make one for yourself!

