Beautiful Table Settings with PatternCAD™
Beautiful Table Settings with PatternCAD™ & THE Dream Motion™ PRO
When you're learning to use new software and equipment, it's nice to practice on plain cloth where glitches or mistakes won't wreak havoc on a laboriously pieced quilt top. Solid fabric is also perfect for experimenting with stitch patterns because the quilted design is clearly visible. Still, there's no reason why your educational playtime can't become a useful project like these placemats and coasters!Materials and Supplies
- THE Dream Fabric Frame
- THE Dream Quilter™ 15 DQLT15
- THE Dream Motion™ PRO software
- 1 1/4 yards of 45"-wide cotton for top and binding
- 3/4 yard of 45"-wide cotton for backing
- 27" x 45" piece of batting
- Quilting and sewing threads
TIP: I like to use variegated and multicolored threads on solid fabrics to add visual texture and interest.
Cutting
From the top and binding fabric, cut:- 1 piece, 27" x width of fabric
- 8 strips, 2" x width of fabric*
Designing
- Open THE Dream Motion™ PRO and select the PatternCAD™ function. On the screen, choose EZ and then Bowditches.
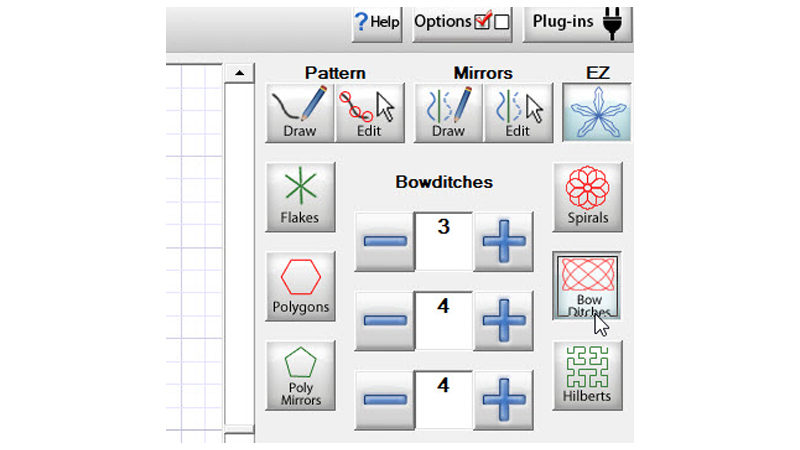
- The screen displays the default bow ditch pattern, a sort of swirling grid. On the right side of the screen you'll see three numerical displays that control the complexity of the design. The best way to understand their functions is to experiment with one complexity factor at a time, moving its number up and down and watching the changes in the pattern display with each click.
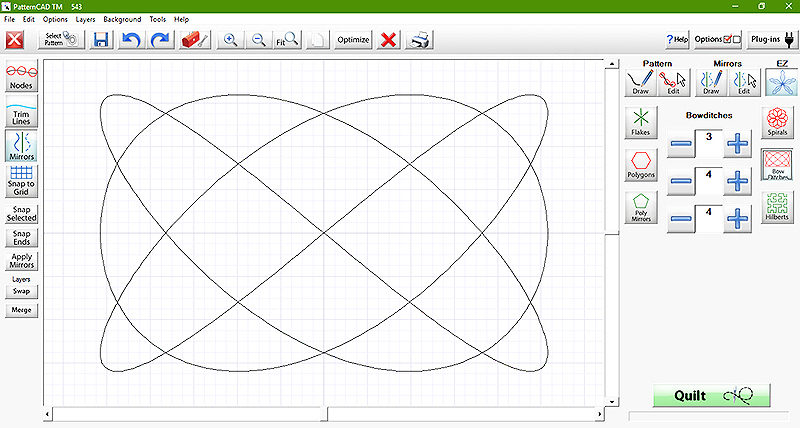 The top number changes the number of loops from top to bottom. The middle number varies the number of loops from side to side. The bottom number alters the space between adjacent lines of stitching. To return to the default setting at any time, reset the numbers (top to bottom) to 3, 4, and 4. You'll notice that some combinations don't produce a regular gridded design.
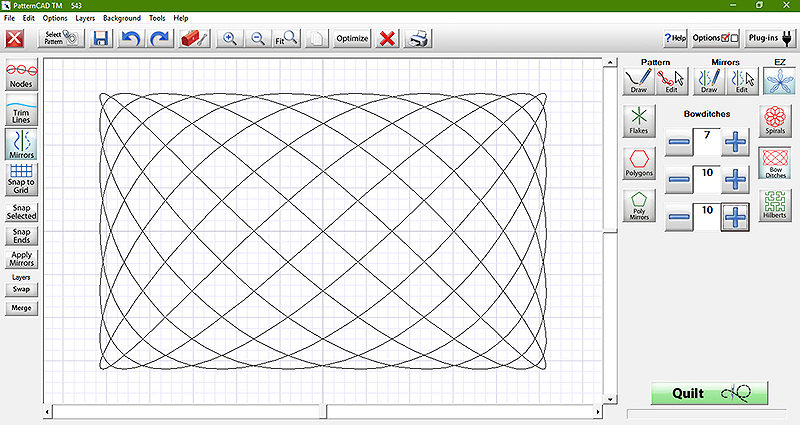
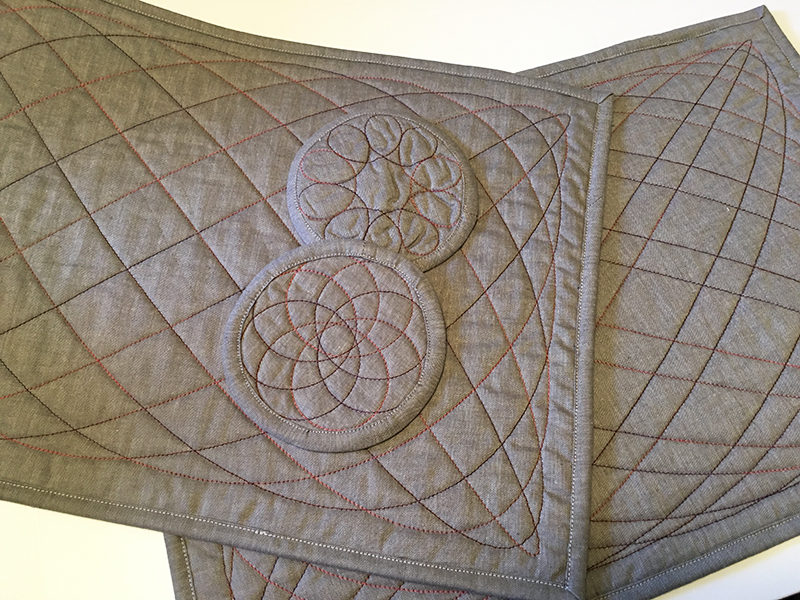
- To copy the project shown, set the complexity numbers (top to bottom) to 7, 10, and 10. Save the design as “placemat 7 10 10” so that you'll remember the complexity settings.
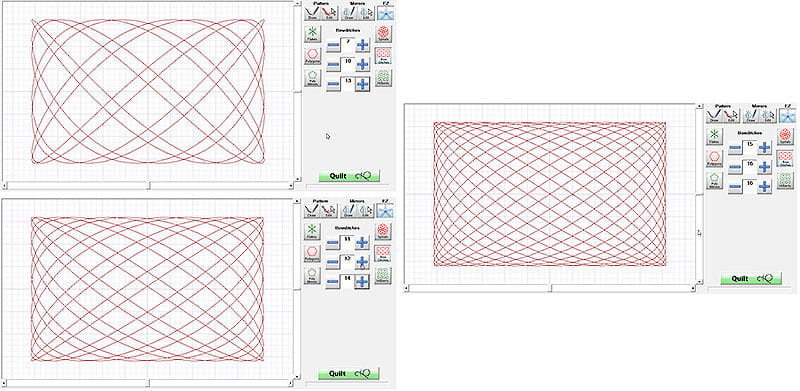
- If you want to stitch your first placemat now, you can click Quilt at the lower right corner of the screen, or close PatternCAD™ and open your choice of quilting interface screens. Instead, I'm going to experiment more with the settings to create four different bowditch patterns for quilting: 7, 10, 13; 11, 12, 14; and 15, 16, 16. Save all of the designs you like.
Construction
- Using the 27" x 45" pieces of fabric and batting, prepare your quilt sandwich for mounting in THE Dream Fabric Frame. Attach fabric headers to the 45" edges. Mount the fabric with the top edge of the quilt sandwich about 1" outside the safe area of the frame and the left selvage edges close to the left end of the safe area. This maximizes your fabric usage so that you can stitch four placemats total.
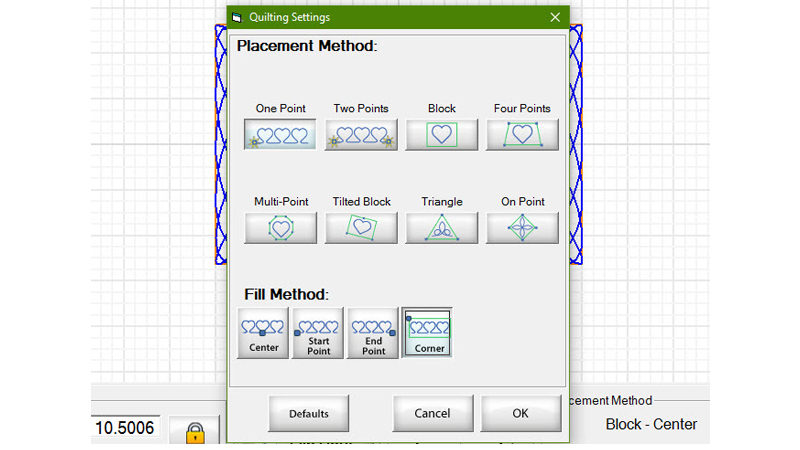
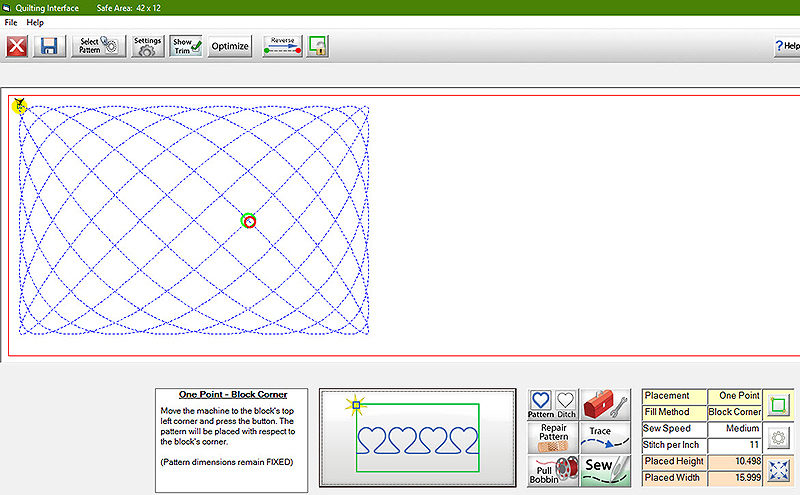
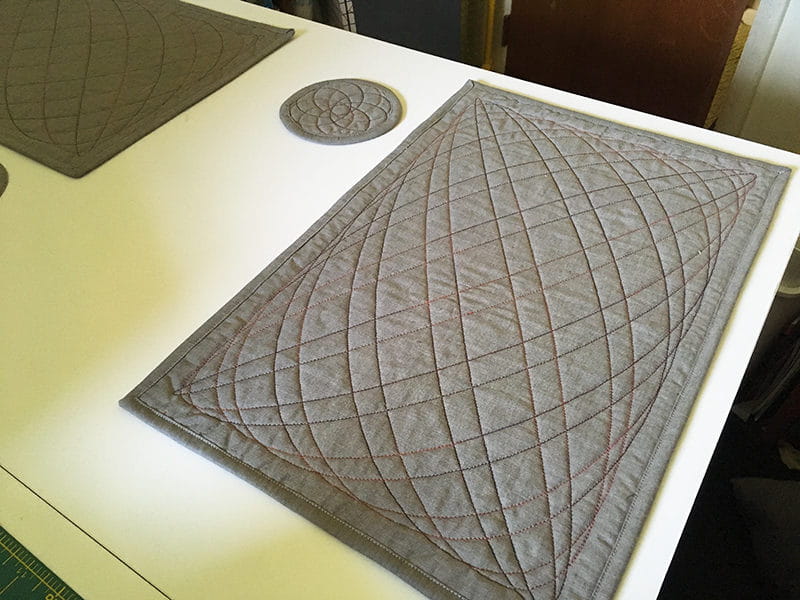
- Open your first design in the quilting interface. Choose One Point & Corner as the placement method, and set the size to 10.5" high and 16" wide. Stitch the design, positioning the corner at the top left of the safe area.
- You can stitch two placemats within one whole-frame safe area. To position the second placemat, set the corner point at least 2" to the right of the first design to allow for trimming. After stitching the second placemat, re-position the fabric in the frame and stitch two more placemats at least 2" below the first pair.
NOTE: If you are also making coasters, re-position the fabric and stitch them now. Position each coaster at least 1 1/2" from the placemat designs, and leave at least 1" between coaster motifs. For more on this, please see the Bonus section below.
- When quilting is complete, trim each placemat to measure 12" x 17 1/2", keeping the design centered; there should be a margin of about 3/4" all the way around the quilted design.
- Join the 2" binding strips into a continuous length and bind the placemats, mitering the corners.
Bonus: Coasters
I hate to leave the edge of my quilt sandwich unused, so I'm going to fill the empty area near the right-hand selvages with circular quilted designs suitable for coasters. In the process, we can experiment with another PatternCAD™ feature.- Open PatternCAD™, choose EZ, and click Spirals. You'll see the default pattern on the screen. Notice that spirals are similar to bowditches, but controlled by only two complexity factors: Spirals and Radius. The default values are 10 and 15; experiment with each to see what changes occur.
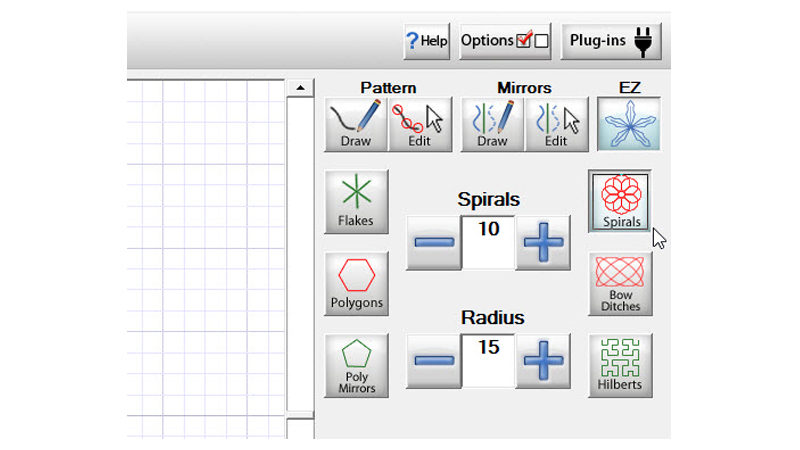 Spirals changes the number of loops in the design. Radius changes the size of each loop, resulting in differently shaped openings at the center of the design.
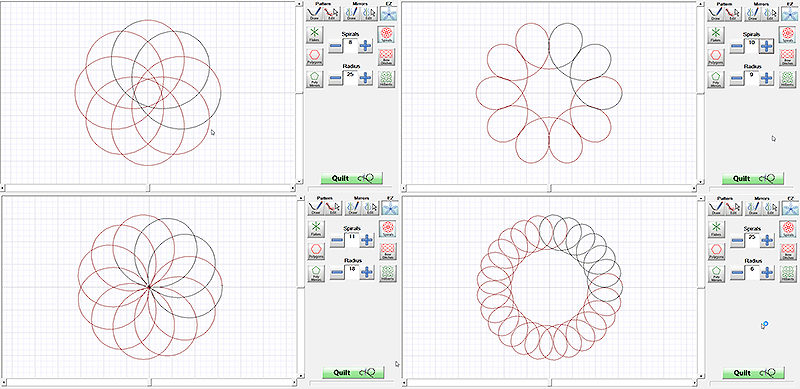
- For my coasters, I used these four settings:
- 8, 25
- 10, 9
- 11, 18
- 25, 6
- Stitch your coasters in the empty area of your quilt sandwich, setting the design size to 4" high and 4" wide. When the quilting is complete, trim each pattern into a 4 3/4" circle and bind the edges.
 Now's the perfect time to have a friend over for tea and dress up the table with your newly made Table Settings!
Related Projects
Stay Connected
* Required fields