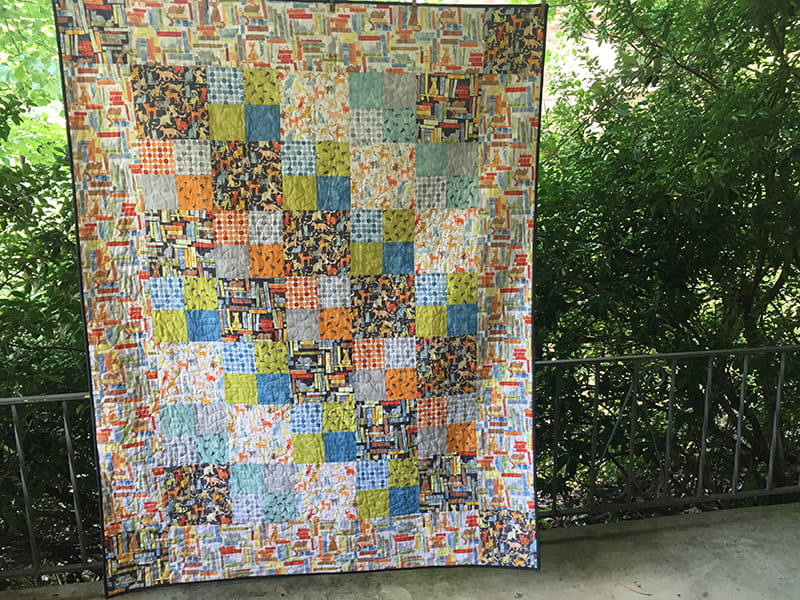
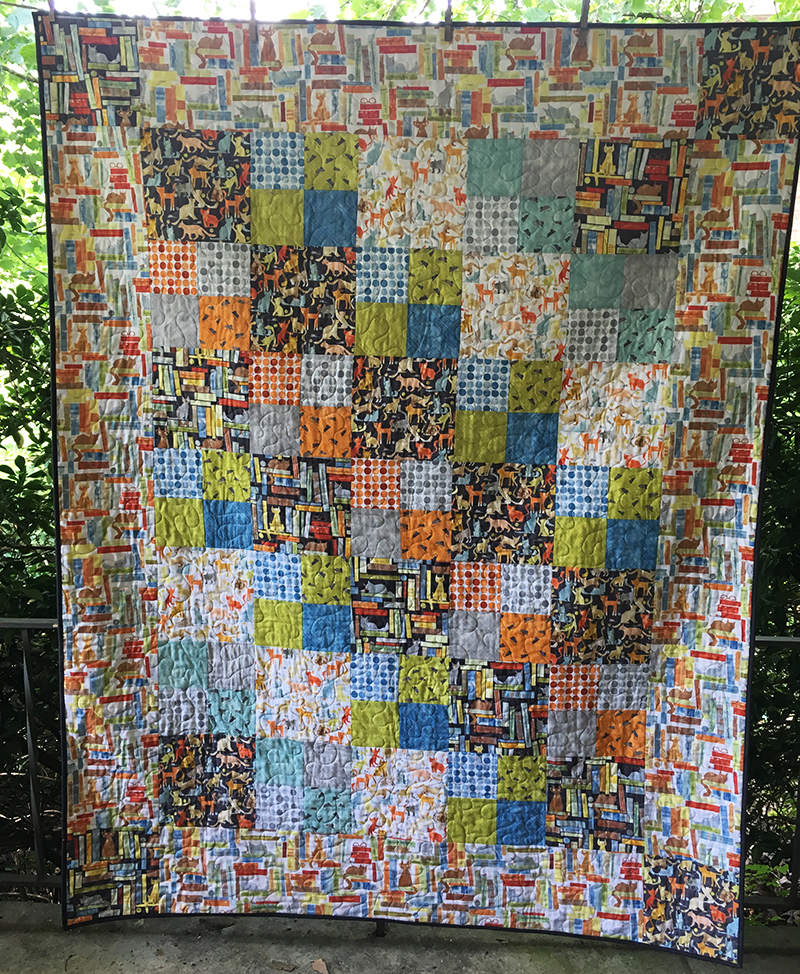
Big Bold Quilt: Conquering Large Format Quilts
Have you fallen in love with a big, lively print and then not quite know what to do with it? The print gets lost when it's cut into small pieces! This easy quilt is a perfect answer. The blocks are relatively large, but the lap-size quilt doesn't take a lot of fabric. The border provides wide open space for the print to shine, and one-way prints work for both blocks and border. Cutting and piecing are fast, and when the piecing is done, you have a great canvas for quilted patterns from Dream Motion Pro
. Finished size: 56" x 72"
Materials
All fabrics are quilting cottons with at least 42" of useable width.- 2 1/8 yards of border print
- 5/8 yard each of three accent prints
- 1/4 yard each of ten coordinating prints, two prints in each of five colors*
- 3 3/8 yards of fabric for backing
- 1/2 yard of fabric for binding
- 60" x 76" piece of batting
Cutting
NOTE: Cut the border pieces in the order listed to be sure that your directional print is oriented correctly in all four borders.
From the border print, cut:
- (first cuts) 2 strips, 8 1/2" x width of fabric
- (second cuts) 2 strips lengthwise, 8 1/2" x remaining fabric length (about 59 1/2")
- 6 squares, 8 1/2" x 8 1/2"
- 7 squares, 8 1/2" x 8 1/2" (14 total)
- 1 strip, 4 1/2" x width of fabric (10 total)
- Crosscut a 19" strip from each gray and aqua strip (4 total). Crosscut a 23" strip from each orange strip (2 total).
- 7 strips, 2" x width of fabric
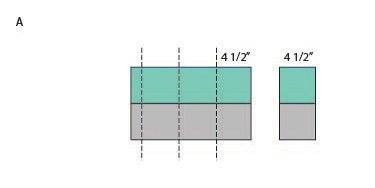
- Pair a 19" gray strip with each aqua strip. Sew together along one long edge to make two strip sets. Press the seam allowances to one side. From each strip set, cut four pieces, 4 1/2" wide (eight pieces total).
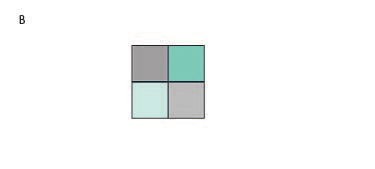
- Join a segment from the first aqua/grey strip set to a segment from the second strip set, alternating the positions of the gray sections. Sew the segments together, matching the seam lines, to make a four-patch block containing four different fabrics; make four.
- Pair each orange strip with the remaining length from a gray width-of-fabric strip. Sew together along one long edge to make two strip sets. Press the seam allowances to one side. From each strip set, cut five pieces, 4 1/2" wide.
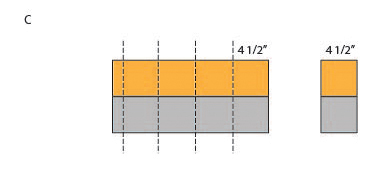
- Join segments from the two strip sets as in Step 2. Stitch together to make five blocks of four different fabrics.
- Repeat the process from Steps 1 and 2 to make two strip sets from the blue and green strips. Cut eight segments, 4 1/2" wide, from each strip set and combine them to make eight blue/green four-patch blocks, each containing four different fabrics.
- Arrange the four-patch blocks and 18 accent-print blocks as shown. Be sure any directional prints are oriented correctly. Reserve the four remaining accent-print squares to use in the border.
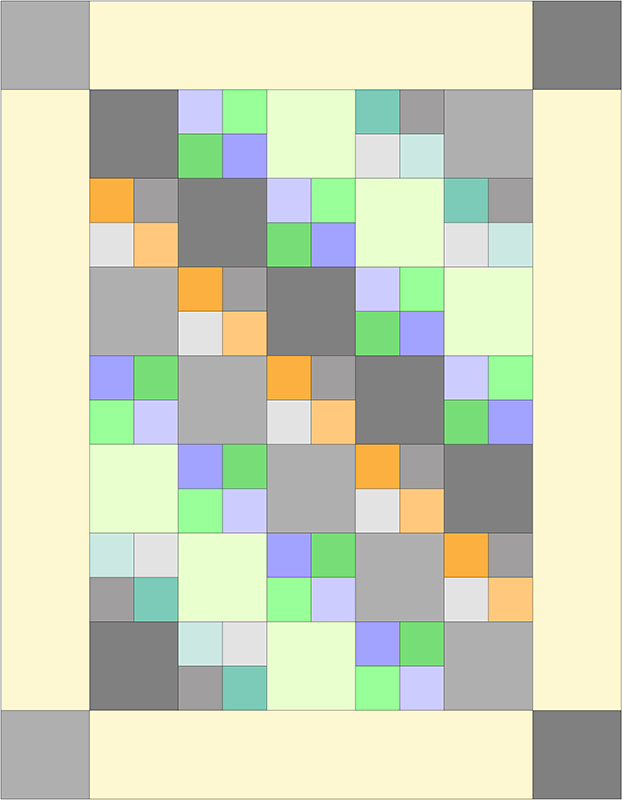
- Sew the blocks together in rows. Press the seam allowances to one side, alternating the direction from one row to the next to avoid bulk.
- Sew the rows together to complete the quilt center, matching the seamlines. Press the seam allowance in one direction.
- Trim the longer border strips to match the length of the assembled quilt center. Trim the shorter border strips to match the width of the quilt center. (Do trim all four strips now, before attaching any borders.)
- Keeping the print oriented correctly, sew a long border strip to each side of the quilt center.
- Sew one of the remaining accent-print squares to each end of the short border strips. Pay attention to the orientation of any one-way prints. Stitch the assembled top and bottom border units to the quilt, matching seamlines.
- Cut the backing fabric into two equal lengths and remove the selvages. Sew the two lengths together and press the seam allowances open.
- Layer the backing, batting, and quilt top and baste the layers together. Quilt as desired, using THE Dream Fabric Frame
, Dream Quilter 15
, and Dream Motion Pro
. For the sample, we chose an allover pattern of a stippling motif for the look of freemotion quilting.
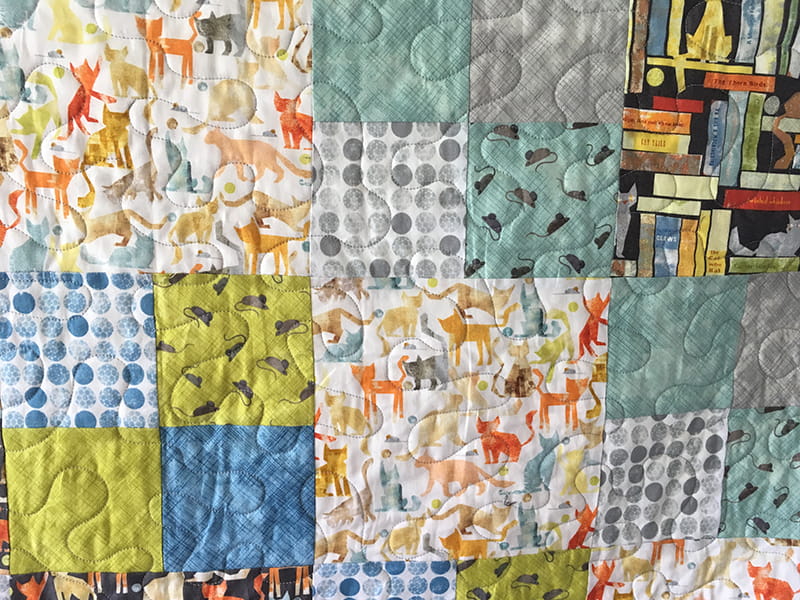
TIP: Another beautiful quilting option is to place one motif in each block. Treat the four-patch blocks as four small squares, quilting each with an individual design, or as 8" blocks like the others in the quilt. The long, wide borders are ideal for feathers and other continuous designs. Remember that The Dream Fabric Frame makes it easy to rotate your quilt 90 degrees for quilting the side borders.
- Trim the backing and batting to match the quilt top.
- Remove the selvages from the binding strips and join them end to end. Press the binding in half lengthwise with wrong sides together. Bind the raw edges of the quilt.
