DIY Christmas Stocking
Take a look at our custom sewn and personalized stockings all ready to stuff with gifts and goodies! Make them yourself and you can easily embroider a name or delightful Disney design while the top band is still flat and goes easily into the hoop. Follow these instructions and you’ll be finished with your stocking before the carolers start singing!
Materials and Supplies:
- Brother Sewing and Embroidery Machine with 4-inch hoop capability for embroidering featured design or lettering
- Visit the Brother iBroidery.com download center
for the design featured here along with many more holiday designs to choose from - SA5815
Brother medium weight adhesive backed tear-away stabilizer to secure trim fabric in hoop - SA520
Brother lightweight water-soluble stabilizer to use as a topping for plush trim fabric - Brother embroidery thread and bobbin thread
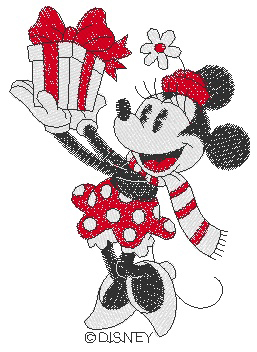
- Featured Design shown below:
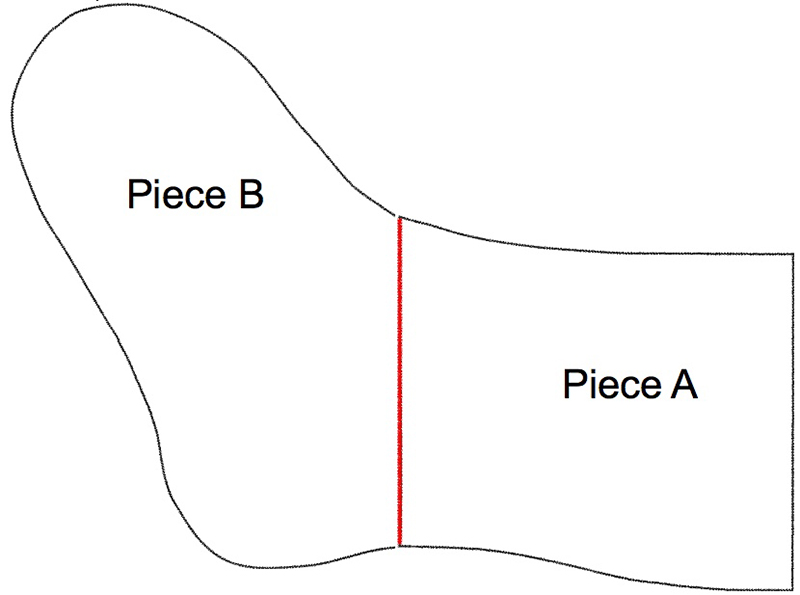
- Printable .pdf pattern for Stocking Pattern Piece A.pdf
and Stocking_Pattern Piece B.pdf
included with these instructions.
Note: Print patterns for pieces A top and B bottom using actual size. Add 1-inch to top edge of piece A. Cut out each piece and tape A and B together, matching red lines.
Fabrics for each one of the featured stockings:
- Two pieces of red dress-weight faux suede measuring 10-inches wide X 16-inches long for outside of stocking.
- Two pieces of white craft felt measuring 10-inches wide X 16-inches long for lining inside of stocking.
- Soft, low pile plush fabric with a mink like surface, one strip of fabric measuring 8-inches wide X 13-inches long for top trim. Apply lightweight fusible interfacing to the wrong side of the strip to add body and keep fabric from stretching.
- One strip of red dress-weight faux suede measuring 2-inches wide X 6-inches long to form loop for hanging.
Tips for Fabric Selection: There are many other fabrics that will work for this project, including polar type fleece, craft felt, and even luxurious fabrics like velvet and velveteen. Pre-quilted fabric or fabric you quilt beforehand is another great choice. Be sure to pre-wash fabric if you plan to launder the finished item. When using plush fabric for the trim add lightweight water-soluble stabilizer as a topping to keep stitches from sinking into the fabric.
There are just a few basic steps for making your personalized stocking:
- Cut pieces
- Embroider top band
- Assemble stocking
To Create Stocking
- Use the completed pattern to cut two pieces (one front and one back) from red faux suede and white craft felt.
- Set up machine for embroidery. Choose a design or program desired lettering for the trim piece, keeping the size to fit within an area measuring approximately 4-inches wide X 3-inches high.
Tips for Design and Lettering: If your design is much higher than 3-inches, you’ll need to increase the size of your band. Remember that the band is folded in half with a ¼-inch seam allowance added for lower edge. When selecting lettering choose a block style for maximum coverage on plush trim. If you are unsure of the results take a few minutes to test on a remnant of fabric prepared in the same manner as your actual trim piece.
- Mark center placement for embroidery on the trim strip, deciding if you need the finished toe to face toward the left or toward the right. Note that green and red lines indicated vertical and horizontal center of trim strip and blue lines indicate center back seam. Red cross mark shows the center point of the design or group of lettering for the finished stocking. See Figure #1a and #1b.
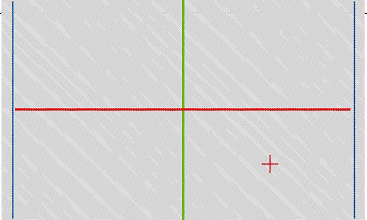 Figure #1a (For toe facing to the left as seen in finished project.)[/caption]
[caption id="attachment_11692" align="aligncenter" width="363"]
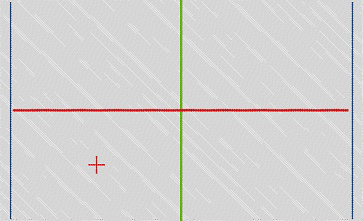 Figure #1b (For alternative stocking with toe facing to the right.)[/caption]
- Hoop adhesive backed stabilizer in 4-inch hoop and align strip so center marking matches center of hoop. Smooth fabric in place to secure it to the stabilizer.
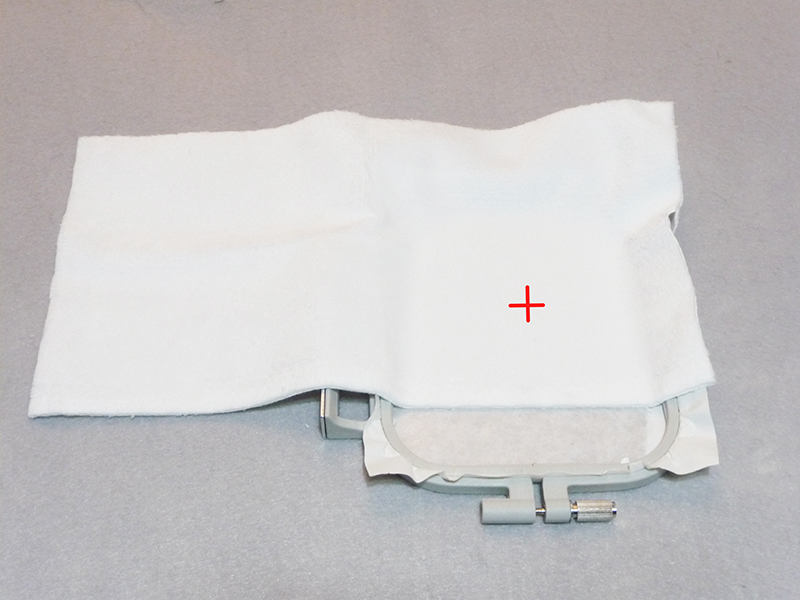
Tip: If your fabric has nap it is a good idea to hoop fabric with nap running down for a more smooth finish for your embroidery.
- Place a generous piece of water-soluble on top to keep stitches from sinking into the pile and embroider your design.
- When embroidery is finished carefully remove all excess stabilizer and gently wash out remaining wash-away topping. Let dry. See examples of design and lettering placement below:

- Set up machine for sewing.
- With wrong sides together, layer each one of the inside felt pieces with each matching fabric piece. Pin and then baste a scant ½-inch from all the outer edges.
- Next, place right sides of stocking pieces together and sew sides and toe using a ½-inch seam.
- Trim seam, clip curves, turn right side out, and press.
- Remove any basting stitches that may show on the outside.
- Match short ends of trim strip with right sides together, and sew using a ½-inch seam allowance.
- Fold strip in half with wrong sides together, forming a circular piece for the upper trim.
- Pin to the top edge of the stocking with right sides together and center back seams matching.
- Sew the seam using a ¼-inch seam allowance.
- Use an overcasting stitch to clean finish the raw edges.
- Press seam lightly using a press cloth as necessary and then flip trim up toward the top and smooth the seam so it lays flat inside the stocking.
- Select the narrow strip cut for loop. Fold and press under ½-inch on each long edge, pressing toward center.
- Fold again with right sides facing and then topstitch close to the folded edge to form a strip measuring approximately ½-inch wide.
- Fold to from a loop and sew to the back seam, placing the raw edges just below the top edge of the trim. You are finished!

