Baby Days Embroidered Burp Cloth
-Brother Sews Blogger

This embroidery project is sure to please anyone with a new baby to care for. Start with an ordinary cloth diaper and turn it into a cute custom burp cloth using your Brother sewing and embroidery machine. Instructions include font edit features to create customized, colorful lettering to add to the featured design. Easy, fast, and fun to make, I hope this idea will inspire you to mix designs and fabric together to embroider and sew a whole batch of practical, customized burp cloths! Are you ready? Let’s go sew!
Materials and Supplies
-Brother sewing and embroidery machine. Note: Machine featured in this project is the Brother NS 1750D. You can use any machine -with 4-inch hoop capability.
-Brother Embroidery Threads and Bobbin Thread for embroidering.
-SA5818 Brother heavy tear-away stabilizer.
-Basic sewing notions, including thread to match fabric.
-Premium prefold 6-ply cloth diaper for burp cloth.
-Fat quarter of cotton fabric or fabric remnants for trim strips. See instructions for measurements.
-Brother Embroidery Design, item Number 200910994 from ibroidery.com. See Figure #1.
Figure #1

Basic steps for creating embroidered burp cloth:
-Create combination design and embroider on one end of diaper.
-Add fabric trim.
-Trim sides with decorative stitches.
Note: Be sure to take a look at the Brother Free Design of the Month project for March. You’ll find detailed instructions to help you create a combination design with added built-in lettering.
Creating Embroidered Burp Cloth:
1. Transfer design to machine. Select the design and touch set. Create a combination design by moving the featured elephant design near the lower corner of the hoop area, and then add customized lettering as follows:
-Choose a bold font for the lettering. See Figure #2.
Figure #2

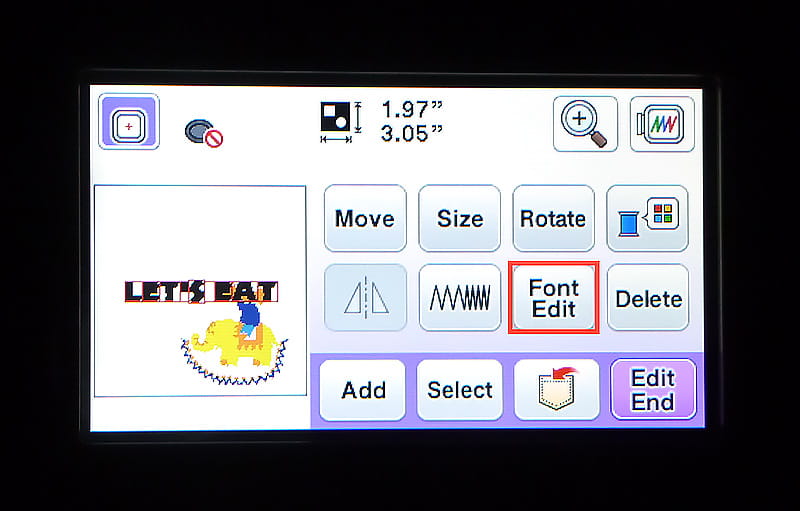
Program the words Let’s Eat using size small with upper-case lettering. Touch set. Next, touch Font Edit key. See Figure #3a and Figure #3b
Figure #3a
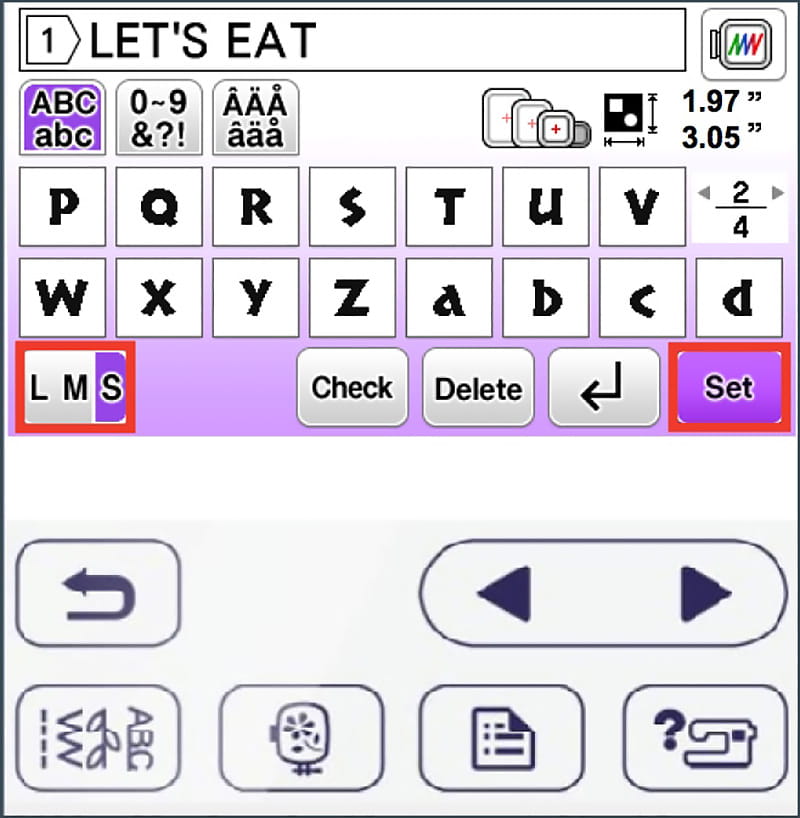
Figure #3b
-Touch key to change spacing. See Figure #4a.
Figure #4a
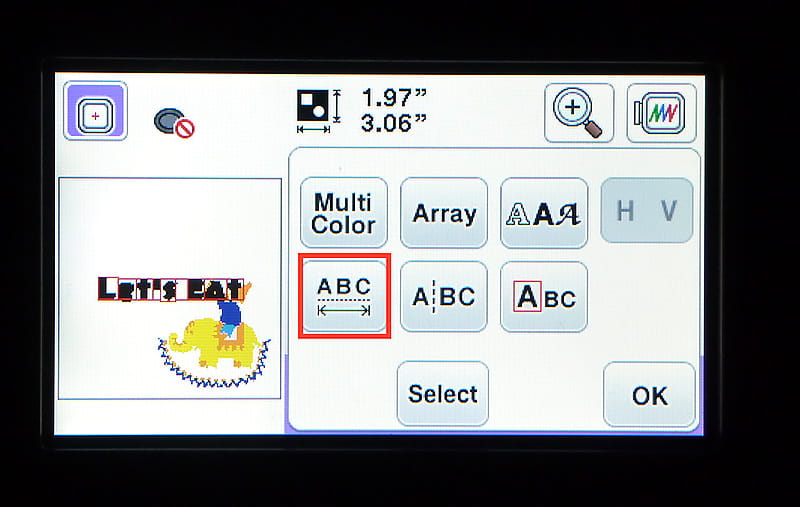
-Use spacing key to push letters closer together, tapping key three times. Touch OK to finish changing spacing. See Figure #4b.
Figure #4b
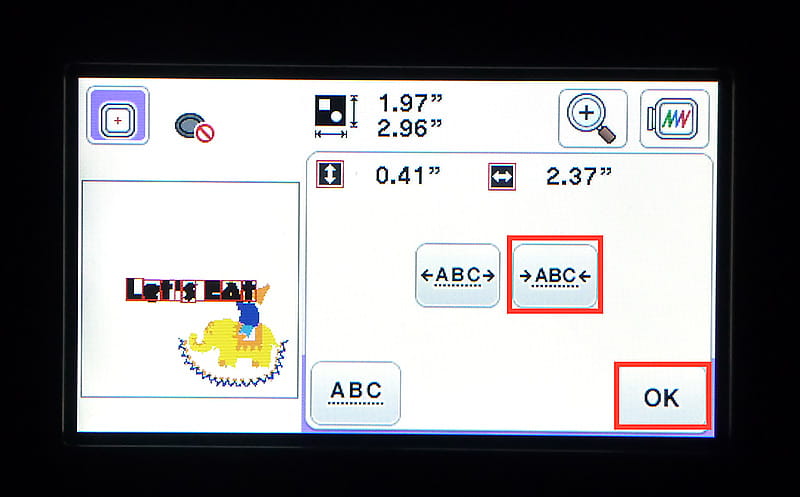
Tip: I like to push the letters closer together when using a sharp curve like the lettering featured in this project. This keeps the curved letters from looking too far apart.
-Touch OK again to return to edit mode. Touch size key. Increase size of lettering to equal approximately .55” high. Touch OK to return to edit screen. See Figure #5a and Figure #5b.
Figure #5a
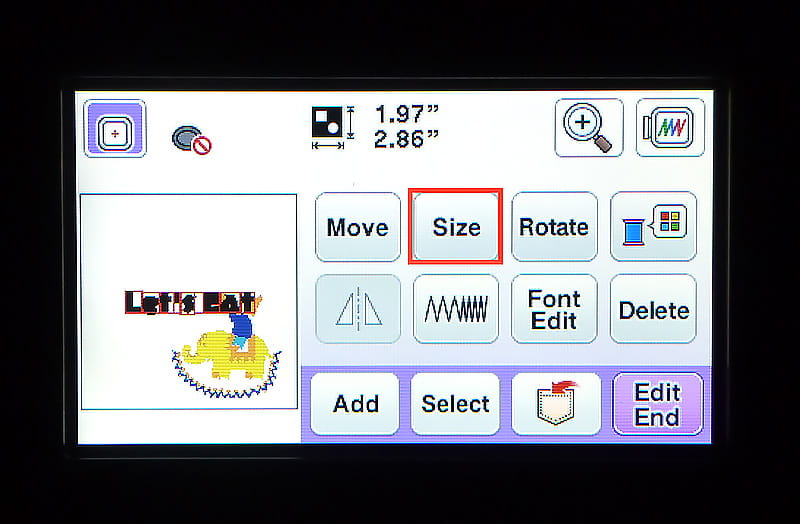
Figure #5b
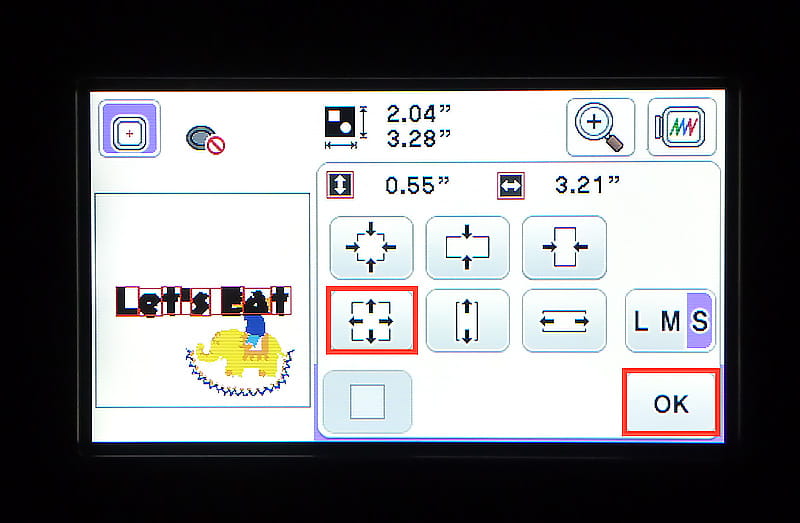
-Select Font Edit key. To add color stops for each individual letter, touch the Multi-Color key. Next, touch Array key. See Figure #6.
Figure #6

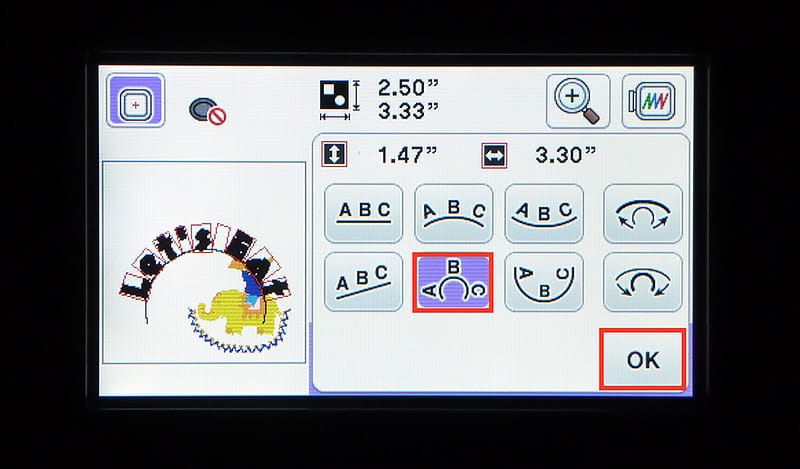
-Next, select circle curve key to make lettering swirl around design. Touch OK and then OK again to return to edit screen. See Figure #7.
Figure #7
Toggle between Rotate and Move keys, selecting and moving elements until you’re pleased with the layout. Touch OK. See Figure #8a, and Figure #8b.
Figure #8a
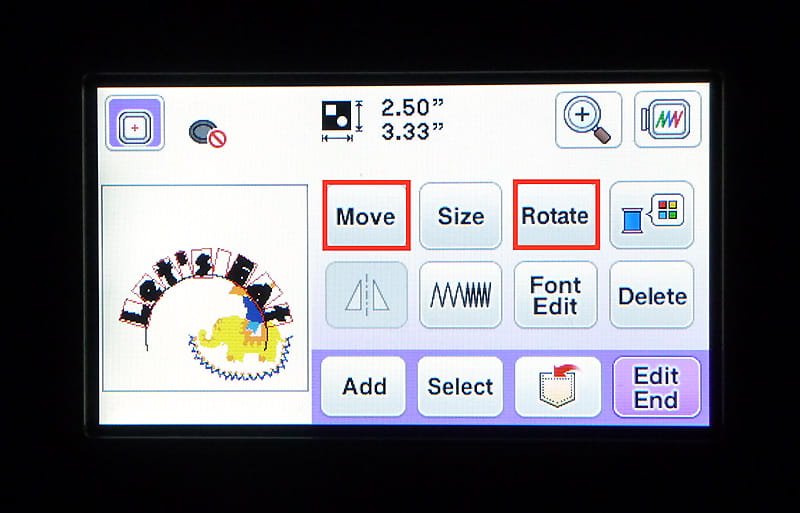
Figure #8b
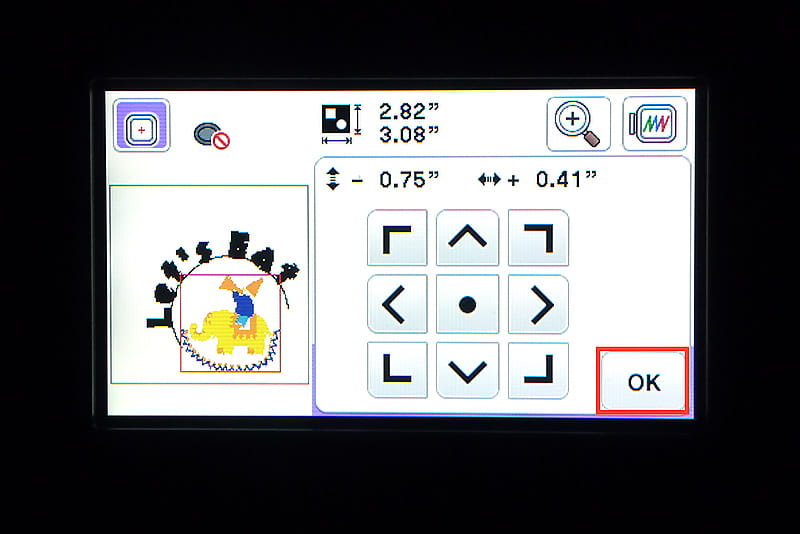
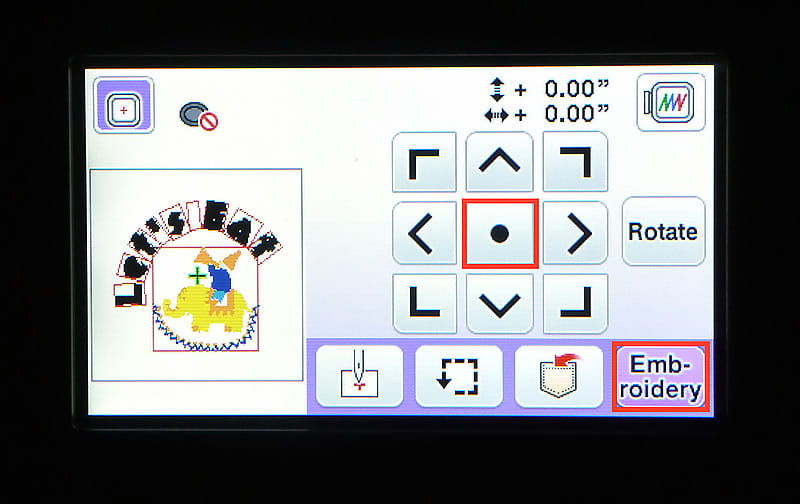
-End editing. Center combination on the screen, then touch Embroidery. See Figure #9.
Figure #9
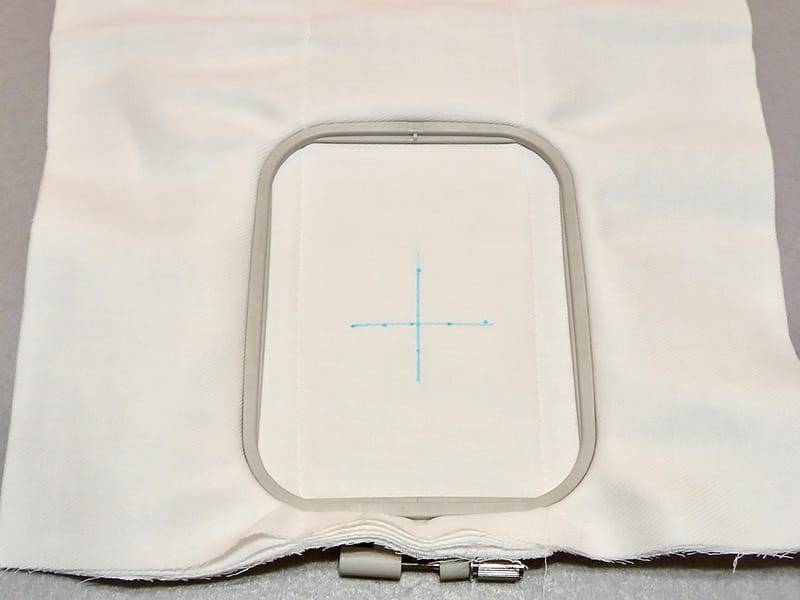
2. Mark center alignment for combination design 4-inches up from lower edge of diaper. Center in 4-inch hoop. See Figure #10.
Figure #10
-Slip a piece of heavy tear-away underneath hoop and embroider the design with the desired colors. Remove tear-away stabilizer. Tip: Use a pair of serger tweezers to remove small bits of stabilizer. See Figure #11.
Figure #11
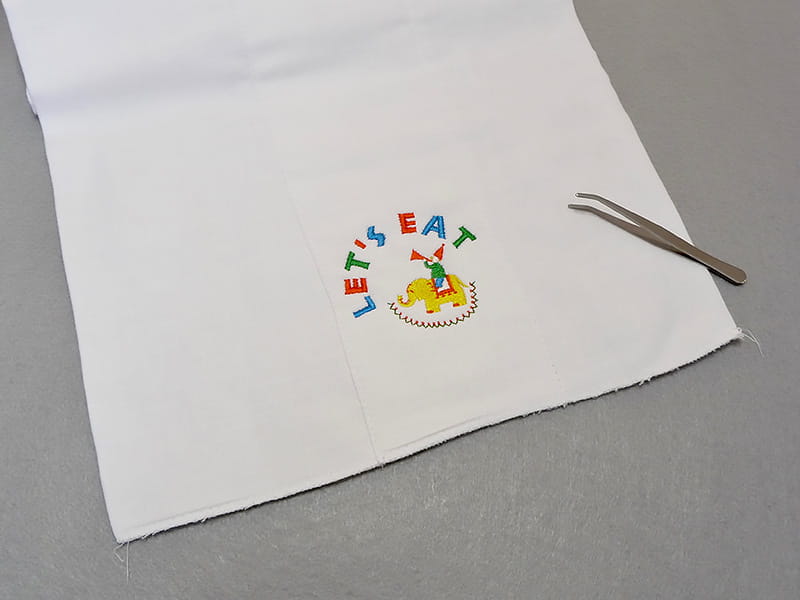
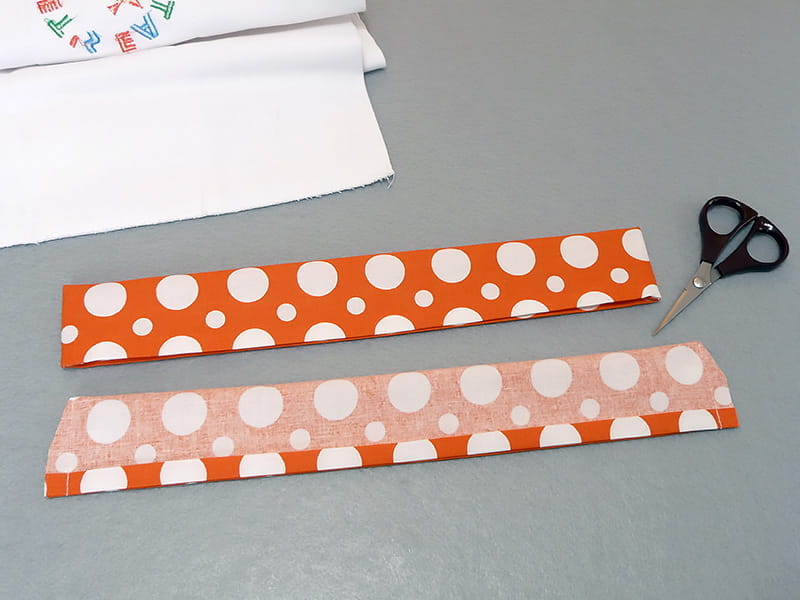
3. To determine the length of trim strips, measure width of diaper along top and bottom edge, and add one inch to the measurement. Edge measurements may or may not be even. Use your length measurements to cut two 5-inch wide strips of fabric. Fold and press under ½-inch along each long raw edge. See Figure #12a.
Figure #12a
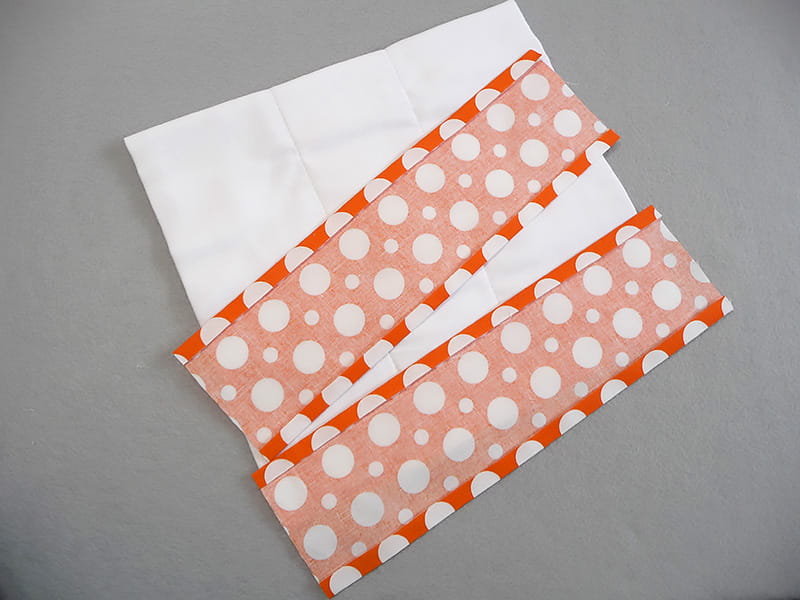
Fold strips in half lengthwise, matching folded edges. Pin short ends. See Figure #12b.
Figure #12b
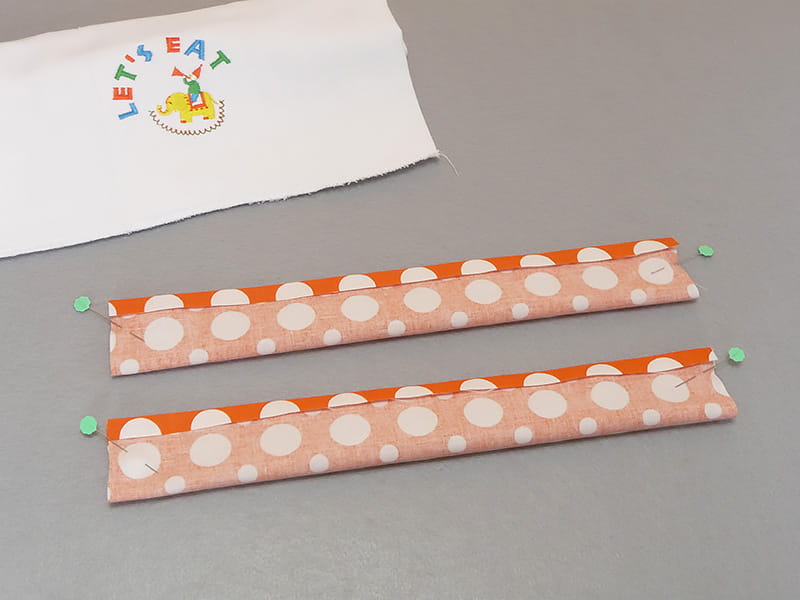
4. Set up machine for sewing with standard presser foot. Sew short ends using a 3/8-inch seam allowance. See Figure #13.
Figure #13
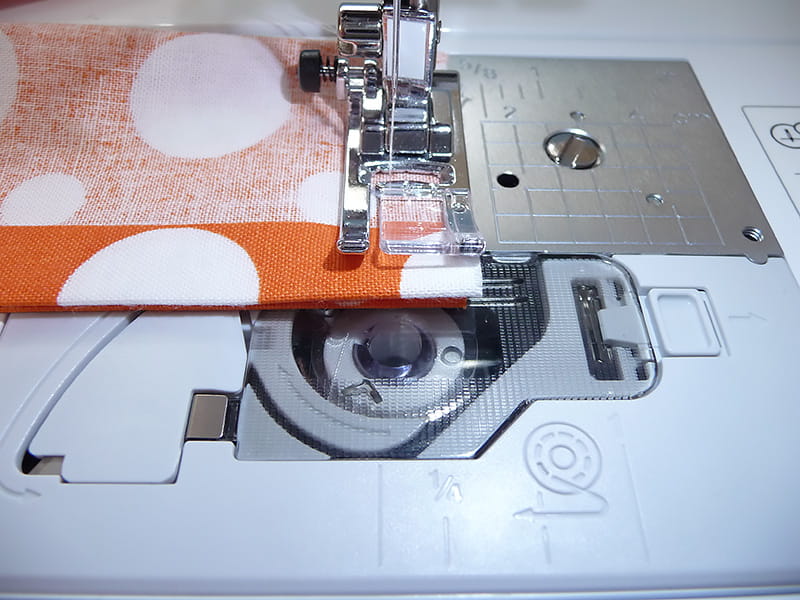
5. Clip corners, turn right side out, and press. See Figure #14.
Figure #14
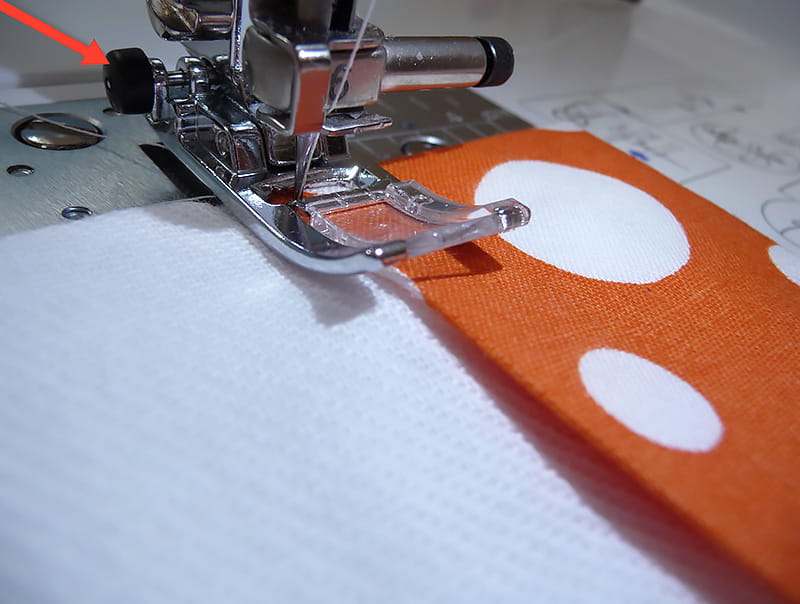
6. Slip strips over the ends of the diaper, tucking edge up to the fold line of the strip. Topstitch along the edge, catching both long edges of the strip. See Figure #15.
Tip: Use black balancing button at the beginning of stitching, holding the foot flat and pressing on the button until it locks. See red arrow in photo below. This keeps the foot flat when starting in a thick area. Button will release automatically when fabric levels out.
Figure #15
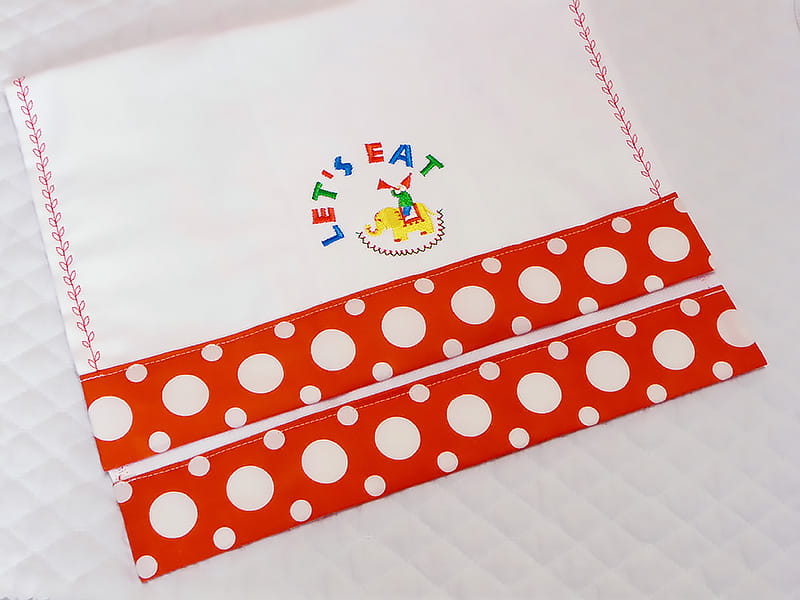
7. Thread machine with embroidery thread and change to presser foot N. Select an open style decorative stitch and sew along each edge of diaper for a decorative accent. You are finished! See Figure #16.
Figure #16
Interested in making a custom baby bottle cover to coordinate with the burp cloth? Check out this short video from the Brother Sponsored It’s Sew Easy TV show. You’ll find it on my YouTube channel here


