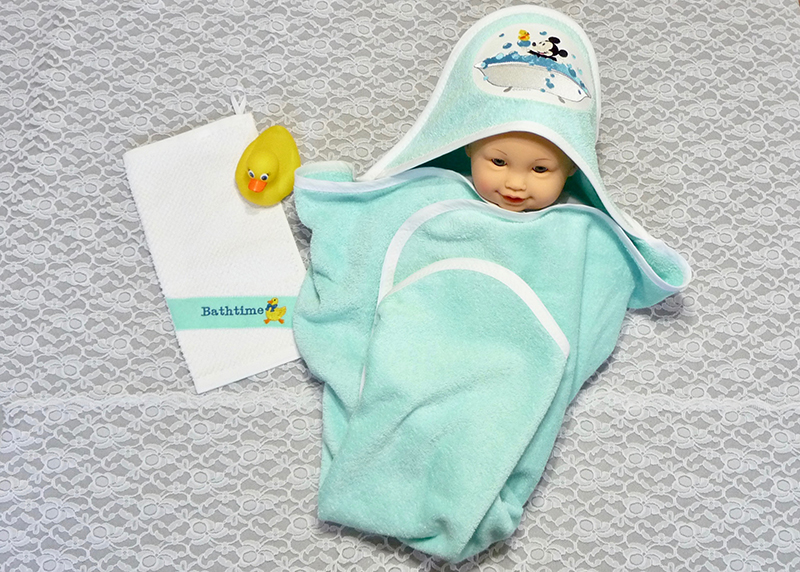
Foot of the Month: Embroidered Bath Wrap
What could be cuter than a baby in a bath wrap with embroidery added to the hood? This wrap is finished with pre-purchased bias binding and attached using our featured foot of the month, the MuVit Dual Feed foot along with the Open Toe foot attachment. Add a few items such as a bath mitt and rubber duckie for a great gift set!
Materials and Supplies
- Brother Sewing and Embroidery machine.
Note you will need a 5X7 hoop to stitch the featured design. - SA148 5mm Brother Cording Foot
or SA110 7mm Brother Cording Foot. - Brother MuVit Dual Feed Foot
for sewing binding, along with SA195, the Open Toe Foot
for MuVit is featured in this project. You can use a Walking Foot
as an alternative. - Brother Embroidery and bobbin thread for embroidering.
- SA5810 Brother Pacesetter
medium weight tear-away stabilizer. - Embroidery design to fit hood of bath wrap.
- Embroidery needle.
- Basic sewing notions including thread to match binding, clips or pins for securing fabric layers, and low tack tape.
- Machine needle for sewing.
- Baby Mickey in the Bathtub
from the Brother iBroidery.com
design download site is the embroidery design featured in this project. See Figure #1.
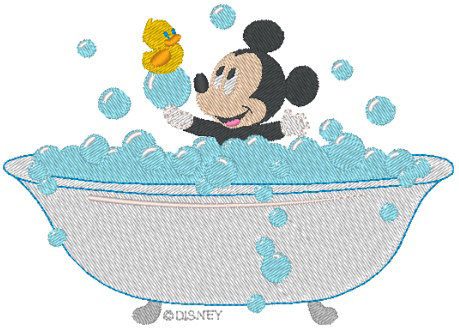 Figure #1[/caption]
Fabric and Notions for Bath Wrap
- Two packages of extra wide double fold bias tape for finishing edge of hood and baby wrap.
Note: You will need approximately 4 1/2 yards of this tape. In most cases you will see this size of tape sold in 3-yard packages.
- One 30-inch X 30-inch square of terry cloth for wrap.
- To determine size for hood, begin by drawing a 12-inch square, fold in half to form a triangle, and cut one triangular piece for hood.
- One piece of quilt quality white cotton cut large enough to amply fit the hoop. Fuse medium weight interfacing to the wrong side.
- Lightweight tricot type interfacing cut large enough to cover fabric and design inside the hoop.
Note: Bath wrap is made from 16-ounce Turkish terry, a product of Shannon Fabrics. Featured color is Aruba. Disclaimer: Brother International Corporation makes no representations or warranties regarding such products.
Instructions for Creating Bath Wrap
- For bath wrap, round off all four corners of 30-inch square using a small plate or a similar object. For hood, round off top of triangle to match edge of wrap.
- To create embroidered appliqué for hood, add an oval frame shape to surround design, selecting triple straight stitch option. See Figure #2.
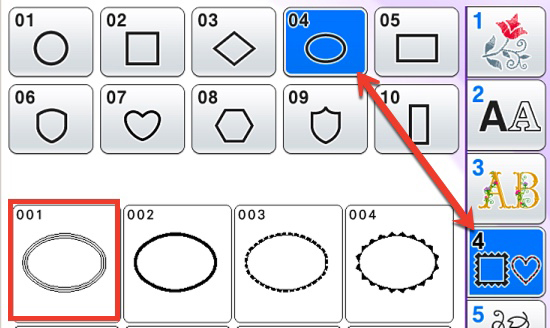 Figure #2[/caption]
- Size the frame to fit around your design. Hoop interfaced fabric layered with tear away stabilizer. Embroider design. See Figure #3.
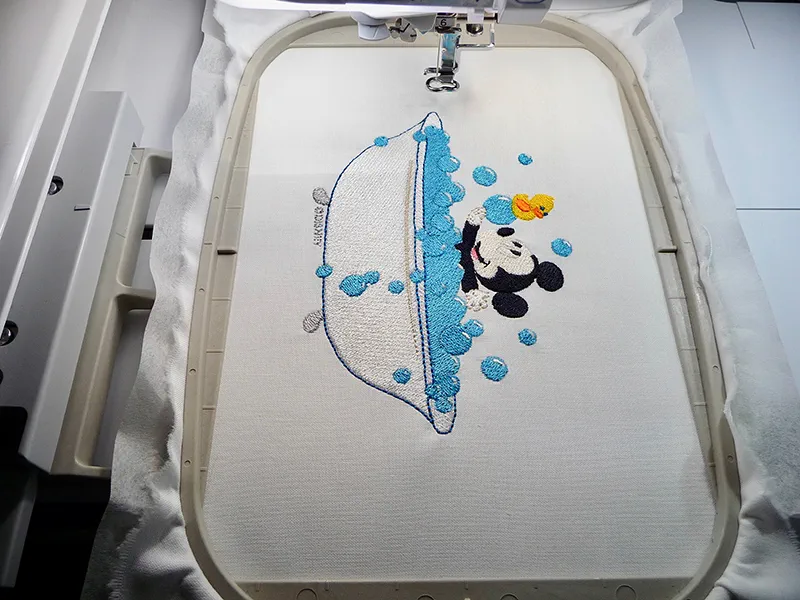 Figure #3[/caption]
- Cover the design with a layer of fusible tricot, having the fusible glue side of the interfacing facing up. Tape in place to keep it taught and smooth. Stitch oval. See Figure #4.
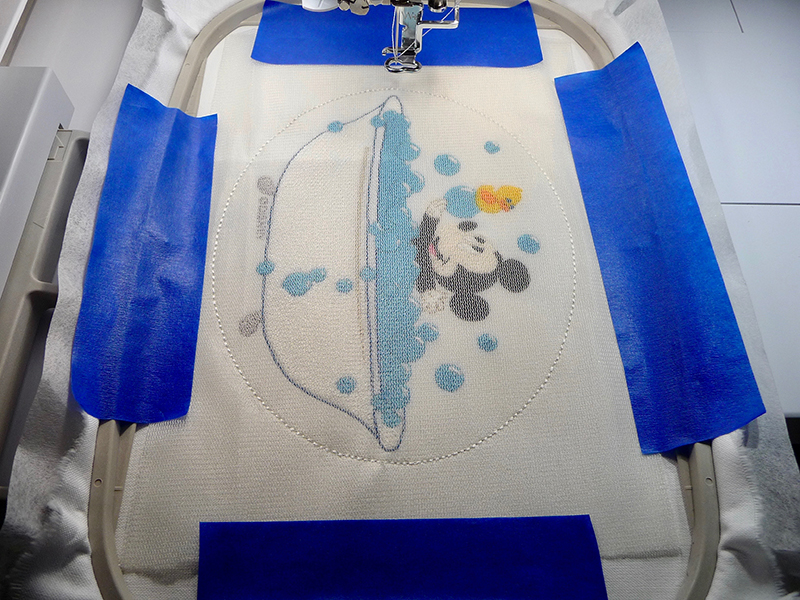 Figure #4[/caption]
- Remove from hoop and trim outside the oval leaving a seam allowance of approximately 1/8-inch. On the wrong side cut through the tricot layer only, cutting both vertically and horizontally to make an opening for turning the piece right side out. See Figure #5.
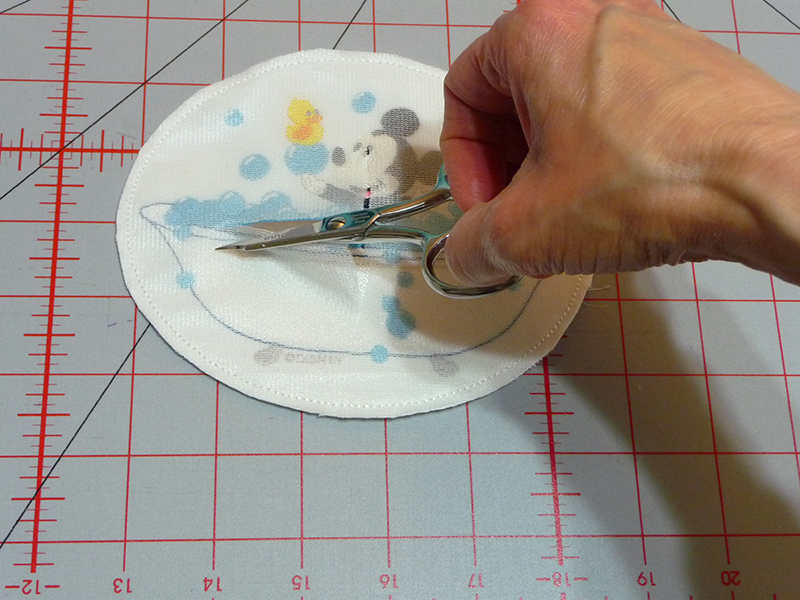 Figure #5[/caption]
- Carefully press the piece so the outer edges are neatly finished, and the wrong side is completely fused. See right and wrong sides of appliqué below:
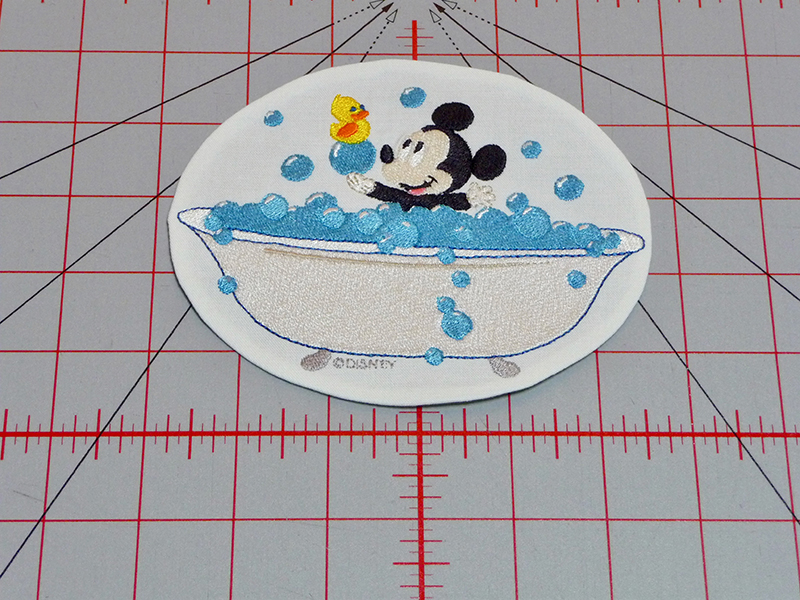 Right Side[/caption]
[caption id="attachment_14555" align="aligncenter" width="800"]
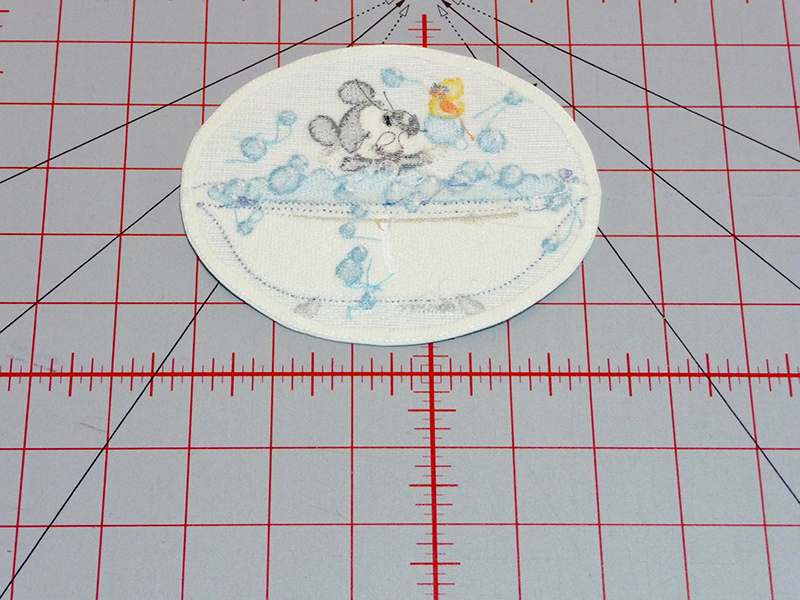 Wrong Side[/caption]
- Set machine for sewing. Pin appliqué in center of hood and attach using a narrow zigzag stitch. See Figure #6.
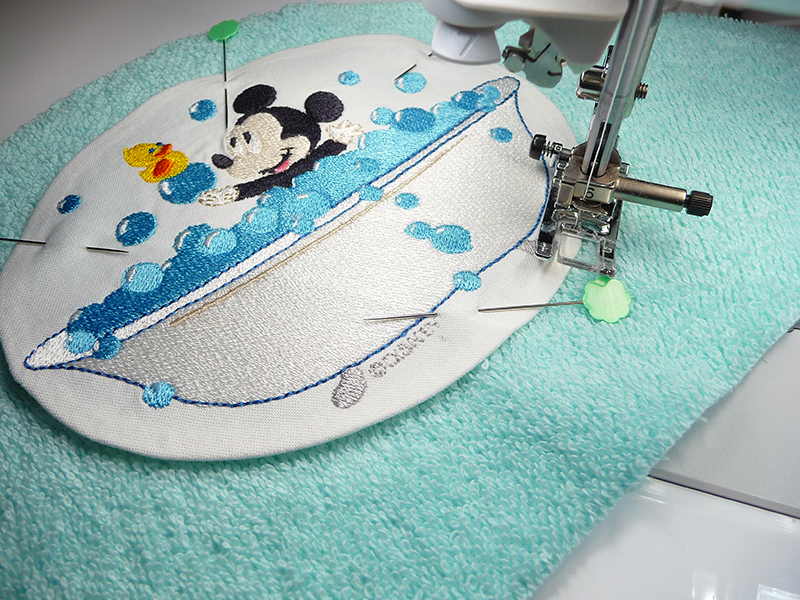 Figure #6[/caption]
- Prepare bias by lightly pressing both pieces flat, taking care that you don't totally eliminate all creases.
Tip: Note that this type of bias is wider on one half and is not folded in the exact center. It's important to sew the bias to the fabric edge so that the wider side edge is turned to the bottom side when stitching the final step. This makes it easy to catch all of the bias edge during the final top stitching.
- Set up machine for sewing with the MuVit Dual Feed foot. Begin binding the raw edges by finishing the long edge of the hood piece. Follow the steps outlined below for stitching all of bias binding:
- Use a straight stitch to sew narrow half of binding to raw edge following the crease line. See Figure #7a.
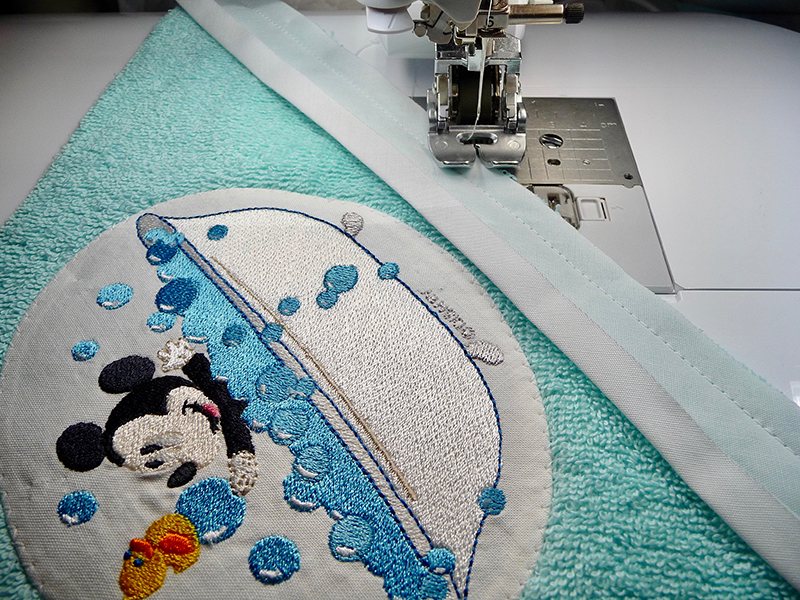 Figure #7a[/caption]
- Turn binding to bottom side, press lightly and pin or clip to hold temporarily. See Figure #7b.
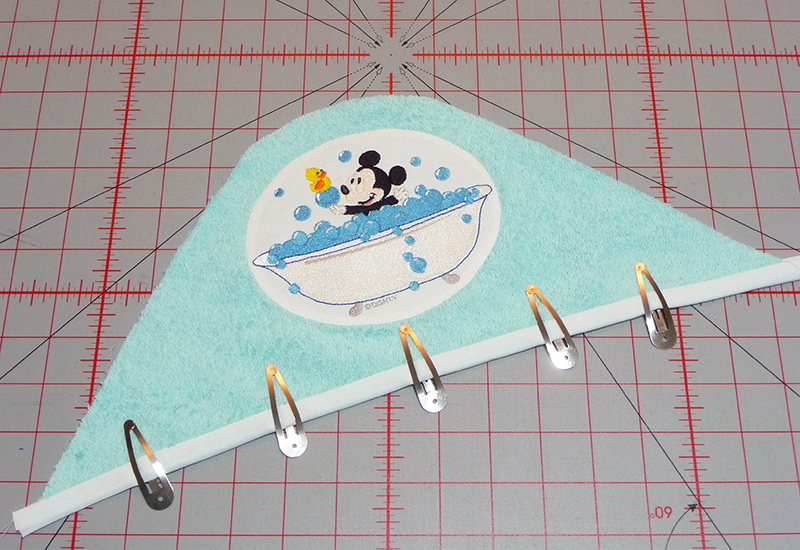 Figure #7b[/caption]
- Switch to open toe for better visibility and top stitch from the right side, using a zigzag stitch to fully catch binding on the bottom side. See Figure #7c.
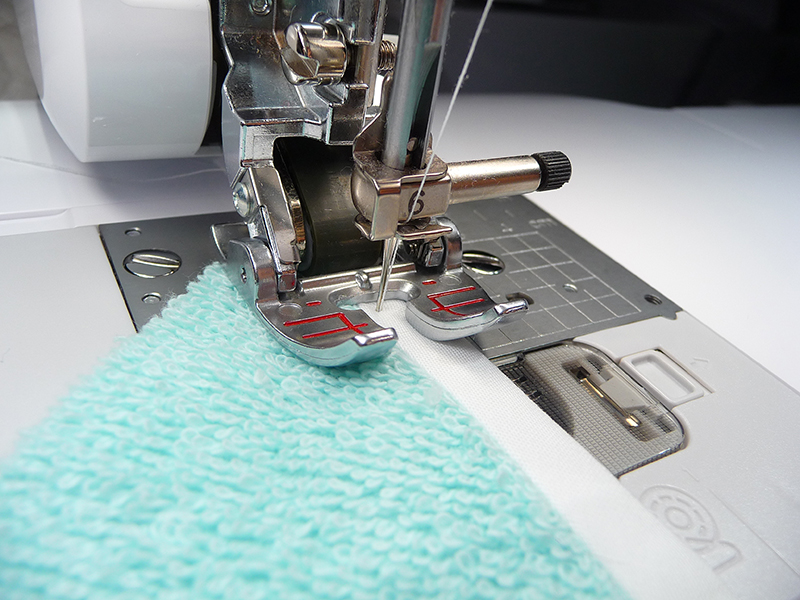 Figure #7c[/caption]
- Pin hood in place along one end of the bath wrap. Before sewing the remaining binding, you'll need to sew the two pieces together to make one long piece.
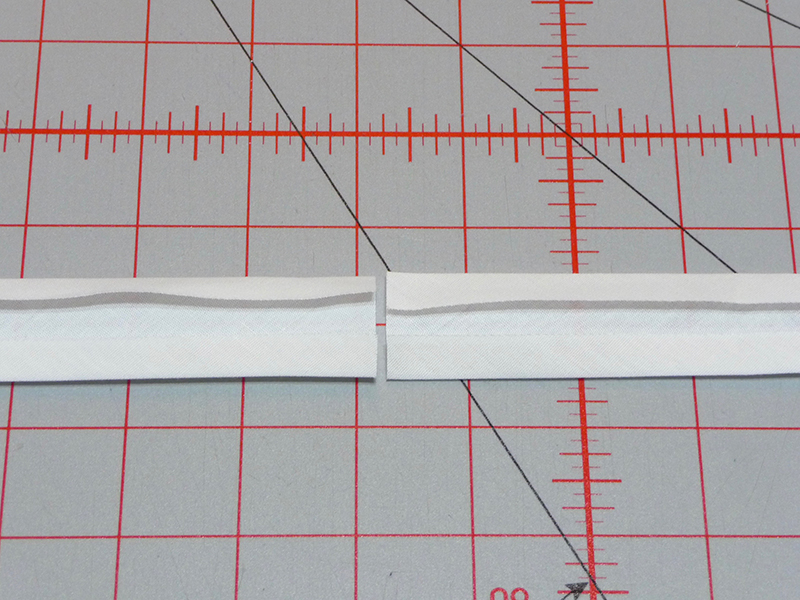
- It's best to sew a diagonal seam by placing pieces right sides together at a right angle, making sure folded edges match with wider halves together.
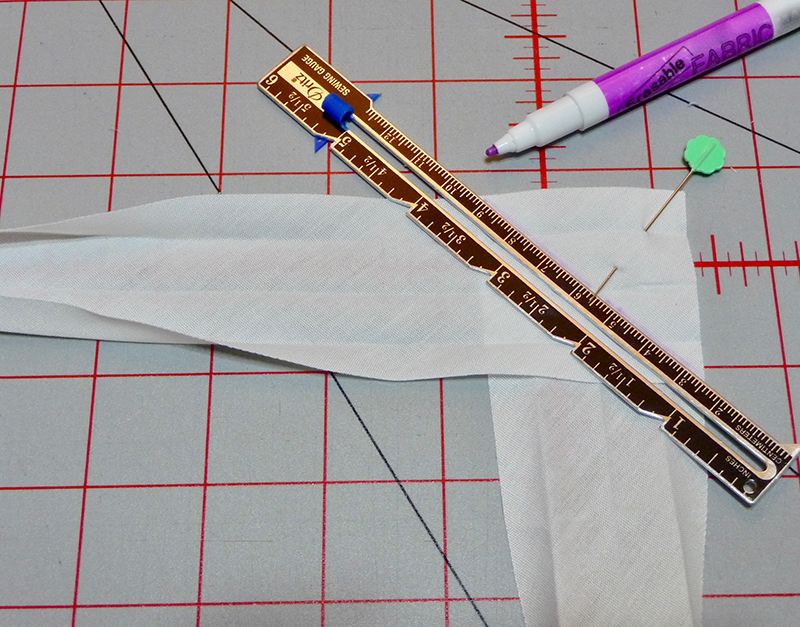
- Draw a diagonal stitching line from end to end and sew.
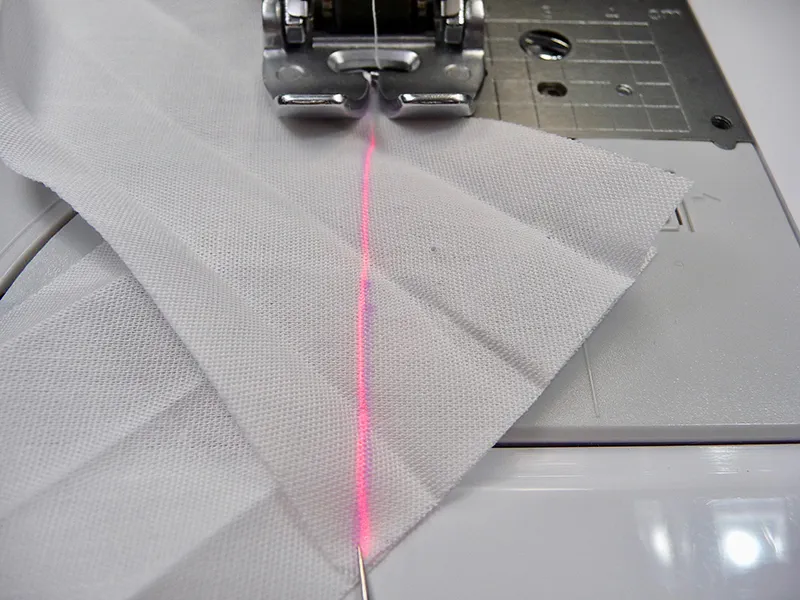
- Trim and then press seam open.
- Starting along a straight edge pin narrow half of binding to wrap and continue to pin binding all around until you reach a point where you are a few inches from where you started.
Tip: For binding to stay flat when it is turned under you will want to slightly ease it in along each curved edge. See Figure #8.
[caption id="attachment_14548" align="aligncenter" width="800"]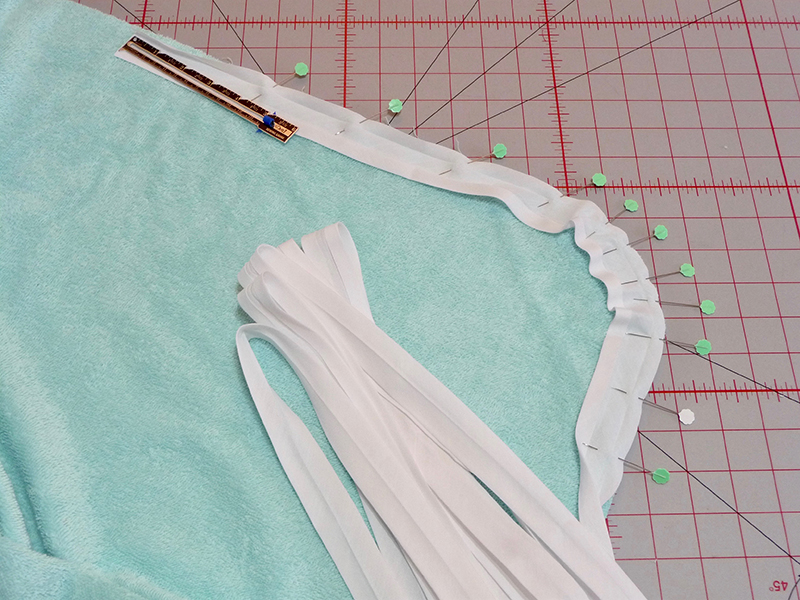 Figure #8[/caption]
- Binding will actually turn out to a wider area along the curves and easing prevents binding from cupping under when finished.
- Stitch binding along crease as you did previously, taking care to leave the first few inches unstitched. To finish binding with a neat overlap, stop with each end free from stitching and fold on the diagonal so each edge meets the other. See Figure #9.
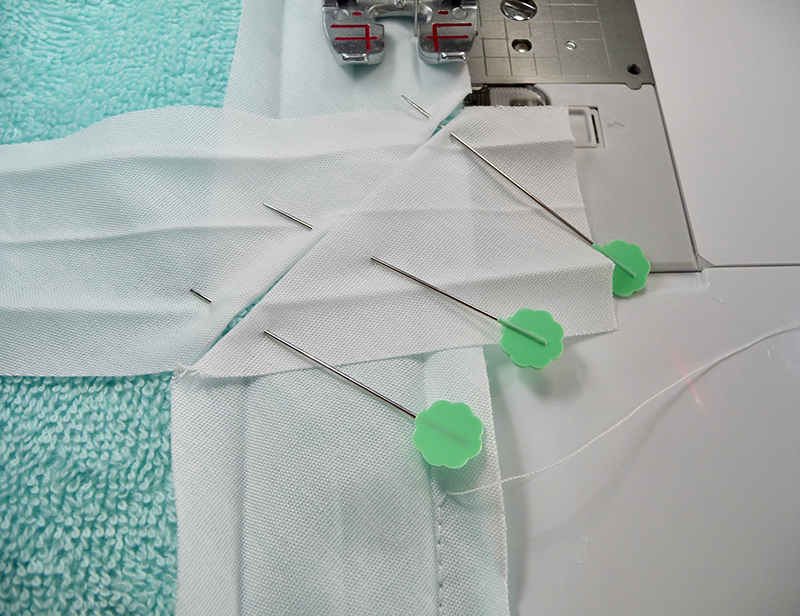 Figure #9[/caption]
- Mark a seam line, place right sides together, and then stitch along the line. See Figure #10.
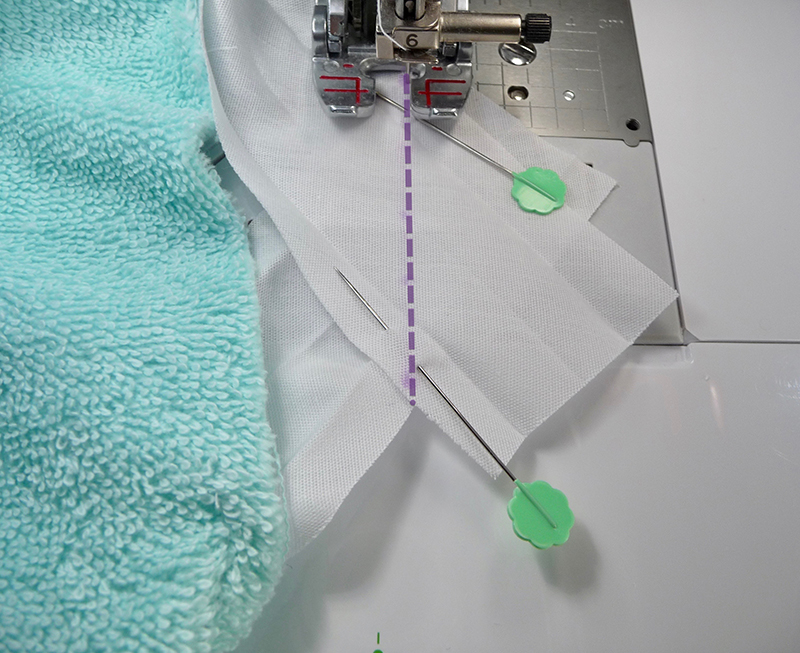 Figure #10[/caption]
- Remove markings, trim, and press. Finish stitching along the crease. See Figure #11.
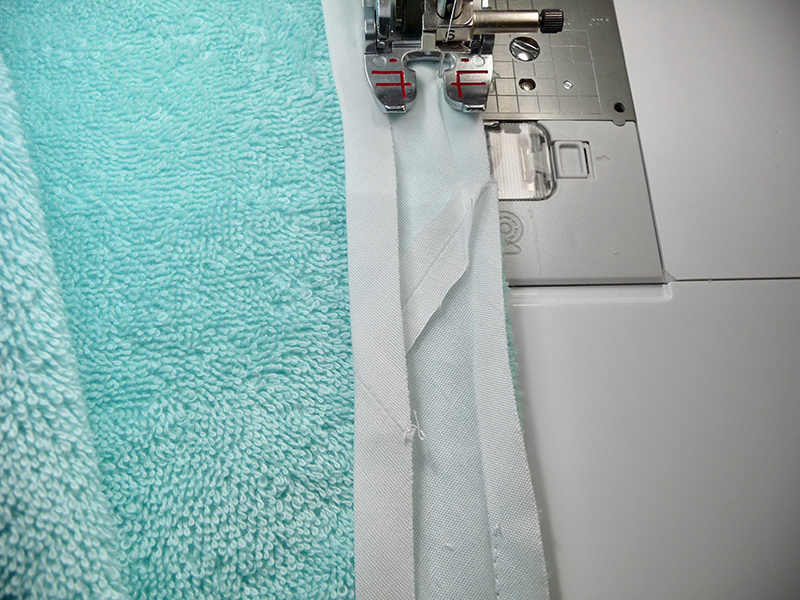 Figure #11[/caption]
- Turn binding to bottom side and finish following the steps outlined in Step 9 of these instructions.
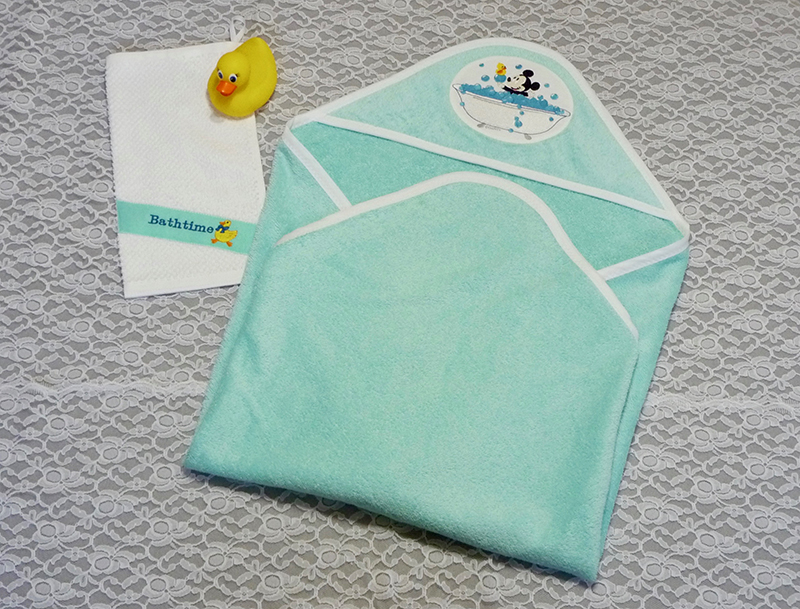
You are finished! Enjoy!
