Foot of the Month: The Wonderful Pearls and Sequins Foot
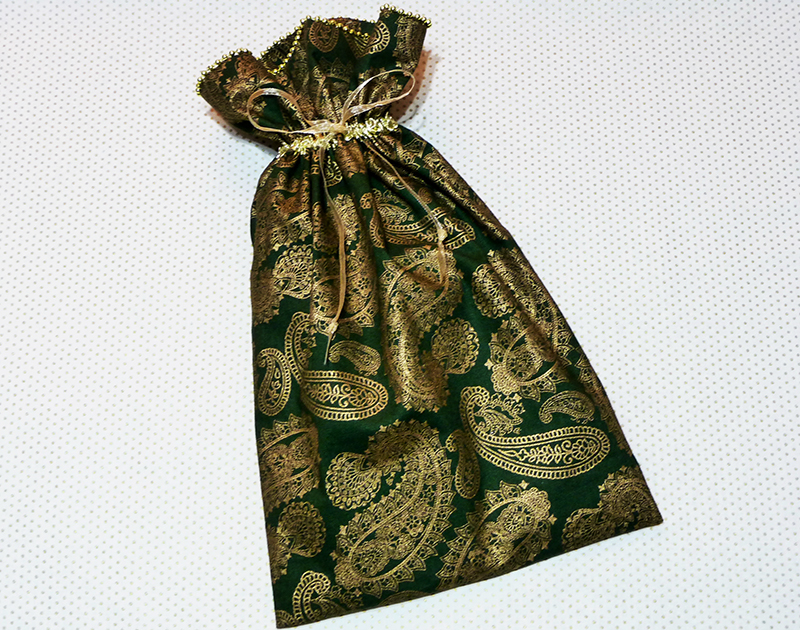
Note: Bag measures approximately 15-inches from top to bottom and 9-inches wide when open. It’s true! Good things come in pretty packages! You can make your own gorgeous gift bag with your Brother sewing machine, a fat quarter of fabric, and a few trims. Our featured Foot of the Month, the Pearls and Sequins foot makes it super easy to apply a string of gold pearls to the top edge, setting this bag apart from an ordinary store-bought gift bag. Are you ready? Let’s go sew!
Materials and Supplies
- Brother Sewing Machine.
Note: I used the Brother NS1750D
to create this bag. Any other Brother zig zag model machine can be used in its place. - SA184
Edge Joining Foot - SA150
Pearls and Sequins Foot
used for sewing bias trim and pearls in place. Note: As an alternative you can use standard sewing thread.
Basic Sewing Notions
- Thread to match fabric and a small pin or tool for pulling narrow ribbon through casing.
- Craft scissors for cutting pearls.
- Pinking shears or a rotary pinking blade and a rotary mat for clean finishing raw edges inside bag.
Fabric and materials for table runner:
- One fat quarter of fabric. Note: A fat quarter is a rectangle measuring an average of 18-inches long X 22-inches wide.
- Single fold ½-inch wide gold metallic bias tape
- 1 yard of ¼-inch wide gold ribbon
- 4-5mm gold craft pearls on a string
Instructions for Creating Gift Bag
1. Gather supplies for gift bag. See Figure #1. [caption id="attachment_22684" align="aligncenter" width="800"] Figure #1[/caption]
2. Trim selvedge edge off fabric and make sure all edges are even. Place the two 18-inch edges right sides together and sew a center back seam using a 5/8-inch seam allowance. See Figure #2.
[caption id="attachment_22685" align="aligncenter" width="800"]
 Figure #2[/caption]
3. Pink the edges and press seam open. Fold bag so seam is in the center of the back. Sew a bottom seam using a 5/8-inch seam allowance. See Figure #3.
[caption id="attachment_22686" align="aligncenter" width="800"]
 Figure #3[/caption]
4. Pink edges of bottom seam. Turn and press under a double fold 1-inch hem at the top of the bag. See Figure #4.
[caption id="attachment_22687" align="aligncenter" width="800"]
 Figure #4[/caption]
Note: Use a straight stitch to sew hem at top of bag.
5. To create a casing for the ribbon, cut a piece of bias to fit around top edge of bag with1/2-inch turned under at each end. Pin bias 3-inches from top edge of bag, with open ends centered on the front of the bag.
Tip: Place a piece of cardboard between the layers so you can easily pin the bias to a single layer of fabric. See Figure #5.
[caption id="attachment_22688" align="aligncenter" width="800"]
 Figure #5[/caption]
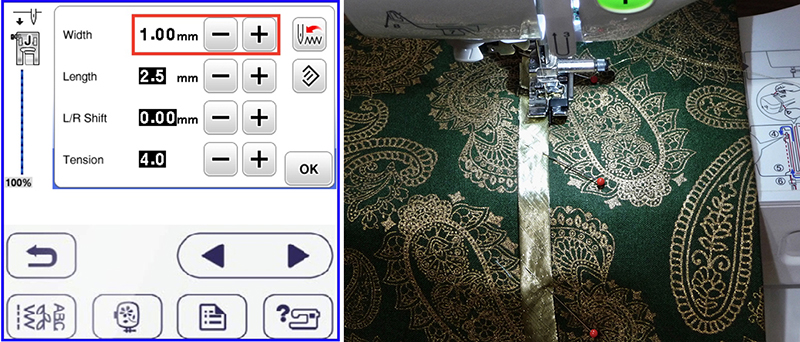
6. Attach the Edge Joining Foot and set machine for free arm sewing. To stitch right-hand side of bias to bag select a straight stitch with needle positioned close to the edge. Sew close to edge of bias to attach to bag, with guide on foot directly along the edge of the bias. See examples below with needle position set for 1.0.
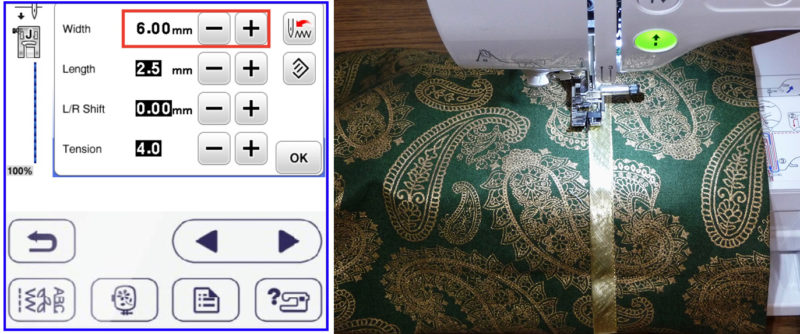
 7. Change the needle position to 6.0 for the left-hand side of the bias and attach to bag. See examples below:
 8. Use pin or other tool to string ribbon through casing from end to end. Tie ribbon ends in a knot. See Figure #6a and #6b.
[caption id="attachment_22689" align="aligncenter" width="800"]
 Figure #6a[/caption]
[caption id="attachment_22690" align="aligncenter" width="800"]
 Figure #6b[/caption]
9. Change to Pearls and Sequins Foot and select a zig zag stitch that will skip over the pearls. See stitch and settings below:
 10. Slide string of pearls under the foot, leaving 1-inch of pearls at the back of the foot. Beginning at the center back seam, position pearls along top edge of bag and attach by zig zagging over the pearls as you feed them along the edge of the fabric. Take care to gently pull pearls from behind the foot, keeping them flowing smoothly along the top edge. See Figure #7.
[caption id="attachment_22691" align="aligncenter" width="800"]
 Figure #7[/caption]
Stop just before you reach the center back seam, trim pearls so they meet, and backstitch to secure threads. See Figure #8.
[caption id="attachment_22692" align="aligncenter" width="800"]
 Figure #8[/caption]
You are finished and your gift bag is ready to fill with something special. Enjoy!


