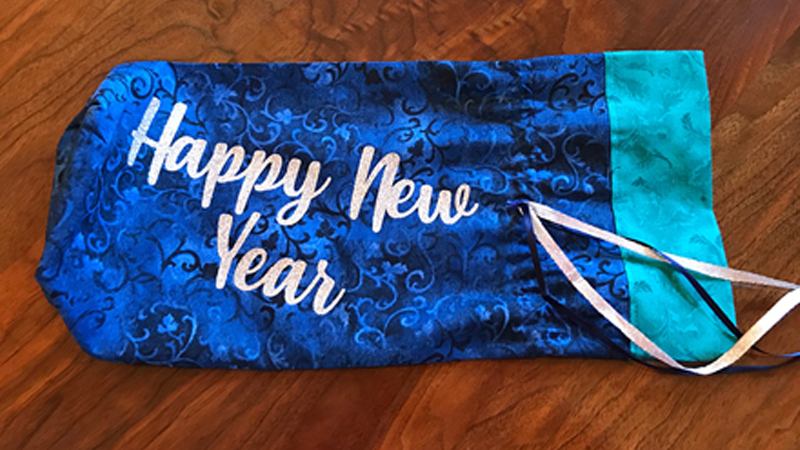
Ultimate New Year's Eve Sew A Long: Holiday Gift Bags
 One of those things that I always leave to the last minute is a gift for the hostess of any functions that I attend. It seems to get lost in the rush to do everything else. This gift bag is quick and easy to create. It is also versatile in that you can change the dimensions and make it for any gift that you like. I am stepping outside of the usual blogs that I write in that this time I am doing most of the construction of the bag on my Brother 1034D Serger.
This way I have finished seams and don’t have to worry about the bag raveling on the inside. If you don’t have a serger, you can always construct this with your regular sewing machine. If you want finished edges, go back over the seams with a light zigzag stitch to finish them off.
Materials:
- 4/3 thread serger – setup for 4 thread
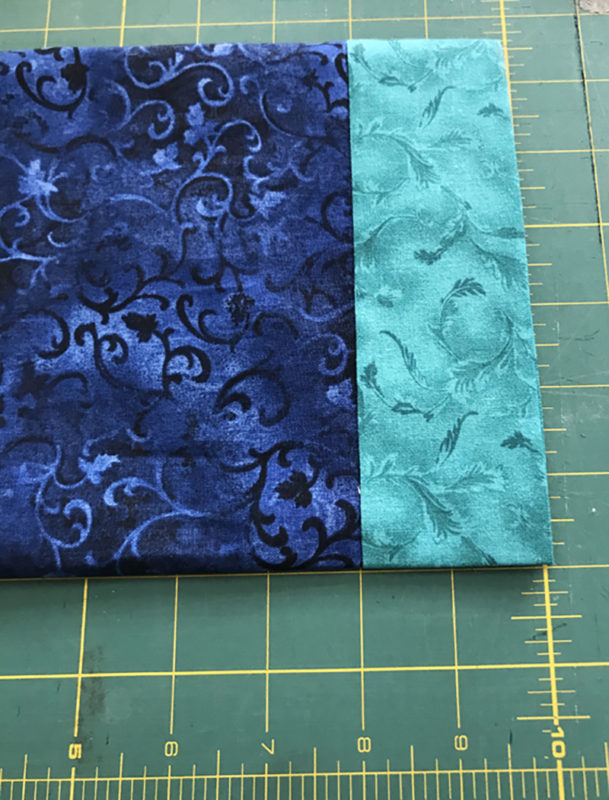
- 1 piece of fabric for body of bag 14 x 14 inches
- 1 contrasting piece of fabric 8 x 14 inches
- 1 sheet Silver Glitter HTV (CATG01)
- Iron
- Sewing thread
- Ribbon to coordinate – 2 colors 1yd each (to match the fabrics - you can use one color if you prefer)
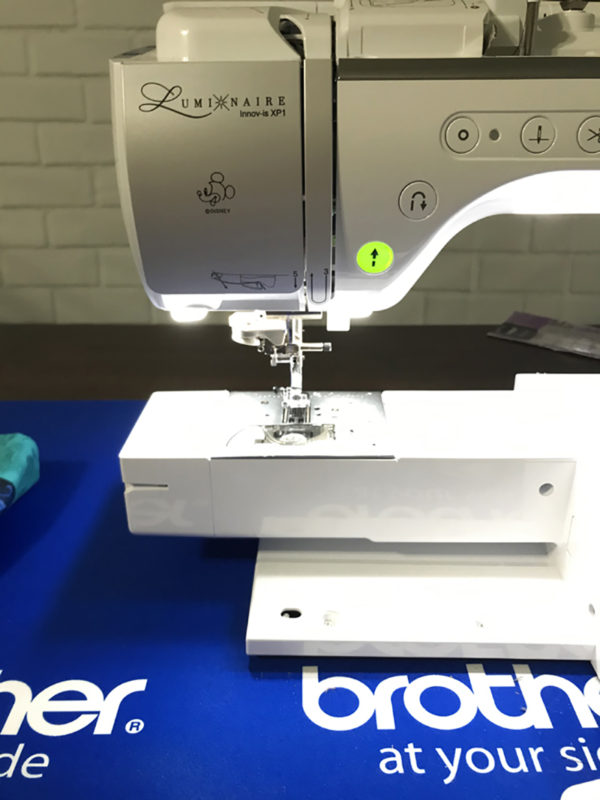
- Sewing machine (I used my Brother Luminaire
and 1034D Serger
for this project). - ScanNCut machine
- ScanNCut Standard Mat
- ScanNCut Black Auto Blade
- Marking chalk or pen
Let's start sewing!
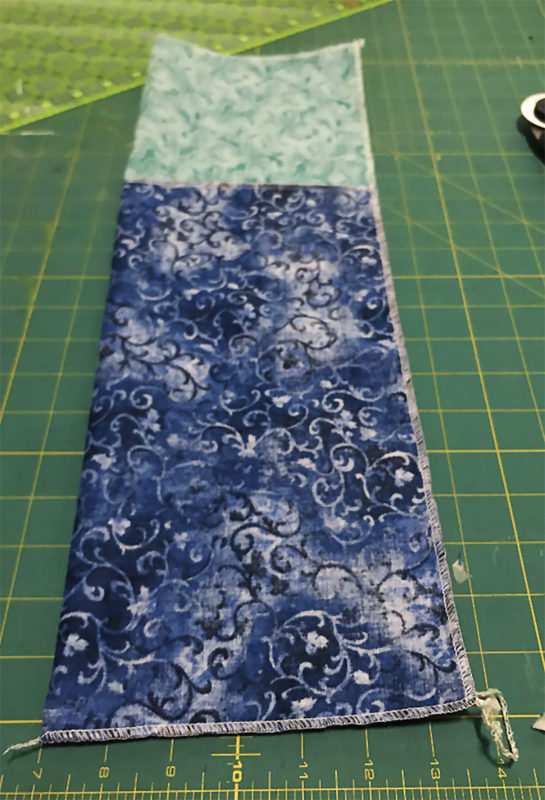
• Cut your fabric and place the top to the bottom right sides together and then serge them together across the 14-inch side.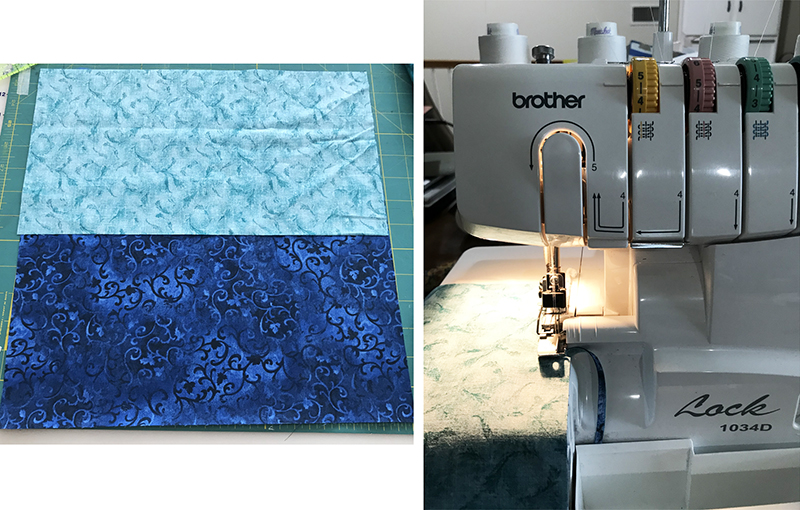 • Serge the top of the shorter fabric. Press the seam and Mark in 3.75 inches from the side of the bag, 1½ inches down.
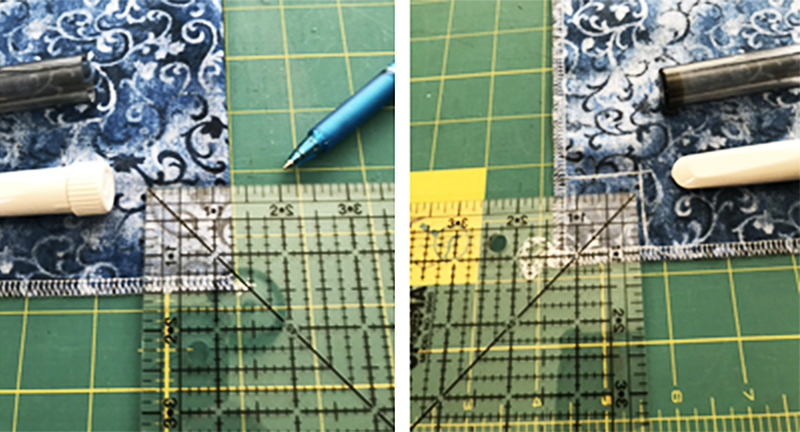
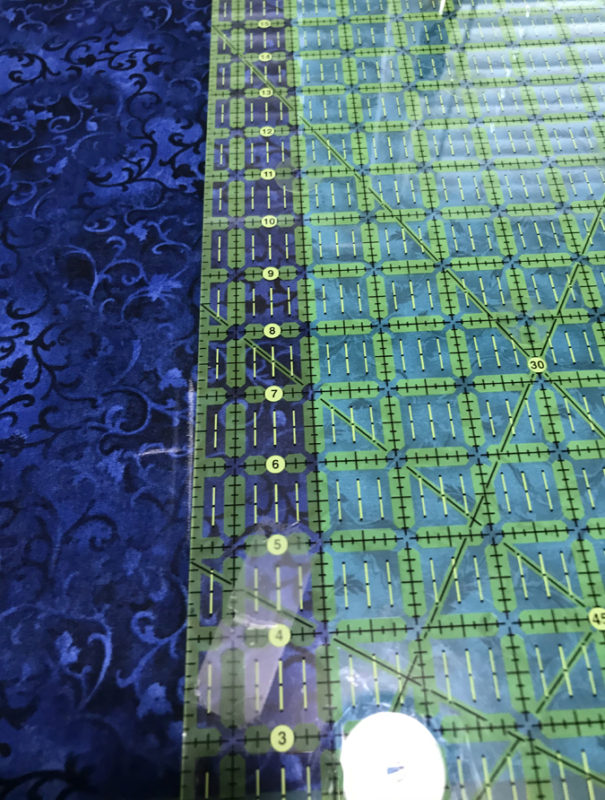 • Mark the 1½ inch line all the way across the bag. Mark another line ½ inch down from the first line. This will be your casing.
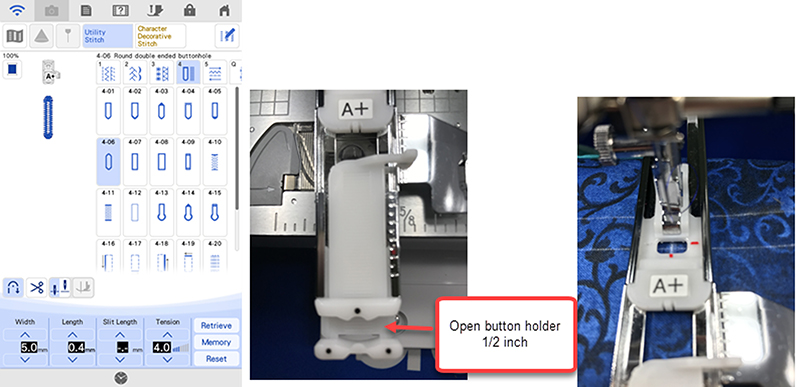
Hint: When using the Brother Luminaire XP1, you can project your grid at ½ inch increments. If you do this, you don’t need to mark the fabric.
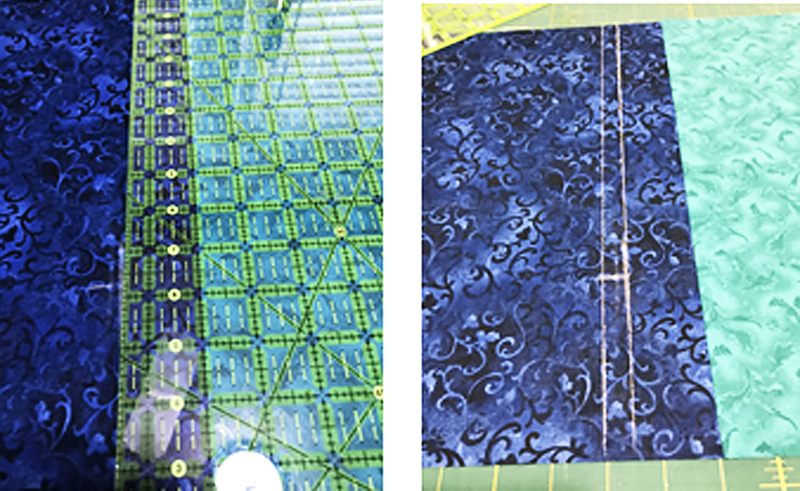 • Touch the buttonhole menu. Touch stitch 4-06. Insert the buttonhole foot onto the machine without the base. Open the button area ½ an inch and then stitch a ½ inch buttonhole in this spot.
 • Open the buttonhole. I use my Brother seam ripper that came with my machine for this process. It is quick and does a great job. Fold in half right sides together lengthwise and serge the bottom and open side together.
 • Mark 1¼ inches in from the bottom and each side of the bag. (Measure from above the seam).
 • Cut out the 1¼ square from each side.
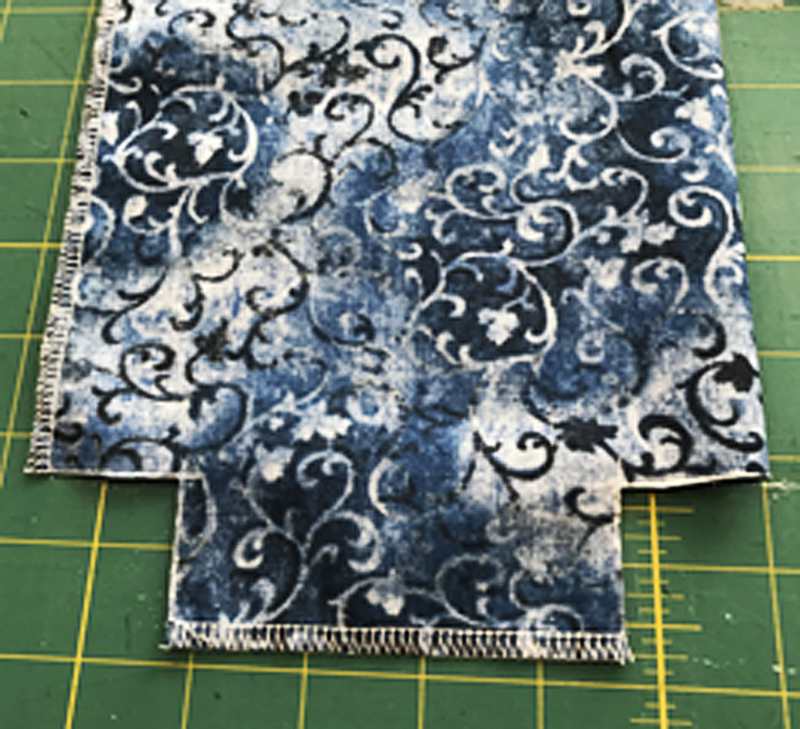 • Fold opening and serge together to make a boxed bottom.
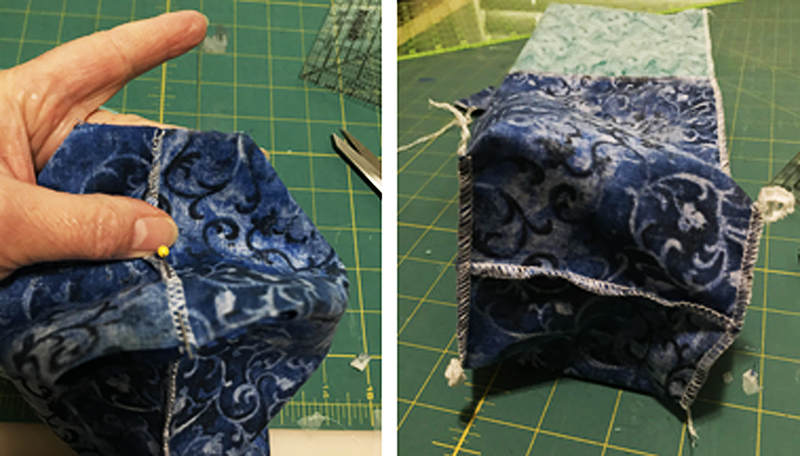 • Turn right side out. Fold top inside the bag leaving a 2-inch strip showing on the front of the bag and then press.
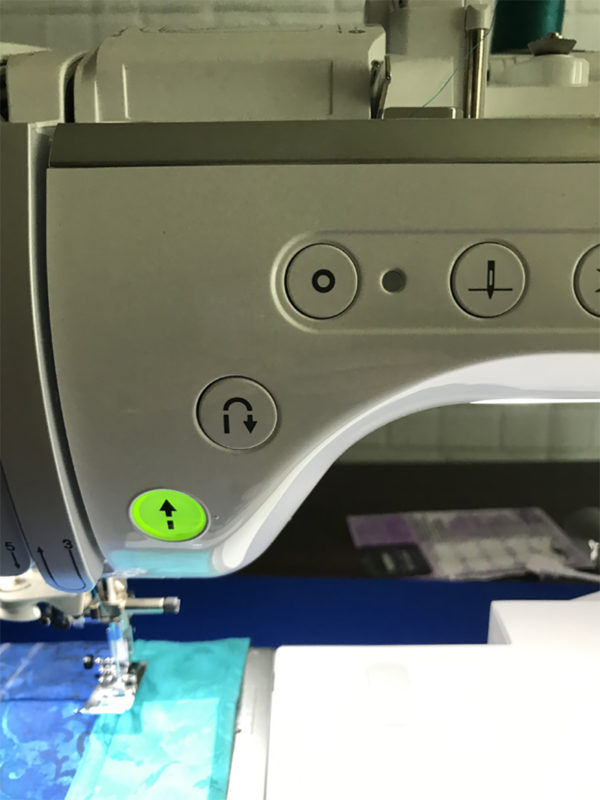
 • Set up your sewing machine for free arm sewing and place bag over the arm.
 Top stitch with a straight stitch along the 2 lines. Hint: If you have a Luminaire machine, you can set up the laser sub guideline to project a grid at ½ inch intervals to make this process very easy.
• Touch the laser.
• Touch On.
• Touch Sub.
• Touch Grid.
• Change interval to ½ inch.
Top stitch with a straight stitch along the 2 lines. Hint: If you have a Luminaire machine, you can set up the laser sub guideline to project a grid at ½ inch intervals to make this process very easy.
• Touch the laser.
• Touch On.
• Touch Sub.
• Touch Grid.
• Change interval to ½ inch.
 • Top stitch 1/8 inch on top of the accent color if desired. (If you are in a hurry skip this step).
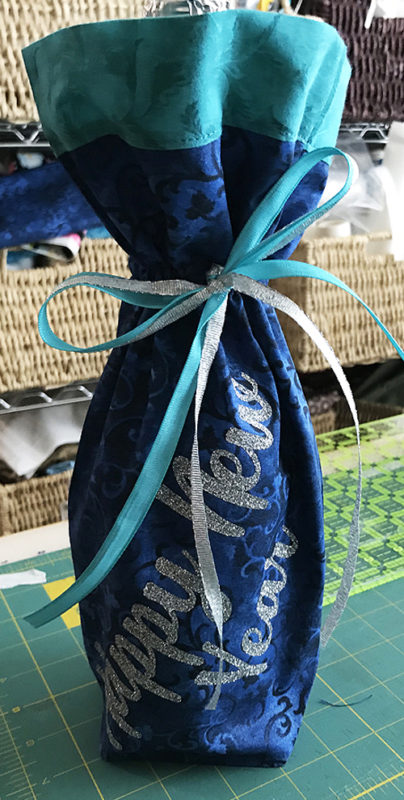
 • Feed the 2 colors of ribbon through the buttonhole.
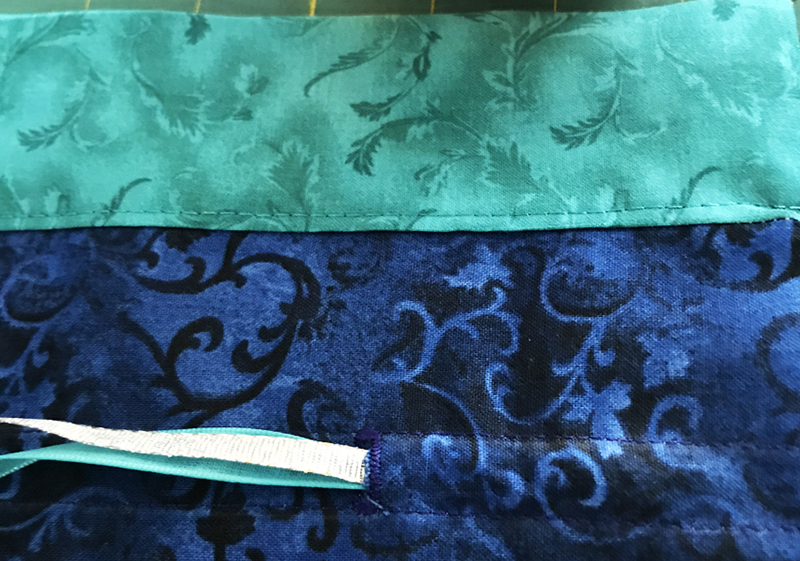 • Put in the wine, champagne or sparkling water bottle and you are ready to gift!
And now, Part 2 of the Holiday Gift Bag Project: Adding the Embellishment!
If you want to add a little more pizazz to your holiday gift wine bag, and have a ScanNCut Machine,you can add Glitter Vinyl as I did in my project. If you choose to add Glitter Vinyl, you may want to wait to add your ribbon until after you have pressed the HTV to the bag. To create my vinyl Happy New Year, I used BES 4 with Power Pack 2.
Power Pack 2 has artwork tools for creating cut files for the ScanNCut.
I love using BES 4
with my ScanNCut.
I work in the program a lot and this keeps me from having to open multiple programs. Having said that, the Happy New Year can be made in BES 4 (with Power Pack 2),
CanvasWorkspace
or PE-DESIGN 10 or 11.
In the following, I will walk you through the steps for creating it in BES 4 with Power Pack 2.
Let's Embellish!
• Open BES 4.
Click on the Text tool and then choose the Normal Text tool. Click on the design page to activate the text tool. Type in the Text “Happy New” and then click away from the text or click Apply in the Properties window.
 • Click on the design page twice to reactivate the text tool beneath the Happy New. Type in the text “Year” and then click away from the text to click Apply in the Properties window.
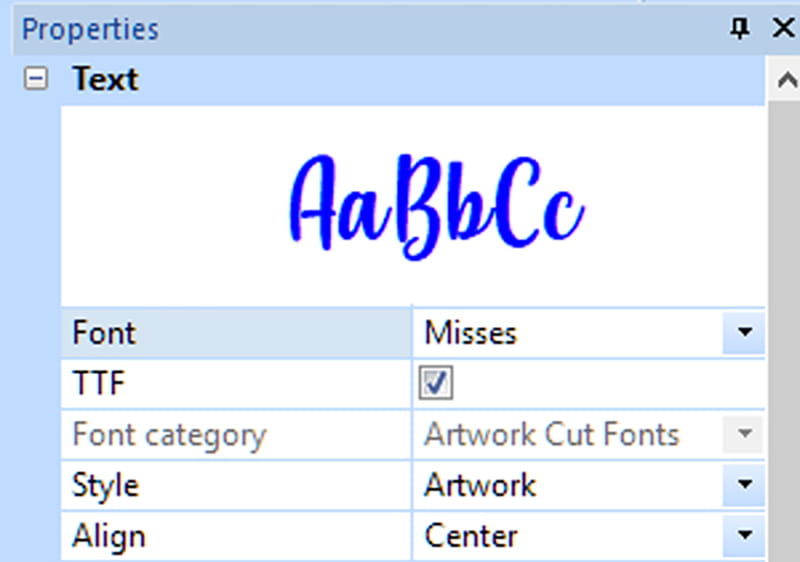
 • Click on the Select tool down arrow and choose Select All. In the Properties window, place a checkmark in front of TTF. Change the Style to Artwork and then click Apply.
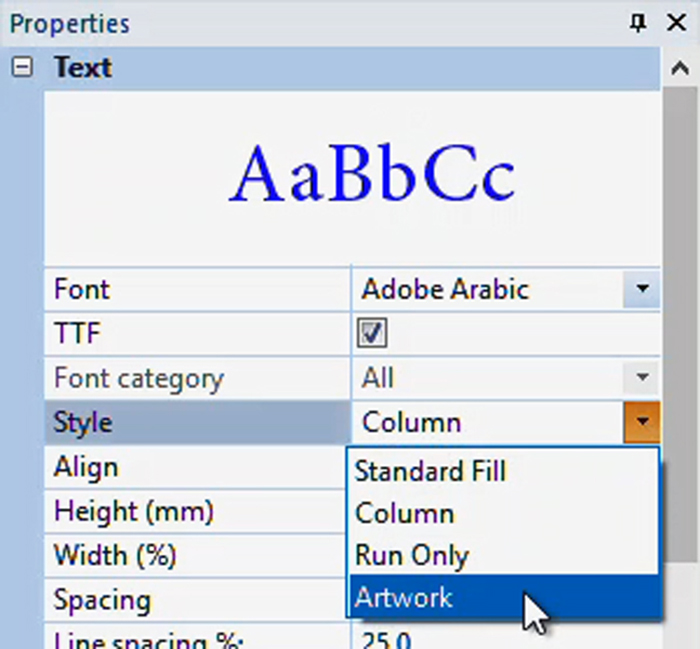 • Choose a TTFont that is bold and then click Apply. Note, that the fonts I have available will be different from yours.
 • I wanted my text spaced closer together, so I reduced the spacing between the text. I typed in a -3 in the spacing window. I tried -2 first, but it wasn’t enough, so I settled on -3.
 • Click on the Text tool and then click back on Happy New. Place the cursor over the diamond in front of the N, hold down the left mouse button and drag the N to the left to reduce the spacing between Happy and New. Release the mouse when it is where you desire.
 • Click on the Arrange Tab. Select All. Choose Horizontal Center.
 • Make any other adjustment you want to the spacing. I wanted my Year to be a little more to the right so that it would be off the P. Yours may look different than mine.
 • If we were to send this file to the ScanNCut
as it is right now, the letters would fall apart. The white spaces in the letters are where they overlap. That area would be cut out as well. To keep this from happening we need to Weld the letters to combine them. Before we can do this, we must break up the text so that the software sees the letters as images instead of text. Right mouse click on Happy and choose Breakup Text.
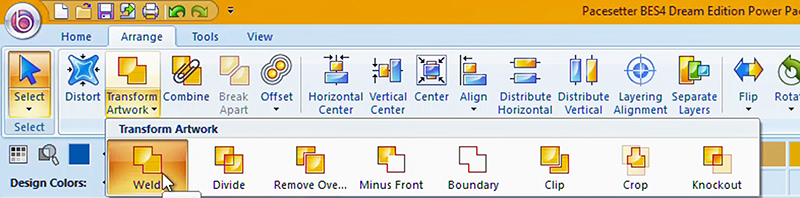
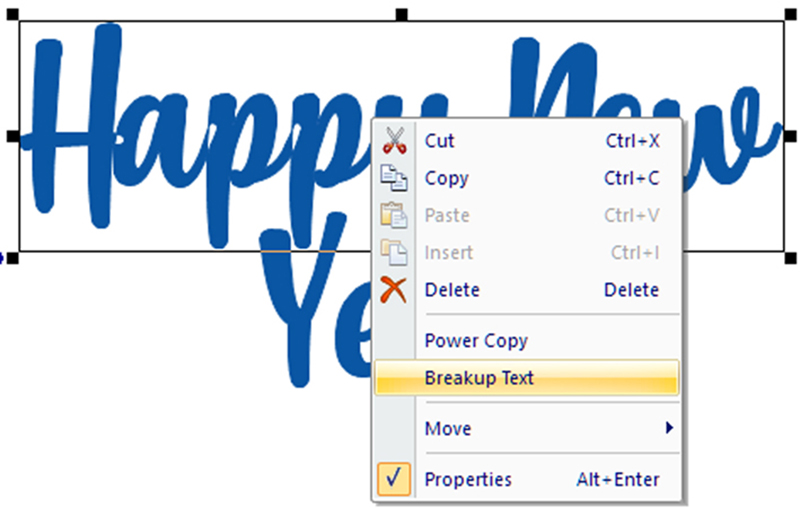 • Right mouse click on Year and choose Breakup Text again. Select All and then on the Arrange Tab, click on the Transform Artwork down arrow and then choose Weld. If you haven’t used any of the Transform Artwork tools, Weld would be the default button.
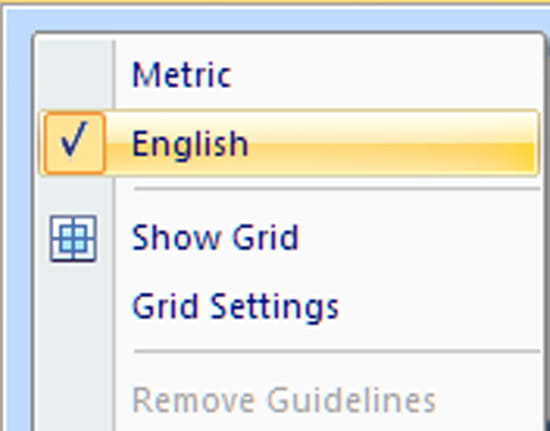
 • If your system unit is Metric, right mouse click on the page ruler and change the measurement to English (Inches).
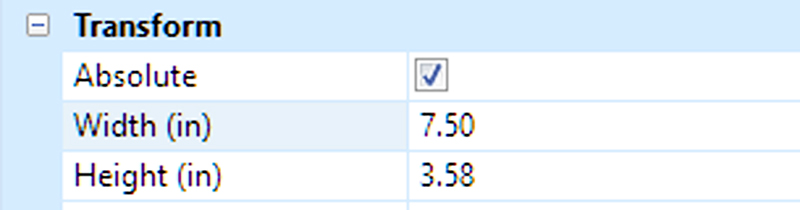
 • In the Properties window, place a checkmark in front of Absolute and change the Width to 7.5 and then click Apply. This will fit on the front of your bag. If your bag is smaller, make sure the measurement of your text fits on the front of the bag. Make note of the finished size.
 • On the Arrange Tab, choose Flip. This will mirror the design so that you can cut the HTV face down. There is one last thing I want to do to make it easier to save vinyl. This is to add a weeding square around the outside of the design. This allows me to cut away the excess vinyl around the design so that I don’t waste as much.
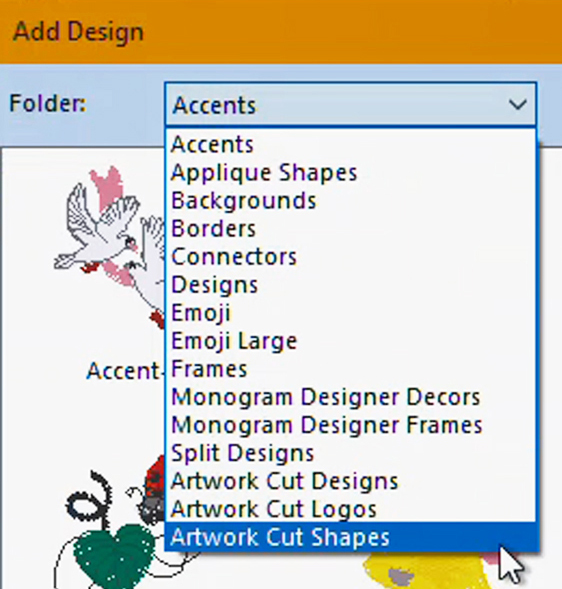
• Click on the Home Tab. Choose Add Design and then from the Folder Dropdown menu choose Artwork Cut Shapes.
• On the Arrange Tab, choose Flip. This will mirror the design so that you can cut the HTV face down. There is one last thing I want to do to make it easier to save vinyl. This is to add a weeding square around the outside of the design. This allows me to cut away the excess vinyl around the design so that I don’t waste as much.
• Click on the Home Tab. Choose Add Design and then from the Folder Dropdown menu choose Artwork Cut Shapes.
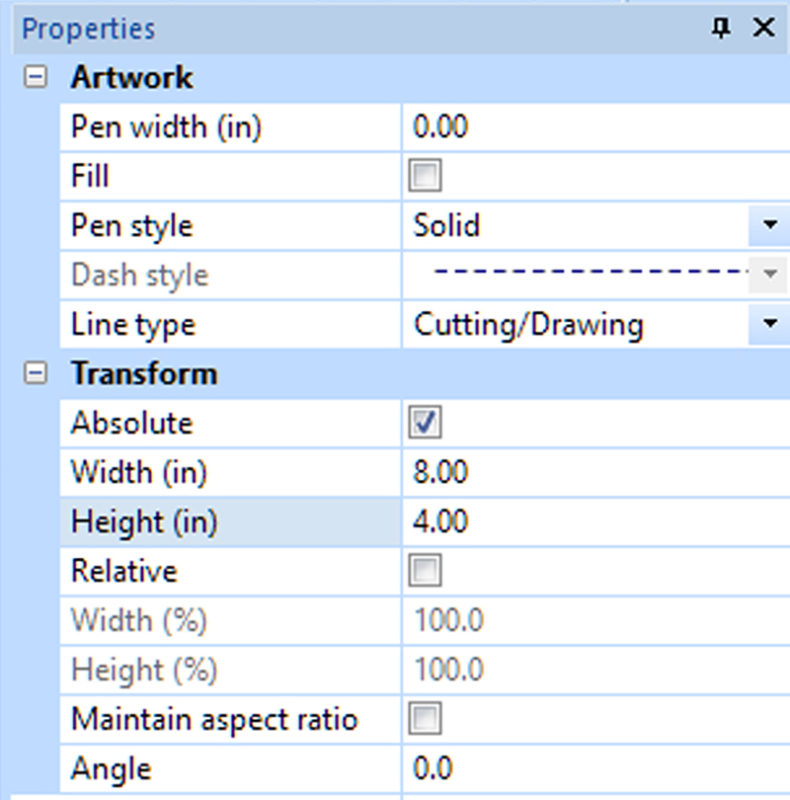
 • Left mouse click on the Square shape to select the shape and then left mouse to insert it onto the design page. Select the shape in the Sequence View Window and then in the properties window, remove the checkmark in front of Fill. Place a checkmark in front of Absolute and remove the checkmark in front of Maintain Aspect Ratio. Change the size of the square to be larger than your design. My overall design dimension was 7.5 x 3.58, so I changed the size of my square to 8 x 4 inches and clicked apply. Change the size so that it is about a ½ inch larger all the way around the design and then click Apply.
 • Select All and then click on the Arrange Tab. Choose Horizontal Center and Vertical Center.
• Click on the Tools Tab and choose Export FCM. Here you will save the FCM file to a USB device and take it to your ScanNCut machine. If you have Power Pack 1 and a wirelessly enabled ScanNCut machine, you can click on the Pacesetter button (the small b), choose ScanNCut
• Select All and then click on the Arrange Tab. Choose Horizontal Center and Vertical Center.
• Click on the Tools Tab and choose Export FCM. Here you will save the FCM file to a USB device and take it to your ScanNCut machine. If you have Power Pack 1 and a wirelessly enabled ScanNCut machine, you can click on the Pacesetter button (the small b), choose ScanNCut
machine and then Send to ScanNCut
machine. Follow the onscreen instruction and retrieve at your ScanNCut
machine. Place Silver Glitter HTV face down (shiny side down and glue side up) on a Standard Mat (purple band).
• Insert the black Auto Blade into the ScanNCut machine. Carefully load the mat into the ScanNCut machine. On the Screen, choose Retrieve Data.
• Choose either USB or Wireless transfer (this depends on the method you used to take the FCM to the machine). If you selected USB, select the appropriate FCM file from the device. If you selected wireless transfer, the design will automatically appear on the screen.
 • Touch Edit. Click on the Select button (3 red squares). Select All (the second icon). Touch OK. Touch Object Edit.
• Touch Unify (this groups the square and the text). Touch OK. Touch OK again. Touch OK again. Touch Please Select. Choose Cut. Touch Settings.
• Go to page 2 of the Settings and turn on Half Cut. Touch OK. Touch Test. Move the test cut into place away from the main area. Press Start. After the test cut has completed, check to make sure the test cut completely. If it didn’t choose Test again, adjust Half cut pressure up or down. (This depends on how your test cut came out, did it cut too deep if so, decrease the pressure. Did it not cut deep enough, increase your half cut pressure.) The goal is to cut through the glue and the glitter, but not the clear plastic carrier sheet.
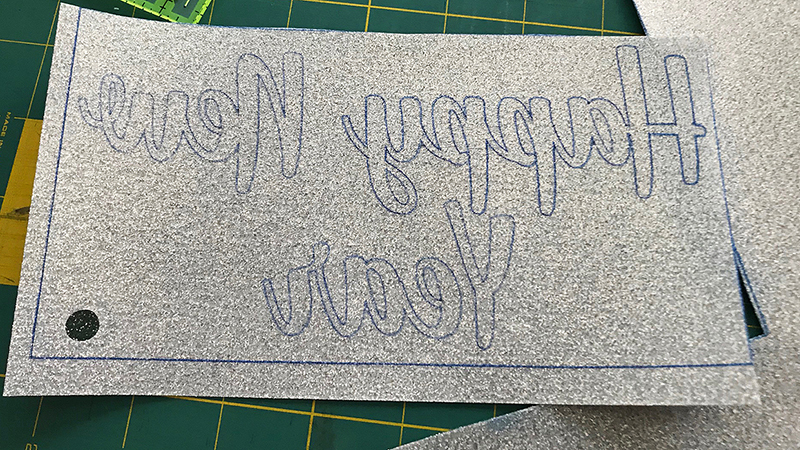
• Once you have a successful test cut, you are ready to cut. Press Start. After you have cut the HTV, don’t eject the mat, take out the Auto blade and insert a pen into your pen cartridge. It looks like a garbage can. The pens that come with the machine aren’t permanent makers, so they will wipe off. Insert the pen cartridge into the machine. Touch Please Select and choose Draw. The cut lines will be drawn. This will make it much easier for you to see the Cut lines so that you can remove the excess away. Removing the excess is commonly known as weeding.
• Once the design has been cut and drawn, unload the mat and remove the glitter vinyl from the mat. Cut along the rectangle around the design to remove any unused media to save for use later.
• Touch Edit. Click on the Select button (3 red squares). Select All (the second icon). Touch OK. Touch Object Edit.
• Touch Unify (this groups the square and the text). Touch OK. Touch OK again. Touch OK again. Touch Please Select. Choose Cut. Touch Settings.
• Go to page 2 of the Settings and turn on Half Cut. Touch OK. Touch Test. Move the test cut into place away from the main area. Press Start. After the test cut has completed, check to make sure the test cut completely. If it didn’t choose Test again, adjust Half cut pressure up or down. (This depends on how your test cut came out, did it cut too deep if so, decrease the pressure. Did it not cut deep enough, increase your half cut pressure.) The goal is to cut through the glue and the glitter, but not the clear plastic carrier sheet.
• Once you have a successful test cut, you are ready to cut. Press Start. After you have cut the HTV, don’t eject the mat, take out the Auto blade and insert a pen into your pen cartridge. It looks like a garbage can. The pens that come with the machine aren’t permanent makers, so they will wipe off. Insert the pen cartridge into the machine. Touch Please Select and choose Draw. The cut lines will be drawn. This will make it much easier for you to see the Cut lines so that you can remove the excess away. Removing the excess is commonly known as weeding.
• Once the design has been cut and drawn, unload the mat and remove the glitter vinyl from the mat. Cut along the rectangle around the design to remove any unused media to save for use later.
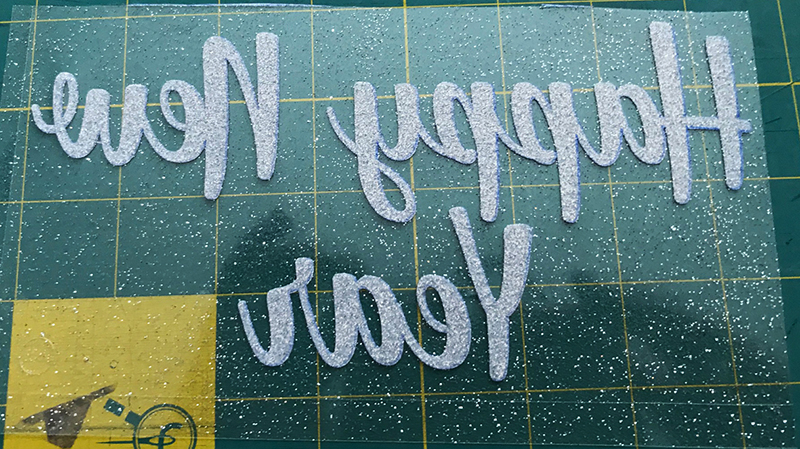
 • Weed away the excess.
 • Put your iron on the highest setting (no steam). Preheat the project by pressing it before placing the HTV in place. Place the HTV saying on top of the wine bag and place a pressing sheet over the top of the project.
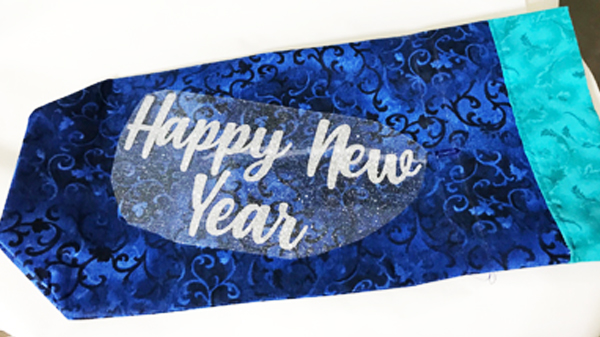 • Press (don’t iron) for approximately 30 second. If you need to move the iron to cover all the parts, press again for another 30 seconds. If you have a heat press, I set my press to 320 and pressed for 20 seconds. My Glitter Vinyl was a Warm peel, so I peeled off the carrier sheet immediately. Add your ribbon through the casing and put the Wine or Champagne in the bag and you are ready to give your gift.
 Cheers to the New Year!
Cindy
Cheers to the New Year!
Cindy
Related Projects
Stay Connected
* Required fields