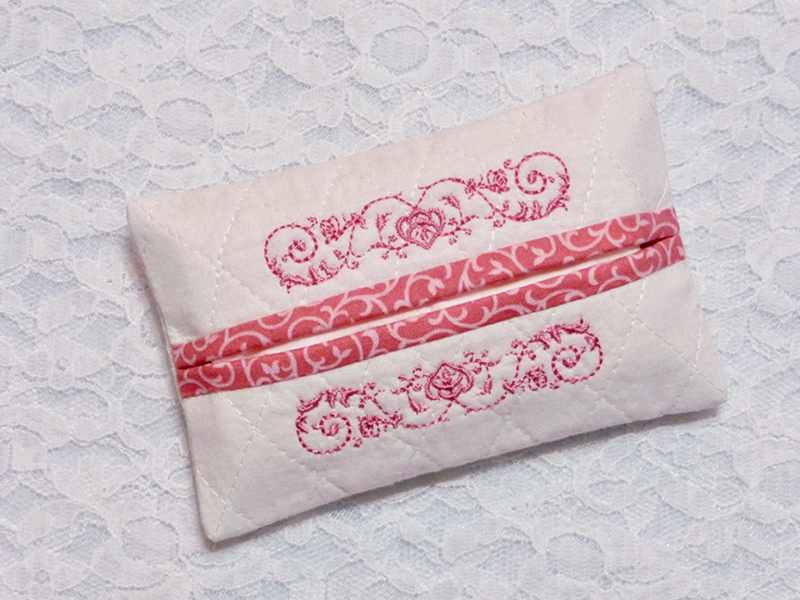
Free Design of the Month: Embroidered Tissue Tote
This embroidered tissue tote is super easy to make! It comes in handy for everyday use and travel too! Our Brother Free Design of the Month is just the right size to accent the opening at the center. Look closely and you’ll see that it’s a scrolling design with a heart shaped motif in the middle. It’s designed so the lining peeks out as trim along the opening. You can coordinate your thread color with your lining fabric for an elegant look. This useful tissue holder is a great item for gift exchanges, craft tables, wedding party favors, you name it! Are you ready? Let’s go sew!
Materials and Supplies
- Brother sewing and embroidery machine
with 4-inch hoop capability. Note: This project features a combination design stitched in a 4-inch hoop. - Brother
Embroidery Thread, Bobbin Thread, and size 11 embroidery needle for embroidering. - Basic Sewing notions including thread to match fabric and a removable marker or chalk.
Fabrics for tissue holder:
- One piece of single faced, pre-quilted fabric measuring 8-inches square for outside of tissue tote.
- One piece of cotton fabric measuring 8-inches wide 6-inches long for lining tissue tote.
- Travel size package of tissues.
Brother Free Design of the Month:
- 0.69” Wide X 3.11” High
- Free Design_January_2020_Small Heart Scroll.pes
Note: Here is a direct link
to the design on iBroidery.
to the design on iBroidery.
Note: Machine used for this project is the Brother NS1750D
with Edit mode for creating a combination design.
with Edit mode for creating a combination design.
Steps to Create Tissue Holder
1. Transfer design to machine. Create a combination design with two motifs facing one another, spaced approximately ¾-inch apart. Figure #1.
[caption id="attachment_22947" align="aligncenter" width="800"] Figure #1[/caption]
2. Center pre-quilted fabric in 4-inch hoop and embroider the combined design. Note: With pre-quilted fabric and a lightweight design, no additional stabilizer was necessary. See enhanced photo in Figure #2.
[caption id="attachment_22948" align="aligncenter" width="800"]
 Figure #2[/caption]
3. Remove fabric from hoop, washout markings, and press. Cut embroidered piece in half, cutting directly on the center line. With design centered on the edge of the strip, trim each half to equal a length of 6-inches. When cut, each half piece should measure 4-inches wide X 6-inches long.
4. Set up machine for sewing. Place the two halves right sides together and pin along the edge opposite the embroidery. See Figure #3.
[caption id="attachment_22949" align="aligncenter" width="800"]
 Figure #3[/caption]
5. Using a ½-inch seam allowance, sew along the 6-inch edge to form a bottom seam. Press seam open. Select lining piece and prepare to finish your tissue tote. You only have a few more steps to go. See both pieces below:
 6. Layer embroidered piece with lining, right sides together and raw edges matching. Observe that the lining is now larger than the outer piece. This allows for a mock binding effect at the opening of the tissue holder. See Figure #4a and Figure #4b.
[caption id="attachment_22950" align="aligncenter" width="800"]
 Figure #4a[/caption]
[caption id="attachment_22946" align="aligncenter" width="800"]
 Figure #4b[/caption]
7. Sew these two edges using a ¼-inch seam allowance. Turn right side out and press flat. See both sides in Figure #5a and Figure #5b.
[caption id="attachment_22951" align="aligncenter" width="800"]
 Figure #5a[/caption]
[caption id="attachment_22952" align="aligncenter" width="800"]
 Figure #5b[/caption]
8. With embroidered side facing up, fold long edges toward the center. Pin along short ends. See Figure #6.
[caption id="attachment_22953" align="aligncenter" width="800"]
 Figure #6[/caption]
Next, sew both short ends using a ¼-inch seam allowance, stitching the seams twice for durability. Use an overcast stitch to finish the seams. See Figure #7.
[caption id="attachment_22954" align="aligncenter" width="800"]
 Figure #7[/caption]
Turn right side out and press. Insert a travel size package of tissue to finish. See below:

Options and ideas:
- Customize the holder by adding initials, a name, or a special message. You can add this to the top or the bottom of the tissue tote.
- Download the instructions here.


