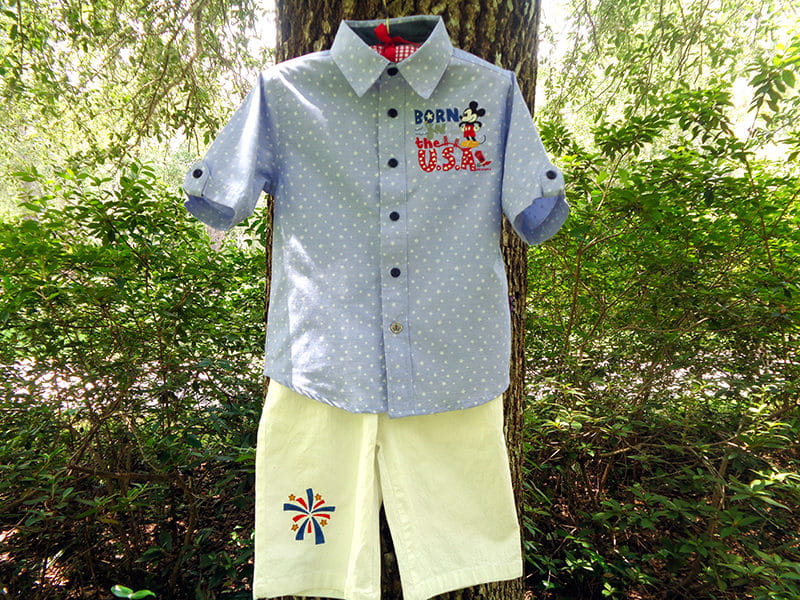
From Sea to Shining Sea Patriotic Outfit
Independence Day is just around the corner. From sea to shining sea, from the west coast to the east, to the great state of Texas in the south, our great country celebrates July 4th with parades, picnics and celebrations of all sorts. And, of course, we also have Mickey Mouse. He is recognized through the world as a USA icon. With your Brother Disney embroidery machine, there is still time to whip up a red, white, and blue easy outfit for a special little guy. He will be well dressed for those festive events as well as Labor Day later in the summer. Beginning with ready-to-wear shirt and shorts, you need only go to iBroidery.com for these designs. Choose this fun Mickey Born in the USA embroidery design for the shirt and the patriotic starburst for his shorts. The star theme is used throughout—in the shirt fabric, on the “Born” lettering and on the starburst shorts design. Your child may have been born in Japan or Brazil or anywhere in the world, but Mickey Mouse WAS born in the USA. He is the All-American Mouse. Pick a shirt and shorts off the rack and start embroidering. This outfit will be finished in an easy afternoon.
Requirements:
- Equipment: THE Brother Dream Machine
or any Brother Disney machine with 4x4 frame - Fabric: Ready to wear shirt and shorts
- Designs: Two iBroidery.com designs:
Item Number: DISWT_1 (Mickey USA)
and Item Number: BIC-ATGAMF015 (starburst) - Notions: Threads for embroidery and reconstruction of shorts leg opened for embroidery, tearaway stabilizer
Shirt Instructions
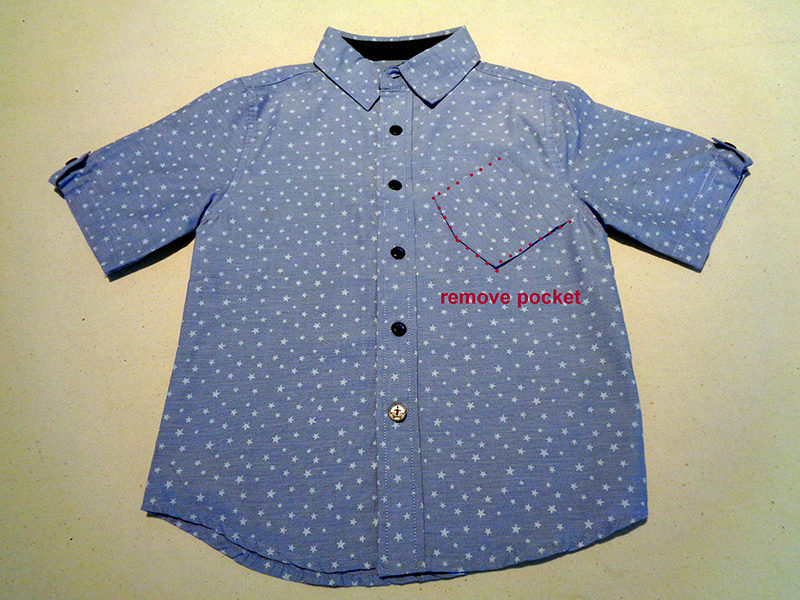
- Remove pocket if there is one. Save for use on an applique PROJECT.
- Press and starch embroidery area.
Note: By outlining the still visible seam line and marking the center of the pocket area, you can achieve perfect placement for your design.
- Load design DISWT_1 to memory stick.
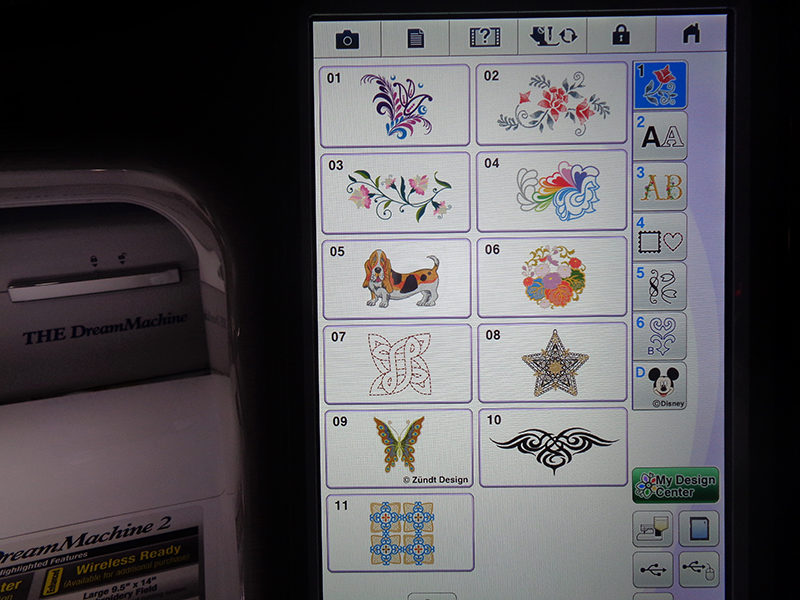
- Open embroidery menu. Select memory stick.
- Bring up “Mickey Born in the USA” design. You can see the dimensions are 3.57” height and 3.73” width.
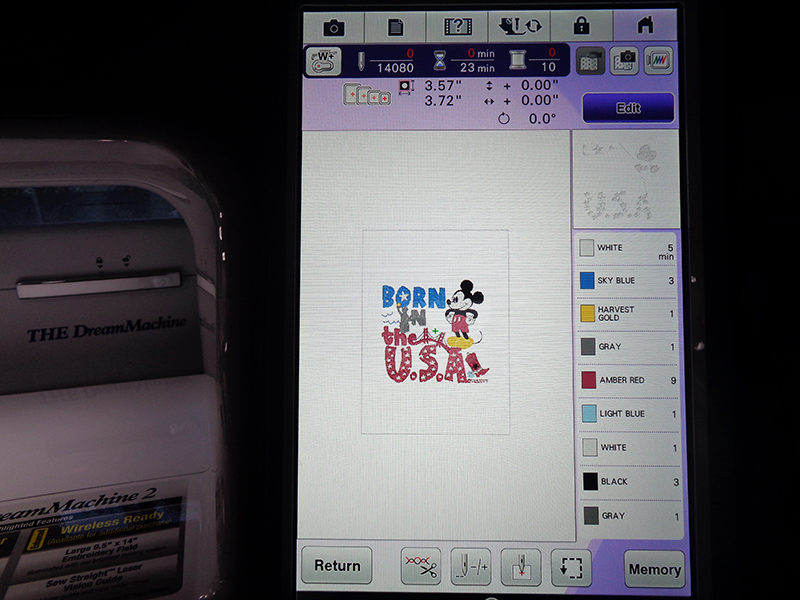
- If necessary, rotate the design 180 degrees.
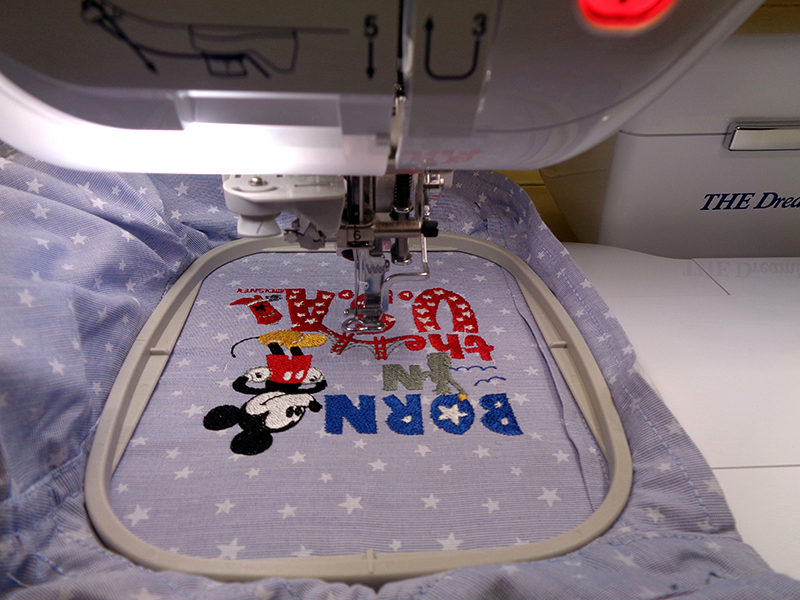
Note: Pockets are almost always below the left shoulder. That makes placement in the hoop with the bulk of the shirt to the right, crowded against the head of the machine. It IS easier to rotate the design 180 degrees, placing the rest of the shirt on the other side.
- Insert tearaway stabilizer and shirt in 4x4 frame and embroider.
- Remove stabilizer and press.

Shorts
- Open right leg inside seam of shorts for access to embroidery area. You may need to open the seam almost to the crotch area.
- With design Item Number: BIC-ATGAMF015 loaded onto memory stick,
open in embroidery menu, as on the shirt. - The design was 3.86 x 3.43”, approximately the same size as the shirt embroidery.
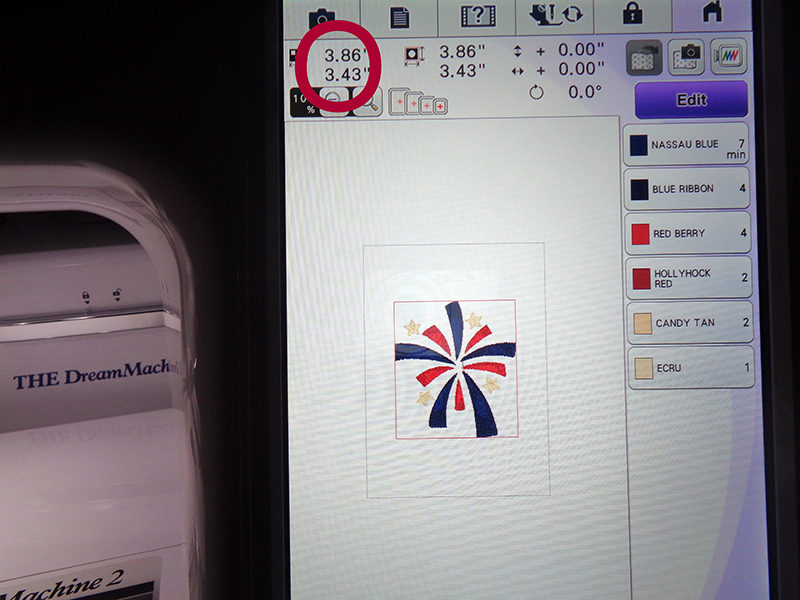 Note: I preferred for it to be smaller so the size was reduced easily with this feature on THE Dream Machine.
Other Brother machine have similar resizing functions.
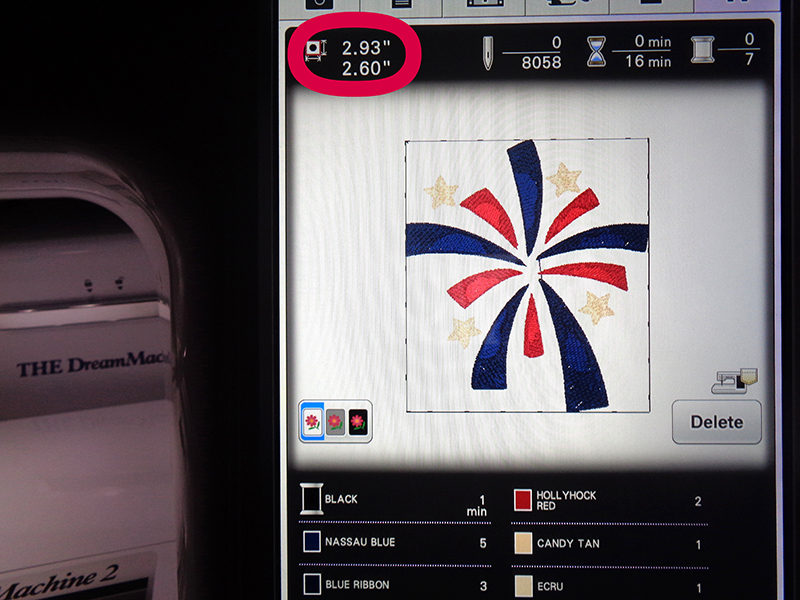
- Reduce design by going to edit screen, selecting SIZE and then selecting the resize tool. Use the arrows below and to the left of the circled tool to reduce to chosen size. I’ve taken the starburst to 2.93 x 2.60.
- Mark right leg of shorts with cross hairs at chosen location for embroidery.
- Hoop stabilizer and shorts leg, embroider. Use of the snowman gives perfect placement accuracy.

- Stitch leg back together.

- Get ready to celebrate the birth of our great nation.
Related Projects
Stay Connected
* Required fields