Geometric Jewels Sampler Quilt Along: Week 6 - Quilt Assembly
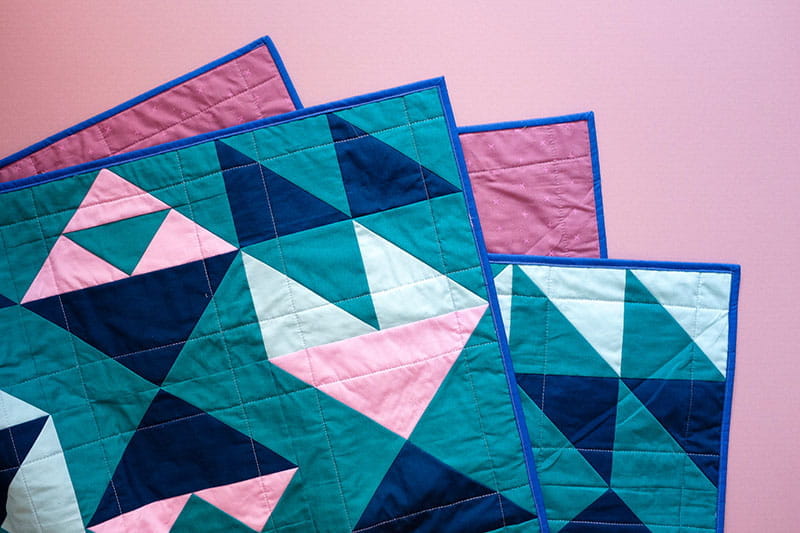
Hello! This is Wendy of The Weekend Quilter, and I’d like to welcome you all to the sixth and final week of the Geometric Jewels Sampler quilt along (QAL)! This week we’re assembling our quilt – from sewing all the blocks together to make the quilt top, basting and quilting the three layers, and adding the binding to hide all the raw edges.
Referring to the Geometric Jewels Sampler quilt pattern, we’re focusing on page 15. The pattern is a FREE download from here, if you haven’t got yourself a copy yet.
In this blog post, I will be sharing two different ways in how to visualise your quilt blocks before they get stitched up together to make the quilt top, as well as a few tips on basting and quilting. I have two separate guest blog posts on the Brother Stitching Sewical on binding. One of them is on how to machine bind, and the other is how to machine bind with decorative stitches. They’re worth a read if you’re unfamiliar or need a refresher on how to bind your quilts. And if you need more visual support on how, you can rewatch my Brother Facebook live demonstrating the two blog posts on binding here.
This is the final blog post for the Geometric Jewels Sampler QAL series. Some of the tips are geared towards the Geometric Jewels Sampler quilt pattern. But with that said, you can take the fundamentals from that and apply it to other future quilt projects.
We’ll be keeping all our weekly tips, tricks and recommendations at the one location for reference here. So you may want to bookmark this one.
*By signing up for the Geometric Jewels Sampler QAL updates, you also agree to sign up to be on The Weekend Quilter and Brother International email newsletter list. We will not sell your email or spam you.
Supplies and Tools:
- Download the Geometric Jewels Sampler quilt pattern for FREE from The Weekend Quilter’s website here.
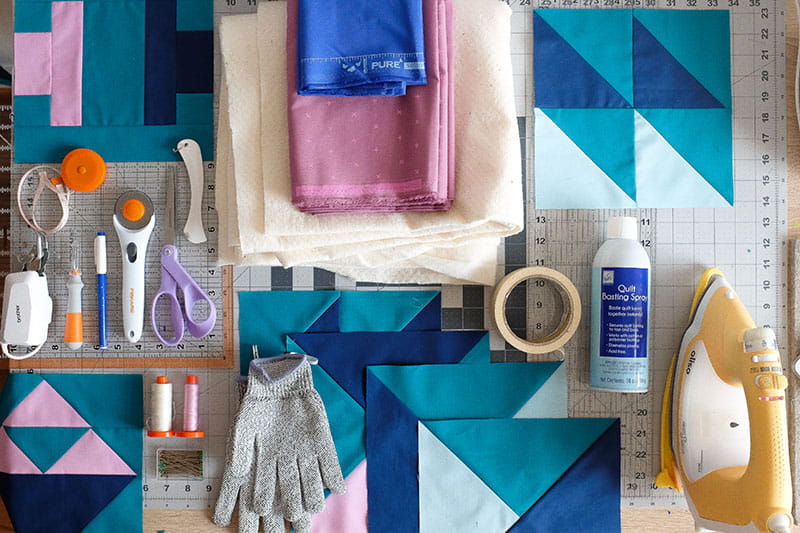
- Basic sewing/quilting machine – the Brother Innov-ís BQ3100 from the Quilt Club Series was used in this tutorial
- Coordinating thread, 50wt cotton for piecing, quilting and binding
- All Geometric Jewels Sampler quilt blocks (6 SP blocks, 10 HSTa blocks, 2 HSTb blocks, 14 QST blocks, 6 SQSTa blocks, 6 SQSTb blocks and 12 FG/QC blocks)
- Backing and binding fabric as outlined in the Geometric Jewels Sampler quilt pattern on page 3
- Batting (or wadding) – There needs to be at least 4in overhang on each side of the quilt top. Therefore, batting needs to be at least 71in x 80in in size.
- Fabric scissors
- Seam ripper
- Iron and ironing board or wool pressing mat
- Rotary cutter
- Quilting rulers – a long ruler and a small or medium size ruler, one side of the ruler at least 6in long
- Cutting mat
- Sewing clips (optional)
- Measuring tape (optional)
- Heavy duty painter’s tape (optional) – this is to create the temporary design wall to visualise your quilt blocks before they get sewn together to be a quilt top.
- If you do not plan on outsourcing the quilting portion (adding decorative stitches to permanently hold the three layers of the quilt together) to a longarm quilter and do it yourself on your domestic machine, you’ll also need the following tools for basting and quilting:
- Basting spray or safety pins
- Heramarker or non-serrated dull knife to mark quilting guidelines
- Brother Compact MuVit Digital Dual Feed Foot or walking foot attachment
- Quilting gloves
Creating Your Own Temporary Design Wall (or Floor)
Having a design wall may come in handy as you’re plotting out the placement of your quilt blocks. And if you don’t have one, creating a temporary one is easy. As long as you have the wall space for it; strong, heavy duty and wide painter’s tape to tape the batting to the wall.
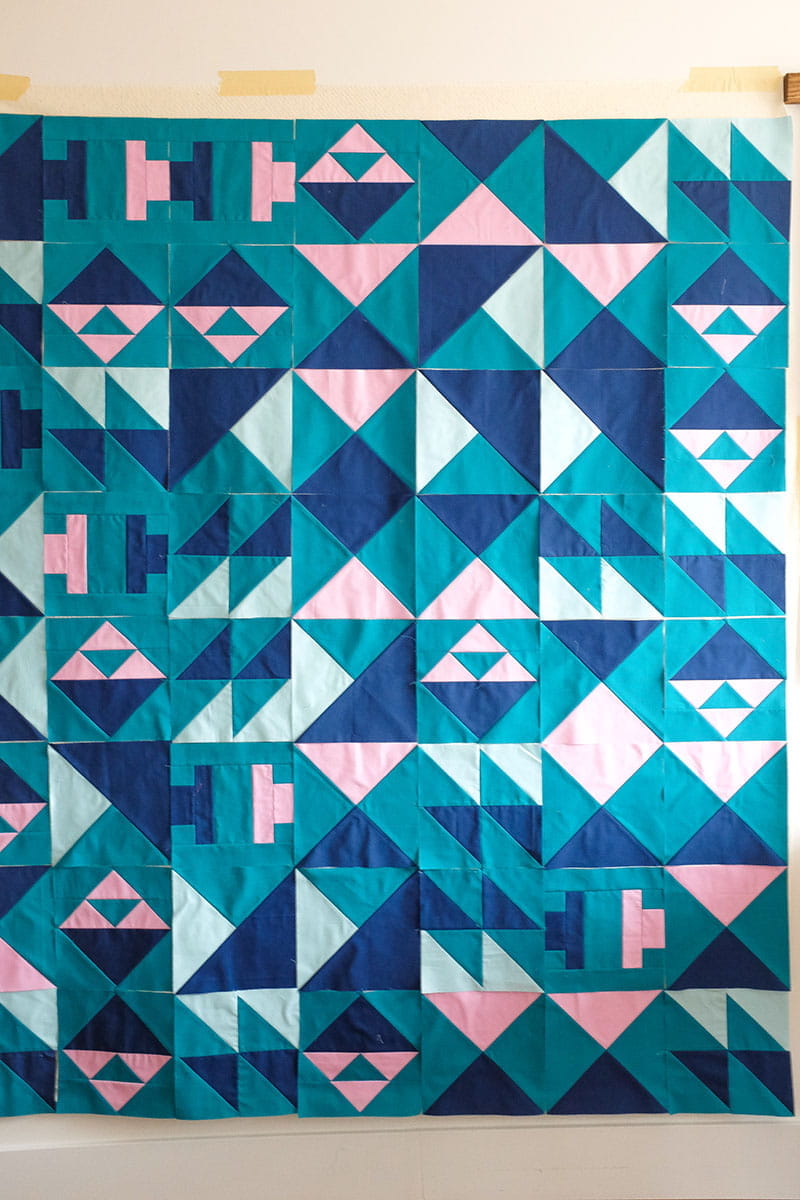
If you don’t have enough wall space or the project is too big for the tape to withhold the weight of the batting, you could lay the batting on the floor and plot out your quilt top. If you need to stop midway, roll it up like a jigsaw puzzle mat.
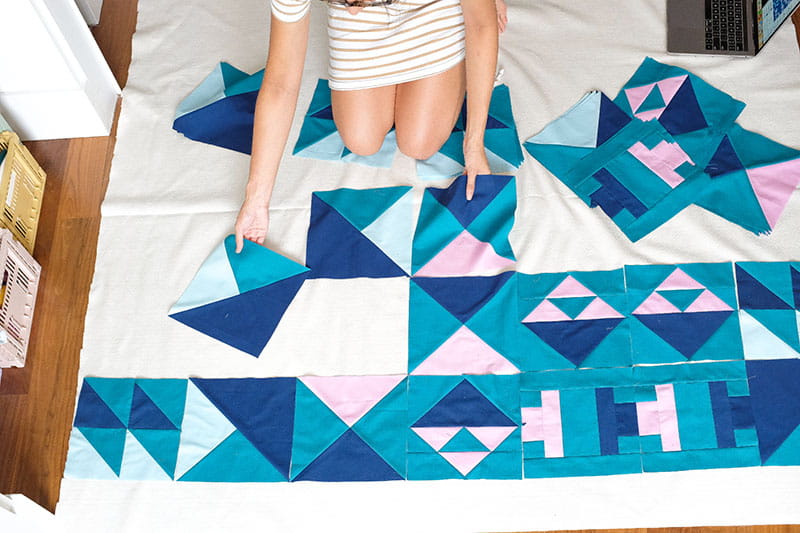
For the batting (whether it's for a design wall or floor), cut it so there’s 4in overhang relative to the finished quilt top size. In doing so, you would have already prepared your batting for the project.
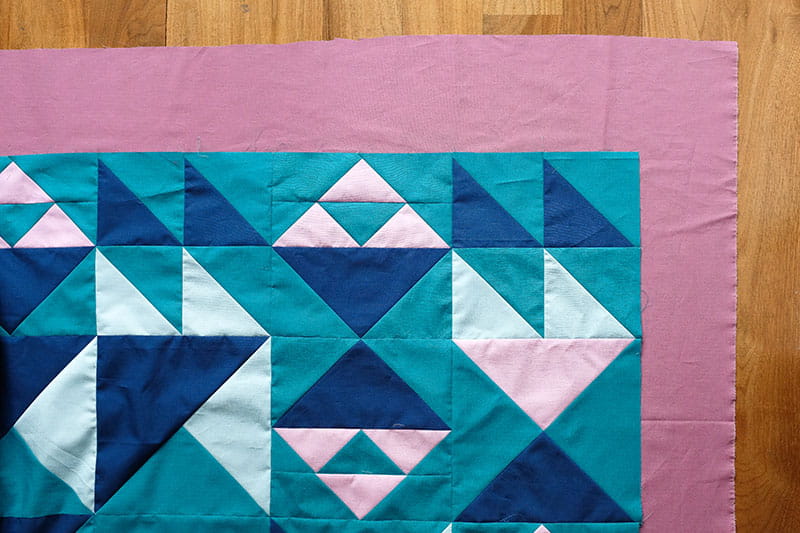
Basting
When I say “basting”, we’re not talking about thanksgiving turkey here. Basting in quilting terms means to temporarily secure the three layers of the quilt (quilt top, batting and quilt back), also known as the “quilt sandwich”, to prevent it from shifting while quilting.
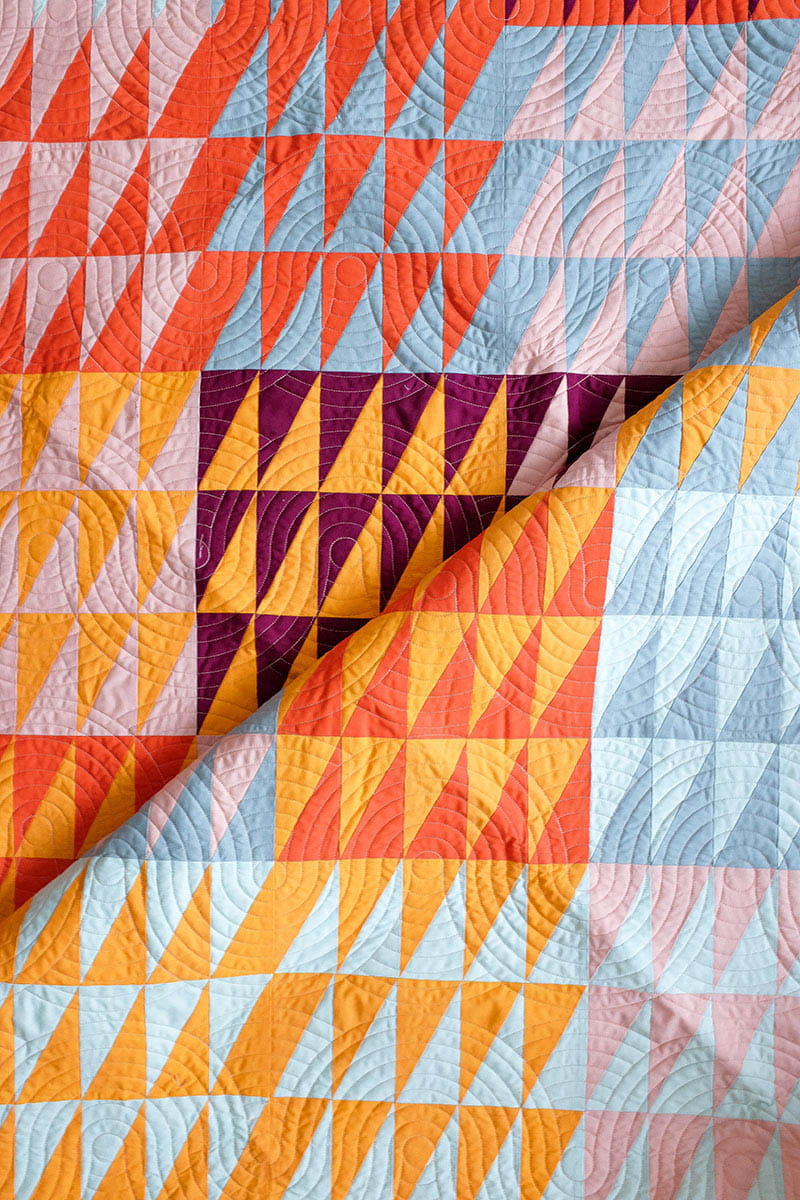
If you’re opting to send your quilt to be quilted by a longarm quilter, you can skip the basting and quilting process of quilt making. Longarm quilters are quilters trained to operate a large quilting machine called a longarm. What they do is load up all three layers of the quilt onto a metal frame, and decorative stitches are sewn on manually or automatically to hold the layers in place permanently. A longarm quilting machine or sending your quilt to a longarm quilter can be very costly. However, it greatly reduces the amount of time and effort from basting and quilting, and there are hundreds of different quilting motifs and designs (also known as pantographs) to select from. Here’s an example of a project quilted by a longarm quilter:
There are various ways to baste your quilt like, spraying, pinning and stitching; and there are several resources out there on how to baste your quilt following those methods. The following tips can generally be applied to all methods:
- Preparing the Quilt Back – Before basting commences, the quilt back needs to be prepared so that it is large enough to cover the entire quilt top with approximately 4in overhang on each of the four sides. For wider or larger quilt projects and depending on the width of the fabric, you’re usually required to piece at least two lengths of fabric together. More specifically, for the Geometric Jewels Sampler quilt project, you’ll need to piece two lengths of fabric together.
When sewing backing fabric together, you’ll need to adjust the seam allowance from ¼in to ½in and press the seam open. These two adjustments work to reduce seam bulk, strengthen the quilt long-term and keep the project lying flat. - Workspace – Ensure your basting space is large enough to fit your whole quilt and the surface you’re working on is flat and hard, such as hardwood floors or a large worktable. This is going to help with keeping the overall quilt sandwich looking flat and smooth.
- Pressing Matters – Iron out all creases and wrinkles in your quilt top and back, as well as your batting, since it probably has been folded up in packaging.
- Rulers Rule! – As you’re laying out your quilt sandwich layers, you could use the long edge of a long quilting ruler to push out any additional air bubbles in between before spray, stitching or pin basting.
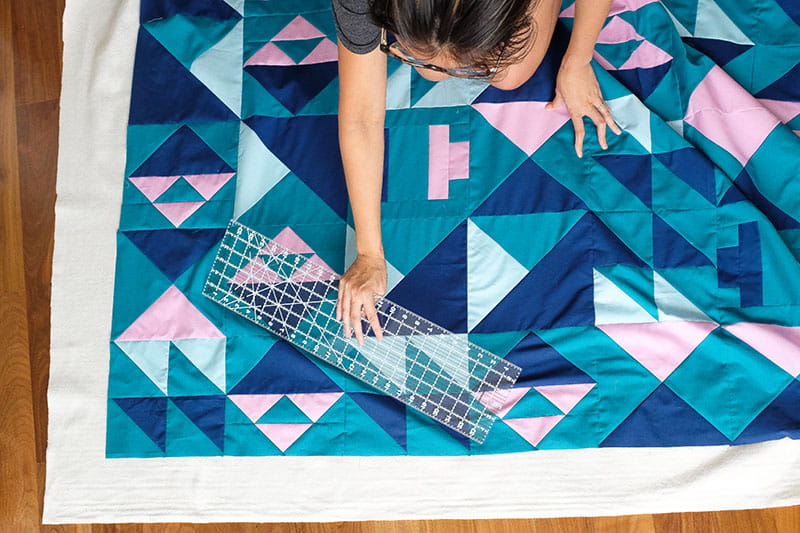
These final tips are for my pin basters:
- Stick it Down – To prevent the quilt back from shifting around as you add the batting and quilt top layers, lay the quilt back on a large hard surface with the wrong side facing up. With the long side of the ruler, push out air bubbles or lumps and tape the quilt back down on your work surface.
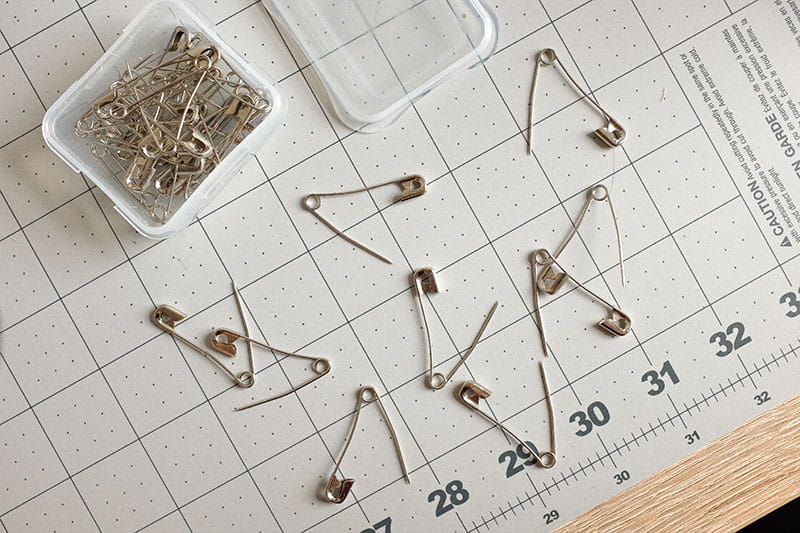
- Keep them Open – To speed things up, place all the safety pins in place (approximately 2in to 3in apart from each other and pin through all three layers of the quilt sandwich) and then close them all when you’re done.
When it comes to storing the safety pins, keep them all open so when it comes to pin basting the next time, they’re all set to go.
Quilting
Now that all the basting is done, we’re set for quilting. At this part of the quilt making process, the layers of the quilt sandwich are permanently stitched together with straight lines or decorative stitches. These stitches are where the craft gets its name: quilting. There are a couple of ways to quilt, by hand or by machine. The following tips are geared towards machine quilting on the domestic sewing machine:
- Go in with a Plan – Prior to the quilting commences go in with a plan or an idea on how you’d like to quilt your project, whether it’s doing parallel lines, grids, using the in-built decorative stitches on your domestic machine and more. You can read more about how-to and tips on machine quilting with decorative stitches in this Brother Stitching Sewical blog post written by me here
If I’m ever unsure, I like to start off with quilting a set of parallel lines covering the whole quilt top and see where that takes me. Taking a photo of the quilt and uploading it onto a design program or printing it out on a piece of paper and drawing lines is another place to start.
You could also use the quilt top design to help guide your decision. For example, for my Geometric Jewels Sampler quilt here, I followed the seams between each quilt block and measured 1½in from the left and right of the seam to create a grid pattern.
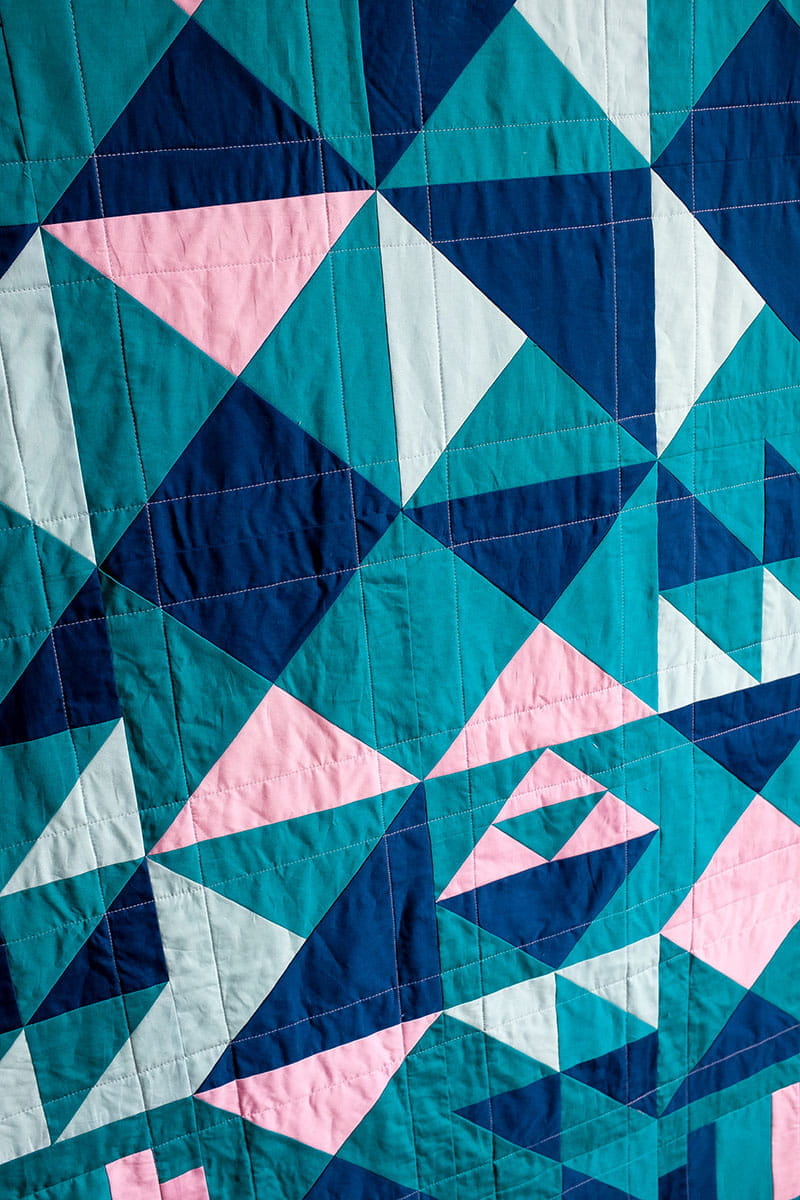
Once you have come up with some sort of plan, use a quilting ruler and heramarker or a non-serrated dull knife to mark temporary quilting guidelines.
-
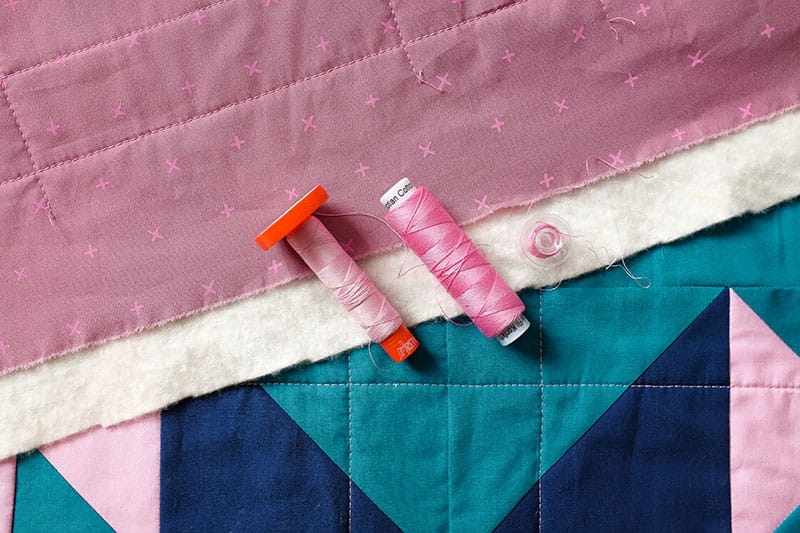
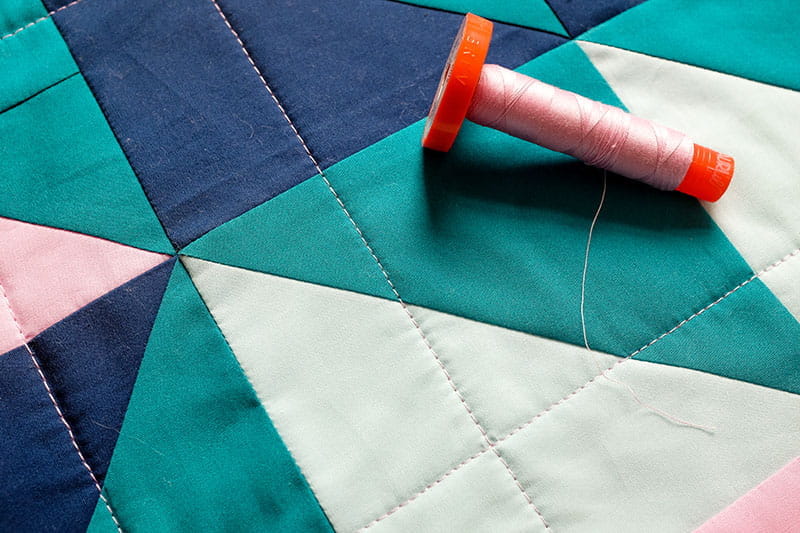
Be Bold – One of my favourite steps in the quilt making process is choosing coloured threads to use for the front and back of the quilt. Don’t be afraid to play around with bright, bold coloured threads. These decisions can enhance and accentuate a design. I like to use 50wt cotton thread here as well. But feel free to play with different thread weights, depending on how visible you’d like the quilting thread to be. The higher the weight, the finer the thread is, and the lower the weight, the more visible the quilting stitches are. If you’re unsure, test it out on a scrap quilt sandwich.
For my Geometric Jewels Sampler quilt here, I used a light pink with a cool undertone that’s similar to the purple fabric used on the quilt top. This helps to blend the contrasting purple with the rest of the blue fabrics used throughout the design, as well as create contrast. On the back of the quilt, I filled my bobbins with a darker pink to match the cross motifs throughout the backing fabric.
-
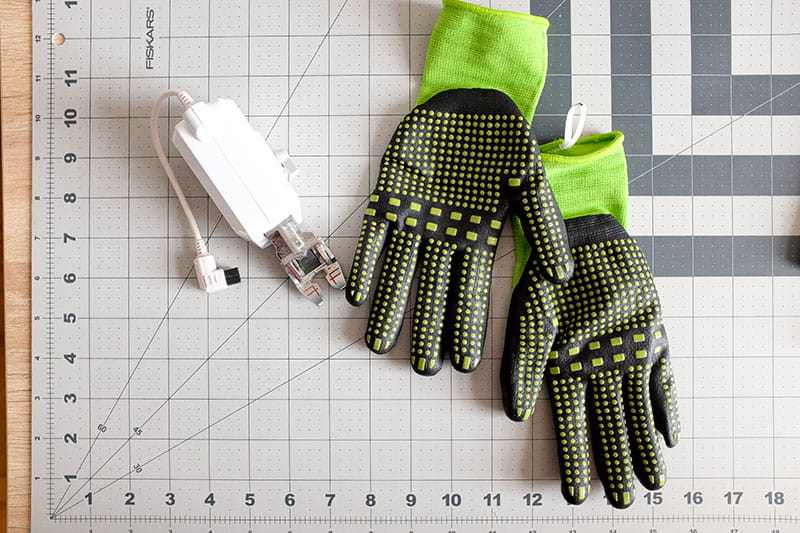
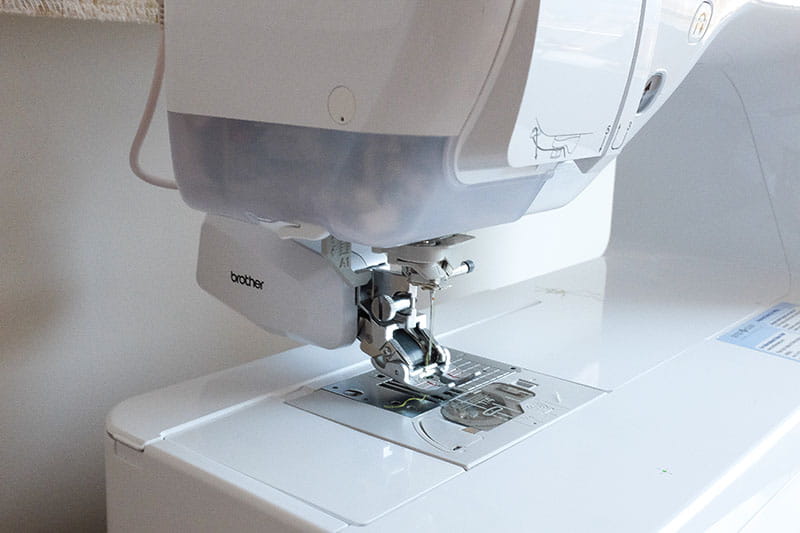
Tools for Success – My other must-have tools when it comes to the quilting process are a set of quilting gloves and Brother’s MuVit Digital Dual Feed (or a walking foot). Walking feet aren’t a one size fits all solution. Make sure that you check your machine, manufacturer’s website or manual for the appropriate walking foot for your sewing machine.
Quilting gloves are a set of gloves with grips on the fingertips and/or palms*. This additional grip works in conjunction with the walking foot to better guide the project through the sewing machine from the top and bottom of the project, to ensure stitch lengths are evenly distributed and the final project lays flat.
*Pro tip: Gardening or utility gloves with grips work just as well as quilting gloves. Sometimes gardening / utility gloves are priced lower and have more grip in comparison. The gloves photographed in this example are utility gloves.
-
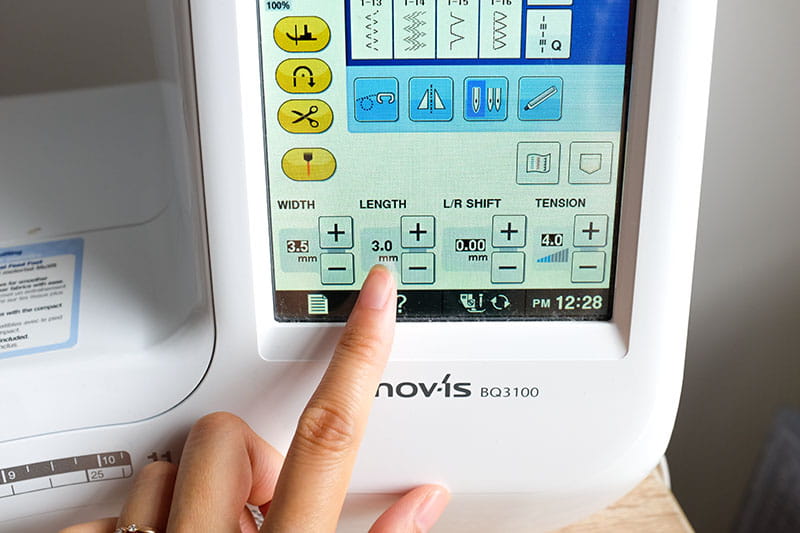
Slight Adjustments – Check that the stitch length on the sewing machine is set correctly before you commence quilting. I normally like to adjust my stitch length anywhere between 3.0mm and 3.5mm. By increasing the stitch length, it reduces the puckering and gathering of the quilt layers. In the example, I have used 3.0mm.
Binding
Finally, you’ve made it to the final step of the quilt making process. Yay! Binding is a long strip of fabric that wraps around the three layers of the quilt sandwich to prevent the edges from fraying.
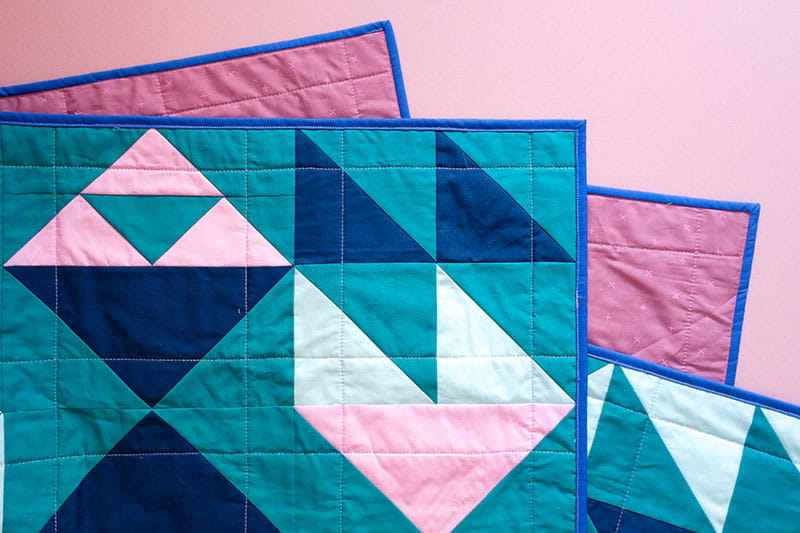
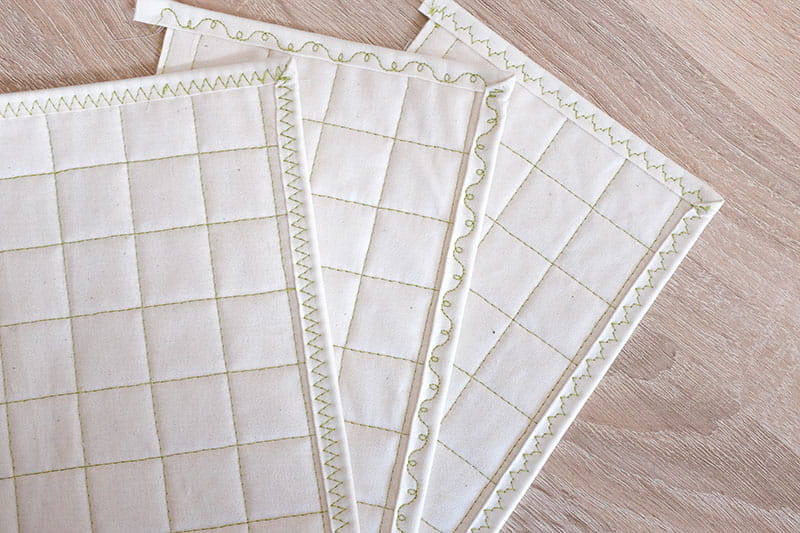
There are a couple of ways to bind a quilt project. Sew the binding on the front of the quilt with the sewing machine, fold the binding over to over the raw edges and then slip stitch by hand to the back of the quilt. Or you could machine bind it on the front and back of the quilt (my personal preference and as shown in the example above).
I have broken down the steps on how to machine bind in detail in this Brother Stitching Sewical blog post. If you would like to take your machine binding to the next level by incorporating decorative stitches, check out this second Brother Stitching Sewical blog post written by yours truly. And if you need more visual support on how, you can rewatch my Brother Facebook live demonstrating the two blog posts on binding here.
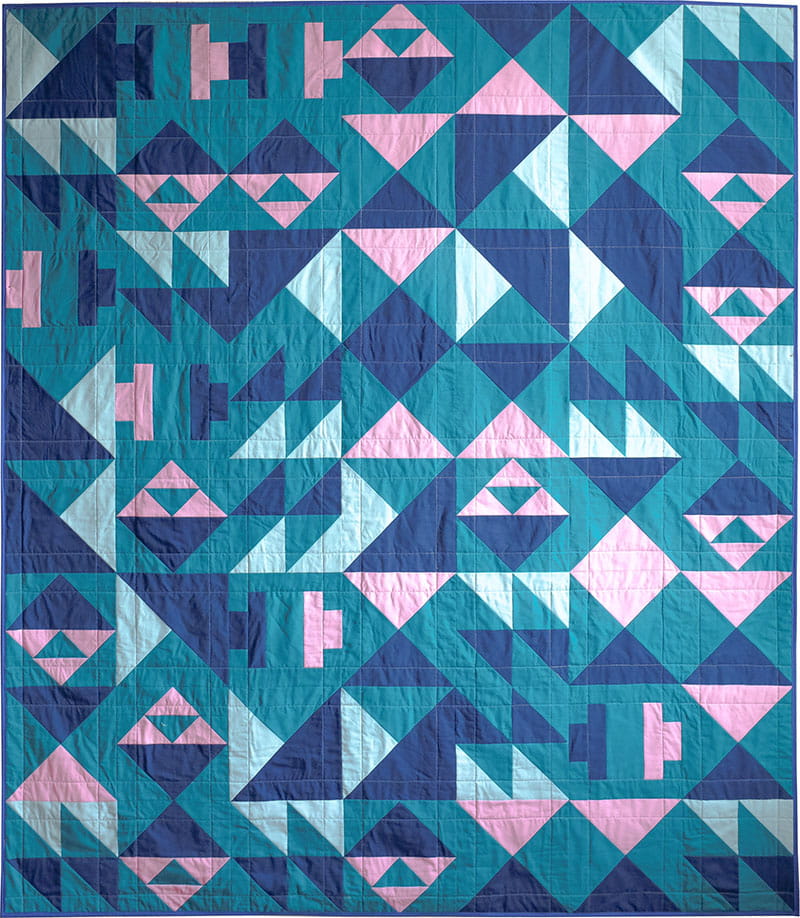
This is the last of the Geometric Jewels Sampler quilt along blog post series. Thank you for joining in on the quilty fun. I hope that you were able to take something away and use it towards a future quilt project.
Seeing your work brings us so much joy. Be sure to share your works-in-progress on social media by tagging Wendy @The.WeekendQuilter and @BrotherSews and using the #GeometricJewelsSampler #BrotherSews hashtags. We’ll be keeping all our weekly tips, tricks and recommendations at the one location for reference here. So you may want to bookmark this one.
Thank you again and happy sewing!

