Giving Apparel Oomph – Quilted Pocket Addition
So one of my friends wanted me to make her a shirt with a quilted woven pocket on it and of course I said yes, because saying no is hard. But really I didn’t think it would work. In my head, it would be too heavy and bulky and would make the shirt drape weirdly. But, since most of my sewing journey involves overcoming this voice of doubt in my head and making it work, I plodded through and woweewow am I stoked that I did. So, this is me now telling all of you that adding a quilted pocket is totally worth the extra work and now I’ll share the steps I took to make it work.
 Next, fold the strip over the front of the pocket. Fold the raw edge up the strip under and press to where the rolled edge is slightly over the stitch line. Edge stitch this in place.
 Now it’s time to bind the sides and bottom and I use the term “bind” very loosely here. Starting on the top of one of the sides, line up the 1” strip and edge of the pocket with right sides together and the end of the strip extending beyond the top by at least ¼”. Sew the strip onto the pocket down one side, across the bottom and back up the other side at 1/8” making sure to appropriately fold and realign the strip at the corners.
 Since I didn’t want to add extra bulk at the edges of the pocket by folding this “binding” under on the back, I chose to use fusible webbing to attach the raw edge of to the back of the pocket with a steam iron. Even though I didn’t do this, if you wanted to have a super clean inside of the pocket, trim the fabric that extends beyond the stitch line before you affix the raw edge to the back.

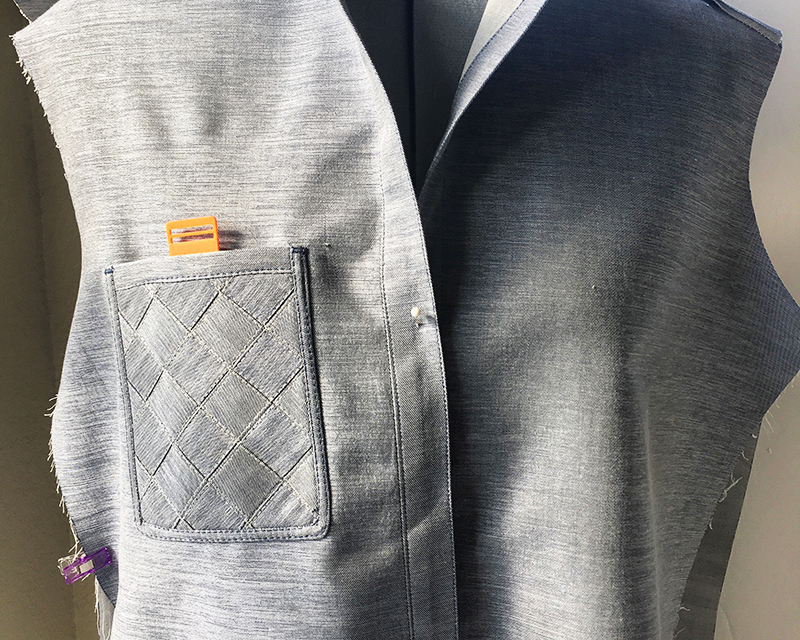
 And look at the ooh la la that it added to this button-up shirt!
 This is definitely a next-level trick that I’m going to keep in my back pocket (pun intended). I’m looking forward to seeing your garments with quilted pockets as well! So... show me show me show me! Please? Tag your photos with #StitchingSewcial, @BrotherSews and @MisterDomestic on Facebook and Instagram so I'm sure to see them.
Stay awesome,
Mathew
This is definitely a next-level trick that I’m going to keep in my back pocket (pun intended). I’m looking forward to seeing your garments with quilted pockets as well! So... show me show me show me! Please? Tag your photos with #StitchingSewcial, @BrotherSews and @MisterDomestic on Facebook and Instagram so I'm sure to see them.
Stay awesome,
Mathew
Machine Used:
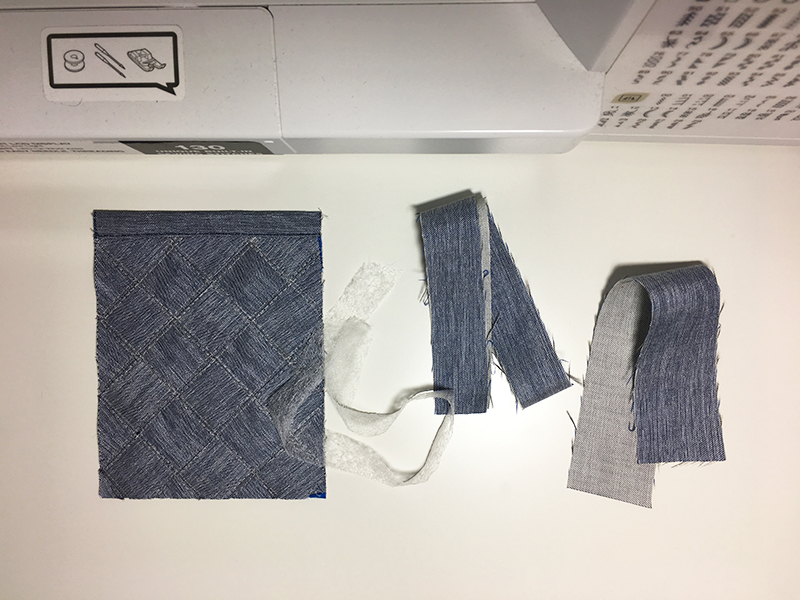
Brother CS7130 130-Stitch Computerized Sewing Machine (AKA Chet)Supplies:
- Apparel pattern that has a pocket on it (I used Grainline’s Archer Button-up
) - Quilted pocket (cut to the expected size of the pocket in pattern)
- 1.5” strip of fabric slightly longer than the top of pocket
- 1” strip of fabric a couple inches longer than the length of the two sides and bottom edges
- Fusible webbing
Finishing the Pocket Edges
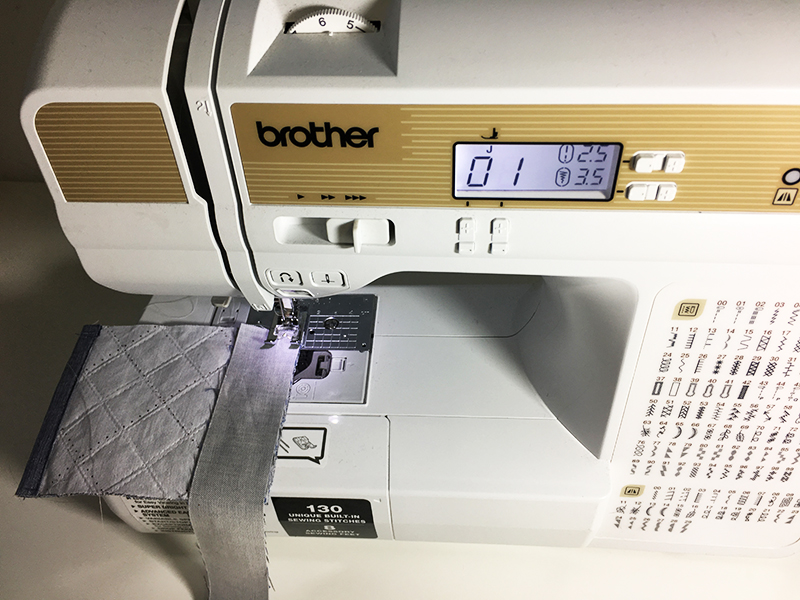
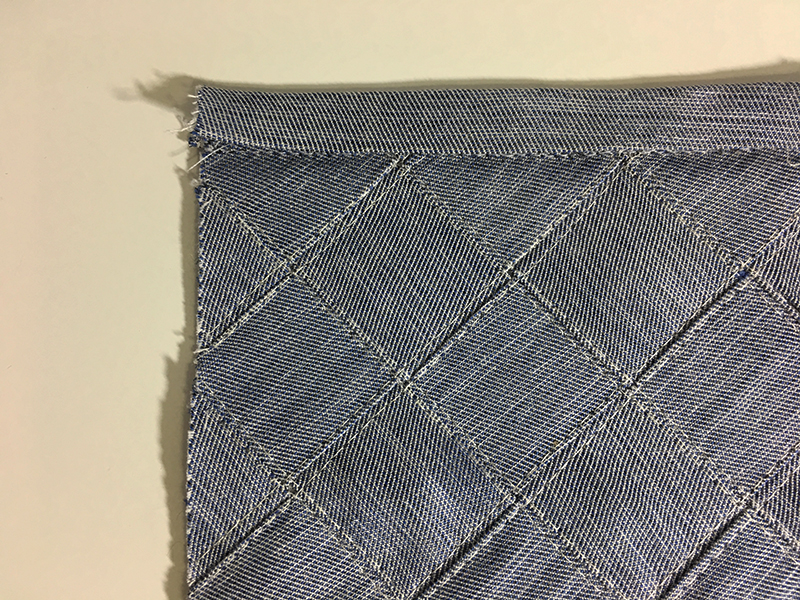
Starting with the top of the pocket, take the 1.5” strip and, with right side of the strip lined up to the wrong side of the pocket, sew along the edges at 3/8”.
Next, fold the strip over the front of the pocket. Fold the raw edge up the strip under and press to where the rolled edge is slightly over the stitch line. Edge stitch this in place.
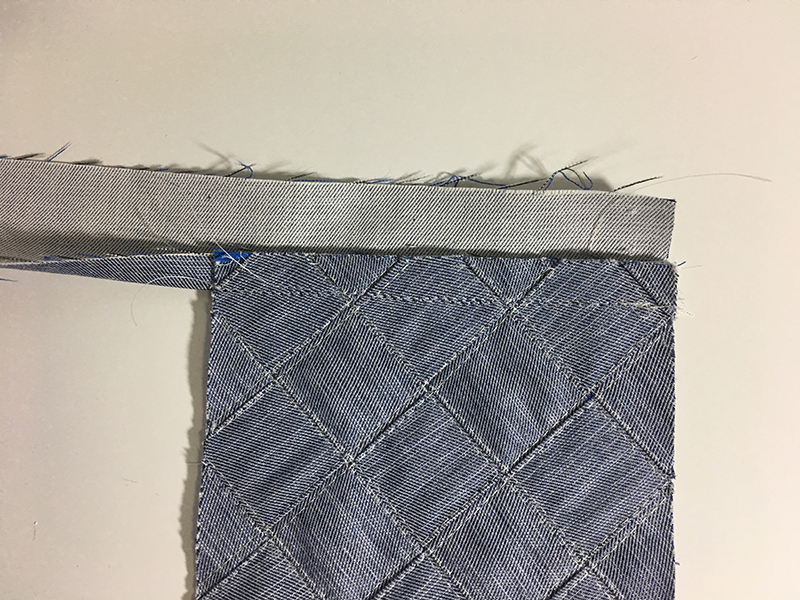
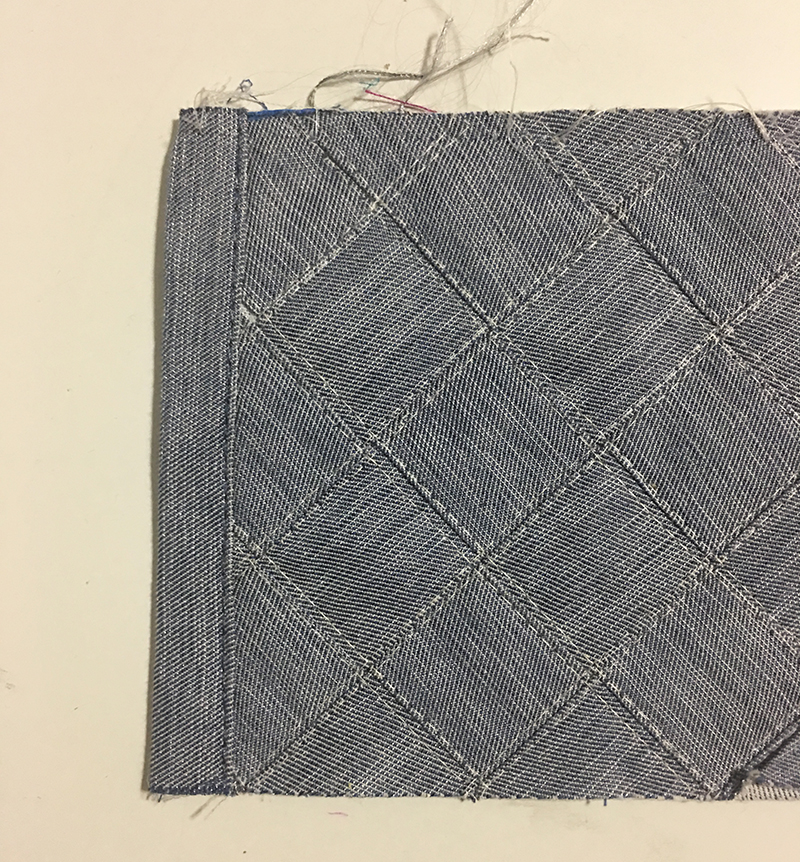
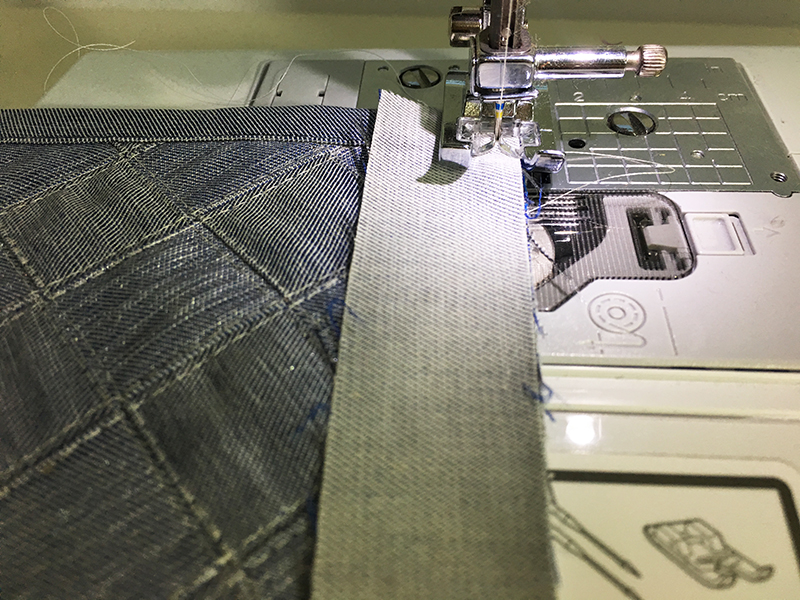
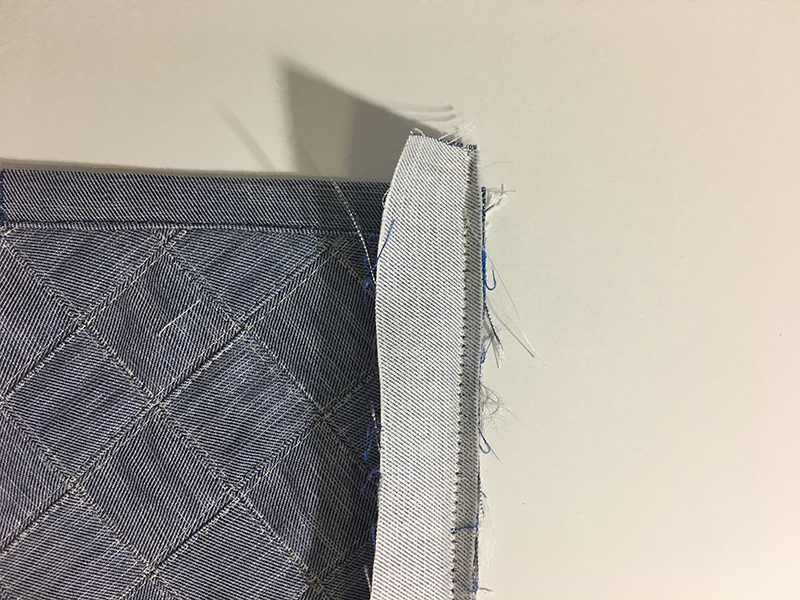
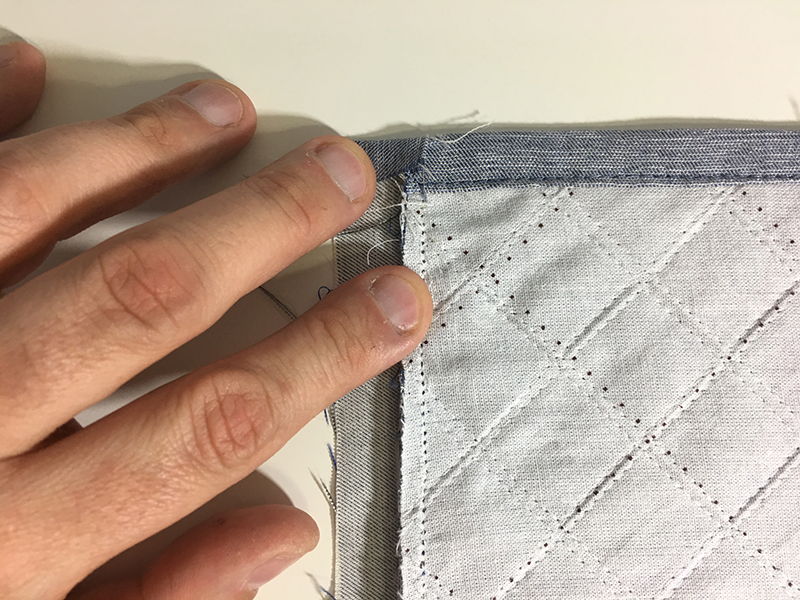
Now it’s time to bind the sides and bottom and I use the term “bind” very loosely here. Starting on the top of one of the sides, line up the 1” strip and edge of the pocket with right sides together and the end of the strip extending beyond the top by at least ¼”. Sew the strip onto the pocket down one side, across the bottom and back up the other side at 1/8” making sure to appropriately fold and realign the strip at the corners.
Since I didn’t want to add extra bulk at the edges of the pocket by folding this “binding” under on the back, I chose to use fusible webbing to attach the raw edge of to the back of the pocket with a steam iron. Even though I didn’t do this, if you wanted to have a super clean inside of the pocket, trim the fabric that extends beyond the stitch line before you affix the raw edge to the back.
Attaching To Your Shirt
Now you have your prepped quilted pocket ready to sew using the markings from the existing pattern. When sewing the pocket, I edge stitched both sides of the “binding” and tacked the top with a zig-zag stitched bar tack using .1 mm stitch length and 2 mm width.
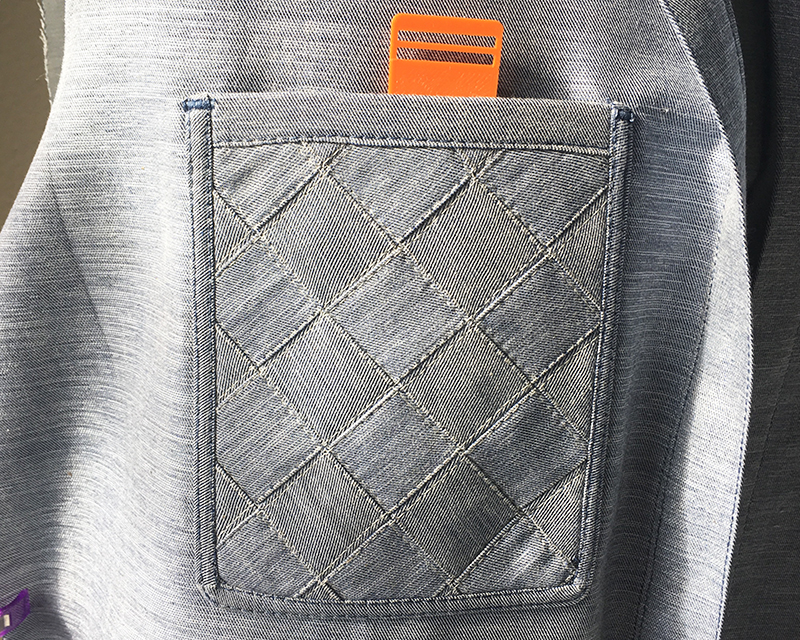
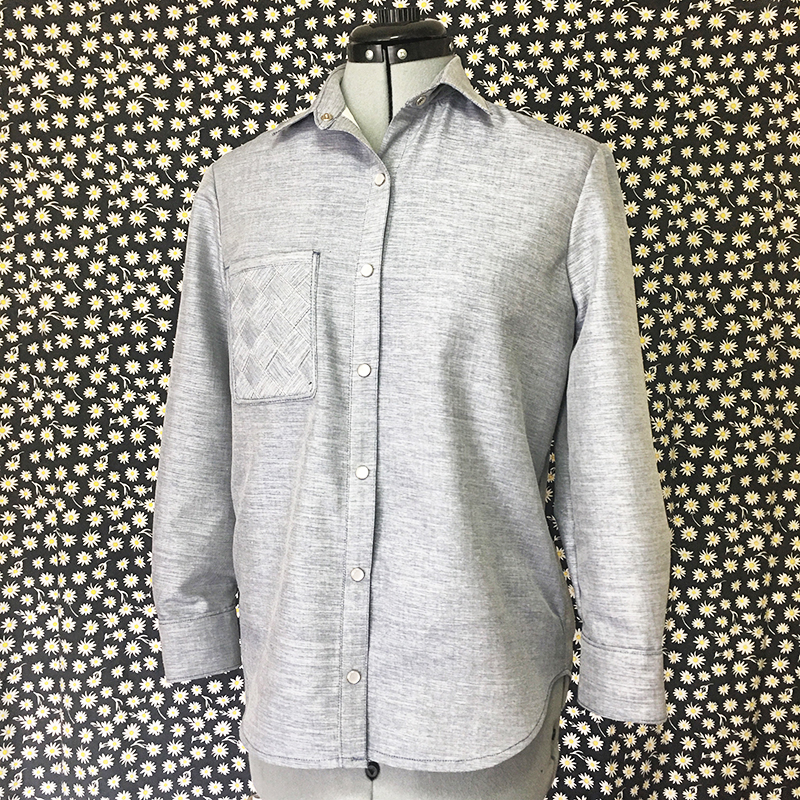
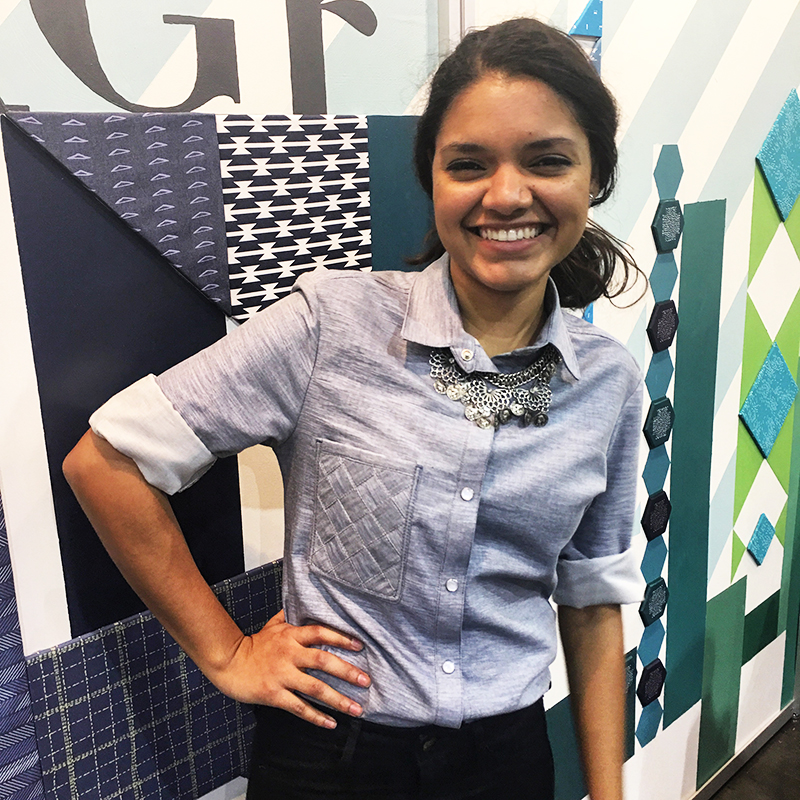
And look at the ooh la la that it added to this button-up shirt!
This is definitely a next-level trick that I’m going to keep in my back pocket (pun intended). I’m looking forward to seeing your garments with quilted pockets as well! So... show me show me show me! Please? Tag your photos with #StitchingSewcial, @BrotherSews and @MisterDomestic on Facebook and Instagram so I'm sure to see them.
Stay awesome,
Mathew
Mathew Boudreaux is also a Sewcialite (brand advocate) for Art Gallery Fabrics.
Archer Button Up Shirt is a Grainline Studio product and Brother International Corporation makes no representations or warranties regarding such product.
Related Projects
Stay Connected
* Required fields