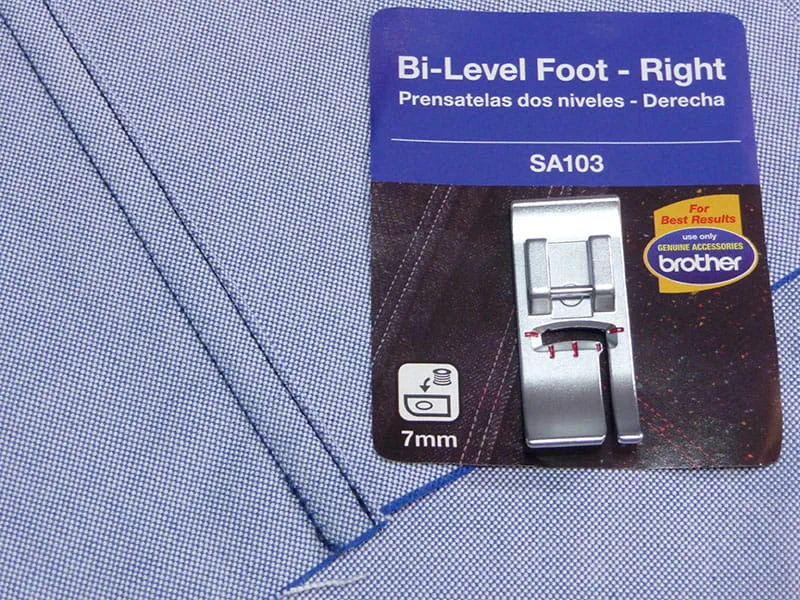
Foot of the Month: Sewing Jeans, Seams and More with the Brother SA103 Bi-Level Foot

Brother is here to help you make creative use of the accessories available for your machine!
This month we are featuring a Bi-Level presser foot. The Brother bi-level foot is perfect for sewing jeans, seams and more! This snap on foot comes in both a right and left version. Specifically, SA103 is designed for precise topstitching and edge stitching over seams and different thicknesses of fabric on the right side. SA104 is designed for precise topstitching and edge stitching over seams and different thicknesses of fabric on the left side. See Figure #1.
Figure #1
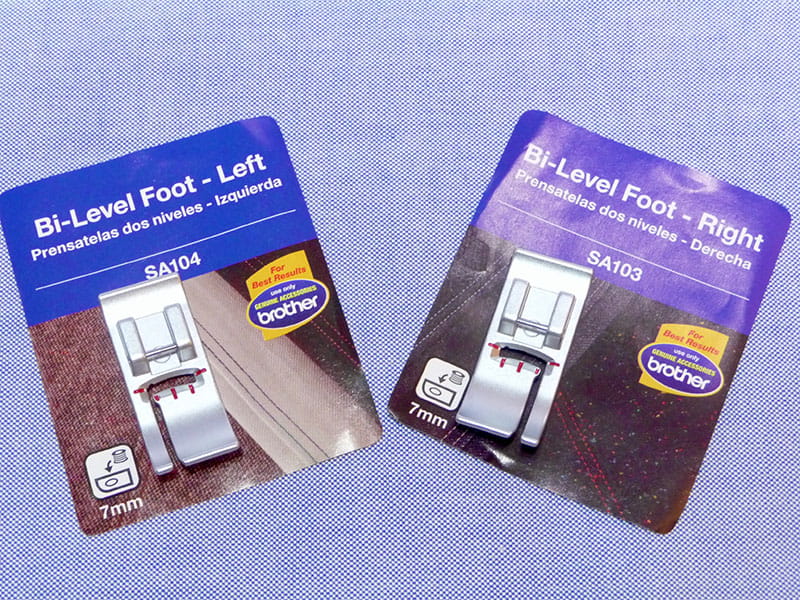
Brother Bi-Level feet have a separation in the toe of the foot, with a groove on the wide side. See Figure #2.
Figure #2
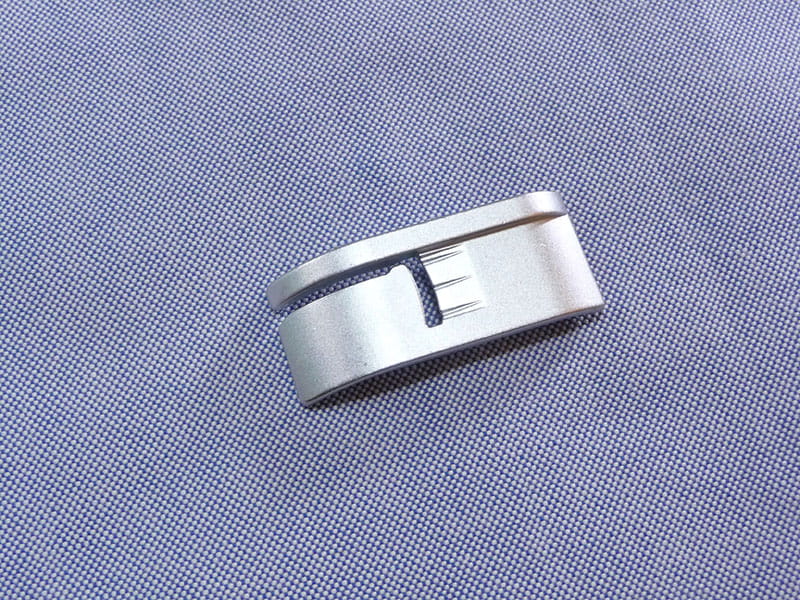
This groove is designed to rest easily over anything bulky that is underneath the foot. The narrow toe and the red markings on the foot all help for precise stitching with raised edges positioned under this groove. There are so many uses for this foot, such as topstitching when two adjoining fabrics are not level, stitching in the ditch on facings and waistbands, attaching trims, webbing, and straps, topstitching binding on quilts, garments, and craft projects, and many more applications.
The slick satin finish surface on the underside of these feet allows for smooth feeding on all sorts of fabrics. Try it on vinyl, leather, and faux leather materials and you’ll be surprised to see how easily it glides across the surface of the material. In this post we’ll concentrate on using SA103, the right sided version, to breeze through stitching flat felled seams.
Flat felled seams are designed to look neat on both the right and wrong side of your projects. Since all raw edges are enclosed, this seam is also strong and sturdy. You’ll find this type of seam commonly used for men’s shirts on both armhole and side seams. It’s also a popular seam for sewing panels together for home dec items and a great seam for sewing bags. You can even use the first version shown in this tutorial when you need a reversible seam. It looks neat and finished on both right and wrong sides.
Consider using this seam anytime you are sewing seams in fabrics that benefit from a neat finish with all raw edges enclosed. Examples in this tutorial include a 5/8-inch seam allowance.
This tutorial shows you how to do two variations of this seam. The first one is ideal for most any fabric when seams need to look neat and flat, with raw edges enclosed. The second version mimics the traditional flat felled seam used in ready-made jeans. Both of these seams are made easier and more professional looking by using your Brother Bi-Level foot.
Are you ready? Let’s go sew!
Materials and Supplies
- Brother sewing machine.
- SA538 Brother Adjustable Seam guide.
- SA103 Brother Bi-Level foot
- You’ll find a video and the instruction manual for this accessory on the Brother Support site HERE. You’ll also see the multitude of Brother models compatible with this accessory, which is essentially any machine with snap on feet.
- Basic sewing notions including thread to match fabric and machine needle appropriate for sewing selected fabrics.
- Remnants of fabric to prepare samples. I used chambray shirting and denim for my examples.
Flat Felled Seam Sample for Shirting and other fabrics ranging from light to heavy.
Note: This style is easy to execute on both straight and slightly curved edges, commonly used on men’s shirts at the armhole and side seam, and on sportswear. It’s a strong seam with all raw edges enclosed. This style will work for most any fabric.
- Cut two strips of shirting fabric. My strips measure 5-inches wide X 6-inches long and I’ll be using a 5/8-inch seam allowance.
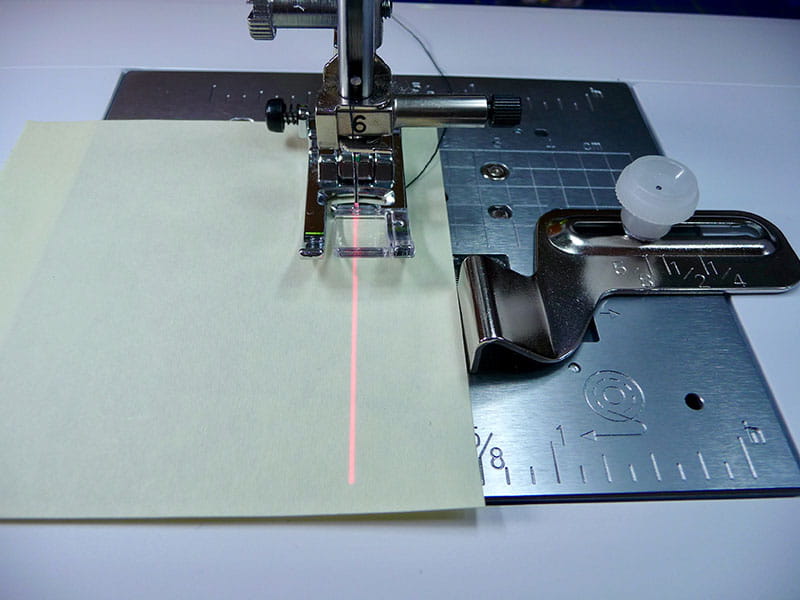
- Set machine for 5/8-inch seam using standard “J” foot and the adjustable seam guide. Tip: If you have access to the Guideline Marker, it helps you to see precisely where the 5/8-inch stitching line will be. Use it for setting up the seam guide and consider using it while sewing if you like. It can help keep you on track as you sew. See set up for 5/8-inch seam in Figure #3.
Figure #3
- Sew fabric with wrong sides together using a 5/8-inch seam allowance. Note: I marked both the right and wrong sides for reference. See Figure #4a and Figure #4b.
Figure #4a
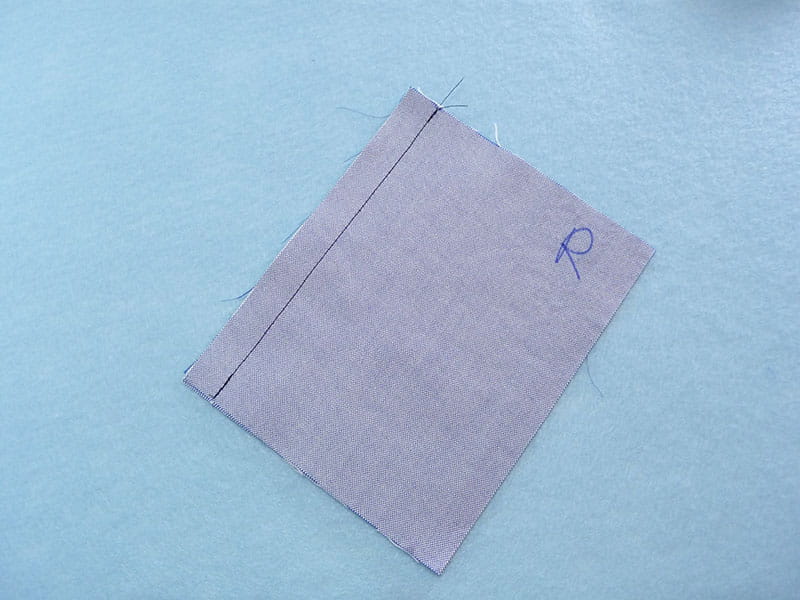
Figure #4b
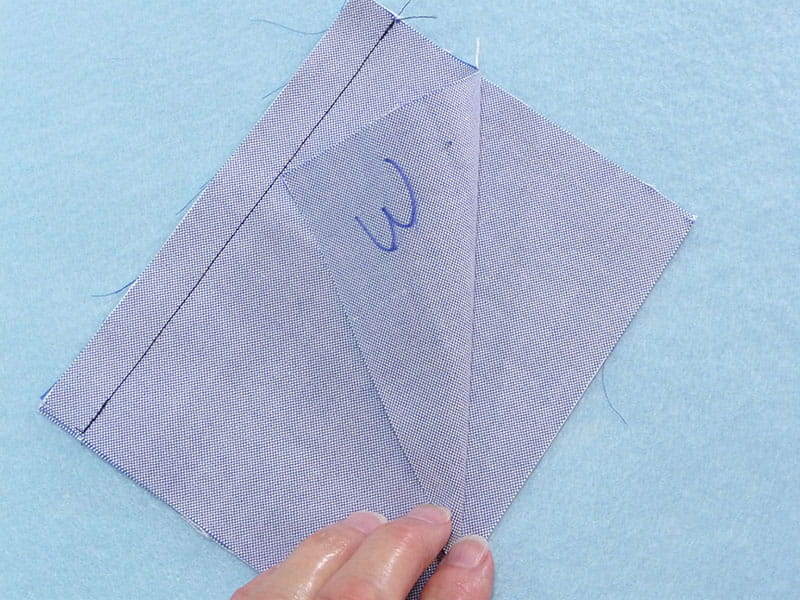
- Press seam open. See Figure #5. Tip: For fabrics that can take heat and steam, always press over your stitches before pressing seam in another direction. Heat and steam help set stitches into the fabric.
Figure #5
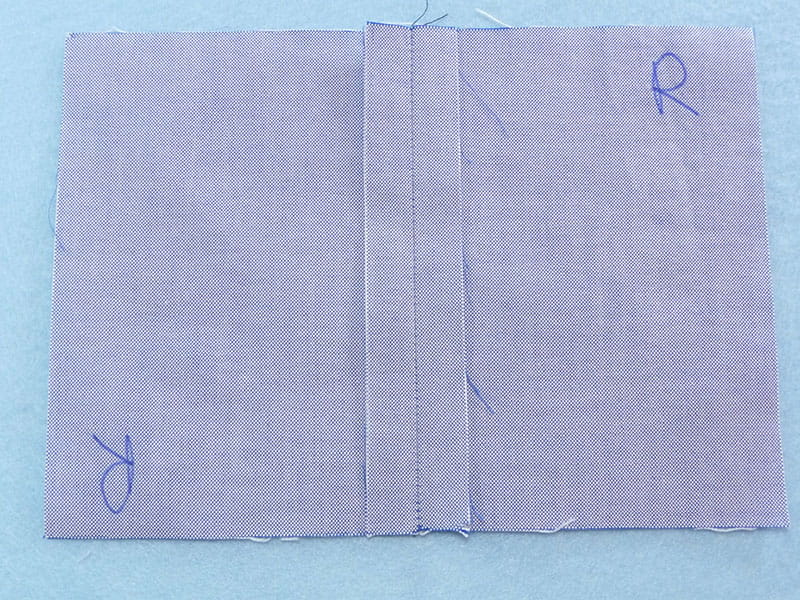
- Trim one side of the seam allowance to ¼-inch. This side is the underlap. Leave the second seam allowance at a full 5/8-inch. This side is the overlap. See Figure #6.
Figure #6
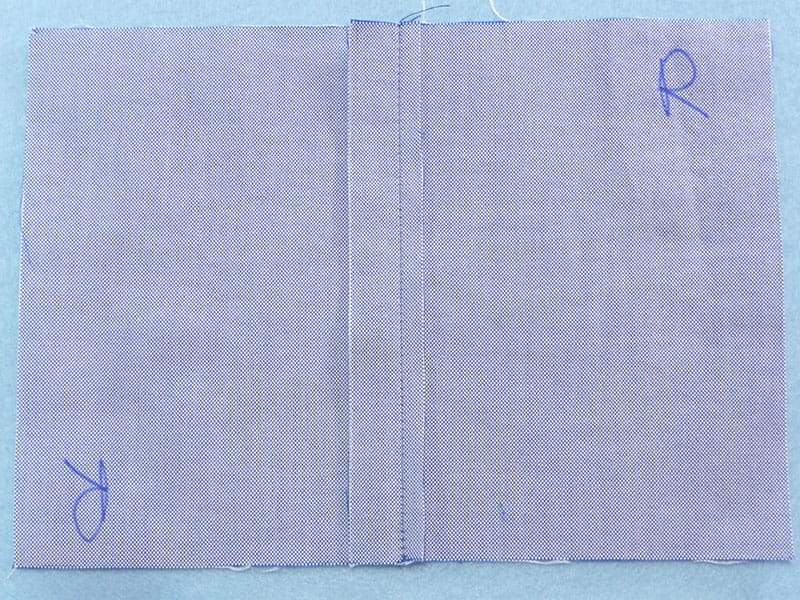
- Next, press the 5/8-inch seam so it is flat and covers the ¼-inch seam. See Figure #7.
Figure #7

- Now, fold and press under 5/8-inch seam allowance of overlap toward seamline, tucking in 1/4-inch seam allowance so this narrow seam allowance is enclosed inside. See Figure #8a.
Figure #8a
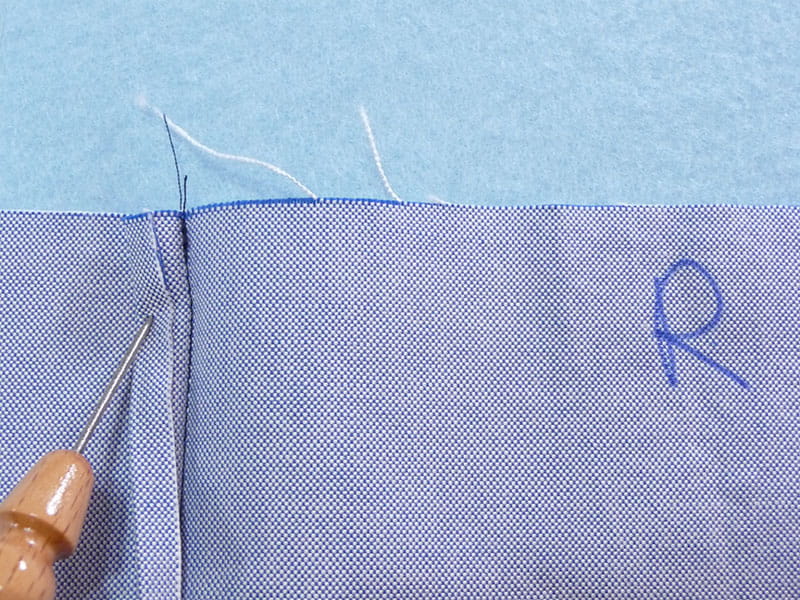
Press carefully on both right and wrong sides. See Figure #8b for an image of the wrong side after pressing.
Figure #8b
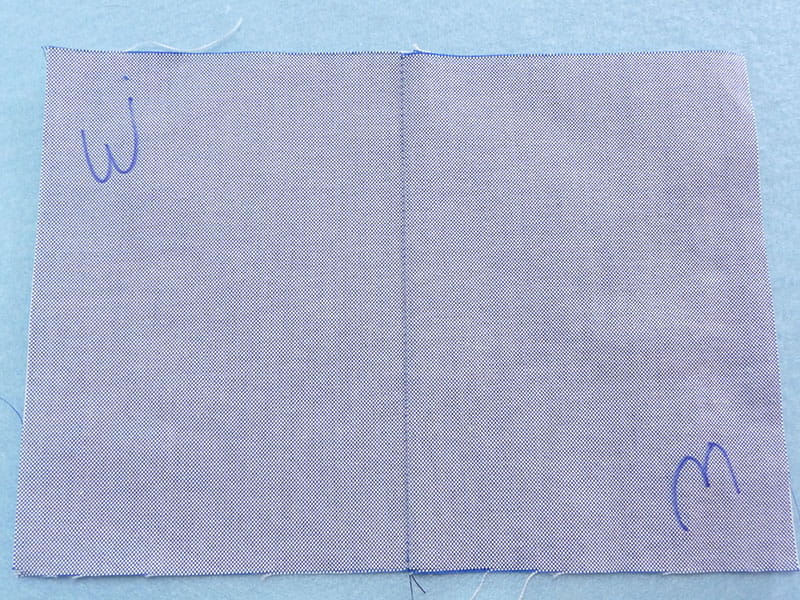
Note: If you are doing this on a slightly curved seam such as an armhole, you’ll need to do some easing to keep the overlap flat. The wrong side of the seam will be flat while the right side is raised slightly.
- Attach Bi-level foot. I’m using SA103 to topstitch the right-hand side of the seam. Move needle so it aligns with red marking on right-hand side of foot. Align the seam so the narrow toe on the foot runs right along the folded edge, and the bulk of the raised seam is under the groove of the foot. See enhanced image in Figure #9, with arrow pointing to red marking on foot at the point where the needle pierces fabric.
Figure #9
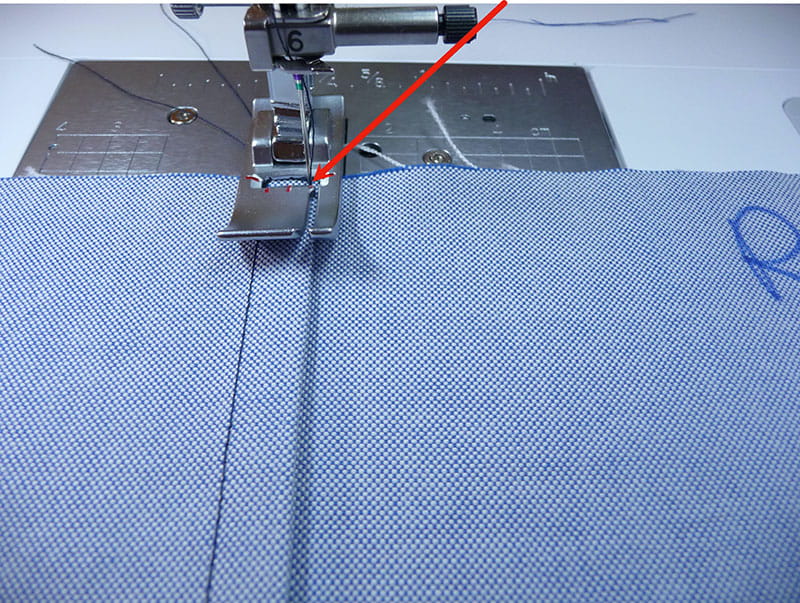
- Topstitch with right side of fabric facing up, having the edge of the foot running consistently along folded edge. See finished seam in Figure #10.
Figure #10
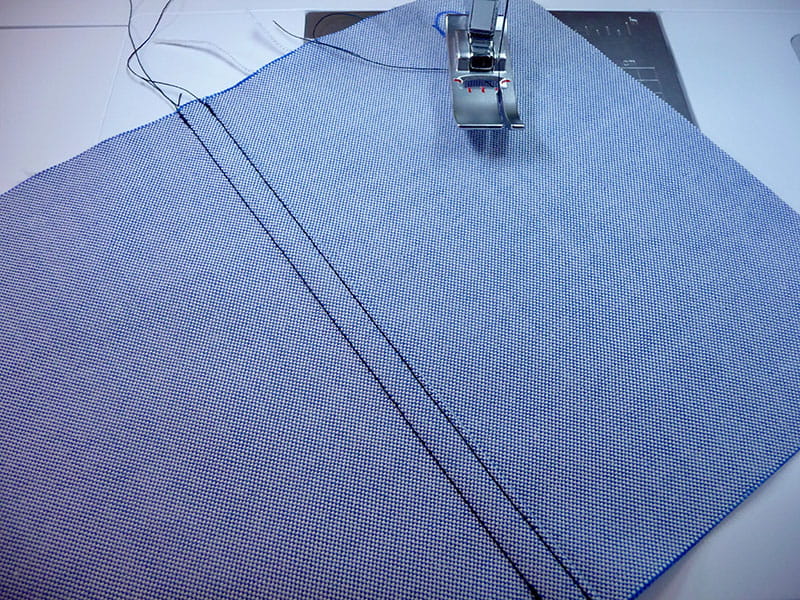
See wrong side of finished seam in Figure #11. Notice how much the fabric ravels, making it an ideal candidate for this style of enclosed seam.
Figure #11
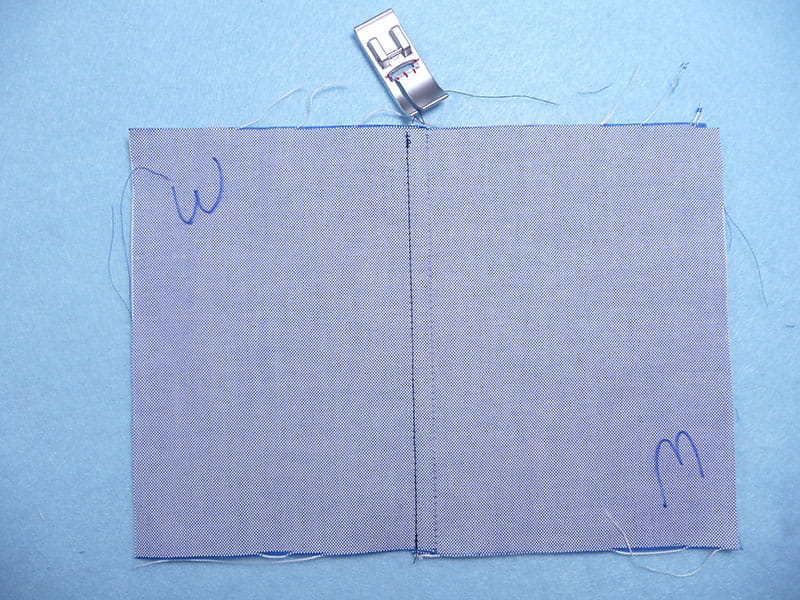
Note: When sewing this on a shirt side seam you want the folded edge pressed to the back of the shirt. For an armhole seam you would want the folded edge pressed toward the shoulder.
Flat Felled Seam Sample for Sportswear and Jeans Inseam
Note: This style is the most durable and mimics the well-known jeans inseam on ready-to-wear. Sewing a flat felled jeans seam that’s identical to ready to wear is only possible with industrial equipment where the fabric is automatically folded and then topstitched with a special double needle, with straight stitches on top and chain stitching on the wrong side.
- Cut two strips of denim fabric 5-inches long X 4-inches wide. Note: I marked both the right and wrong sides for reference.
- Attach Bi-level foot. I’m using SA103 to topstitch right-hand side of seam. Place first piece of fabric with the right side facing up. In the next step, we’ll need to align the raw edge of the second piece 3/8-inch from the raw edge of the seam. I marked the 3/8-inch line for positioning second piece. See Figure #12.
Figure #12
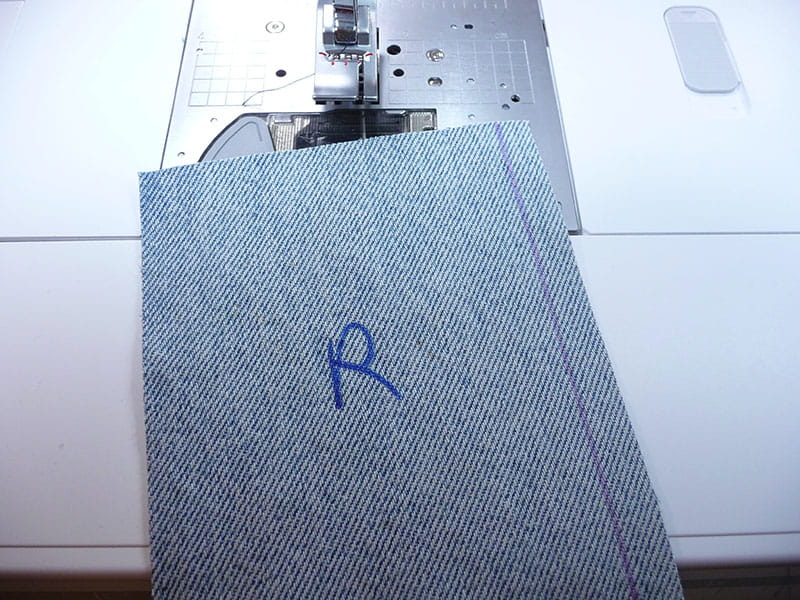
Next, layer the second piece over the top, with the wrong side facing up and the raw edge of the second piece 3/8-inch away from the raw edge of the first piece. See Figure 13.
Figure #13
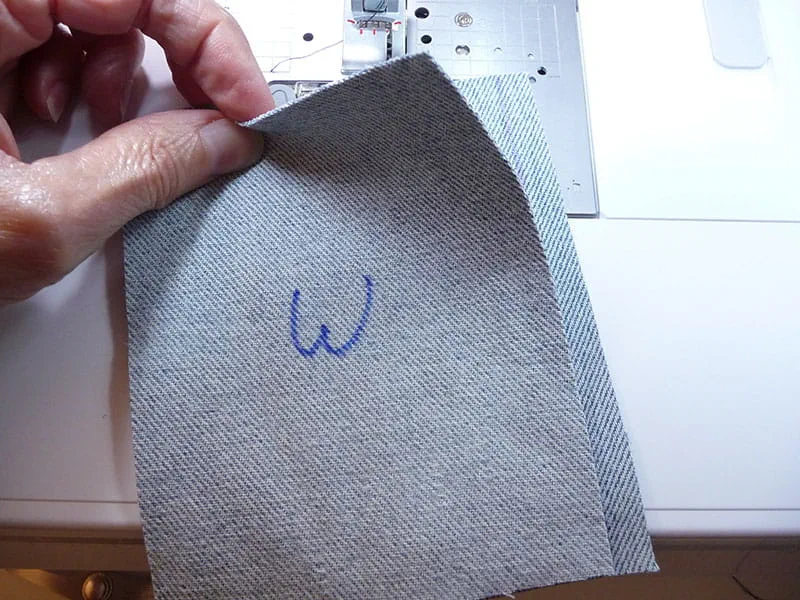
- Wrap and press first piece over second piece, wrapping 3/8-inch toward the wrong side and completely enclosing raw edge. You now have the fabric pieces right sides together, with both wrong sides facing you just like you would for sewing a standard seam.
- Place seam under the foot so the opening of the presser foot toe is along the folded edge. Move the needle position to line up with red mark on the far left-hand side of the foot. See Figure 14.
Figure #14
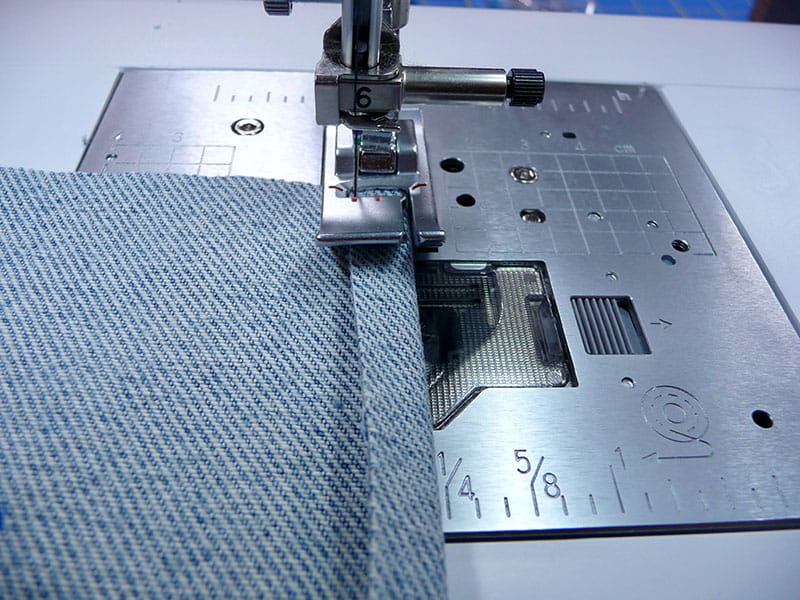
- Topstitch close to raw edge. See Figure 15.
Figure #15
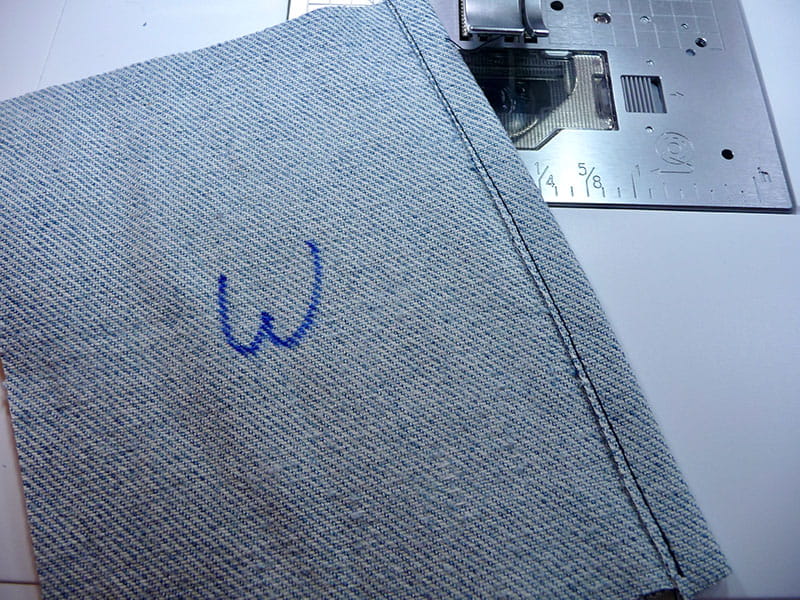
- Open up the two pieces. With the wrong side facing you, press folded edge to the left, so that raw edge is hidden underneath. See Figure 16.
Figure #16
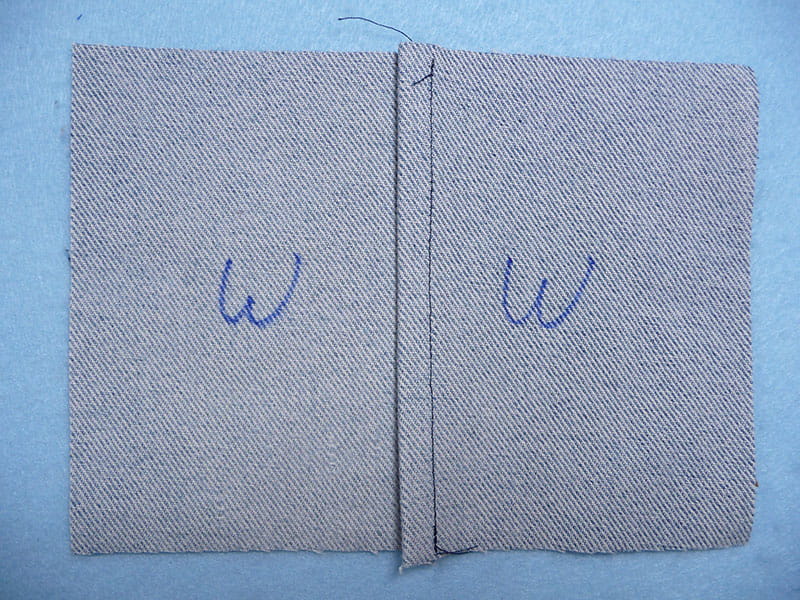
Press again from right side. See Figure 17.
Figure #17
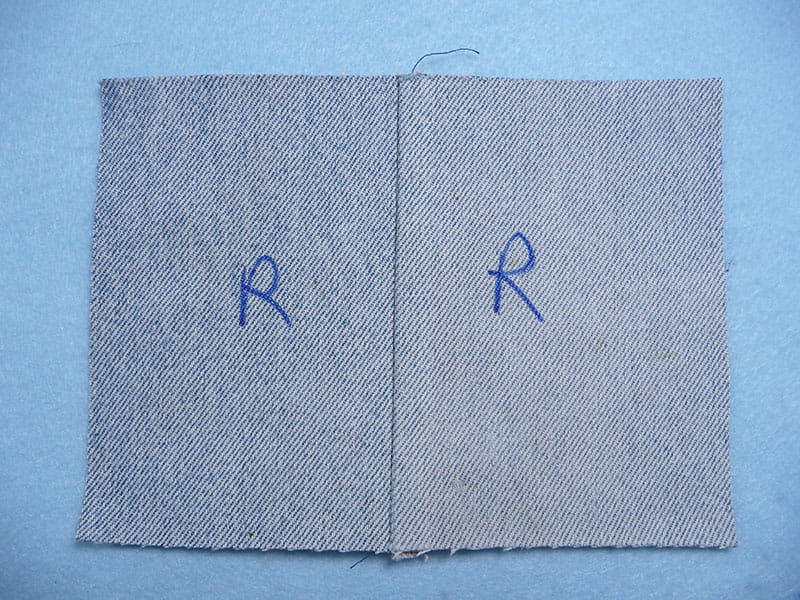
- Now, move needle position so it is slightly left of the red mark on the far right-hand side of the foot. My setting was 6.0. With right side of fabric facing you, topstitch the first line of stitching close to the seam, having opening of foot aligned with seamline. See Figure 18.
Figure #18
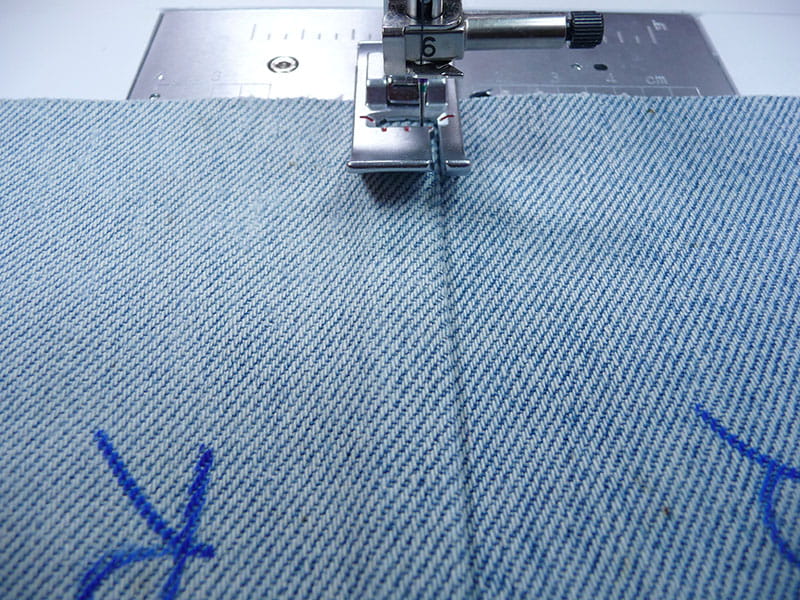
Tip: Choose the triple stitch with a stitch length of 3.0 as a substitute for having topstitching thread found on ready-made jeans. See Figure 19.
Figure #19
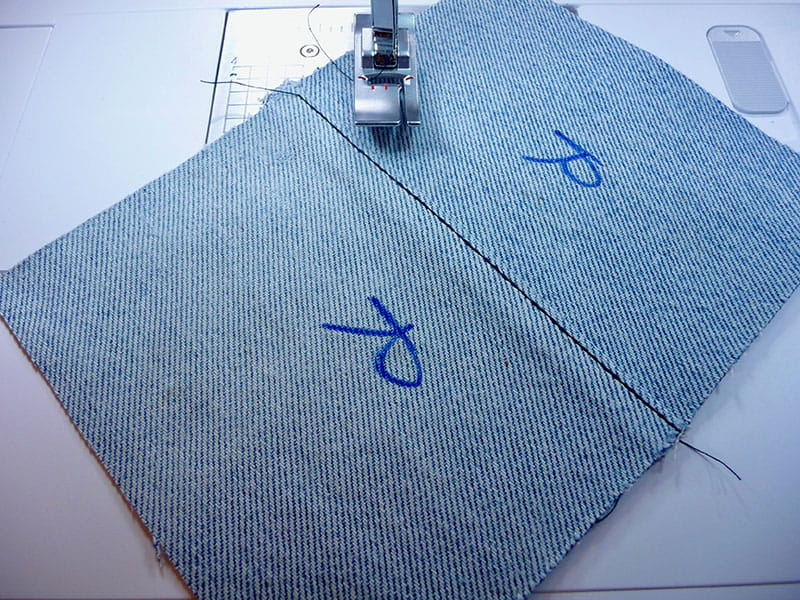
- Place fabric back under foot and move needle to align with red mark on far left-hand side of the foot. See enhanced image in Figure 20, with arrow pointing to red marking on foot at the point where the needle pierces fabric.
Figure #20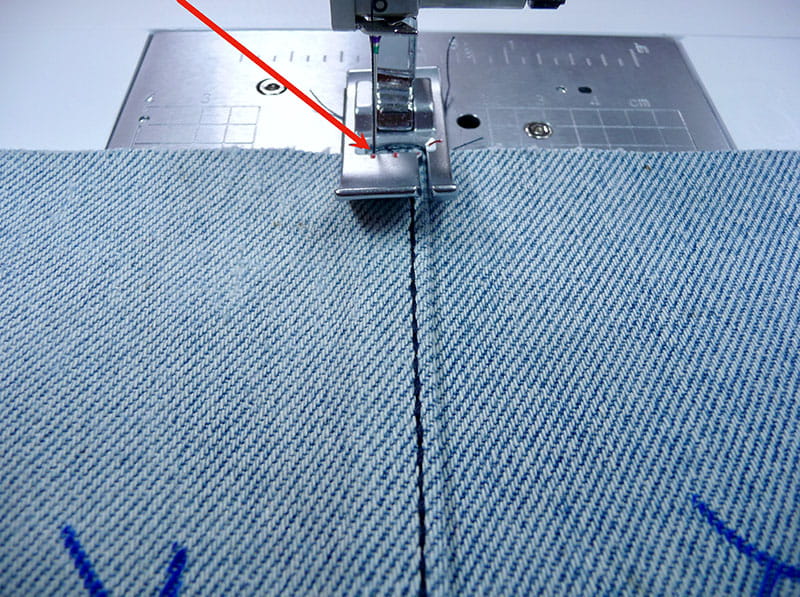
- Sew second line of topstitching. See Figure 21.
Figure #21
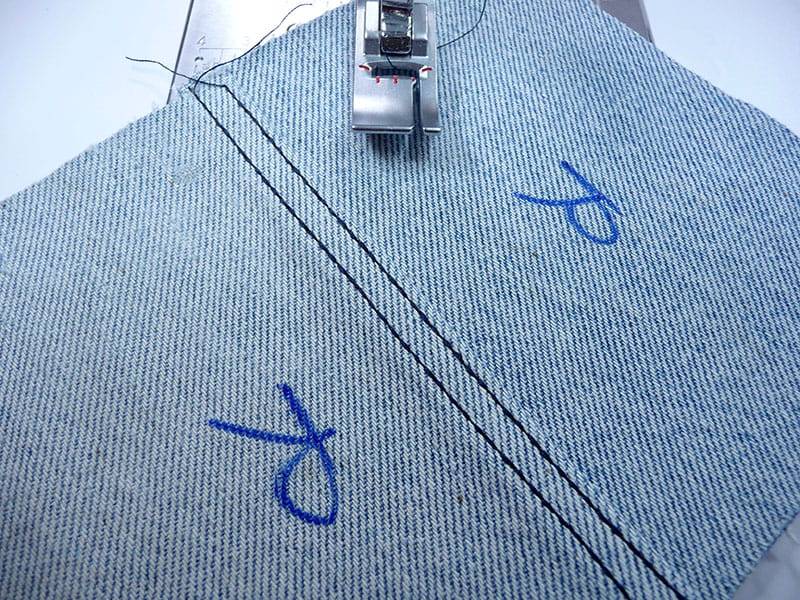
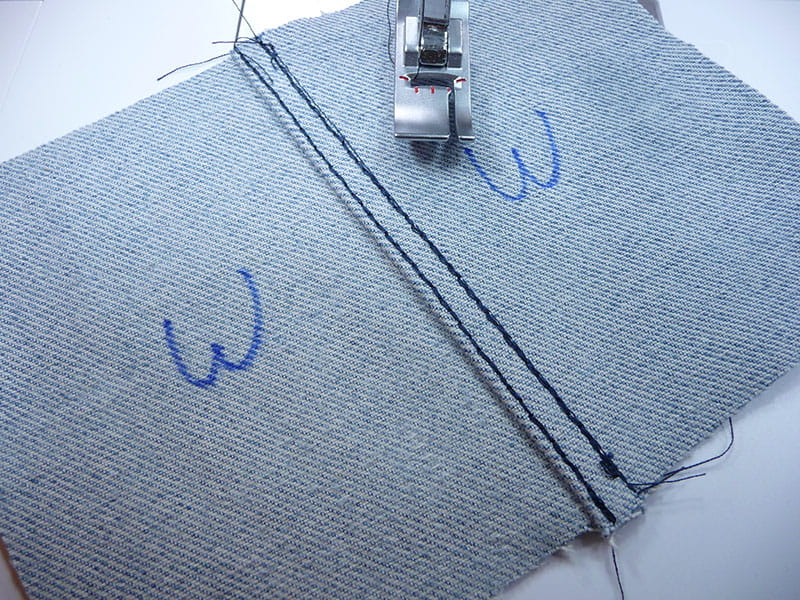
The resulting seam features two perfectly spaced rows of topstitching and a very strong seam. See the wrong side of the seam in Figure 22.
Figure #22
By following this tutorial, you now have samples of two ways to sew a flat felled seam using your Brother Bi-Level foot! Enjoy adding this new seam sewing skill into your sewing repertoire! See finished seams in Figure #23.
Figure #23
