How to Sew a Japanese Knot Bag
-Brother Sews Blogger
![]()
Sewing bags is my passion. From belt bags to drawstring bags and fanny bags, the Japanese Knot Bag remains a favorite of mine. It's simple to make and versatile, with a creative "knot" closure created by sliding one handle through the other. For my project, I opted for Shibori fabric to add an intricate pattern, and I made it reversible for extra style options. This bag suits fashion-forward individuals seeking unique ways to express their style. Whether you love DIY or appreciate handmade items, making your own Japanese Knot bag is rewarding. Learn how to create one below, choosing fabrics and patterns that showcase your unique taste.
Supplies:
- 1 yard of outer fabric – suggest medium-weight cotton, linen, etc.
- 1 yard of lining fabric
- 1 yard fusible interfacing (optional)
- Brother SE1900
- General Sewing Supplies
- Knot Bag Pattern
Instructions:
Step 1
Cut out the pattern from your fabric, lining, and interfacing. Apply interfacing to the backside of the outer fabric pieces following the manufacturer’s instructions.
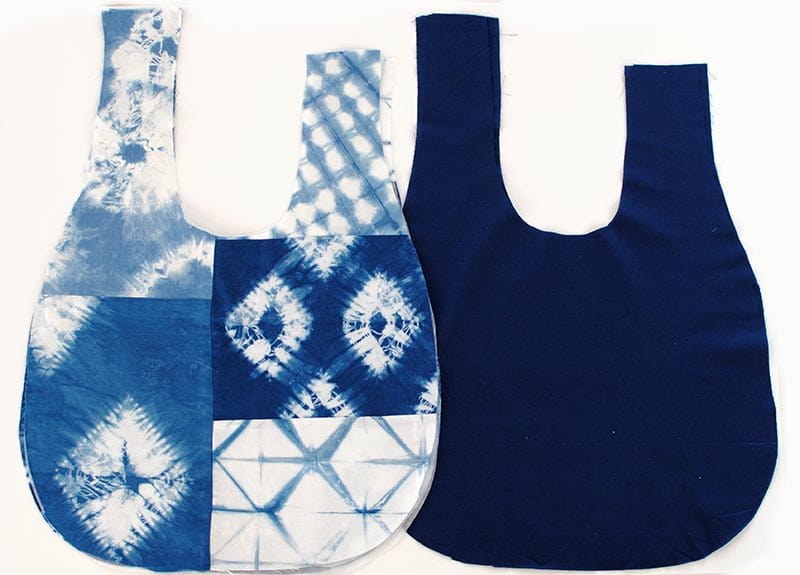
Step 2
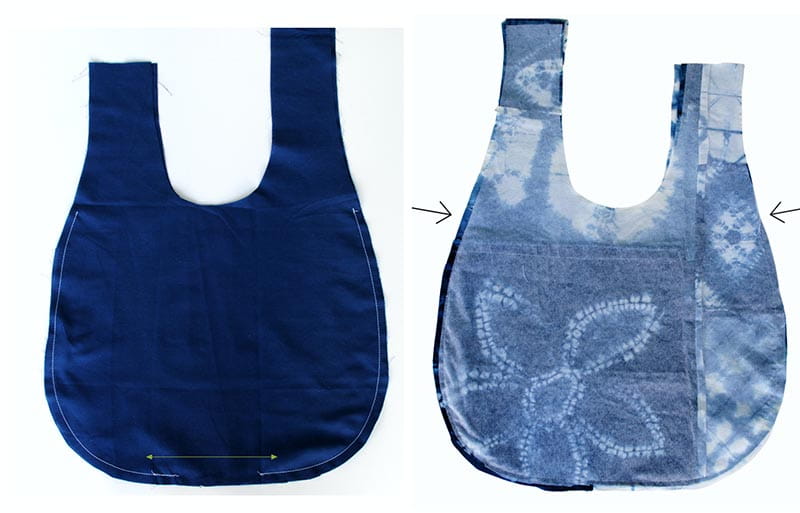
Place the outer bag front and back pieces together with right sides facing. Repeat for lining pieces. Make a mark along the outer edge of the outer bag and lining pieces just below the handles on both sides. Starting at one mark, sew around the bottom of the outer bag with a ¼” seam allowance, stopping at the second mark. Repeat for the lining pieces but leave a 3” opening along the bottom as shown. Clip the curves.

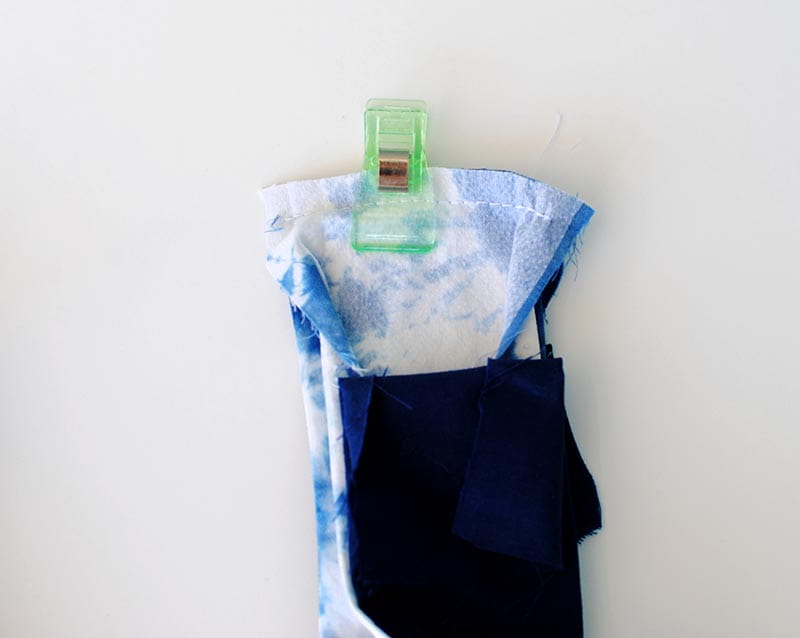
Step 3
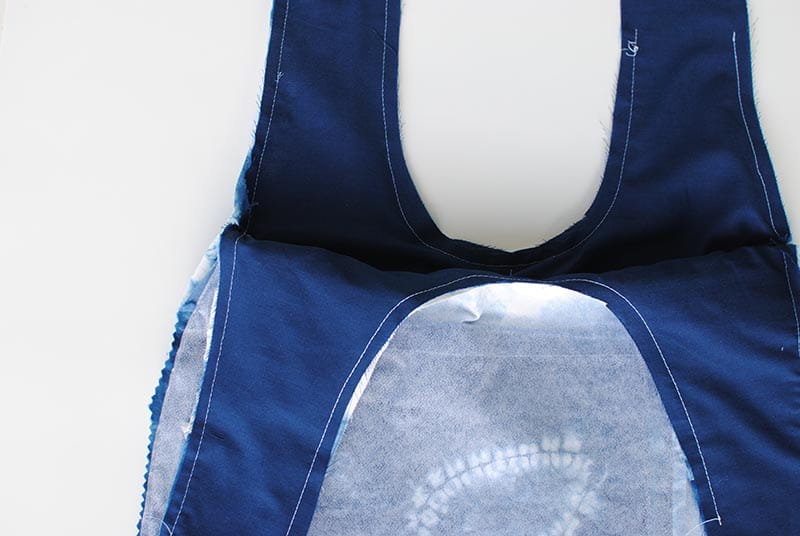
Turn the lining right side out and place it inside the outer bag so right sides are facing. Align the handle pieces and pin or clip the edges together. Sew the handles, stopping 2” from the top edge. It should look like this. Clip the curves.


It should look like this. Clip the curves.
Step 4
Flip the bag right side out through the opening in the lining. Press flat.
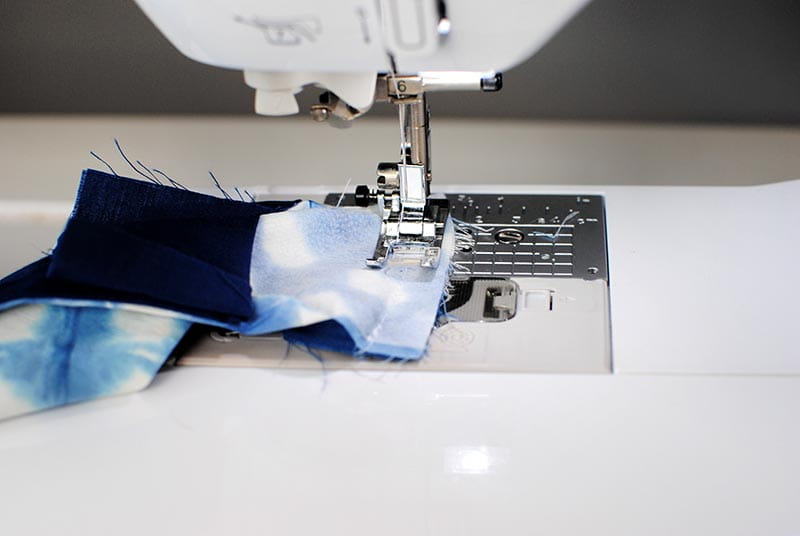
Step 5
Match the top edges of the handles on the outer fabrics, placing right sides together. Pin or clip, then sew the seam. Repeat to sew the handles on the lining fabric. Press.
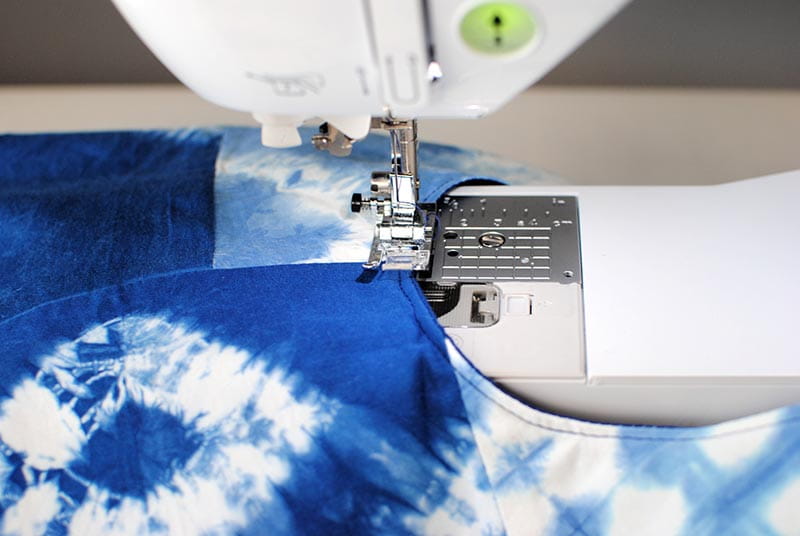
Step 6
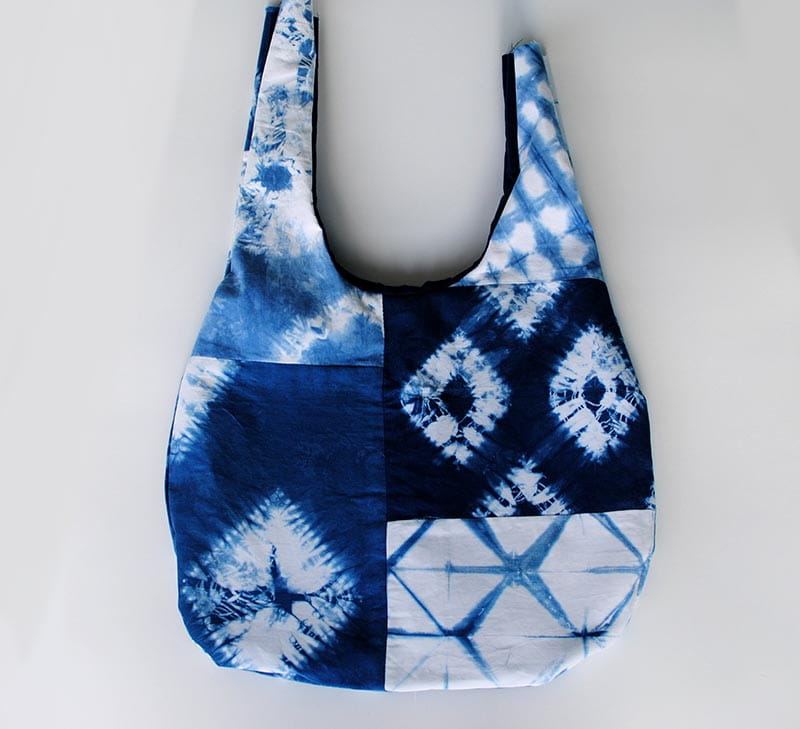
After ensuring everything is neatly aligned, and your seams are pressed, all that’s left to do is topstitch around the edges. This step not only adds a professional finish but also reinforces the bag's structure, ensuring durability. Carefully sew along the perimeter, keeping your stitches even and consistent for the best result. Don’t forget to sew the opening in the lining closed to maintain a clean look inside. Once finished, your Japanese Knot Bag is ready to use, showcasing your creativity and personal flair, while offering a stylish and functional accessory.
You're all done! Enjoy your new Japanese Knot Bag!

Do you remember when I shared my love for creating bags? Well, if you had fun making your Japanese Knot Bag, I have two exciting projects you'll love! Just in time for Earth Day, why not craft your own Earth-Friendly Burlap Bag? It's an excellent way to contribute to the planet! And if you're looking for a stylish way to organize your lipstick, blush, and more, don't miss out on the super fun Makeup Bag project. Dive in and get creative!
FAQ
Q: What are the advantages of the knot bag?
A: The Japanese Knot bag is an unstructured bag that can hold just about anything, from personal items to groceries and more! The handles are asymmetrical. The longer handle is designed to slip through the shorter one, forming a “knot” which closes the bag and keeps the contents secure. Japanese Knot bags are often made to be reversible, so you get two bags in one!
Q: What fabric is good for a Japanese knot bag?
A: A variety of fabrics can be used to make a Japanese knot bag, depending on the desired look and feel of the finished bag. Medium-weight cotton or linen fabrics are good options for beginners as these fabrics are stable and easy to work with. Specialty fabrics like silk, jacquard, or velvet can be used for a more luxurious look and feel, but they can be more challenging to work with.
Tags
Shop this Project
No sewing machine? No problem! Any products mentioned in this project are available to buy here so you can stay stitching.

Brother SE1900
- 138 Embroidery designs and 240 built-in stitches
- 5" x 7" Maximum embroidery area
- 8 Included accessory feet
Related Projects
Stay Connected
* Required fields