March Free Design: Elegant Embroidered Handbag
Materials and Supplies:
- Brother Sewing and Embroidery Machine with 4-inch by 4-inch hoop.
- Brother Polyester Embroidery Thread to match fabric.
Wind a bobbin with this same thread to use for embroidering flowers. - SA540 Lightweight, fibrous type water-soluble stabilizer.
- Brother Free Design of the month.
- Embroidery needle for embroidering.
- Small sharp curved tip scissors for trimming embroidered flowers.
- Sharp, fine machine needle for sewing.
Basic sewing notions:
- Thread, a wash out marker or chalk, a loop turner, a bodkin, and a press cloth. Optional but helpful, clear fabric starch, glass head pins, and a padded press board.
Note: Check the temperature of your iron and test for proper setting before pressing fabric and seams of satin and netting.
Fabrics and supplies for purse and embroidered flowers:
- Crepe back satin or similar fabric, 1/2 yard of 54" to 60" inch wide fabric.
- Lightweight, pre-shrunk flannel, one piece measuring 19 1/2-inches wide X 11-inches long and one piece measuring 6 1/2-inches square for backing quilted pieces of purse.
- Lightweight netting, also known as bridal tulle in a color that coordinates with the satin fabric, two pieces measuring 8-inches square for each flower.
Note: This project features three complete flowers.
Supplies for making purse patterns:
- Compass or other circle drawing tool
- Paper or pattern tracing cloth for creating purse pattern
- Rulers for drawing patterns
Brother Free Design of the Month
- Design size: 3.67" High X 3.32" Wide (93.1mm High X 84.3mm Wide)

Note: Click here to download the Lacy Rose_Free Design March 2018.pes
Steps to Create Purse
- Create patterns for purse pieces using measurements below. Mark notations for cutting on each pattern piece.
- For lower purse piece: Rectangle measuring 19-inches wide X 10 1/2-inches long, CUT ONE.
- For upper purse piece: Rectangle measuring 19-inches wide X 3 1/2-inches long, CUT ONE.
- For purse lining: Rectangle measuring 19-inches wide X 13-inches long, CUT ONE.
- For outer purse bottom piece and for lining purse bottom: Circle measuring 6-inches in diameter, CUT ONE for outer purse and CUT ONE for the lining.
- For casing on purse: Rectangle measuring 2 1/4-inches wide X 10-inches long, CUT TWO.
- For drawstrings: Rectangle measuring 1 1/4-inches wide X 25-inches long, CUT TWO.
Note: All purse seams are sewn using a 1/2-inch seam allowance.
- Using all of the above patterns, layout and cut each piece from satin fabric as described. Separate the circle cut for outer purse bottom and lower purse piece to layer with flannel, and then set aside all pieces temporarily.
- Transfer design to your machine. Prepare to embroider each flower by layering two pieces of netting with water soluble stabilizer on the top and on the bottom. See Figure #1.
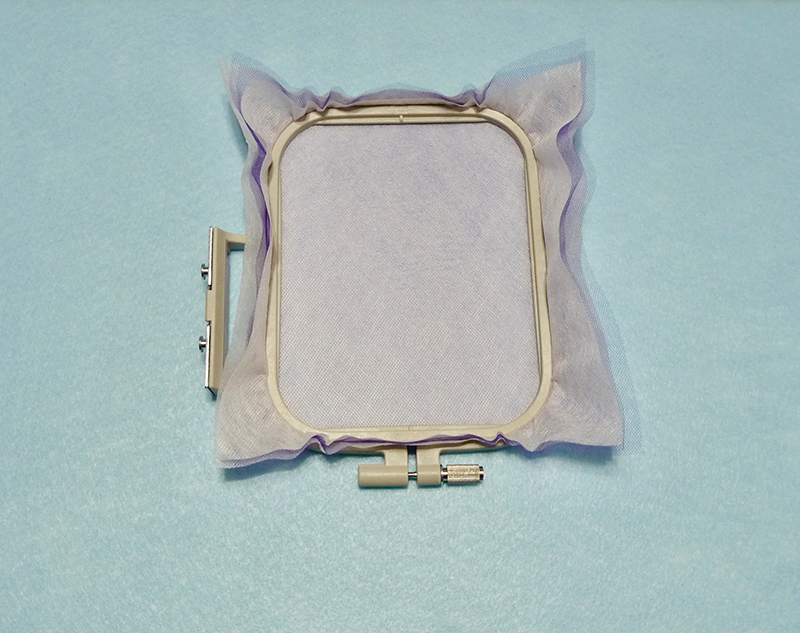 Figure #1[/caption]
- Embroider design with embroidery thread in top and bobbin. See Figure #2.
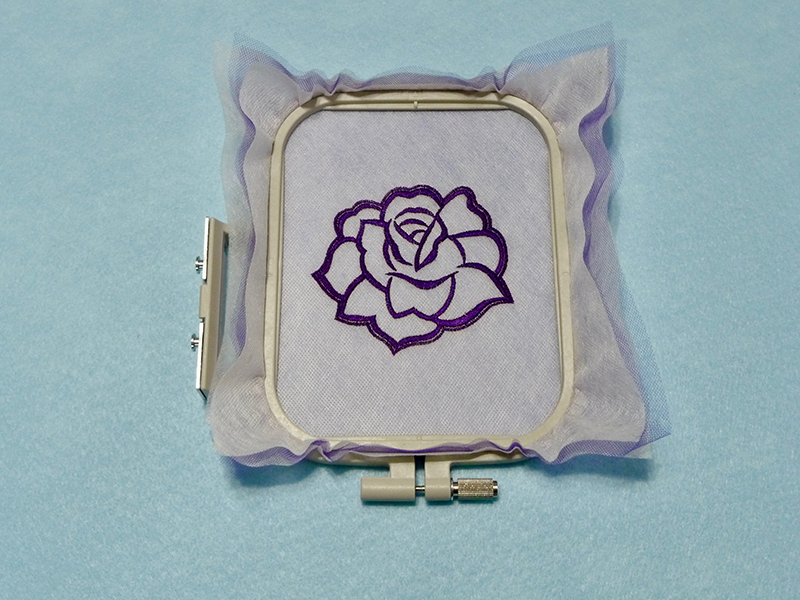 Figure #2[/caption]
- Repeat for each flower. Use the curved tip scissors to cut close to the finished edge of each flower, taking care that you don't cut the stitches at the edge. See Figure #3.
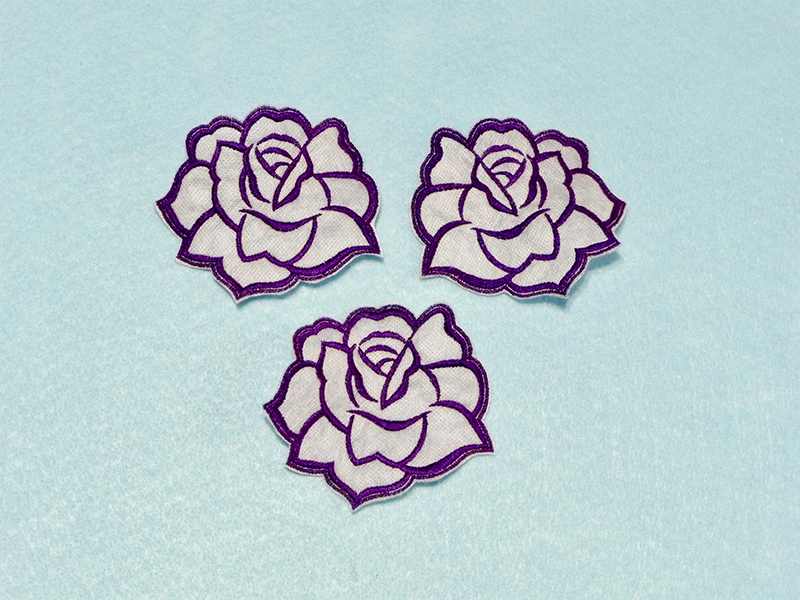 Figure #3[/caption]
- Wash out stabilizer as directed on the package. Let dry and press flat using a press cloth.
- Set up machine for sewing with walking foot and guide. Prepare to quilt the lower purse piece and outer circle for the purse by layering each piece with the slightly oversized flannel piece. Mark horizontal and vertical lines on each piece. See Figure #4a and #4b.
 Figure #4a[/caption]
[caption id="attachment_13697" align="aligncenter" width="800"]
Figure #4a[/caption]
[caption id="attachment_13697" align="aligncenter" width="800"]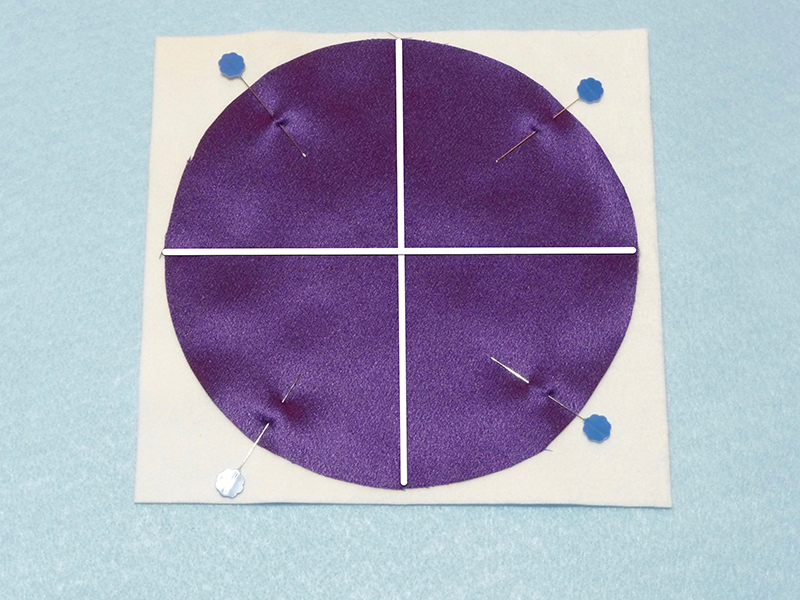 Figure #4b[/caption]
- Quilt each piece, beginning by quilting each center line and then continuing to quilt the entire piece having quilt lines spaced 1/2-inch apart. See Figure #5a and #5b.
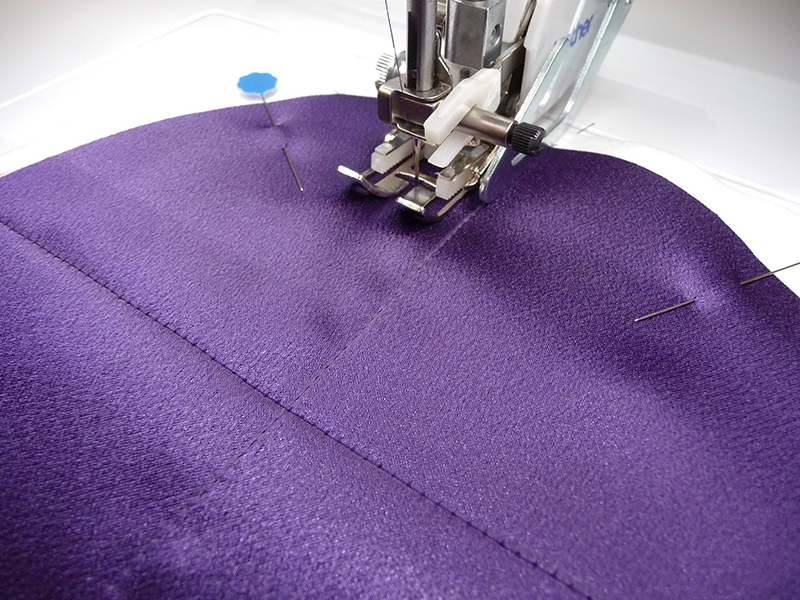 Figure #5a[/caption]
[caption id="attachment_13699" align="aligncenter" width="800"]
Figure #5a[/caption]
[caption id="attachment_13699" align="aligncenter" width="800"]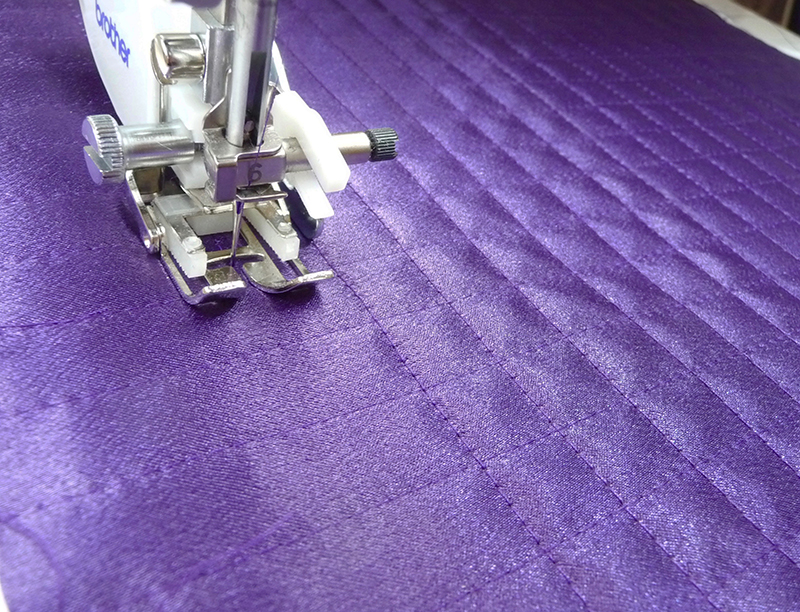 Figure #5b[/caption]
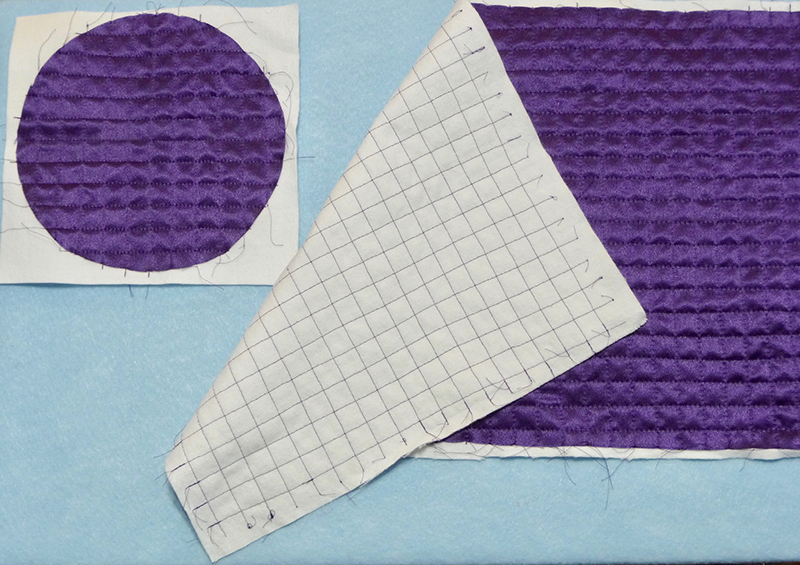
- Finished pieces should resemble pieces shown below:
- Press each one and use the corresponding patterns to trim so they are even. Select upper purse piece and pin to quilted piece matching long edges. Sew pieces together. See below:

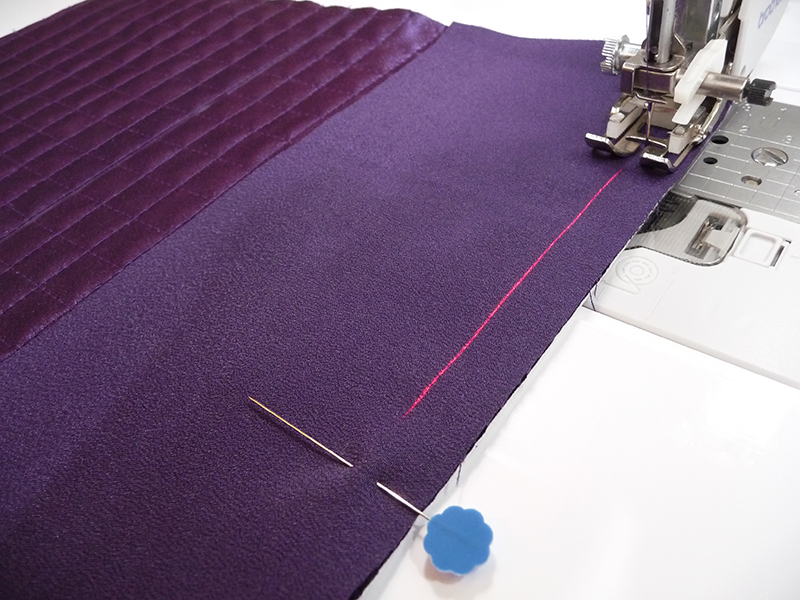
Tip: The walking foot works well for sewing main purse pieces together.
- Pin flowers in place on quilted purse piece. See Figure #6.
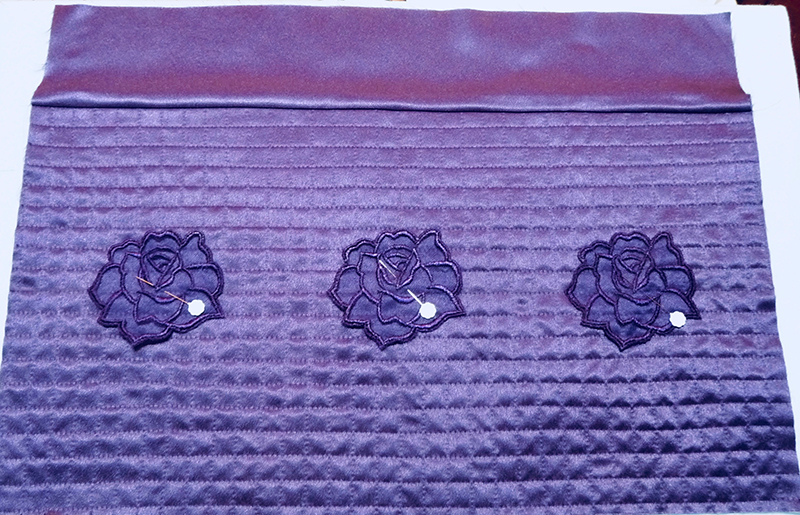 Figure #6[/caption]
Tip: Use a small amount of straight stitches to lightly tack top, bottom, and sides of each flower through both layers.
Note: Alternatively, you can tack flowers in place using small hand stitches. It's not necessary to stitch around the whole flower. Feel free to place flowers any way you choose, spacing them evenly across the purse or clustering them together, making sure they are positioned approximately 3-inches down from the seam.
- Place right sides together and form a cylinder by sewing center back seam of quilted piece. To form bottom of purse, pin quilted circle to the piece. Note that the un-quilted strip is at the top of the purse. See Figure #7.
 Figure #7[/caption]
- Clip into seam allowance of the cylinder and sew pieces together. See Figure #8.
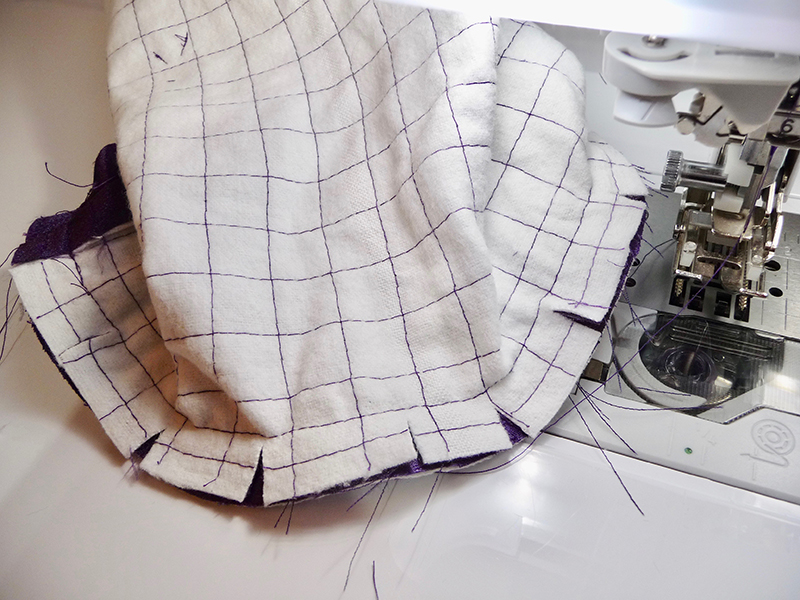 Figure #8[/caption]
- Sew lining piece into a cylinder, taking care to leave a small opening for turning purse right side out. Sew circle to form bottom of purse lining Trim seam to eliminate bulk. Slip lining over purse and pin top edges together with right sides facing. See Figure #9a and #9b.
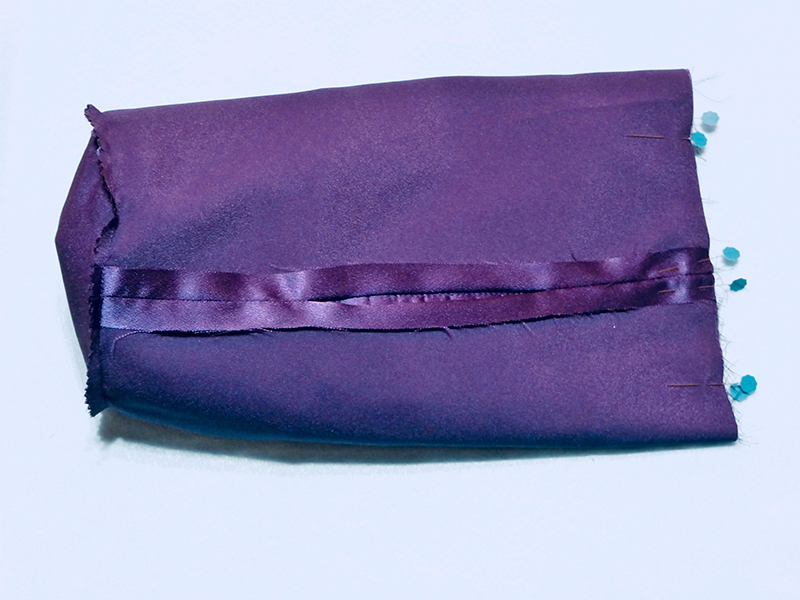 Figure #9a[/caption]
[caption id="attachment_13704" align="aligncenter" width="800"]
Figure #9a[/caption]
[caption id="attachment_13704" align="aligncenter" width="800"]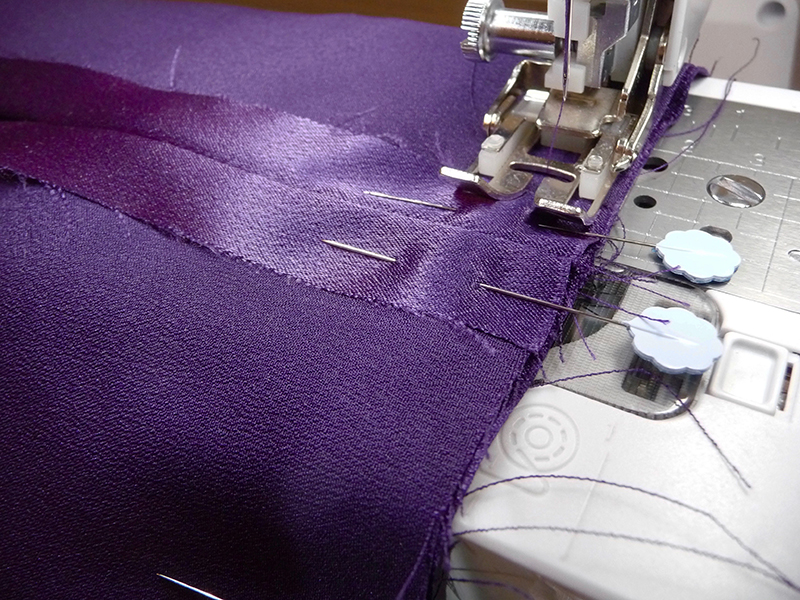 Figure #9b[/caption]
- Turn right side out through opening in lining. See below:

- Push lining into purse, press, and stitch close to top edge through all layers. See Figure #10.
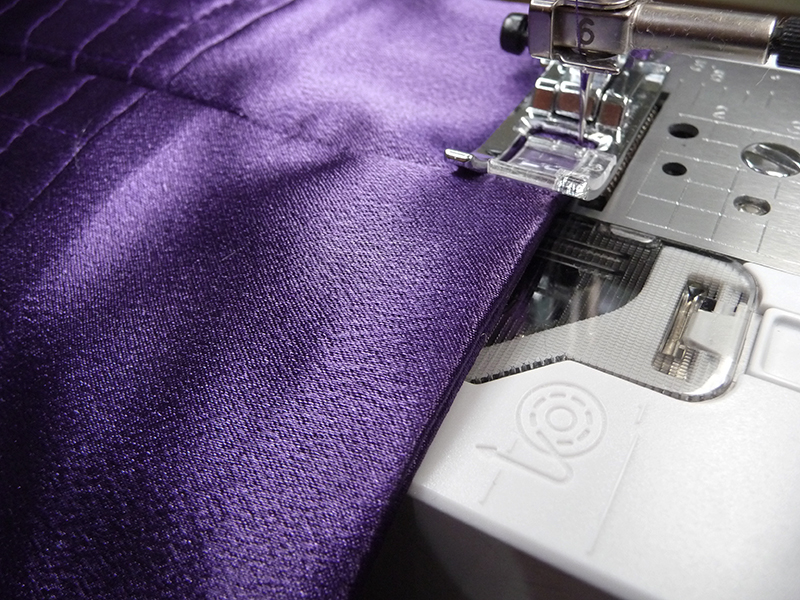 Figure #10[/caption]
- Select pieces cut for casings. Turn short raw ends under, pressing 1/2-inch to the wrong side. Fold long edges to meet in center and press.
Tip: It helps to use a little bit of clear starch and press with pieces pinned to press board using heat resistant glass head pins. See Figure #11.
[caption id="attachment_13706" align="aligncenter" width="800"]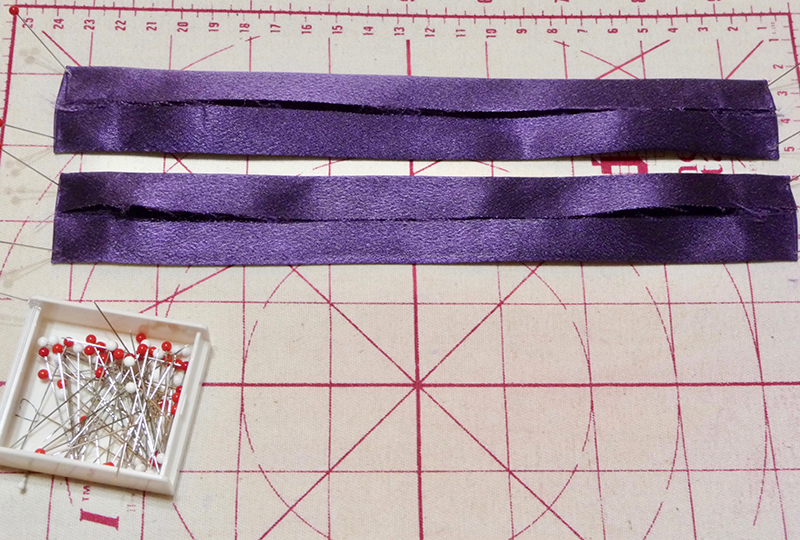 Figure #11[/caption]
- Pin one strip to the front half of the purse and one to the back half, centering strips over seam at the top. Short folded ends should meet at the sides. See Figure #12a and #12b.
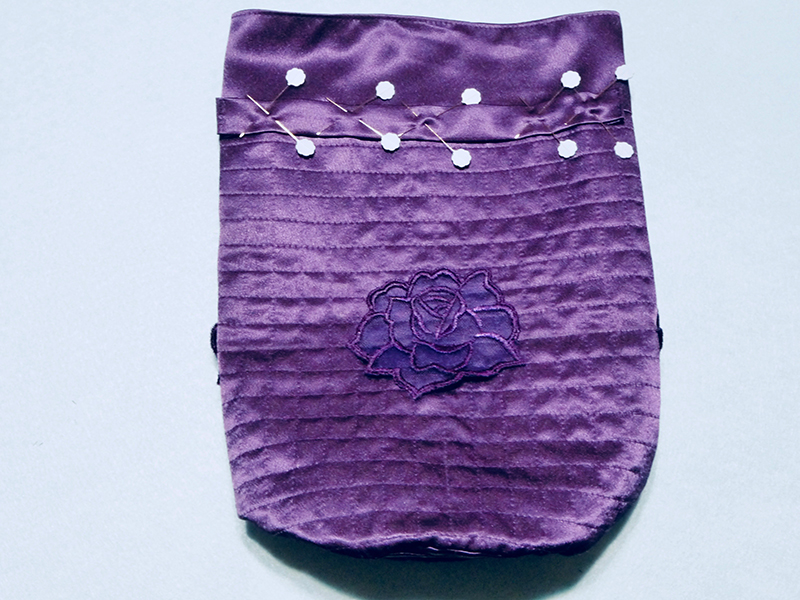 Figure #12a[/caption]
[caption id="attachment_13708" align="aligncenter" width="800"]
Figure #12a[/caption]
[caption id="attachment_13708" align="aligncenter" width="800"]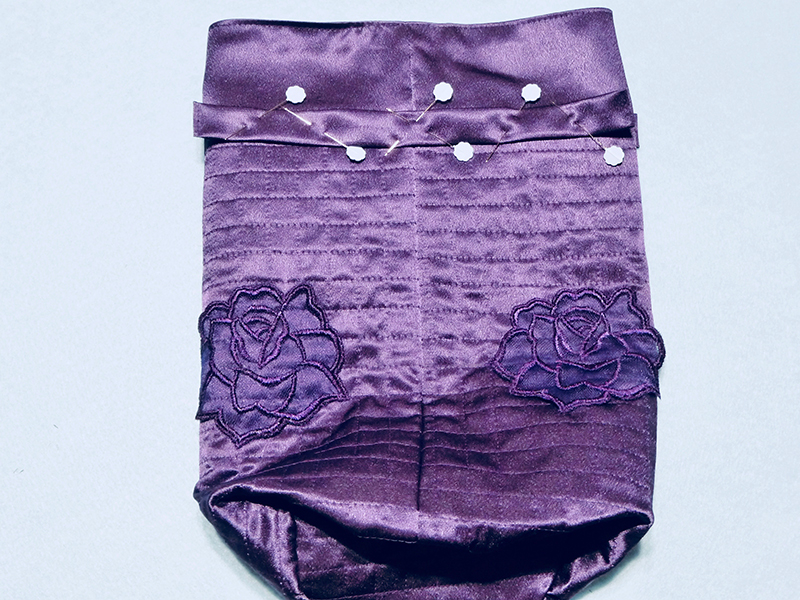 Figure #12b[/caption]
- Switch to regular presser foot. Using the free arm of your machine, edge stitch close to long edges of casings to attach to purse. Select drawstring pieces. Turn each short end under 1/2-inch, place right sides together and then sew long edges using a 1/4-inch seam. Turn right side out using loop turner to form a set of narrow drawstrings.
- Attach bodkin to first drawstring. Beginning at one side pull through both casings, exiting on the same side as you began. Insert second drawstring on the remaining open side.
- Pull through in the same manner, once again having both ends exit on the same side where you began. See Figure #13.
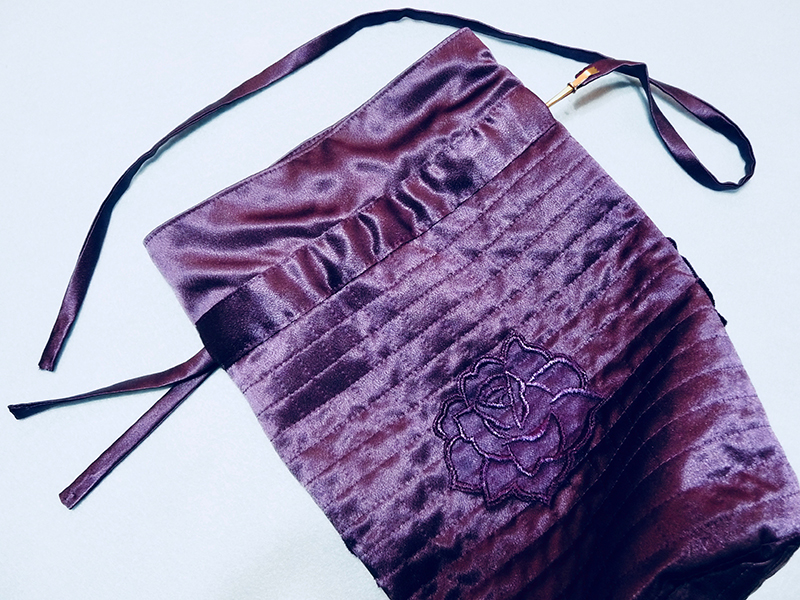 Figure #13[/caption]
Note:
This allows you to pull on both at the same time to close top of purse. Knot each set of loose ends together to form a loop for purse handles. You are finished! Enjoy!Related Projects
Stay Connected
* Required fields