How to Make a Quilted Evening Clutch
-Brother Sews Blogger

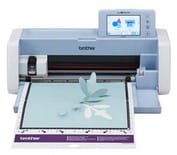
How would you like a luxurious Velvet Clutch for the holidays or other special occasions? This DIY clutch was made from beautiful jewel tone velvets with a pop of bright green. The pattern was created in the Brother Advanced Quilt Design software. The software allowed me to design my pattern or block in any way and any size I wanted. The quilting software also gave me the FCM file I needed to be able to cut the velvet pieces on the Brother ScanNCut DX using the new rotary blade to make sure they were perfect.


To make it easier to piece the velvet together, I used the MuVit Foot (Dual Digital Feed) with the laser guidelights. The MuVit foot will help keep difficult fabric like velvet (even chiffon) from slipping or shifting and the laser guidelight makes it simple to get those perfect seams and points.


Once I finished the piecing, I added different colored borders. Notice that no pins are needed with the MuVit Foot!

Then I simply placed a lining piece (using the top as my pattern) right side to right side and stitched them together, leaving an opening to turn to the right side out.
Once it was turned and pressed, I top stitched all the way around. Then it was time to quilt using the laser guidelights! Quilt as desired. I liked following the geometric shapes.
Hint: The 1st one I made I used a metallic gold thread for the quilting. Unfortunately, it disappeared into the velvet. I was hoping it would peek out, but it didn’t. The 2nd one I made without borders, and I used a monofilament thread.

Once I was happy with the quilting, I folded the bottom up and stitched the sides together.

Add a button or catch as desire and enjoy your luxurious handmade Velvet Clutch for years to come!


