Ruffled Table Mat for Folding Tray Ruffler Foot
Spoil Mom this Mother’s Day with a ruffled tablemat made to fit a folding tray. This gift idea lets Mom relax with breakfast in bed or a cup of tea on the sofa. The Brother ruffler attachment makes it a snap to gather up a long strip of fabric to trim the tray cover (or a pillow...a robe... a kitchen towel...the possibilities are endless!) You can use your decorative stitches to add some flair to the contrast edging. Take a peek at the back of the tablemat and you’ll find a special embroidered message. While this is optional it adds a custom touch that will make Mom smile each time she uses this pretty piece.
Materials and Supplies
- Brother Sewing Machine
- Brother Embroidery machine
and embroidery supplies
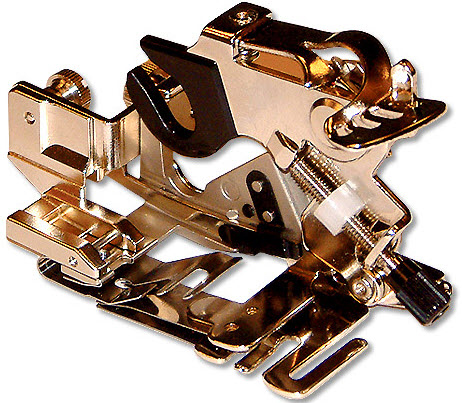
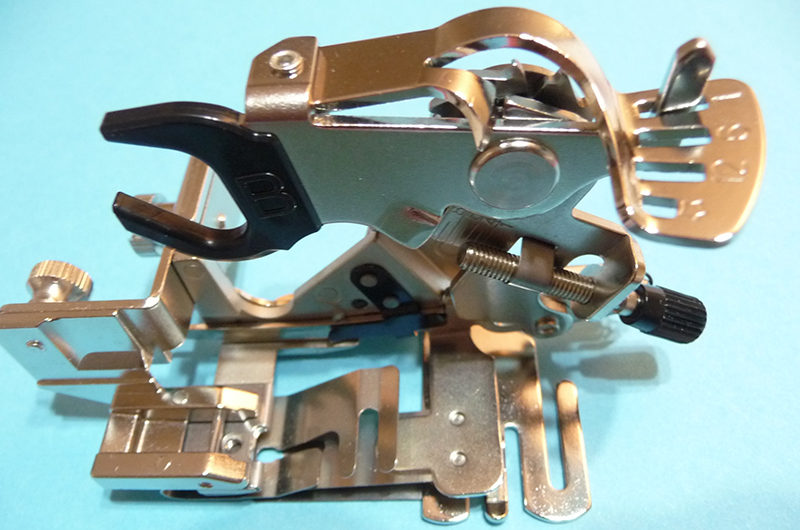
for optional design on tablemat. - SA143 Brother Ruffler Foot Attachment
- MT999 Brother Gold Metallic Thread
or other embroidery thread
for decorative stitching. - Embroidery needle size 11 for embroidery and decorative stitching.
- Basic sewing notions including a tool for turning points, a large safety pin, thread to match fabrics, and a size 14 quilting (sharp needle) for sewing.
- Folding tray: Measuring approximately 20-inches from left to right and 12 ½-inches from front to back.
- Fabric print for front: Cut one piece measuring 21-inches wide X 13-inches long.
- Solid or tone on tone fabric for back: Cut one piece measuring 21-inches wide X 13-inches long.
- Solid or tone on tone fabric strips for trimming front: Cut two strips measuring 3-inches wide X 21-inches long and two strips measuring 3-inches wide X 13-inches long.
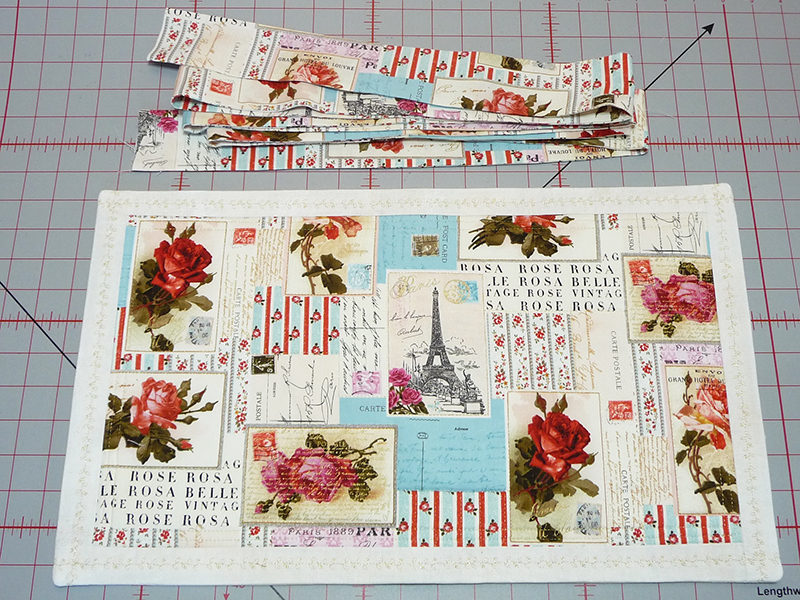
- Fabric print for ruffle: Cut 4 strips measuring 5-inches wide x 45-inches long.
- To test ruffle setting: Cut one or more strips measuring 5-inches wide x 10-inches long from either fabric.
- Thin cotton batting for interlining: One piece measuring 21-inches wide X 13-inches long.
- Featured embroidery design:Roses for Mom is the Brother free design of the month for May
Fabric Notes: Use the width of your fabric to cut strips for ruffle. Launder all fabrics, making sure they are color fast and compatible with one another.
Featured Foot of the Month
SA143 Ruffler Foot Attachment for 7mm MachinesRead the instructions included with the attachment. Be sure to visit the BrotherSews Tutorials
to read the Brother Ruffler Tutorial
for more important information.
Instructions for Creating the Table Mat
- Embroider a design with a personal message in the center of the back piece. Note: You can use standard tear-away stabilizer or use a piece of the cotton batting to stabilize the embroidered area. Trim close to design outline after stitching. See Figure #1.
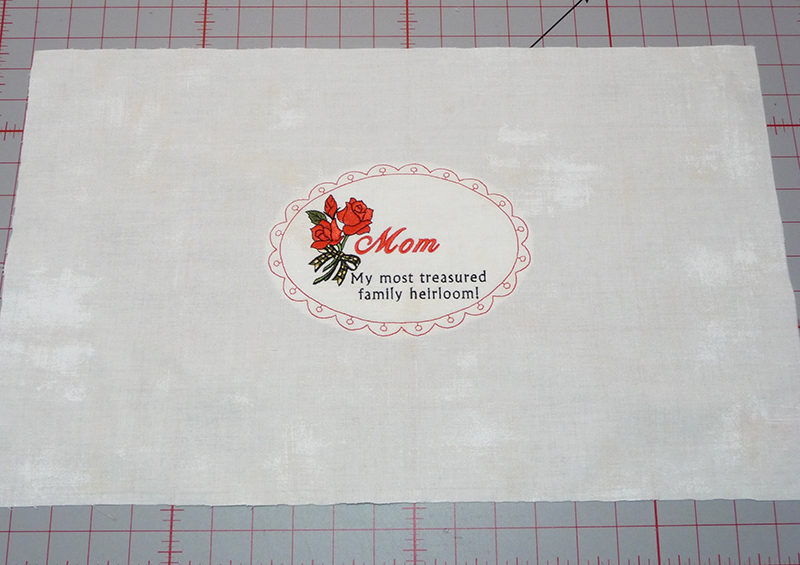 Figure #1[/caption]
Preparing the Ruffle
- Set up machine for sewing. Piece all ruffle strips together as you would if you were creating bias binding, using a diagonal seam to avoid bulk and create a better appearance for the ruffle. Press seams open and trim to a 1/2-inch seam allowance. See Figure #2a & #2b.
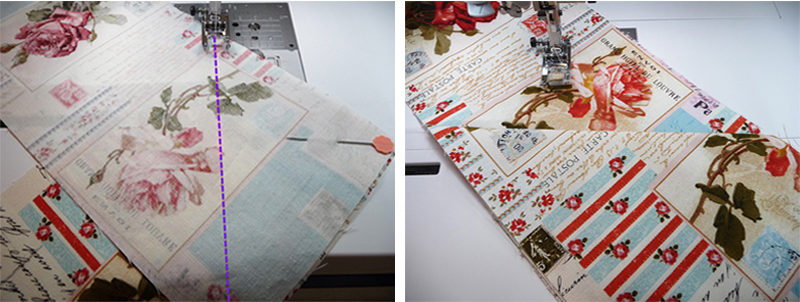 Figure #2a & #2b[/caption]
Making the Mat Front
- Sew contrast strips to front as follows:
With right sides together, sew the two long strips to each edge using a 1½-inch seam allowance.
 Solid or tone on tone fabric strips for trimming front: Cut two strips measuring 3-inches wide X 21-inches long and two strips measuring 3-inches wide X 13-inches long. Press each strip toward the edge, pressing them flat and leaving the entire seam allowance in place. This creates a double thickness and helps hide the print under the solid contrast fabric. Repeat the process for the shorter strips on each side. See Figure #3.
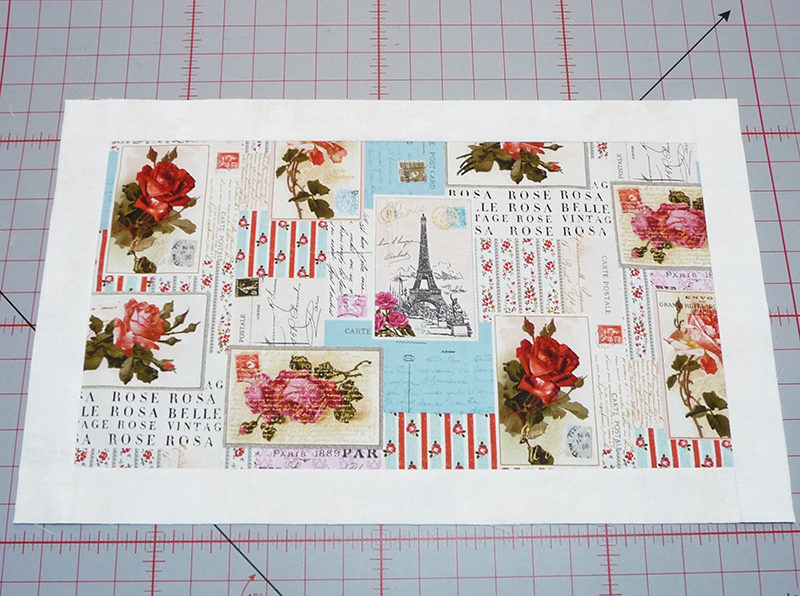 Figure #3[/caption]
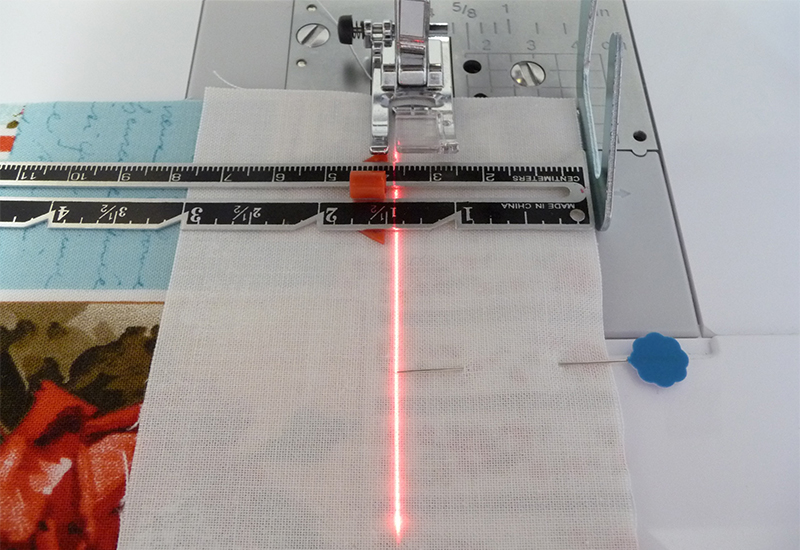
- Set up machine for decorative stitching with foot “N”. Sew a row of an open style decorative stitches close to each seam on the contrast trim.
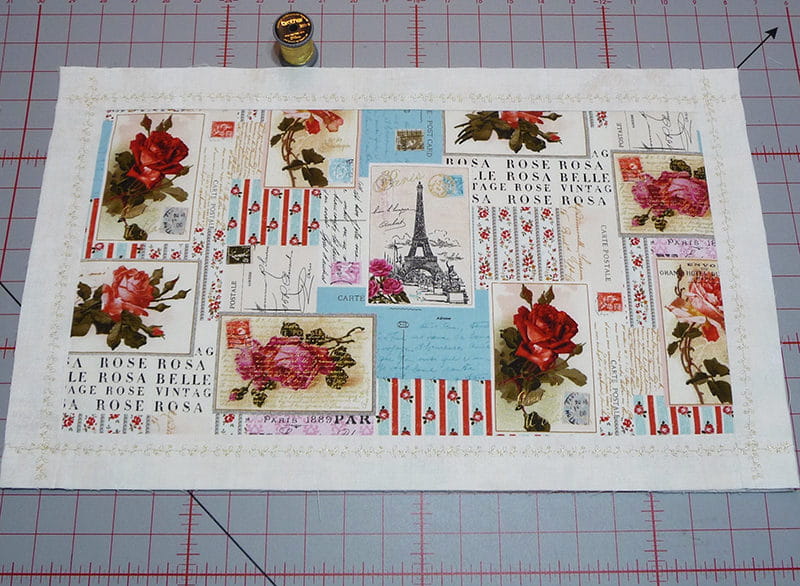
Tip: For many decorative stitches it is usually easier to sew from end to end, and cross over each row at the corners instead of pivoting that it is to pivot. Use mirror image options to stitch balanced rows. See Figure #4.
[caption id="attachment_6835" align="aligncenter" width="402"]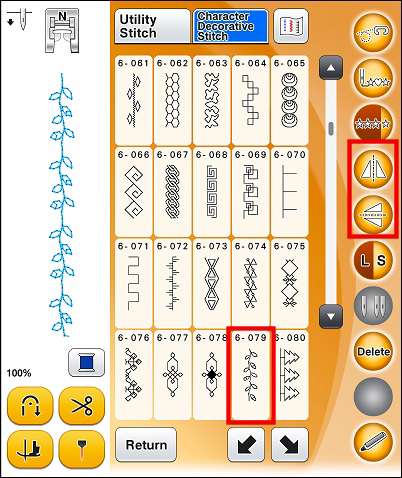 Figure #4[/caption]
- Layer batting against wrong side of front piece and quilt as desired to anchor the two layers together. For this project I followed outlines in the fabric print, randomly quilting the piece using the metallic thread. See Figure #5.
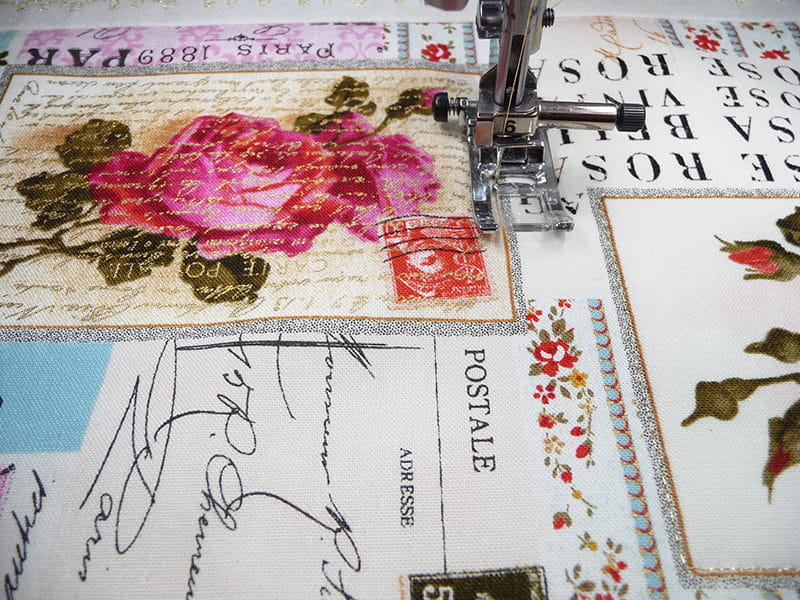 Figure #5[/caption]
- Trim batting just beyond decorative stitching on the wrong side of the front piece. See Figure #6.
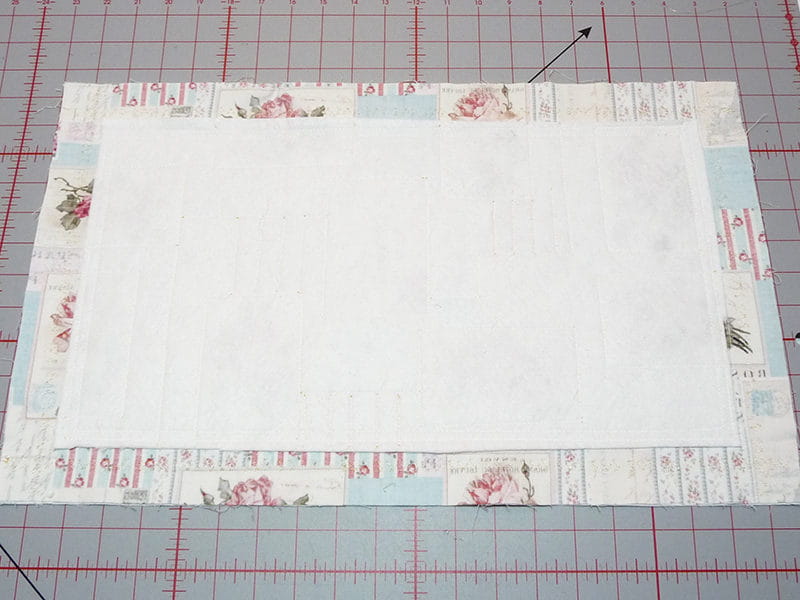 Figure #6[/caption]
Making and Applying the Ruffle
- Fold long strip for ruffle with right sides together and sew into a long tube using a ¼-inch seam allowance. See Figure #7.
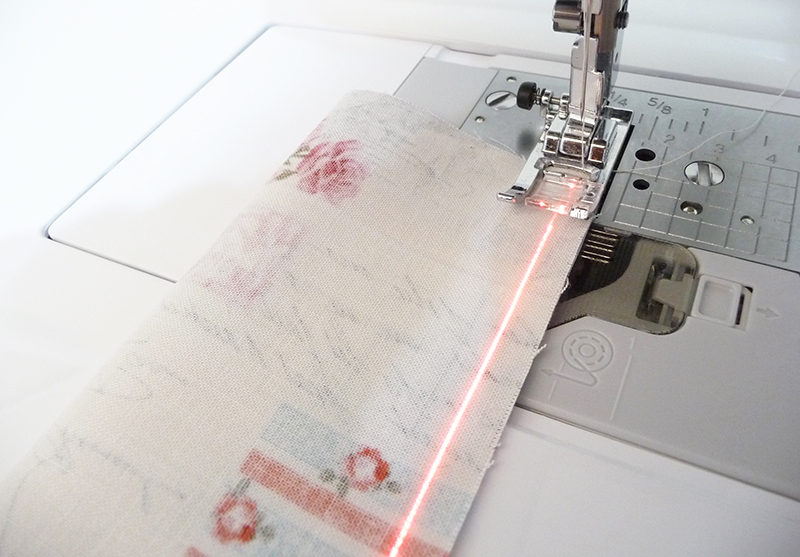 Figure #7[/caption]
- Place safety pin at one end and feed through tube to turn right side out.
- Press strip so seam is at one edge and a fold is at the other. Place front and back tablemat pieces right sides together. Sew ½-inch seam all around leaving an opening the size of your hand for turning. Turn right sides out. Press. Fold ends inside opening slightly, press, and close opening with small hand stitches.
- Set up ruffler as shown below, with the screw in the approximate center position and the stitch setting at “1.” Set machine for a center needle straight stitch with stitch length at 4.0.
 Fold the 10-inch test piece in half with wrong sides together. Test ruffling by stitching a scant 1/4-inch from the raw edge. Your piece should gather up to approximately 5-inches long. If your fabric is longer that 5-inches and you are pleased with the gathers proceed to the next step. If not, adjust the settings on the ruffler by changing the position of the screw until the finished measurement is close to 5-inches. See Figure #8.
[caption id="attachment_6839" align="aligncenter" width="800"]
Fold the 10-inch test piece in half with wrong sides together. Test ruffling by stitching a scant 1/4-inch from the raw edge. Your piece should gather up to approximately 5-inches long. If your fabric is longer that 5-inches and you are pleased with the gathers proceed to the next step. If not, adjust the settings on the ruffler by changing the position of the screw until the finished measurement is close to 5-inches. See Figure #8.
[caption id="attachment_6839" align="aligncenter" width="800"] Figure #8[/caption]
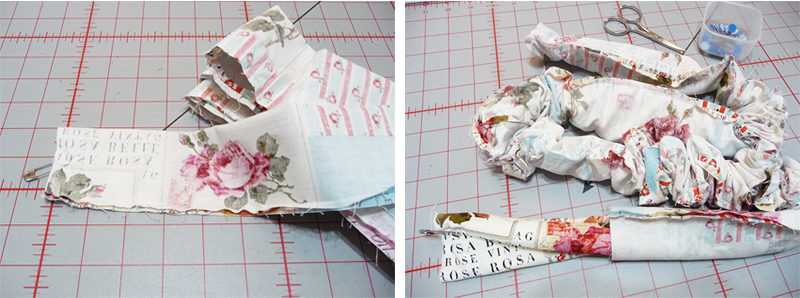
- Place folded edge of fabric between ruffling blade and guide blade. Tip: The ruffler instructions recommend placing a piece of thick paper under the fabric to help insert the fabric between the ruffling blade and the guide blade. This makes it easy to slide the fabric in place. Ruffle the strip, stitching ¼-inch from the folded edge, beginning and ending 1-inch from the short raw end. See Figure #9a to #9c.
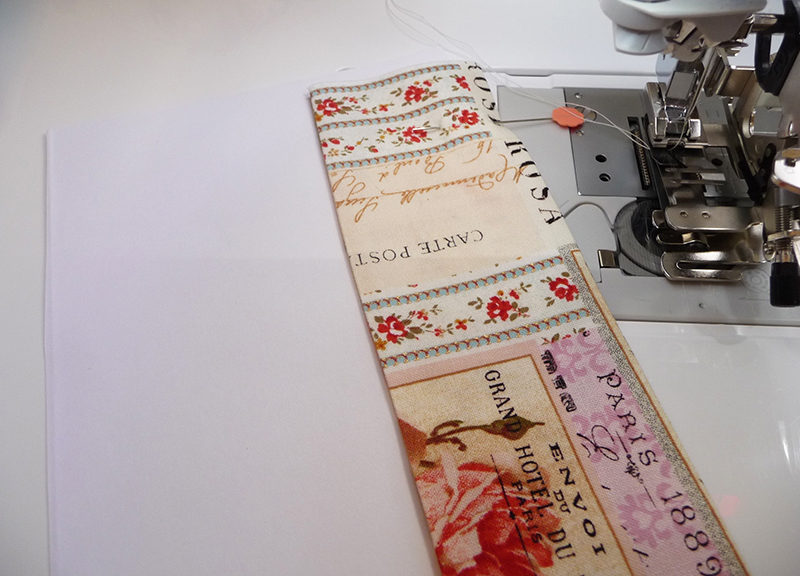 Figure #9a[/caption]
[caption id="attachment_6841" align="aligncenter" width="800"]
Figure #9a[/caption]
[caption id="attachment_6841" align="aligncenter" width="800"]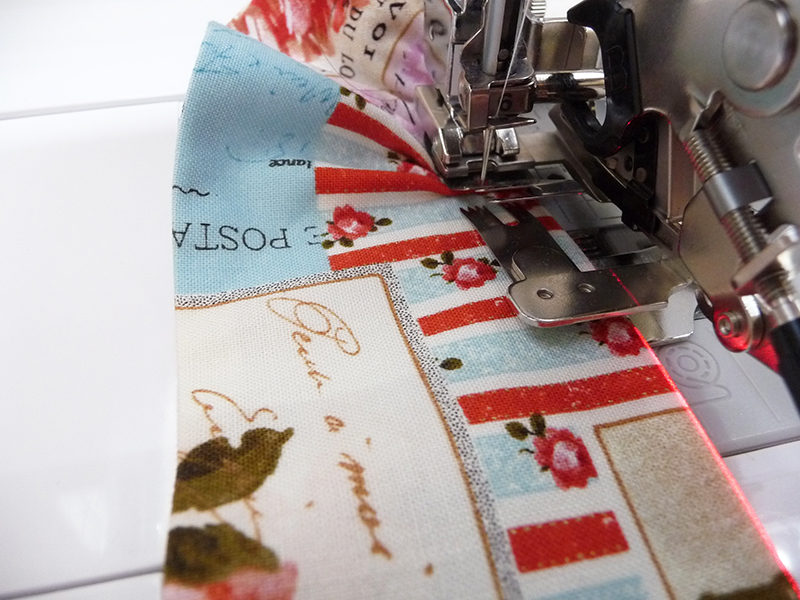 Figure #9b[/caption]
[caption id="attachment_6848" align="aligncenter" width="800"]
Figure #9b[/caption]
[caption id="attachment_6848" align="aligncenter" width="800"]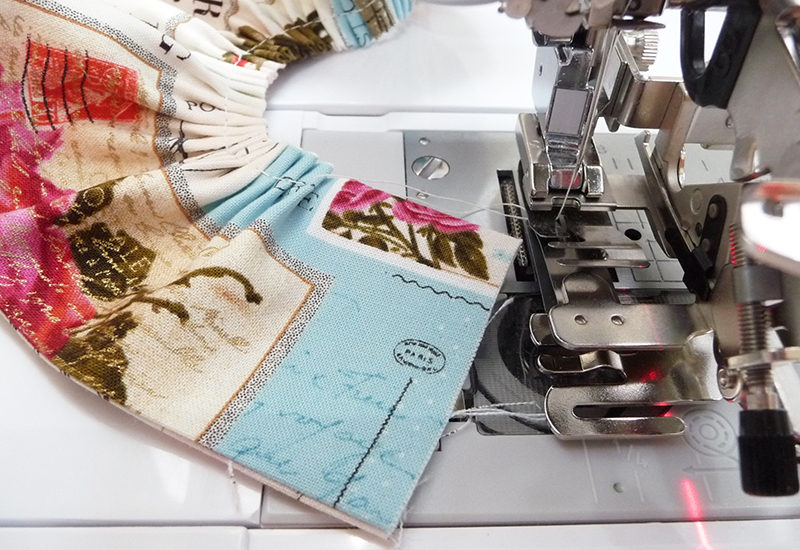 Figure #9c[/caption]
- Loosely pin ruffle to finished piece beginning and ending at bottom center on the back-side. Trim excess ruffle as needed, leaving a small amount for an overlap at the center. Tuck in each raw end of ruffled piece and sew closed with small hand stitches. Carefully re-pin ruffle in place. Stitch along border, stitching close to the edge of the tablemat to secure ruffle at the edge. See Figure #10.
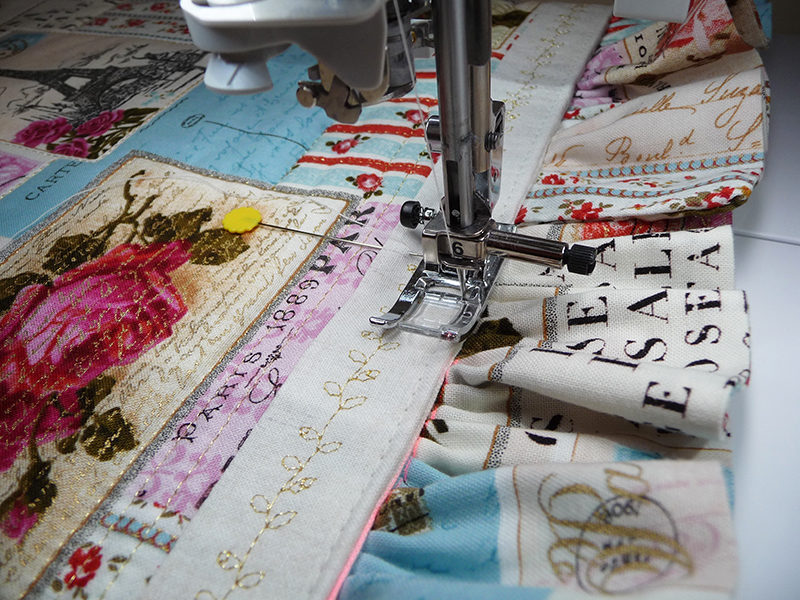 Figure #10[/caption]
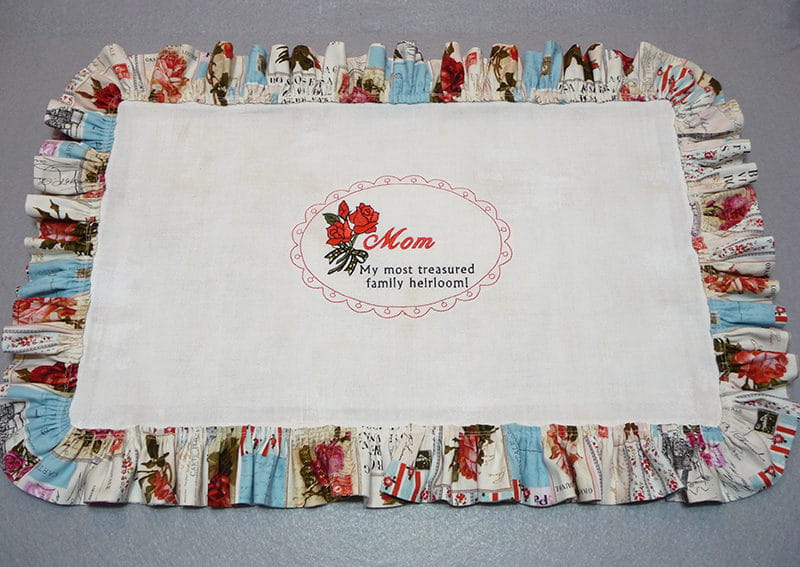
Your tablemat is finished! See front and back sides of tablemat below:
[caption id="attachment_6850" align="aligncenter" width="800"]
Figure #10[/caption]
Your tablemat is finished! See front and back sides of tablemat below:
[caption id="attachment_6850" align="aligncenter" width="800"]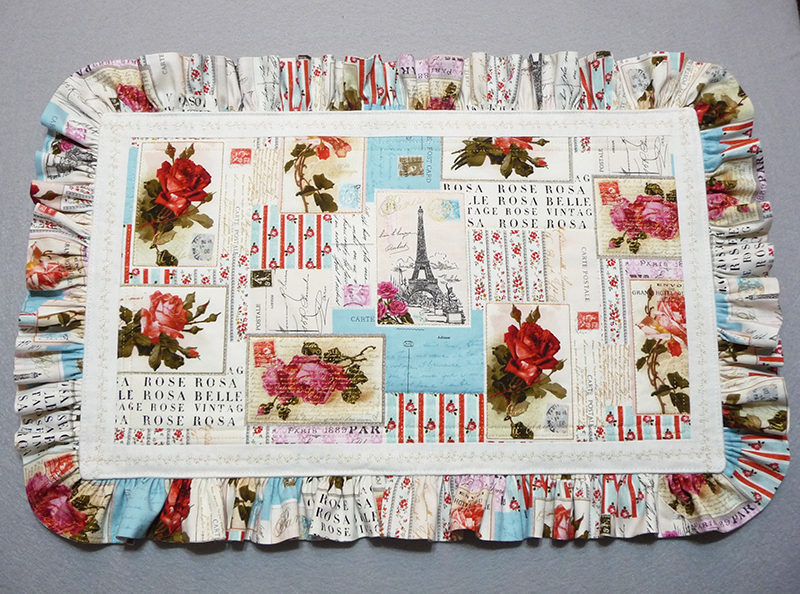 Front[/caption]
[caption id="attachment_6851" align="aligncenter" width="800"] Back[/caption]
Front[/caption]
[caption id="attachment_6851" align="aligncenter" width="800"] Back[/caption]
Related Projects
Stay Connected
* Required fields