Seaside Summer Solstice Sundress
Brother Sews Blogger
Celebrate the June 21st summer solstice, the official beginning of summer, by spending those extra daylight hours with your Brother sewing/embroidery machine. Stitch this seaside sundress and pick up a few tips about sewing with border prints and machine embroidery appliqué designs. With your Brother machine it’s easy, it’s fun, it’s perfect!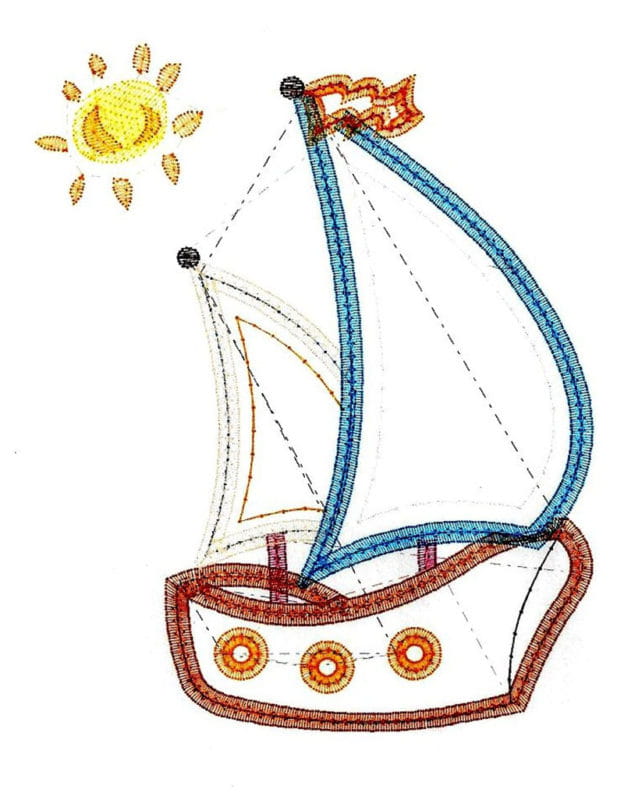 4. Trace front center bodice pattern piece which is on the fold onto paper and cut complete front pattern.
5. Trace pattern piece onto generously sized piece of white broadcloth bodice fabric. This must be large enough for the embroidery to be placed slightly above center in the appropriate frame size, either 4x4 or 5x7 depending on the size and placement of your sun design.
6. Hoop bodice fabric with 2 layers of tearaway stabilizer.
7. Load the design into your Brother embroidery machine. Add basting frame.
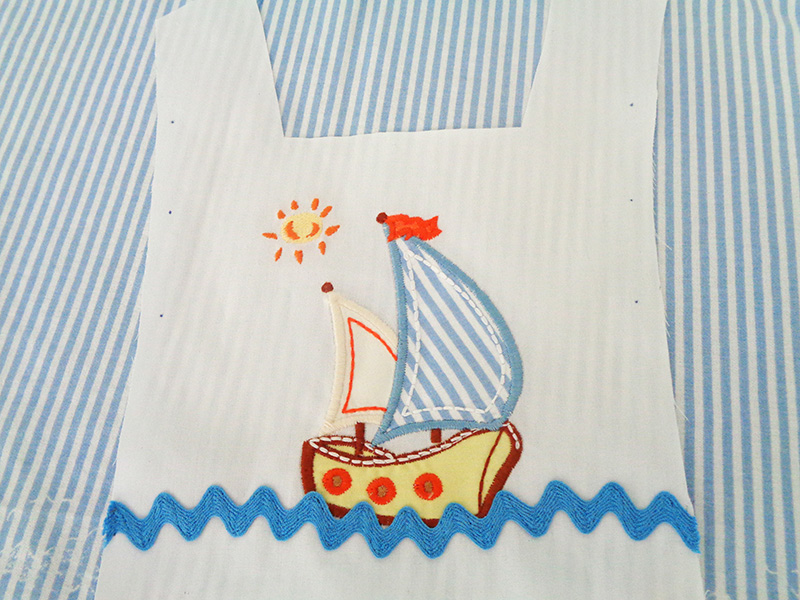
8. Baste, color #1 with white thread. Stitch color 2, after basting frame, the outline of the body of the boat.
4. Trace front center bodice pattern piece which is on the fold onto paper and cut complete front pattern.
5. Trace pattern piece onto generously sized piece of white broadcloth bodice fabric. This must be large enough for the embroidery to be placed slightly above center in the appropriate frame size, either 4x4 or 5x7 depending on the size and placement of your sun design.
6. Hoop bodice fabric with 2 layers of tearaway stabilizer.
7. Load the design into your Brother embroidery machine. Add basting frame.
8. Baste, color #1 with white thread. Stitch color 2, after basting frame, the outline of the body of the boat.
 9. Cut appliqué fabric for body of boat. Apply spray adhesive lightly and place firmly over outline.
 10. Trim fabric close to outline.
 The design will continue with outline, fabric placement, trimming, for other parts of the design, along with some surface embroidery. Then it will return for satin stitch over the appliqué pieces. Do not color sort or resize but follow the color sequence precisely.
11. Stitch blue rick rack below schooner with monofilament thread.
The design will continue with outline, fabric placement, trimming, for other parts of the design, along with some surface embroidery. Then it will return for satin stitch over the appliqué pieces. Do not color sort or resize but follow the color sequence precisely.
11. Stitch blue rick rack below schooner with monofilament thread.
 15. Continue with pattern instructions from step #14-17 which direct you to stitch center front to center backs at shoulder seams.
16. Seam right bodice side front and right bodice side back at shoulder seams, repeating with left hand side pieces. Then stitch front and back bodice linings at shoulders. Add orange piping to bottom edge of each front side piece then set these pieces aside. Press ruffles in half, gather then join to bodice pieces. Read instructions carefully.
17. Press the ruffle in half. Continue with April pattern step 18, gathering the ruffles and joining them to the bodice.
15. Continue with pattern instructions from step #14-17 which direct you to stitch center front to center backs at shoulder seams.
16. Seam right bodice side front and right bodice side back at shoulder seams, repeating with left hand side pieces. Then stitch front and back bodice linings at shoulders. Add orange piping to bottom edge of each front side piece then set these pieces aside. Press ruffles in half, gather then join to bodice pieces. Read instructions carefully.
17. Press the ruffle in half. Continue with April pattern step 18, gathering the ruffles and joining them to the bodice.
 18. Continue with April pattern steps 19-, to complete the bodice., constructing and attaching the sashes.
 B. A more attractive dress side is most easily accomplished by cutting the skirt in one length with only one side seam.
C. Matching the pattern at that remaining side seam can be done by altering the back width if necessary. Place the raw edge against the border print until a pattern match can be made. Draw a seam line on each piece. THIS IS THE SEAM LINE, NOT THE CUTTING LINE.
B. A more attractive dress side is most easily accomplished by cutting the skirt in one length with only one side seam.
C. Matching the pattern at that remaining side seam can be done by altering the back width if necessary. Place the raw edge against the border print until a pattern match can be made. Draw a seam line on each piece. THIS IS THE SEAM LINE, NOT THE CUTTING LINE.
 D. According to the pattern, each skirt width, front and back is 26”. Altering that a few inches will make no great difference, though ideally the skirt width will be made wider rather than more narrow.
E. Add a seam allowance and cut. Stitch carefully with drawn lines matching.
D. According to the pattern, each skirt width, front and back is 26”. Altering that a few inches will make no great difference, though ideally the skirt width will be made wider rather than more narrow.
E. Add a seam allowance and cut. Stitch carefully with drawn lines matching.
 F. Take care to calculate where the center back is before inserting the placket.
20. Face the hem with 3 ½” of border stripe or white broadcloth. Fold the top raw edge under ¼” and hand whip in place.
F. Take care to calculate where the center back is before inserting the placket.
20. Face the hem with 3 ½” of border stripe or white broadcloth. Fold the top raw edge under ¼” and hand whip in place.
 21. Run gathering threads, ¼” and 5/8” from top edge of skirt. Fold right placket under and baste in place before stitching gathering threads. Do not stitch through left placket.
22. Draw up gathering threads, marking center front. Mark bodice center front then pin skirt to bodice, matching side seams and center front. Begin pinning at bodice back fold line and stop at the other. Stitch skirt in place with ½” seam. Follow pattern instructions for covering skirt seam with bodice lining, whipping the lining in place to cover the skirt gathers.
23. Stitch buttonholes on right side of back and buttons on left side
21. Run gathering threads, ¼” and 5/8” from top edge of skirt. Fold right placket under and baste in place before stitching gathering threads. Do not stitch through left placket.
22. Draw up gathering threads, marking center front. Mark bodice center front then pin skirt to bodice, matching side seams and center front. Begin pinning at bodice back fold line and stop at the other. Stitch skirt in place with ½” seam. Follow pattern instructions for covering skirt seam with bodice lining, whipping the lining in place to cover the skirt gathers.
23. Stitch buttonholes on right side of back and buttons on left side
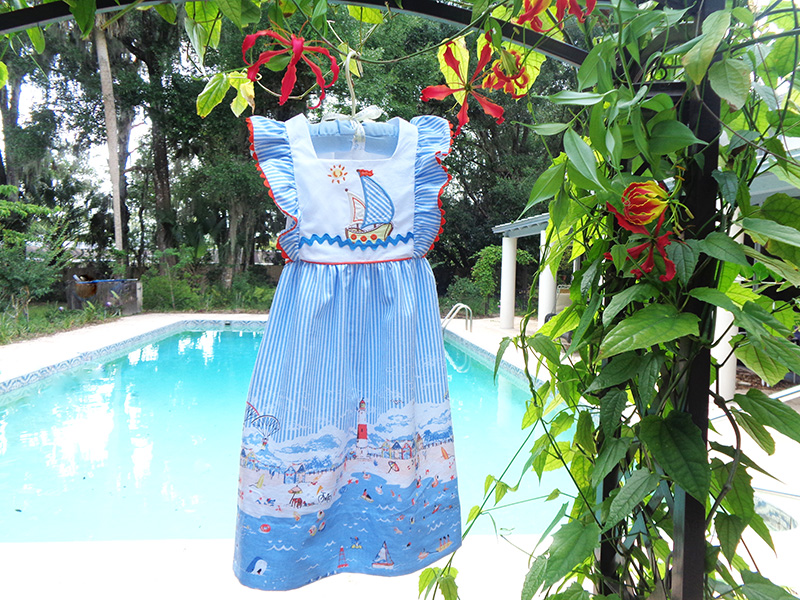 Now a special little miss is ready for summer vacation!
Celebrate the June 21st summer solstice, the official beginning of summer, by spending those extra daylight hours with your Brother sewing/embroidery machine. Stitch this seaside sundress and pick up a few tips about sewing with border prints and machine embroidery appliqué designs. With your Brother machine it’s easy, it’s fun, it’s perfect!
Requirements
- Children’s Corner “April” pattern: View A, un-smocked version was selected
- All fabrics and notions were calculated for size 4. Yardage requirements for larger sizes will need to be recalculated.
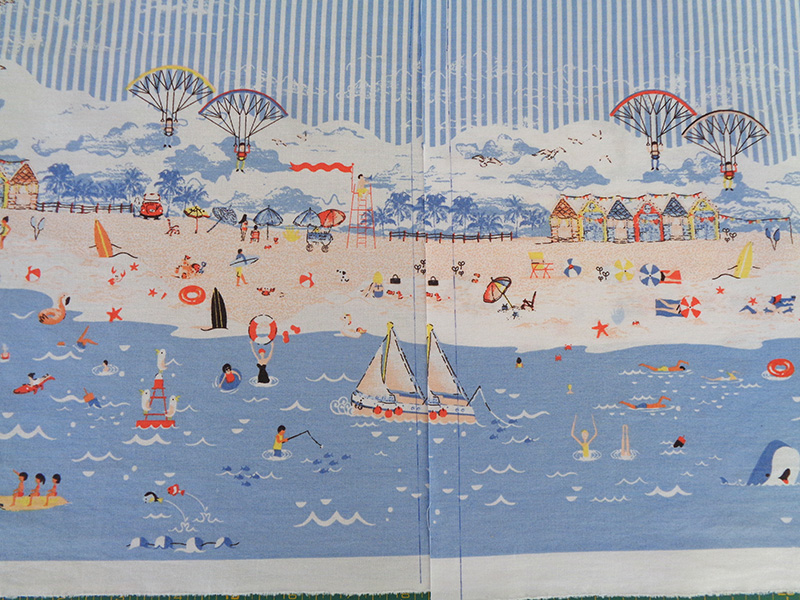
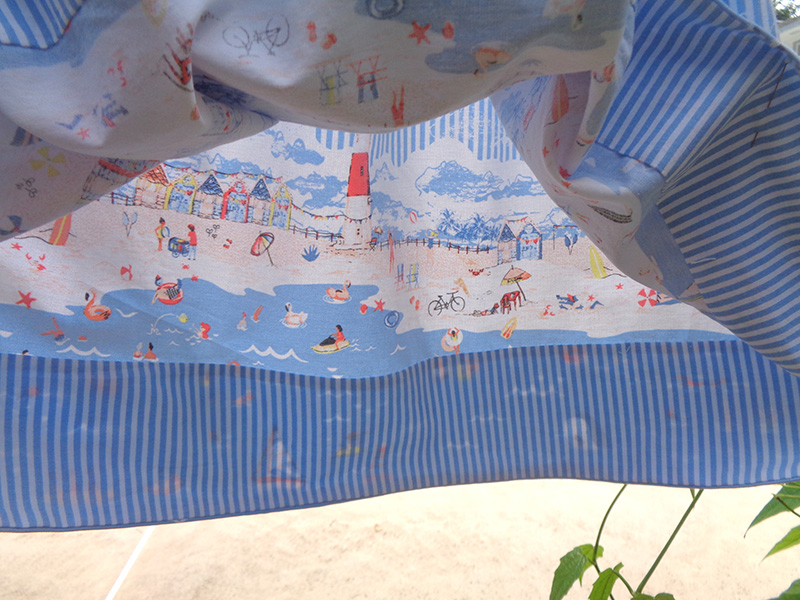
- Fabric: 2 yds. beach themed border fabric, stripes above border
- Yoke and lining: ¾ yd. white broadcloth
- Appliqué fabric: small pieces of yellow for boat, brown for port holes, ivory one sail, blue stripe for second sail, orange for flag
- Notions: Tearaway stabilizer, 1.75 yds. orange rick rack, 30” orange mini piping, 12” blue rick rack, 4 buttons, monofilament thread and embroidery threads
- Designs: Schooner sailboat appliqué design available at appliqueandembroideryoriginals.com, small sun embroidery design from Baby Pooh and Friends Card
Some appliqué tips before you begin.
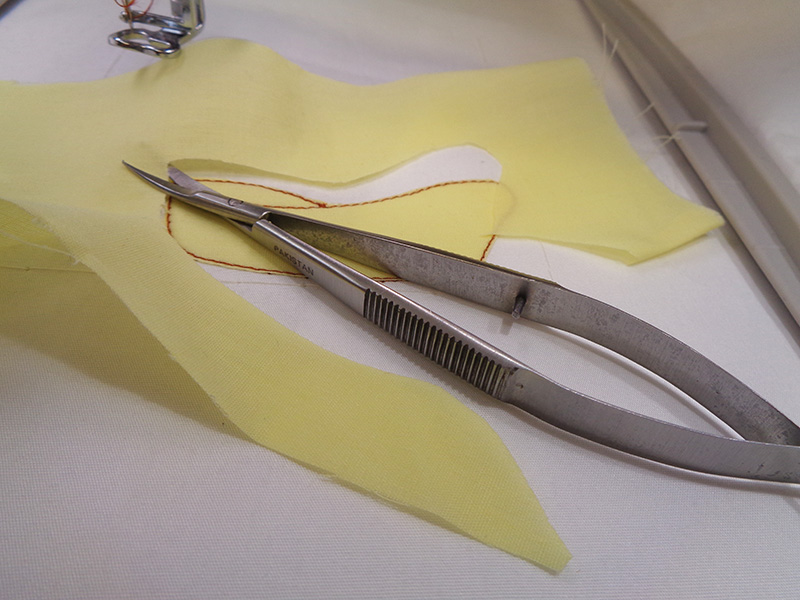
A. Press and starch all fabrics. B. Apply spray adhesive to appliqué fabrics before putting them in place. C. Always, always stitch a design rehearsal. D. Avoid loosely woven fabrics. E. Use nothing heavier than quilting weight cotton unless you are adventurous and have had a successful design rehearsal. F. Consider positioning ginghams, stripes and plaids diagonally. G. Use 50/2 or 60/2 cotton thread for small outline areas. H. Use curved blade snips to trim away fabric. I. Add 3-dimensional features when safe and attractive, like buttons, rick rack or beads. J. Coordinate threads with fabric and trims before beginning. L. Reduce speed.Preparation
Read all instructions before beginning. 1. Select appliqué fabrics to coordinate with border print fabric. Spray starch and press those fabrics. 2. Select threads for embroidery. 3. Starch and press bodice fabric.Embroidery
4. Trace front center bodice pattern piece which is on the fold onto paper and cut complete front pattern.
5. Trace pattern piece onto generously sized piece of white broadcloth bodice fabric. This must be large enough for the embroidery to be placed slightly above center in the appropriate frame size, either 4x4 or 5x7 depending on the size and placement of your sun design.
6. Hoop bodice fabric with 2 layers of tearaway stabilizer.
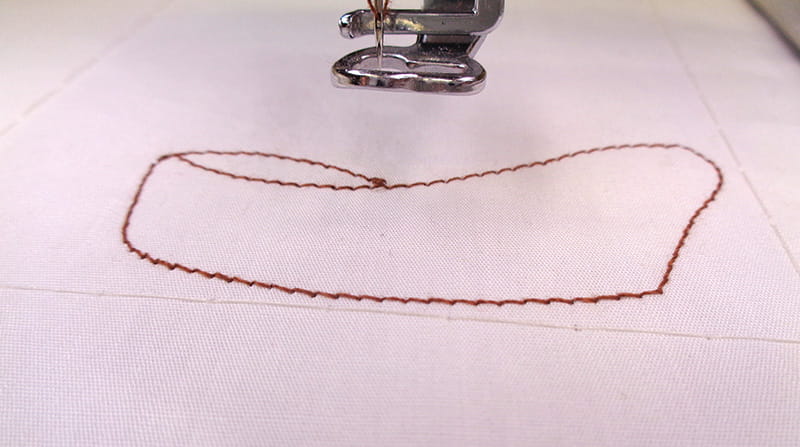
7. Load the design into your Brother embroidery machine. Add basting frame.
8. Baste, color #1 with white thread. Stitch color 2, after basting frame, the outline of the body of the boat.
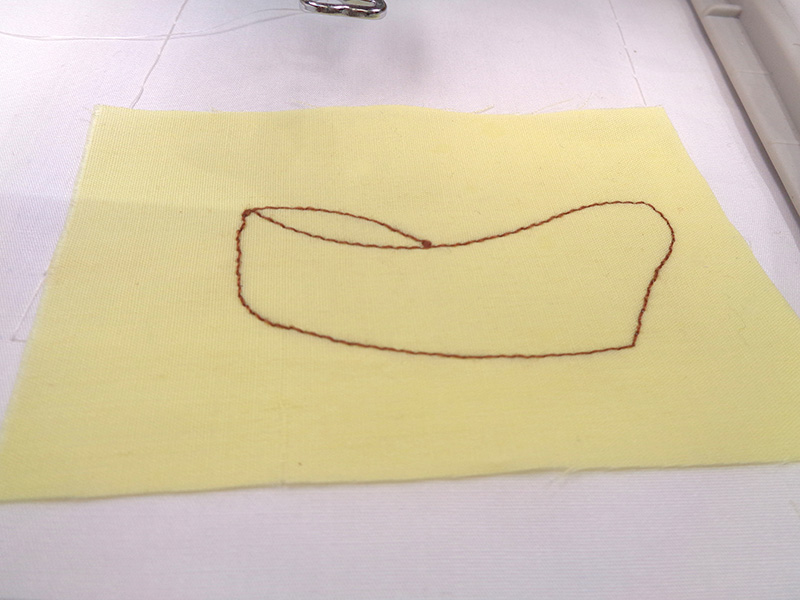
9. Cut appliqué fabric for body of boat. Apply spray adhesive lightly and place firmly over outline.
10. Trim fabric close to outline.
The design will continue with outline, fabric placement, trimming, for other parts of the design, along with some surface embroidery. Then it will return for satin stitch over the appliqué pieces. Do not color sort or resize but follow the color sequence precisely.
11. Stitch blue rick rack below schooner with monofilament thread.
Bodice
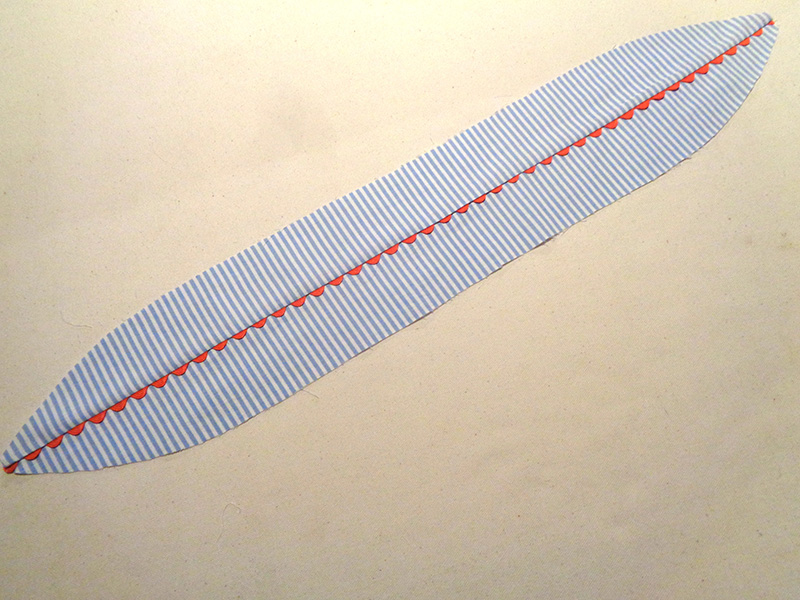
12. Apply orange piping to center bodice. 13. Cut 2 ruffles from stripe fabric above border. Before cutting, see note in step 11 below. Press in half and cut along center crease. 14. Insert orange rick rack between two halves of ruffle, with scant ¼” seam. Note: This will reduce the width of the ruffle by almost ½” but adds visual width with rick rack. If you prefer to maintain the original width, add ¼” to each side of the ruffle pattern before cutting out.
15. Continue with pattern instructions from step #14-17 which direct you to stitch center front to center backs at shoulder seams.
16. Seam right bodice side front and right bodice side back at shoulder seams, repeating with left hand side pieces. Then stitch front and back bodice linings at shoulders. Add orange piping to bottom edge of each front side piece then set these pieces aside. Press ruffles in half, gather then join to bodice pieces. Read instructions carefully.
17. Press the ruffle in half. Continue with April pattern step 18, gathering the ruffles and joining them to the bodice.
18. Continue with April pattern steps 19-, to complete the bodice., constructing and attaching the sashes.
Skirt
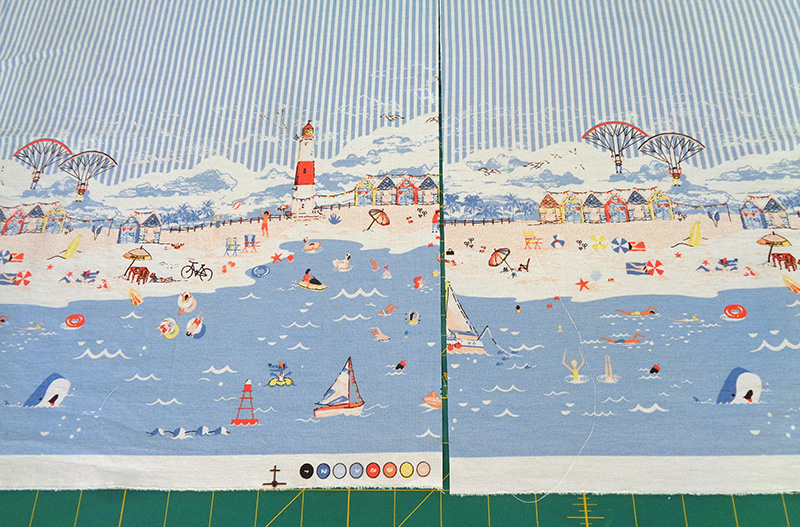
Pattern allows for a 3 ¼” hem. Unless you want to reduce the border width you will need to reduce the skirt length by the hem allowance and add 3 ½” hem facing. That includes ¼” for a seam allowance. 19. Cut out the skirt from border fabric. Note: Border prints require special attention. A. It is more pleasing to the eye to have the pattern match at the side seams. Simply cutting at the suggested width and seaming there rarely gives the best result. This would have been the less than satisfactory result if the 26” front would have been butted to the 26” back.
B. A more attractive dress side is most easily accomplished by cutting the skirt in one length with only one side seam.
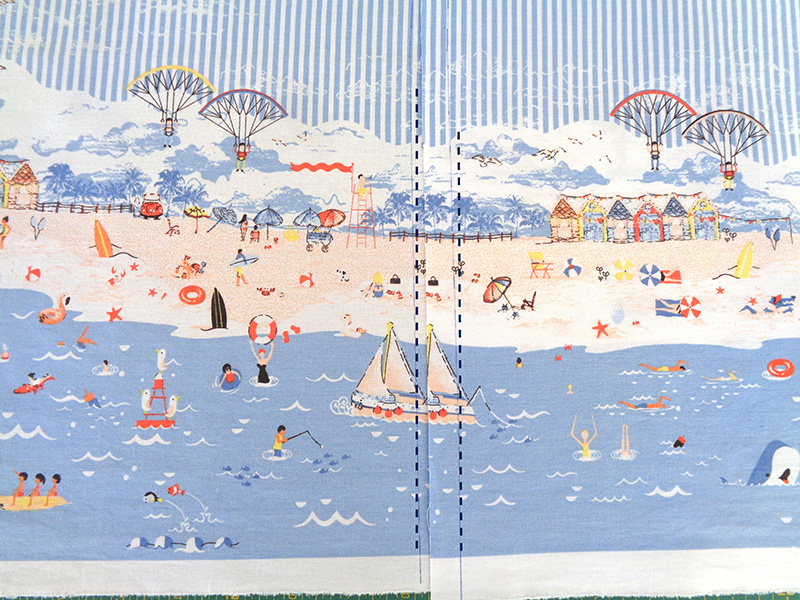
C. Matching the pattern at that remaining side seam can be done by altering the back width if necessary. Place the raw edge against the border print until a pattern match can be made. Draw a seam line on each piece. THIS IS THE SEAM LINE, NOT THE CUTTING LINE.
D. According to the pattern, each skirt width, front and back is 26”. Altering that a few inches will make no great difference, though ideally the skirt width will be made wider rather than more narrow.
E. Add a seam allowance and cut. Stitch carefully with drawn lines matching.
F. Take care to calculate where the center back is before inserting the placket.
20. Face the hem with 3 ½” of border stripe or white broadcloth. Fold the top raw edge under ¼” and hand whip in place.
21. Run gathering threads, ¼” and 5/8” from top edge of skirt. Fold right placket under and baste in place before stitching gathering threads. Do not stitch through left placket.
22. Draw up gathering threads, marking center front. Mark bodice center front then pin skirt to bodice, matching side seams and center front. Begin pinning at bodice back fold line and stop at the other. Stitch skirt in place with ½” seam. Follow pattern instructions for covering skirt seam with bodice lining, whipping the lining in place to cover the skirt gathers.
23. Stitch buttonholes on right side of back and buttons on left side
Now a special little miss is ready for summer vacation!
Related Projects
Stay Connected
* Required fields