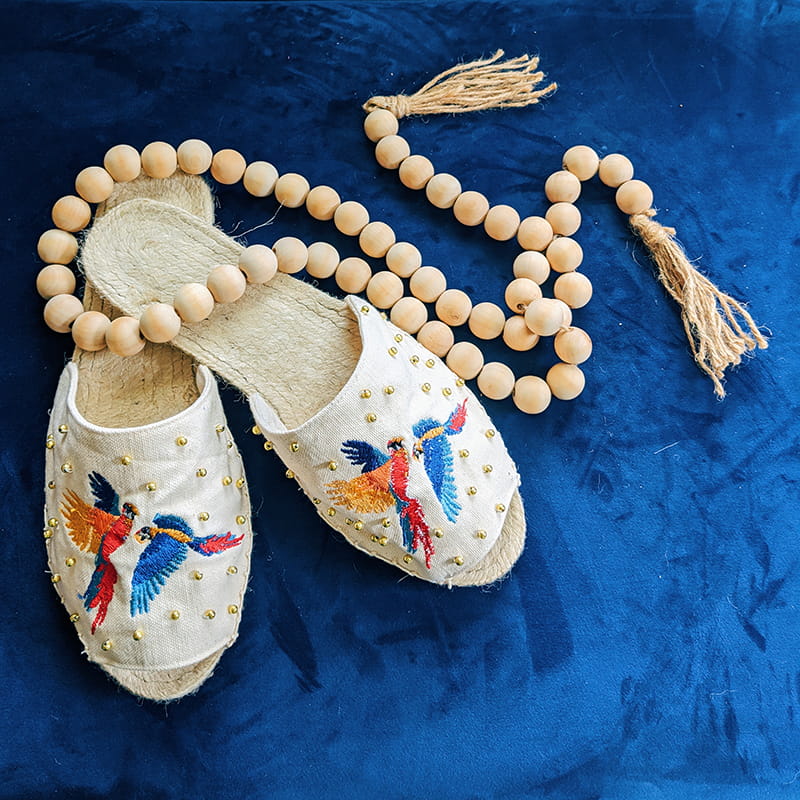
Stylin Summer Shoes
Step into summer with these embroidered DIY espadrille shoes
Hold up, summer lovers! Hear me out before you blow your budget on sandals that make your wallet cry.
Picture this: a pair of espadrilles so cute that you and your friends won’t believe you made them yourself. Yes, you read that right. This summer, we’re trading overpriced store-bought shoes for a little DIY embroidery magic. Think embroidery, gold beading, and custom fits with “main character energy” written all over them. Whether you’re crafting them for long strolls through farmers' markets, beach vibes, or just to flex your creative genius, these handmade espadrilles will be your summer BFFs. Grab your coffee, turn up some feel-good tunes, and get those hands ready for the DIY project of the season.
This simple tutorial will guide you through creating custom espadrilles with embroidery and optional beading, perfect for lounging by the beach or strolling through sunny streets.
Here’s what you’ll need to get started
Materials
- Espadrille kit (This typically includes the shoe soles and basic materials)
- Embroidery machine or sewing and embroidery combo machine
- Canvas fabric
- SA580 Medium-weight tear-away stabilizer
- Embroidery file: Downloadable designs online (choose one that fits the front of your shoes)
- Gold beads (optional)
- Thimbles
- Needle-nose pliers
- Hand sewing needles and thread
7 steps to create these one-of-a-kind shoes for summer
You can also follow along in here
1. Choose your design
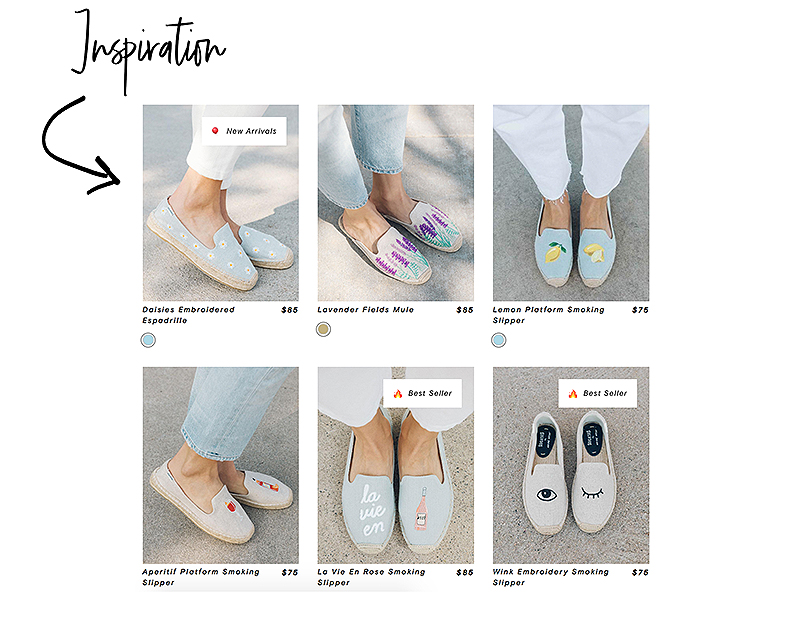
Start by finding inspiration for your dream espadrilles. Online embroidery designs are abundant and affordable.
Choose a file that fits the dimensions for the front of your shoes. Once chosen, transfer the file to your embroidery machine (most modern machines make this process a breeze).
Pro tip: Always double-check the measurements of your design and fabric to ensure they align properly when placed on your shoes.
2. Cut and prepare your fabric
Select a durable canvas fabric for this project. Cut the fabric pieces using the templates in your espadrille kit. Make sure these pieces are sized appropriately before moving forward.

3. Embroider your fabric
Using your embroidery machine, stitch your chosen design onto the fabric. Be mindful of positioning so the design lands perfectly on the front of your shoes. Place tear-away stabilizer in the hoop along with the fabric to support the stitching.
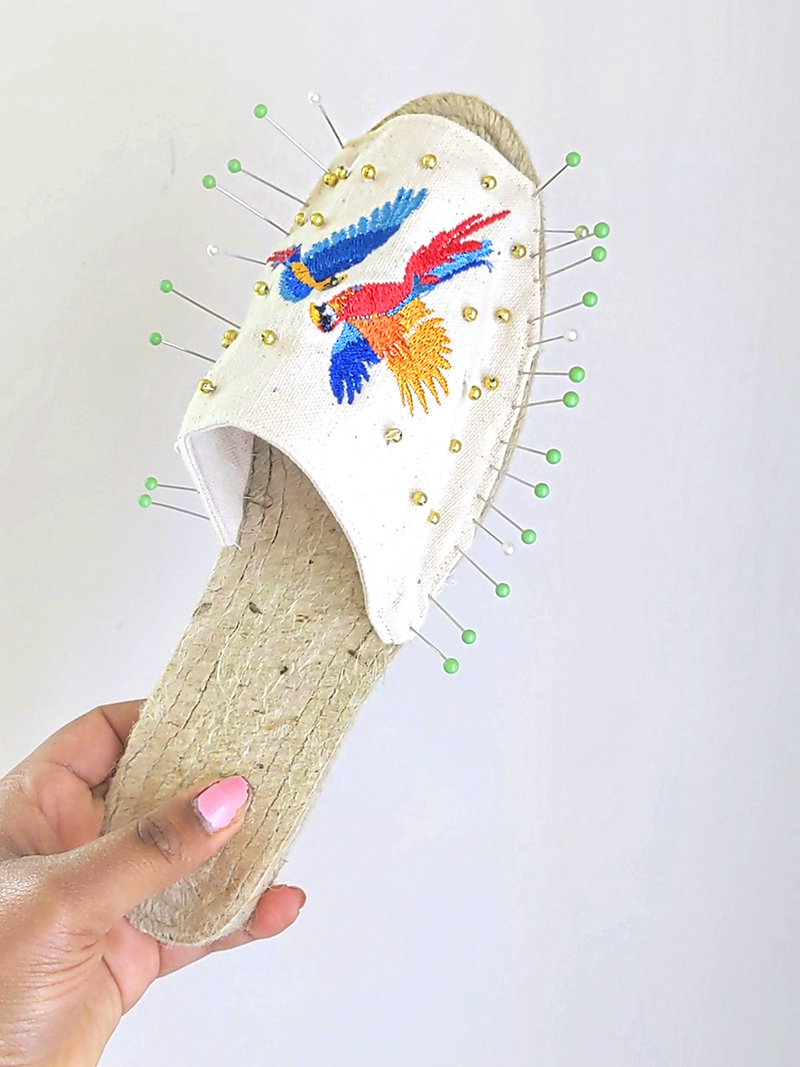
4. Add gold beading (optional)
If you want to add a little flair to your design, consider hand-stitching gold beads around your embroidery. To do this neatly, stitch the beads onto the fabric before sewing the fabric layers together. Not only will this make the work easier, but it'll also keep the inside of your shoes smooth and clean.
Pro tip: Double stitch each bead to ensure it stays securely in place while wearing the shoes.
5. Adjust for wide feet (if necessary)
If you have wide feet, you may need to tweak the seam allowance in your kit. A 1/8-inch seam allowance will make slipping your shoes on and off easier without compromising style.
6. Sew fabric to shoe soles
Use the needles in your kit or sturdy hand-sewing needles to stitch the fabric to your shoe soles. Grab a thimble or two for added protection if your fingers get sore.
Pro tip: Needle-nose pliers come in handy for pulling the needle through thick layers. Don’t skip these; they’ll save your hands from a lot of pain!
7. Finish and admire your work
Once everything is stitched together, take a moment to admire your creation.
Craft your way into sunny style with these DIY summer shoes
Guess what? You’re officially a shoe designer now. (How chic does that sound?) Not only did you just create the perfect summer shoe, but you also did the impossible: you combined fashion, comfort, and a little DIY flair into one project. You deserve a round of applause and, honestly, maybe another iced latte.
These embroidered espadrilles? They’re more than just shoes. They’re a vibe. Whether they’re the star of your favorite sundress outfit or your go-to for casual brunch dates, they scream summer in the coolest way possible. Plus, nothing feels as good as knowing you made these beauties with your own two hands.
Keep the creative juices flowing by checking out our blog for more summer-dreamy projects like this summer DIY tote bag or this bucket hat sewing project. Now go rock those shoes and soak up that sunshine, you DIY queen (or king)—your summer just got a whole lot more fabulous!
FAQs
Q: Where can I find espadrille kits?
A: You can purchase espadrille kits online from craft or sewing supply stores. They usually include the soles and basic components.
Q: What embroidery machines do you recommend for beginners? Can I use a sewing machine?
A: Here are a few tips if you’re just getting started with embroidery.
Q: Is this project beginner-friendly?
A: Yes! While some steps require attention to detail, the process is manageable for beginners, especially if they follow the steps carefully. Check out this beginner embroidery tutorial for cute socks or this t-shirt embroidery project if you’re starting.
Q: What can I do if beading feels too complicated?
A: Beading is optional! If it feels too challenging, skip it and still enjoy a gorgeous, embroidered design on your shoes.
Q: How long does this project take?
A: Depending on your experience and focus, this project can take anywhere from a few hours to a full day.
Related Projects
Stay Connected
* Required fields