Outdoor Throw Pillows

How to make DIY outdoor pillows to elevate your patio style
Nothing completes a cozy outdoor setup like a few vibrant, personalized throw pillows. The best part? Making outdoor pillows is way easier than you might think—even if you’re just starting with sewing.
Today, I’m walking you through exactly how to create your own DIY outdoor pillow with tassels. Whether you’re adding life to your patio, balcony, or poolside setup, this sewing project will take you to the next level of chic.
Here’s what you’ll need to get started sewing your outdoor pillows
Supplies:
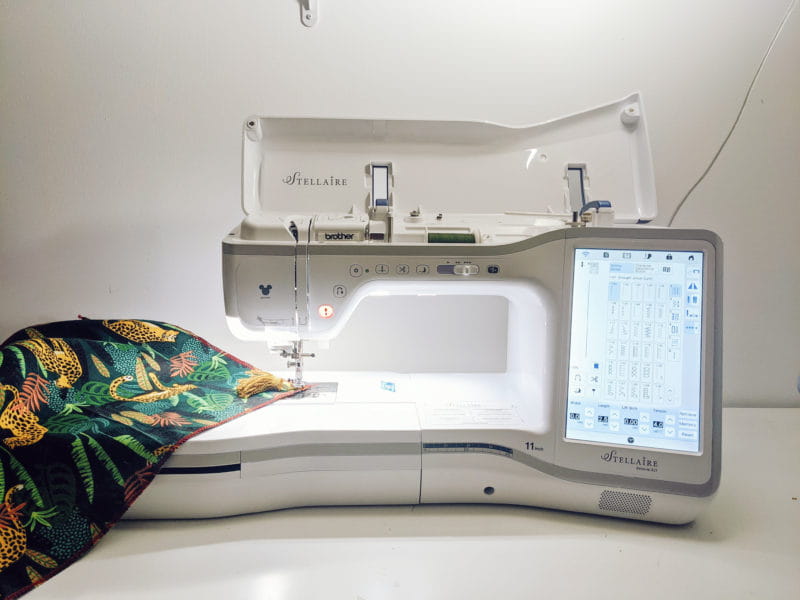
- Brother Stellaire Innov-ís XJ1
- Outdoor fabric (½ yard for 1 pillow; choose weather-resistant fabric)
- 18” x 18" pillow insert
- Four tassels
- 12” invisible zipper
- Brother Concealed Zipper Foot SA102
- Thread
- Fabric scissors
- Measuring tape
- Point turner or similar blunt tool
Here’s your step-by-step guide to sewing outdoor pillows
1. Cut your fabric
Cut two squares of outdoor fabric, each measuring 17” x 17”. These dimensions, although smaller than the pillow insert, include ½" seam allowance on all sides and will ensure a snug, high-quality fit for your pillow insert.
2. Attach the tassels
With the front side of the pillow facing up, place one tassel in each of the corners, making sure the tassel itself is facing the center of the pillow. Stitch the tassels in place. Be mindful of the seam allowance when you are sewing the entire pillow together.
When your pillow is flipped right side out, you want the tassels to be as close to the pillow as possible. You don’t want them hanging too far away from the pillow. So, with that said, when you're stitching the tassels in place, go over the tassel string multiple times to ensure it stays in place.
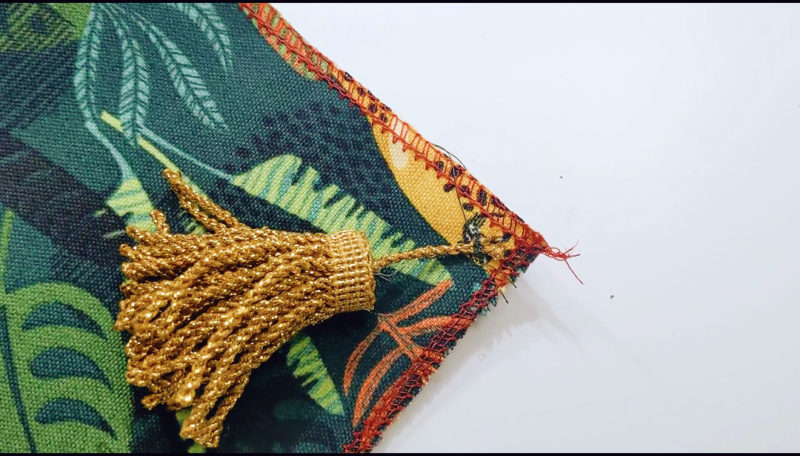
3. Sew the edges
Place the back of the pillow right side down on top of the front and tassels. If desired, secure with a few pins or fabric clips. Stitch around the pillow using a ½" seam allowance. Leave one side, the bottom, open and unstitched.
4. Install the invisible zipper
On the unstitched side, pin your invisible zipper in the center, leaving the sides free. Stitch your invisible zipper in place. The Concealed Zipper foot, an optional accessory available for most Brother sewing machines, can make this step easier. Follow the instructions included with your zipper for proper insertion.
Next, stitch the remaining open seam on either side of the zipper closed, ensuring that your stitches align with those from your invisible zipper. Before completely closing the bottom seam, make sure to open the zipper halfway.
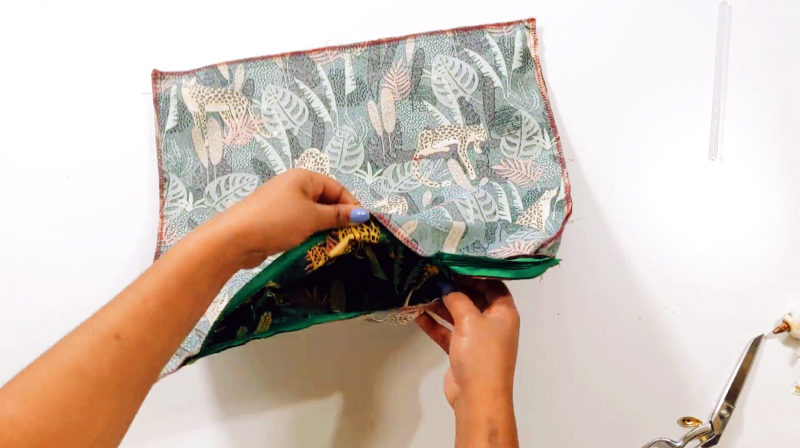
5. Turn the pillowcase right side out
Unzip the zipper all the way. Turn your pillowcase right side out. Use a point turner to push the corners out.
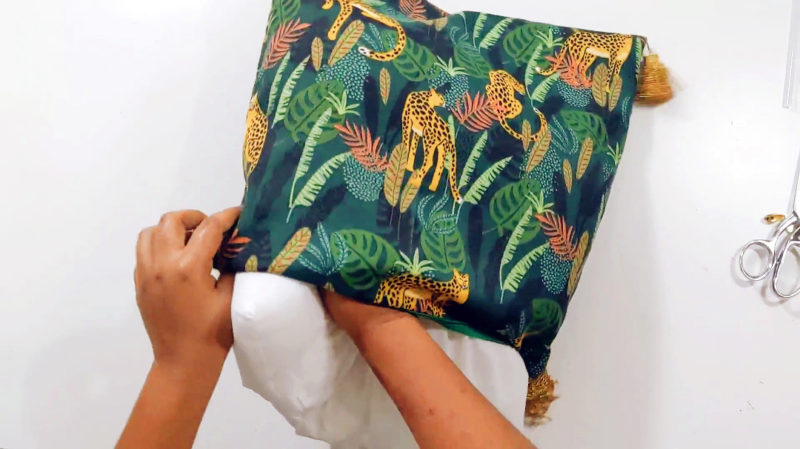
6. Insert the pillow
Slide your pillow insert into the pillow through the zipper opening, taking care not to force it.
Push your pillow into all corners of your pillowcase. Fluff it and make sure it fits snugly into the pillowcase. The bigger pillow allows it to fit snugly into the pillowcase without any loose fabric. This fit trick allows your pillow to have a more quality look.
Zip your pillow closed, and you’re finished! Make as many as you want. Style your pillows and be sure to share them with us.
Outdoor decor made easy
With just a few simple materials and steps, you’ll have custom outdoor pillows that rival anything found in stores. The combination of playful tassels and bold fabric choices will make your patio or backyard uniquely stylish and completely yours.
Once you’ve finished your creations, be sure to snap some photos and show them off. Share your projects with family and friends or tag us on social media @BrotherSews—we’d LOVE to see your designs. Feeling inspired? Grab your supplies and start exploring more beginner sewing projects like these DIY summer shoes, or learn how to sew a bucket hat.
FAQs for your DIY outdoor pillows
Q: Why use outdoor fabric?
A: Outdoor fabric is designed to withstand weather, including sun and rain, making it durable and ideal for outdoor use.
Q: Do I need a specific sewing machine for this project?
A: Not necessarily. Any standard sewing machine will work as long as it can handle thicker fabric. For smoother stitching, a machine like the Brother Stellaire Innov-ís XJ1 has advanced features that make projects like this a breeze.
Q: What size pillow insert should I use?
A: Choose a pillow insert 2” larger than your cover size (e.g., 18" x 18" pillow insert for a 16" x 16" cover). This ensures a snug fit with a polished, plush look.
Q: Where can I find tassels?
A: Tassels can be purchased at craft stores, online retailers, or handmade for a personalized touch! Choose durable materials that match your outdoor aesthetic.
Q: Can I wash these pillows?
A: Yes—but remove the insert first! Most outdoor fabrics are machine washable on a gentle cycle. Always check the fabric care instructions.
Q: How can I make my stitching more durable?
A: Ensure you backstitch at the beginning and end of your seams, especially where the fabric and tassels meet. Looking to sew more with outdoor fabrics? Try sewing this outdoor round mat or this DIY seashell bag.
Related Projects
Stay Connected
* Required fields