How to Sew an Apron: Free Apron Sewing Pattern
-Brother Sews Blogger
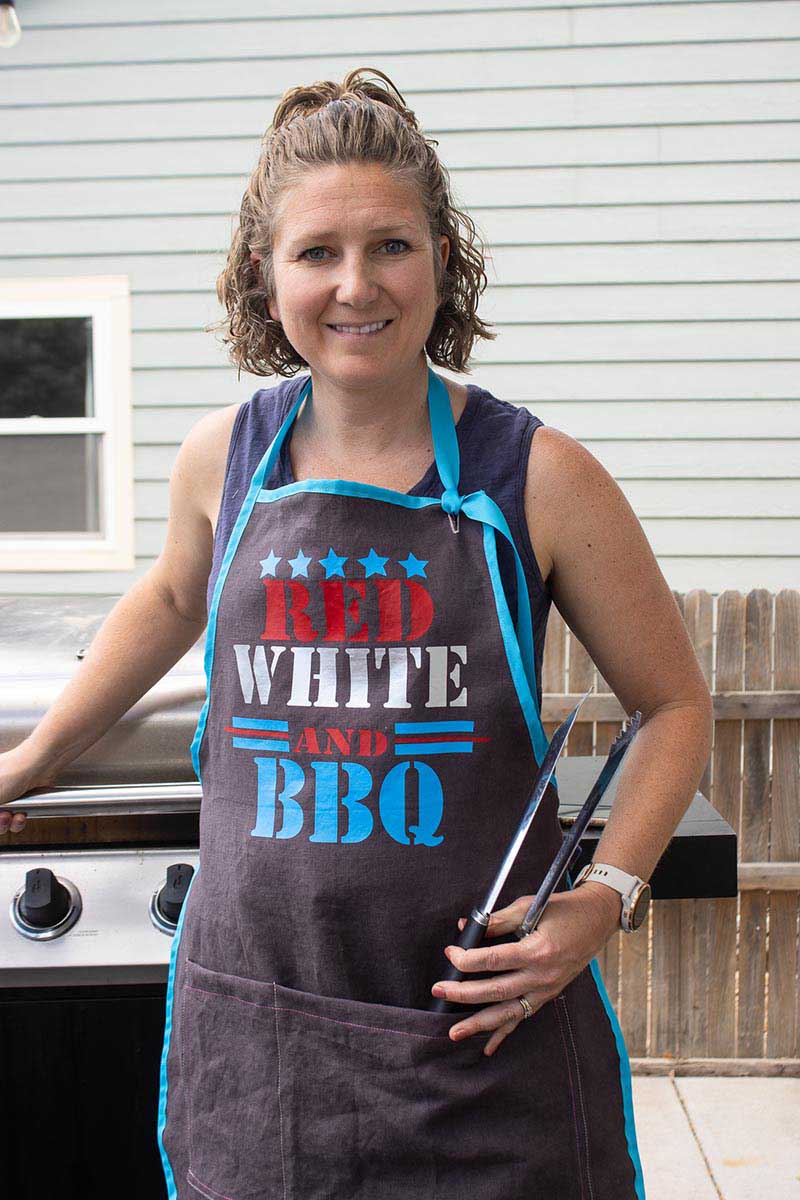
Sew a fun summer apron that’s perfect for grilling with this free sewing pattern from Brother. You can also download the free cut file to add a fun summer design to the apron front. Summer barbecues will be fun and stylish with this handmade apron. So get ready to start grilling (and sewing). Learn how to sew your own apron below.

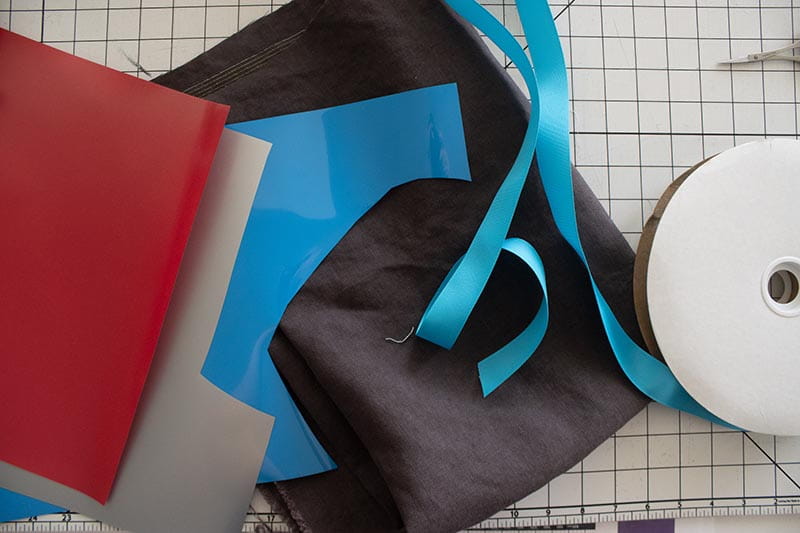
Supplies and Tools:
● Brother ScanNCut DX
● Brother Sewing machine
● Heat Transfer Vinyl
● 1 yard of canvas or linen fabric
● 5.5 yards of 1” ribbon or bias tape
● Free apron pattern {link pdf from drive here}
●Optional free SVG cut file here

Directions:
It’s been such a warm spring that I’m in full summer mode already. That means lots of grilling and eating outside on the deck so we can enjoy this gorgeous weather. My new grilling apron is the perfect way to keep neat and clean while I make a delicious dinner. Since I like to keep all my grilling tools handy, I even added apron pockets for a look that’s fun and practical! This pattern is sized so it works for all genders.
Time to gather your sewing supplies. You need the full yard of fabric for the length, but not the width. You could probably cut two aprons from a 60” wide yard of fabric. I personally used organic linen to sew my grilling apron.
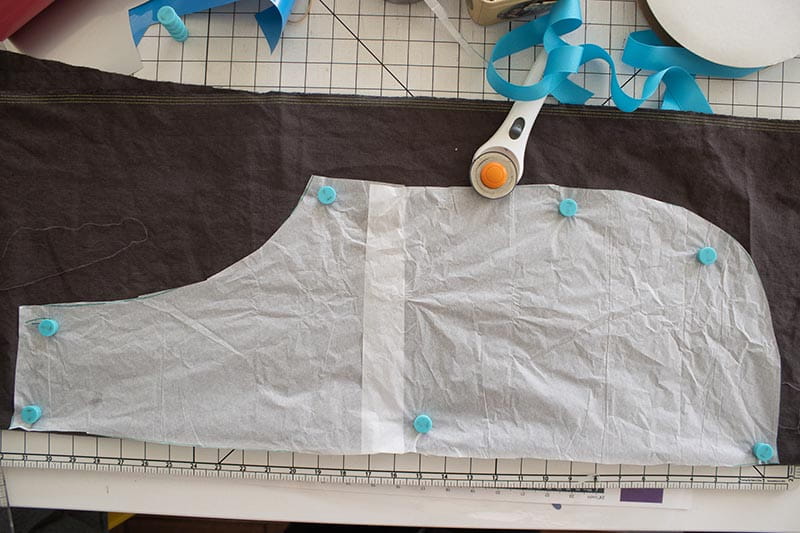
Cut the apron by printing the 6 page free sewing template. Assemble the pattern as seen here.
**template
Fold the fabric in half, then cut the apron on the fold.
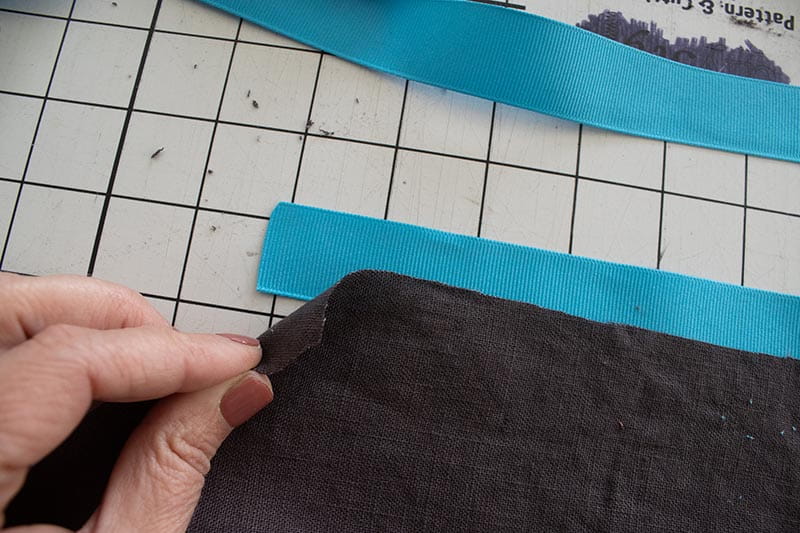
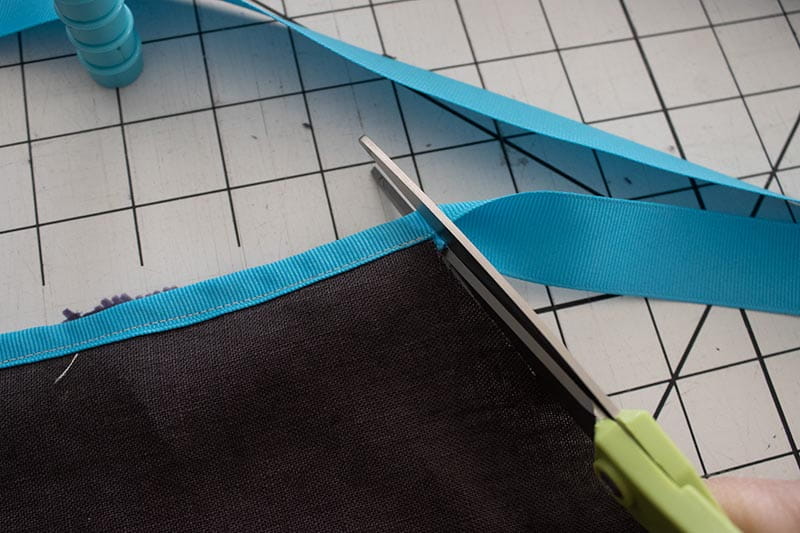
Now it’s time to begin finishing all the raw edges. Start by adding ribbon or bias tape to the longest edge. The bottom curved one. Fold the ribbon in half and sandwich the fabric in the center. If you are using bias tape, it will already have a fold to place around the fabric. Pin or clip in place.
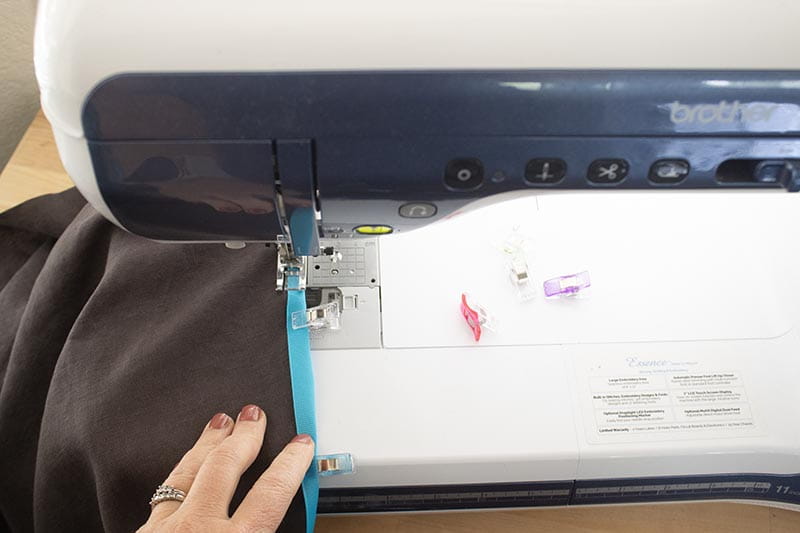
Sew in place using a straight stitch on your sewing machine. You could also use a zig-zag stitch if desired.

When you get around to the other edge, trim off the extra ribbon to use for the next edge.
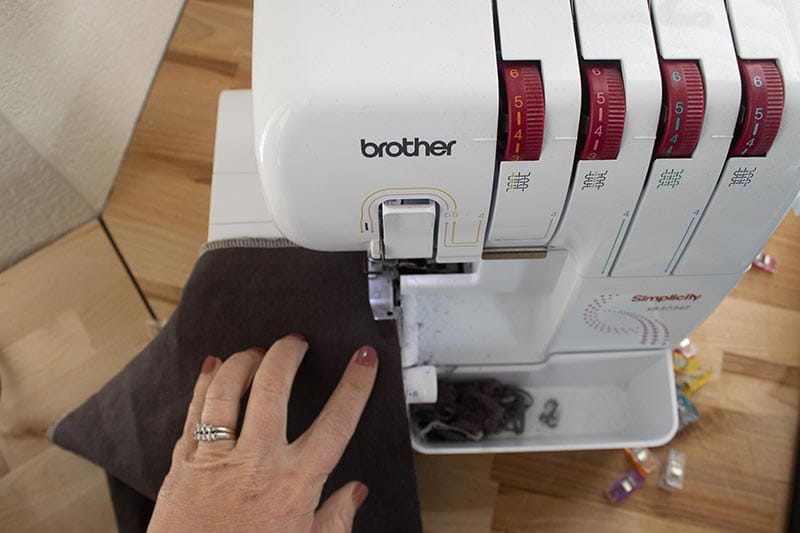
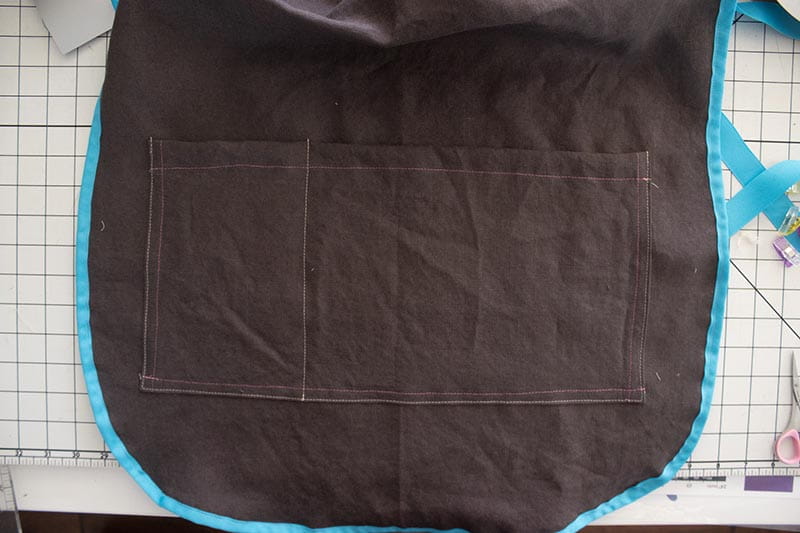
At this point I put on my front pocket, but you can always wait until the end or not use a pocket at all. Finish the raw edges of the pocket with a serger or zig-zag stitch.
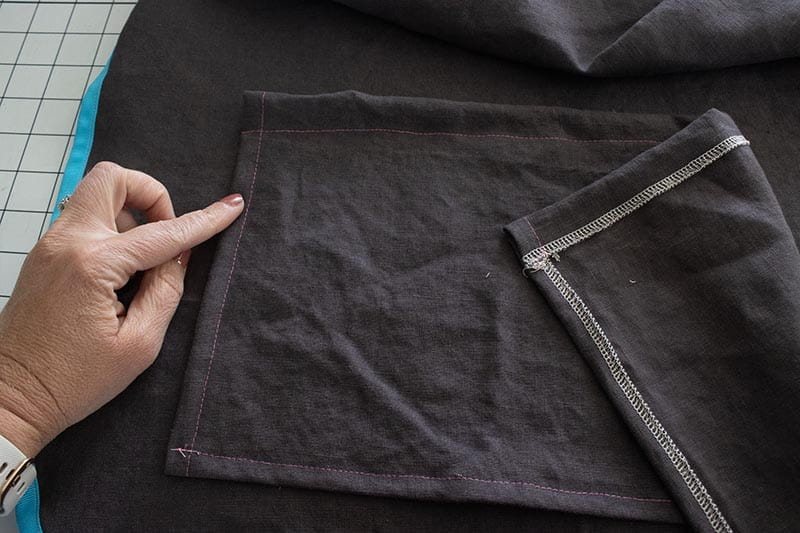
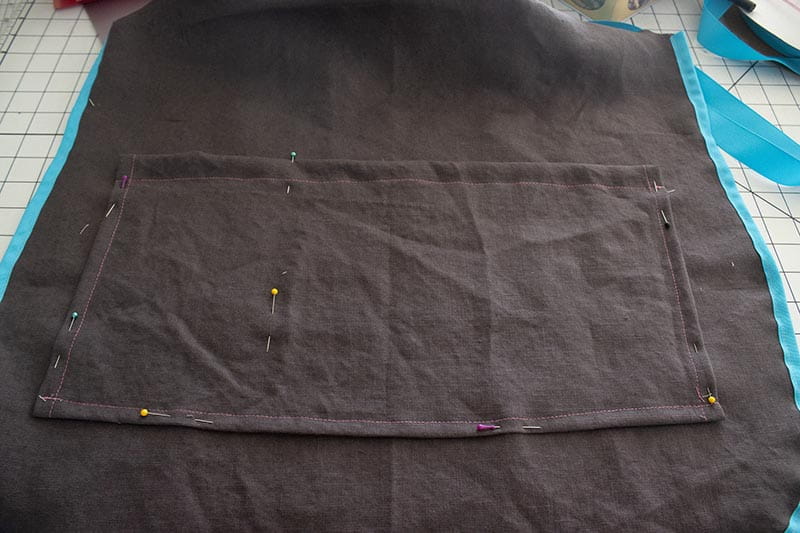
Fold back ½” on all sides of the pocket and stitch back to finish the pocket edges. Once you have the pocket edges finished, pin to the apron. You may want to hold the apron up to your front to check out pocket placement.
Pin and sew the pocket in place.
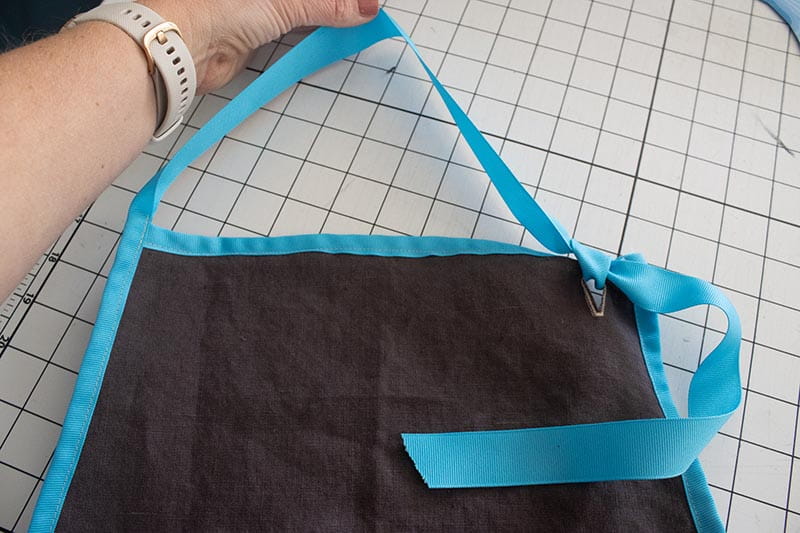
Next back to finishing the edges of the apron. Use ribbon to finish the top, short edge of the apron.

Measure out 36” of ribbon and extend that extra out to the SIDE of the apron. Pin the ribbon along one side of the apron then measure out 24” for the neck.

See the waist tie and neck halter here.
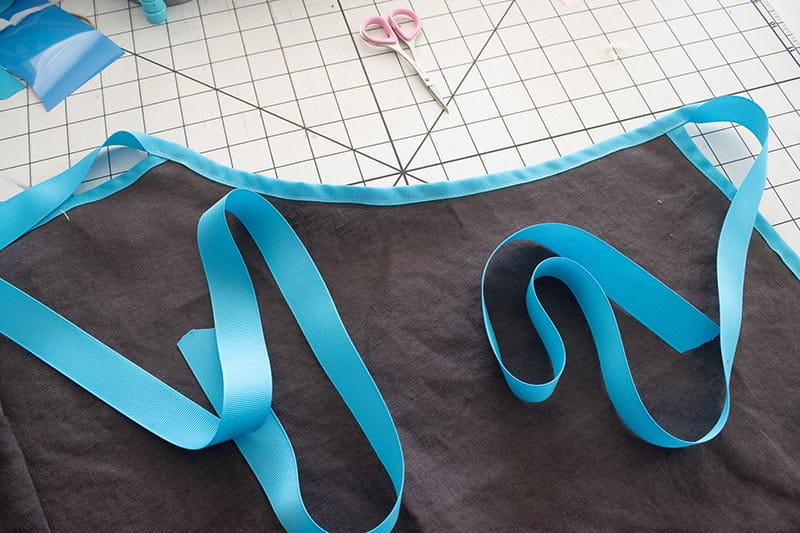
Now it's time to sew the other side of the apron. Fold over ½” then place that on the top edge of the apron. Pin along the rest of the curved side. The extra ribbon should be about 36” and becomes the other waist tie.

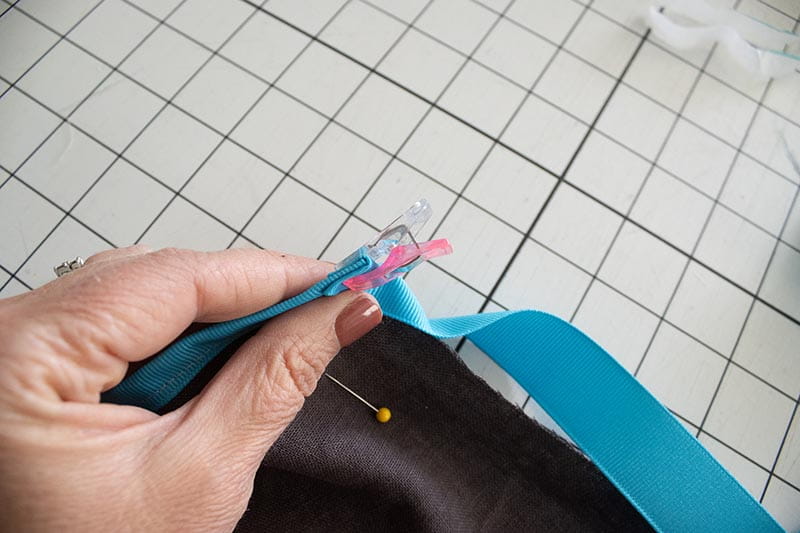

Sew in place.

Now we need a way to attach the neck halter and make it adjustable. I did this by sewing a buttonhole on the opposite side of the apron top. Sew a 1” buttonhole on the side of the apron top opposite of where the neck ribbon extends.

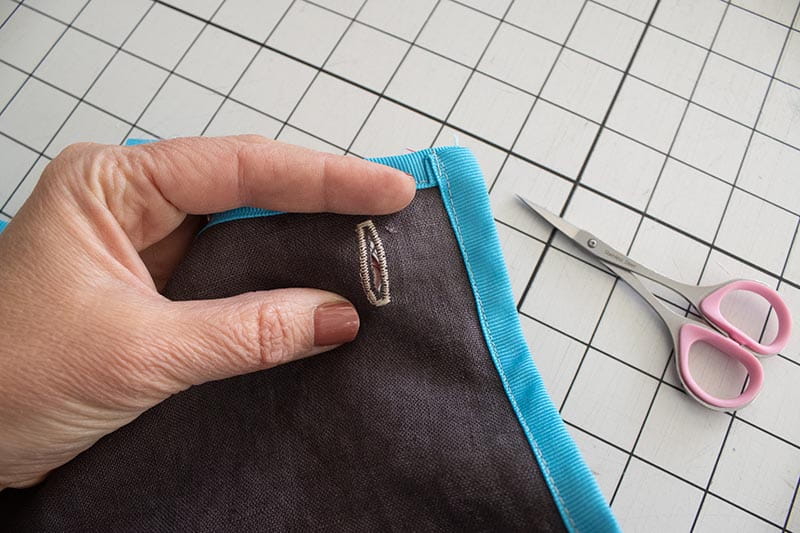
Now you can thread the neck tie through the hole and tie at the length you need. This also allows more than one person to wear this apron and adjust to fit as needed.
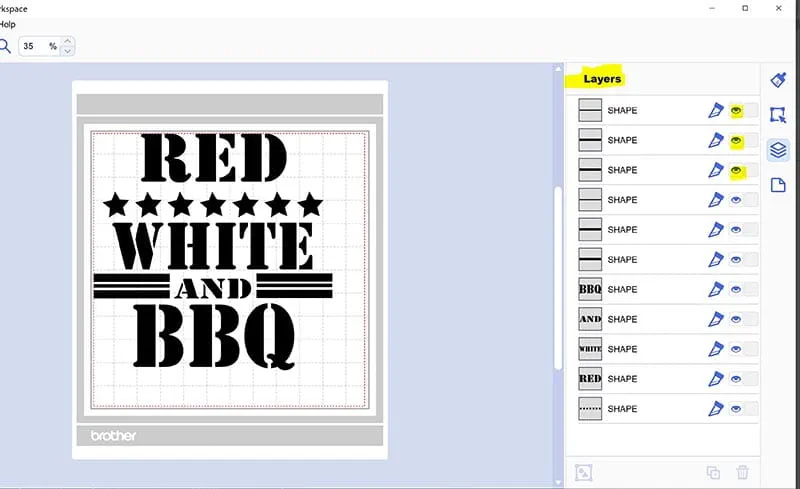
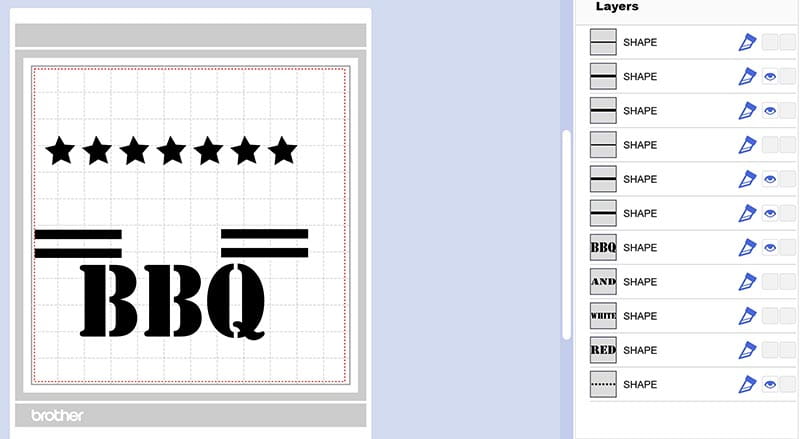
At this point you have a wonderful apron to wear and use, but you can make it even better with a fun free vinyl design. Download the free svg design {link above} and grab some vinyl. Download the free .zip file. Unzip to access all the file types. You can import the svg file directly into Canvas Workspace. It should look like this. You can view different parts of the file, or hide them by toggling the eye in each layer.
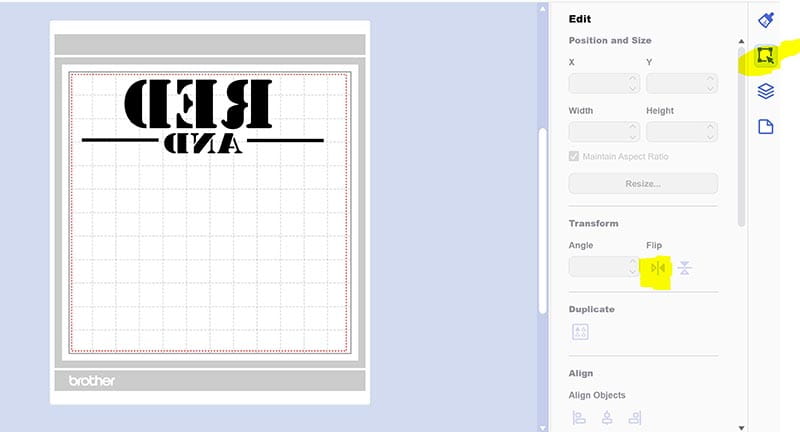
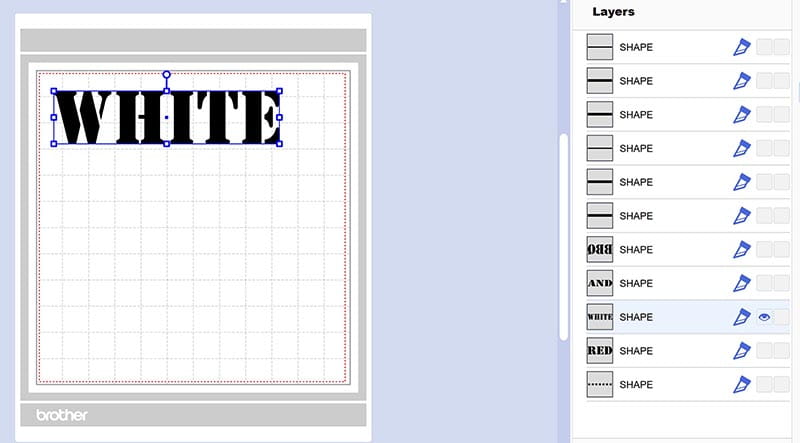
Start by only showing the parts you want to cut from red. Here’s what I chose. Make sure to mirror the image before cutting. I also move the design to save vinyl before I cut.
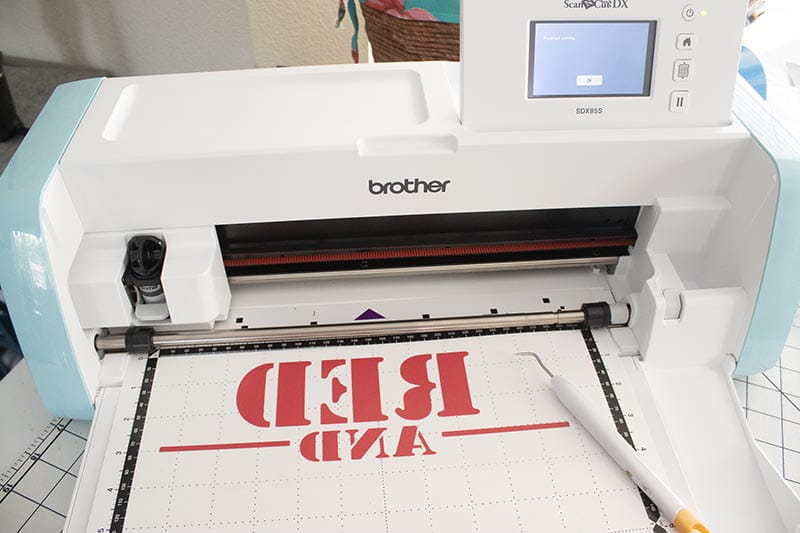
Cut the red vinyl with part of the design, then weed out the extra vinyl.
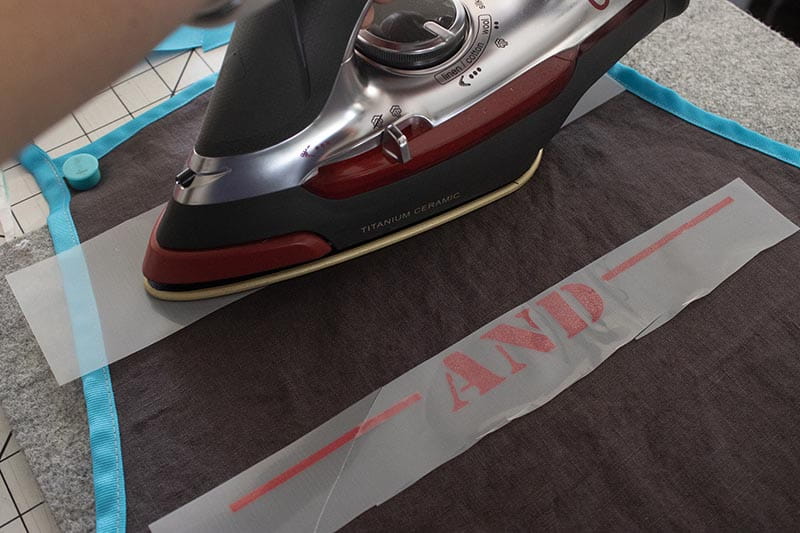
Cut the sections of the design back apart. Flip the design over and use an iron or heat press to fuse the vinyl to the fabric.
Continue this process with all other colors. Blue here, remember to mirror!
And finally white or silver - like I used.
As you add each color layer, you will have exposed vinyl. Make sure to cover all vinyl and not touch it with the iron. I used parchment paper to cover when adding more vinyl layers.
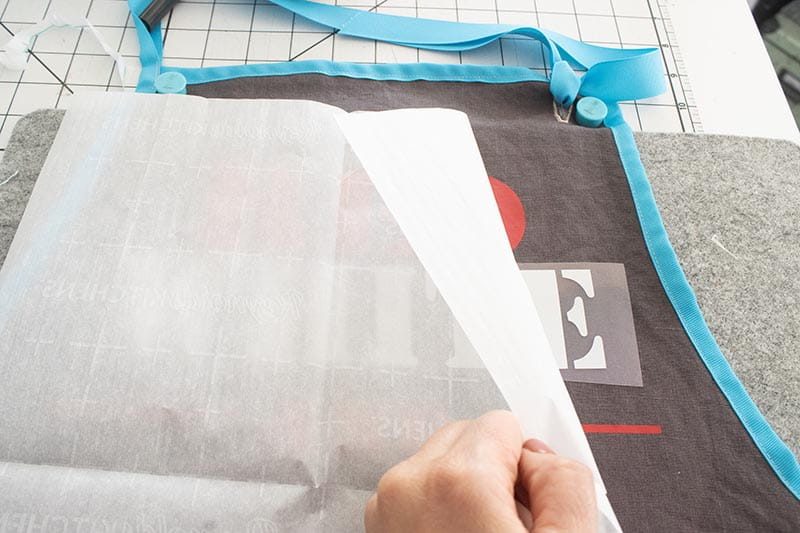
And here’s the finished design, I just love it. I did forget to put the stars between the red and white, so I added them to the top.

I just love how a bit of vinyl makes this apron extra wow!
Related Projects
Stay Connected
* Required fields