Upcycled Pet Collar
This is a super easy, fun and cute project for the lovable fur baby in your home. After all, our pets need to feel super special. For this project, I decided to create two different looks. The Red and White checked is a non-traditional monogram and the Blue and White stripes a traditional monogram. As you can see, Princess wasn't much in the modeling mood today, so the pictures above are the best I could get out of her.
- To start the project, you need to measure the circumference of your dog's neck and add about a half inch to the measurement (my Princess tolerated this step, but she wasn't all that happy with me).
- Next go in search of an old dress shirt that you no longer wear or find one at a thrift shop. Measure the neckline. If it is too large, that is adjustable, if it isn't large enough, you need to look for another one. I found a couple of cute ones with the necklines in pretty good shape at my local thrift store. I was looking for a checked fabric and ended up with a red checked fabric and a blue and white striped fabric. I guess I looked a bit funny going through the thrift store with a measuring tape, measuring necklines.
This is a nice little program if you are just beginning to embroider and want to increase your designing capabilities. The program has quite a few fonts, allows you to merge designs and create circle text and monograms. It also reads the non-Disney embroidery files from your Brother embroidery machine (the phc format).
Having said that, this project can also be completed with the BES4 Dream Edition software program.
Supplies Needed:
- Dress shirt with collar large enough to fit around your pet's neck
- Initial Stitch software program
(or the BES4 Dream Edition software program) - Embroidery thread to coordinate with collar
- Bobbin thread
- 75/11 embroidery needle
- Marking pen (optional - if you use a template, you shouldn't need to mark the fabric)
- Adhesive Tear-away stabilizer
- Printed templates (optional - created in the software program)
- Paper tape or pins to adhere the template to the collar if you print a template
- 4x4 inch embroidery hoop
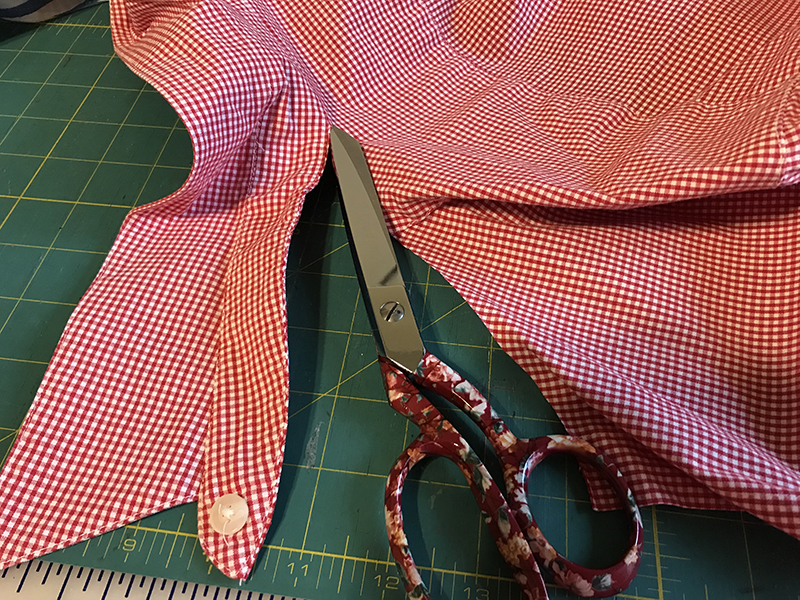
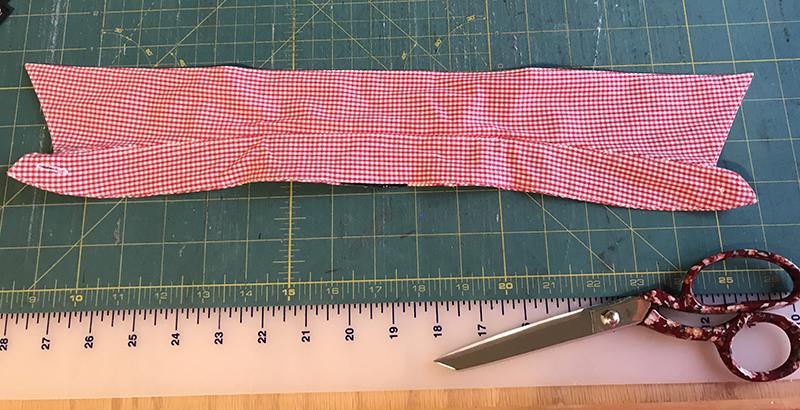
- Measure where you want to place your monogram. You'll need to see how much space you have to work with to create the monogram.
- My area measured about 2 inches at the narrowest point, so I knew I needed to keep my monogram below that size. I decided to make the maximum size of the monogram 1.25 inches to be safe.
Open your Initial Stitch Software
Note: This project may also be done in the BES4 Dream Edition software program.
- Close the Welcome window by clicking on the X in the top right corner.
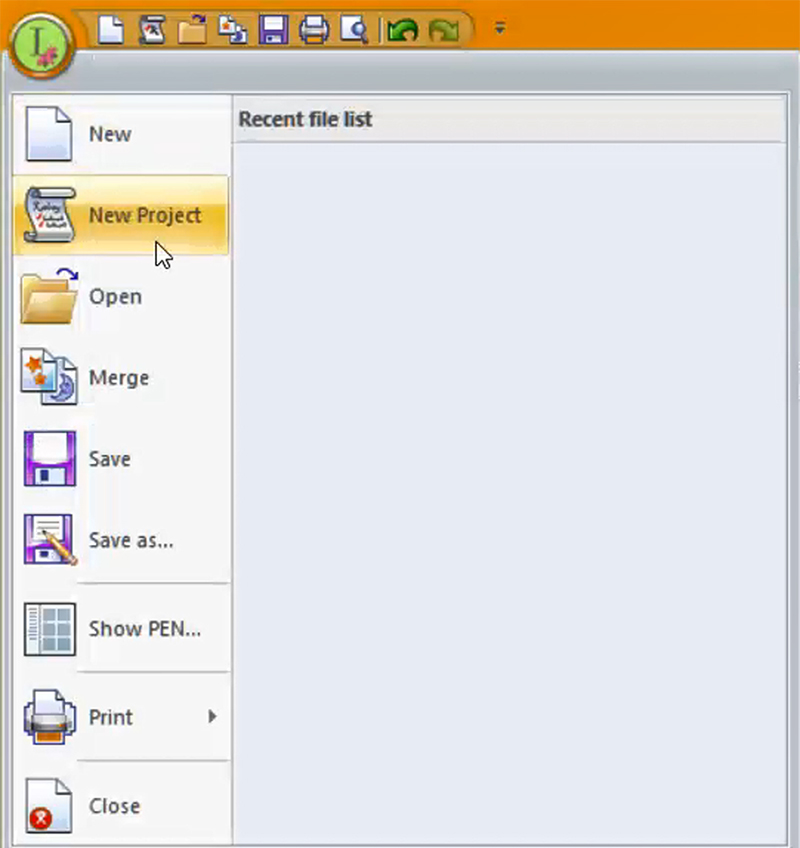
- Click on Pacesetter button and choose New Project.

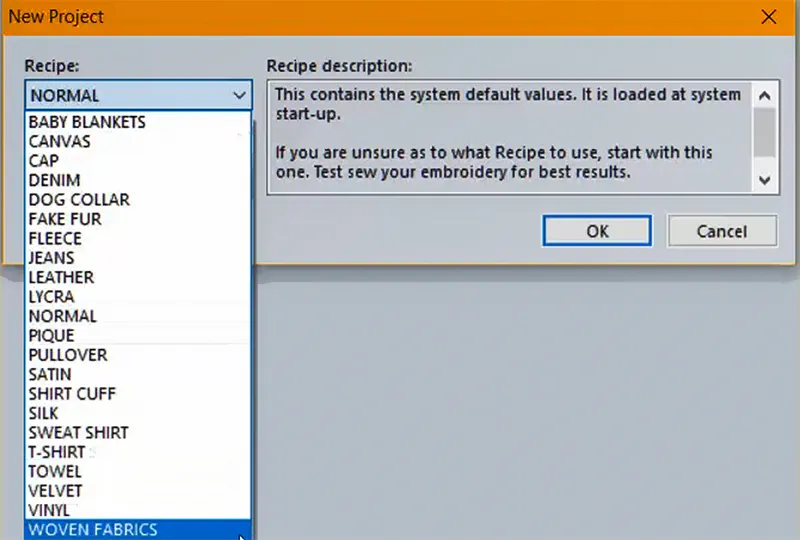
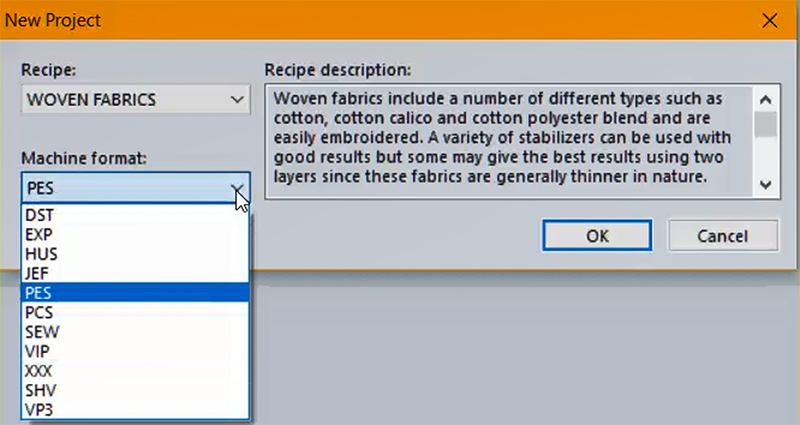
- Choose a fabric style from the Recipe dropdown menu. I selected Woven Fabrics since I was going to embroider on a cotton fabric.
- If you haven't set up your preferences on the View tab yet, select your machine format from the Format Dropdown menu and then click OK.
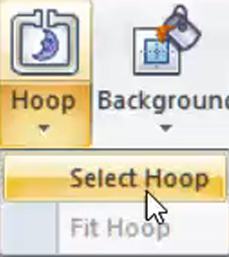
- Click on the Hoop down arrow and then choose Select hoop.
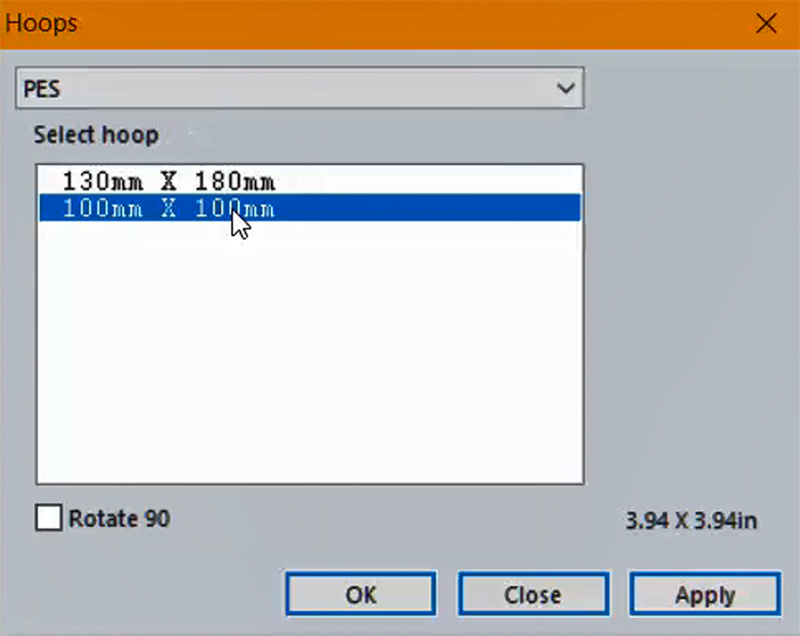
- Choose the 100 x 100 mm hoop or 3.94 x 3.94 in hoop (4x4 inch hoop).
- Click on the Normal Text tool.
- Click on the design page (the square in the center of the window) and then type in your pet's first initial, press Enter and type in your pet's middle initial.
- Left mouse click away from the text or click Apply in the Properties window. The two letters will be stacked.
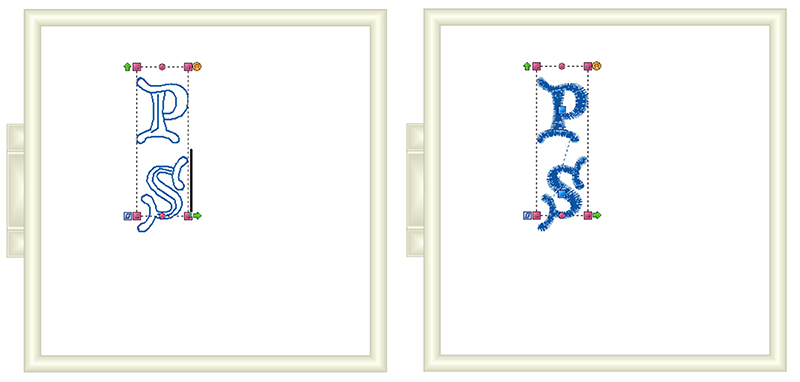
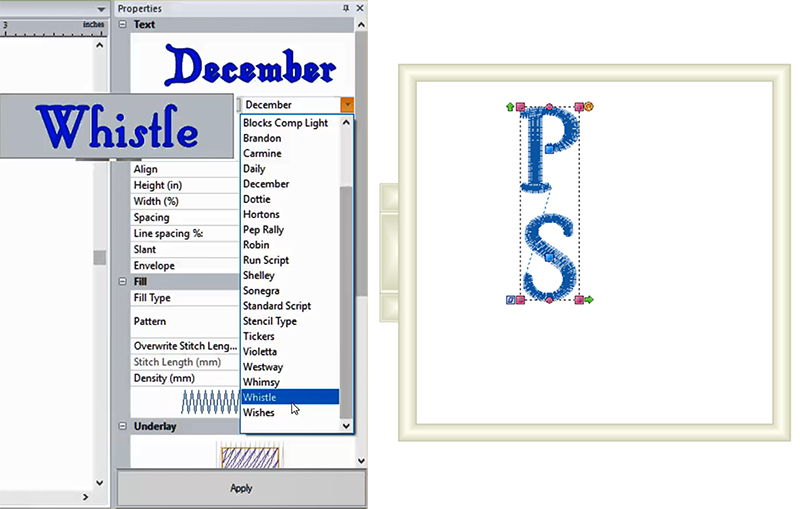
- In the Properties window, click on the Font dropdown menu to select a different font. The up and down arrows on the keyboard will allow you to see a preview of the font. Left mouse click on the font that you want to use, and the click Apply at the bottom of the Properties window. I selected the Whistle font.
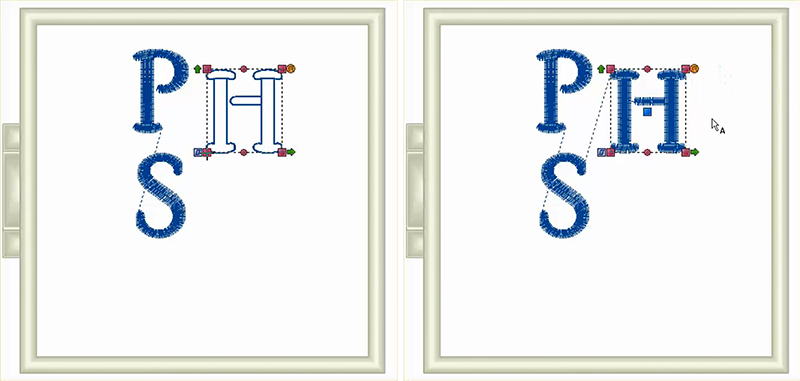
- The Normal Text tool is still selected. Click off to the right side of the initials and then left mouse click to activate the tool again.

- Type in the initial of your pet's last name and left mouse click away from the text to set the letter or click Apply in the Properties window.
- Click on the question mark next to Font.
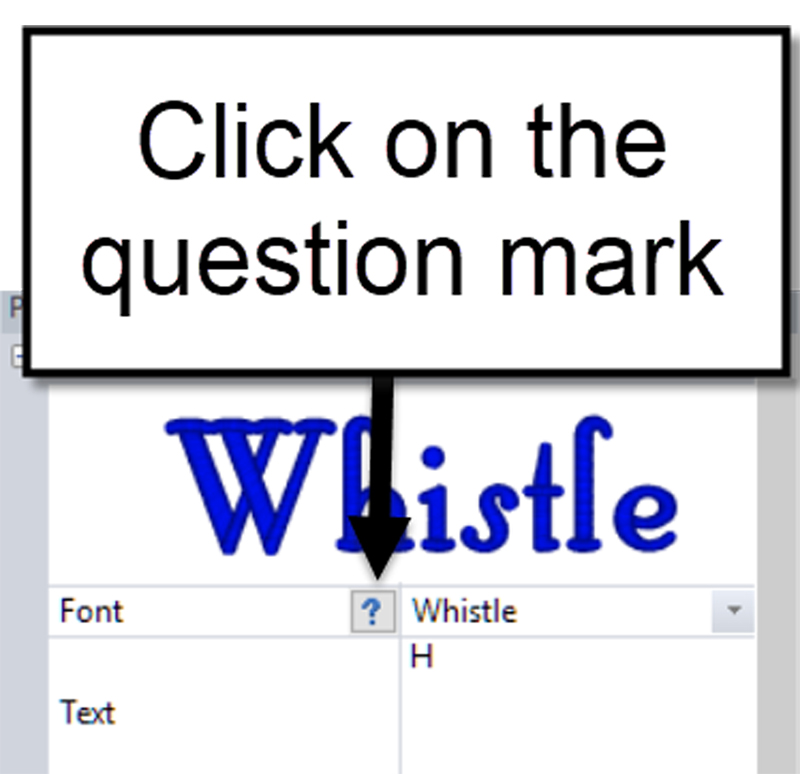
- The recommended minimum and maximum size for the font will be listed in the new window that appears.
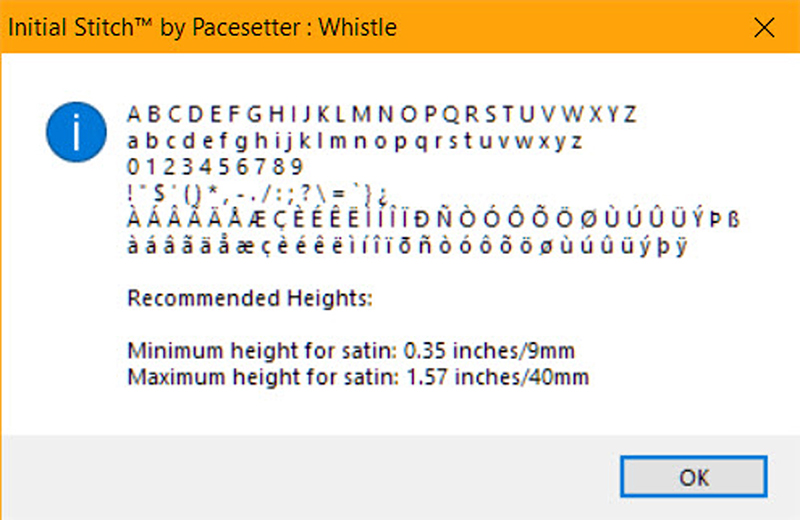
- Make note of the sizes so you know how large and small the text can be made and then click OK to dismiss the window. If the sizes will not work for your collar, select a different font. This font works for the size that I need.
- In the Properties window, change the size of the Pet's last initial to match the height that you determined you needed when you measured the collar. I had decided on 1.25, so that is the measurement I will apply. Change the size and then click Apply.
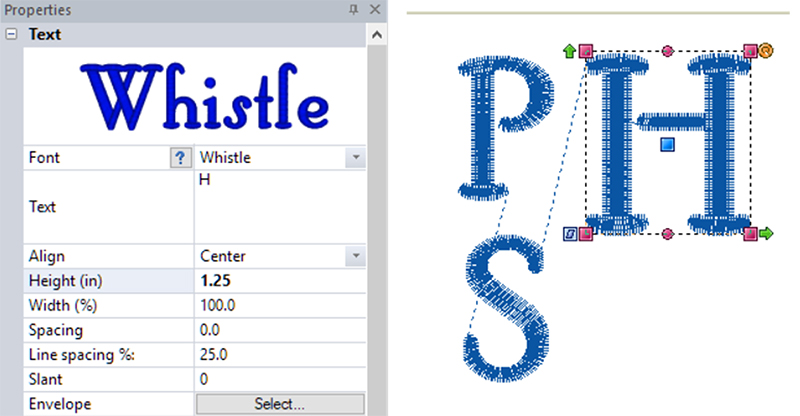
- Click on the Select tool and then click on the stacked initials.
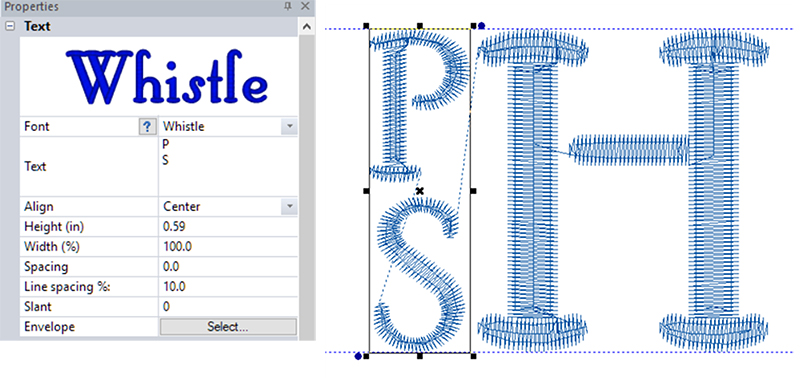
- In the Properties window, adjust the size of those letters. This will take a little bit of playing as you won't know the exact number.
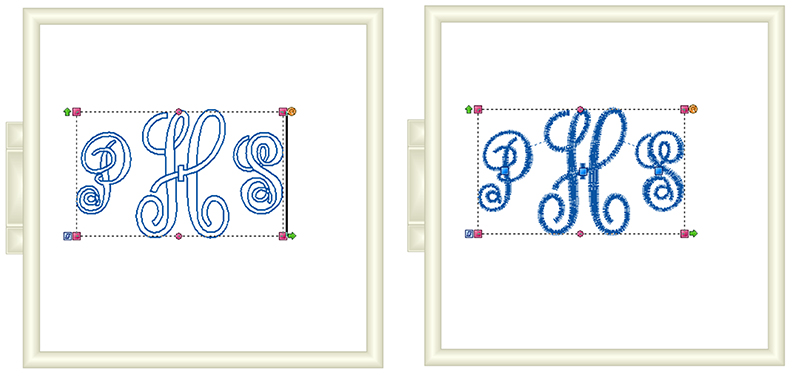
- We could click on the select tool and pull the text in from the corner, but we wouldn't know if the size of the text would be too small. We know the H is 1.25 inches, so I am going to try .55 and see what happens. My goal is for the stacked letters to be the same size together as the H. I have moved the letters, so they are next to the H after adjusting the size.
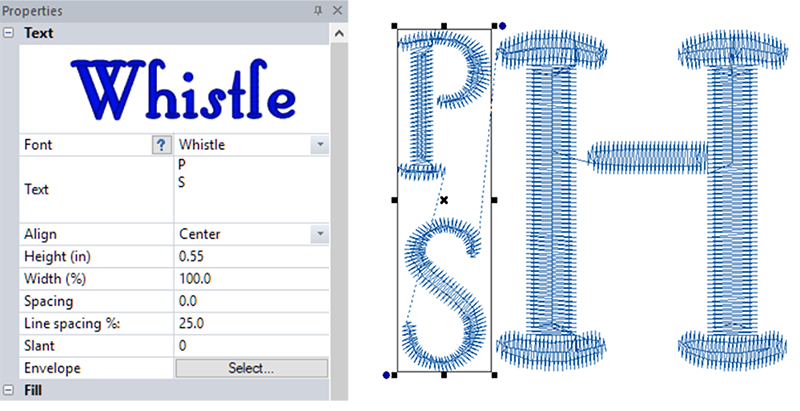
- This looks about right to me, but I think if I adjust the line spacing it may be better. I am going to reduce the line spacing to 10 and then click Apply.

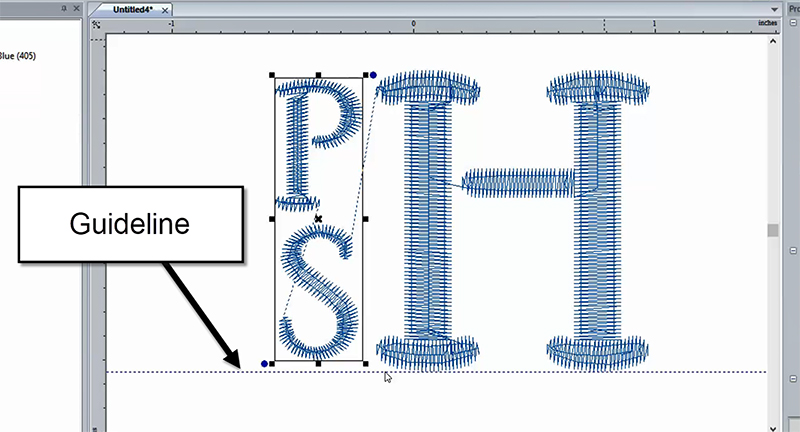
- There is one more trick that will help us with this project. The software has guidelines that you can add to help you align the designs. This will visually assist us in seeing if the size and spacing are correct for out lettering. Place the cursor over the top page ruler, hold the left mouse button down and drag the mouse until you have a blue dashed line beneath the H.
- Repeat the process to add a guideline above the H.
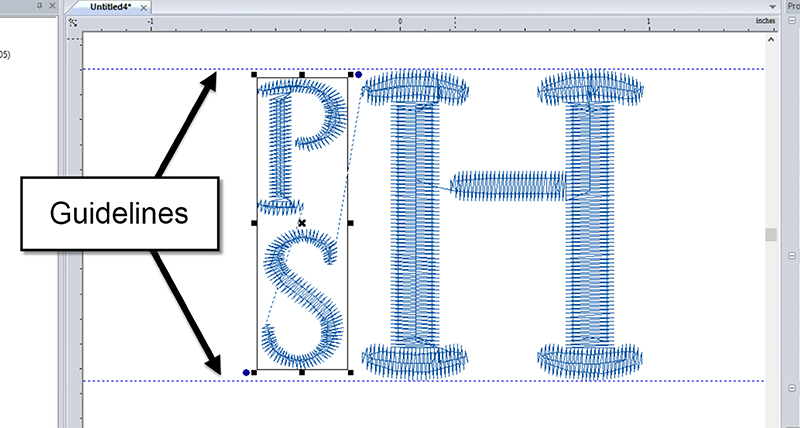
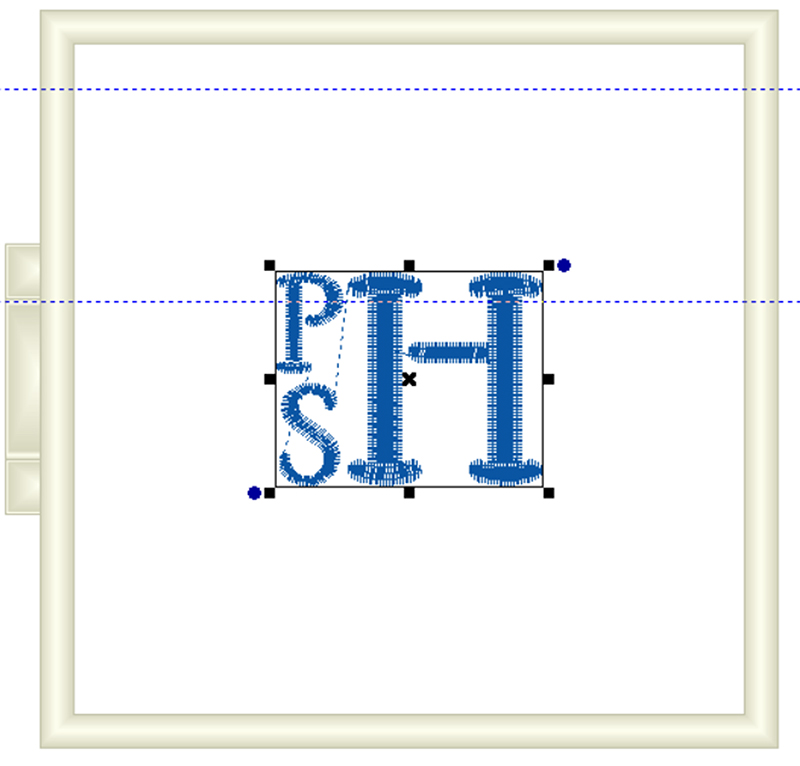
- After adding the guidelines, I can see I can increase the size of the letters a little. I played and came up with a final setting of .59 inches with a spacing of 10mm. This fits perfectly inside the guidelines. Adjust the spacing between the stacked letters and the last initial if necessary.
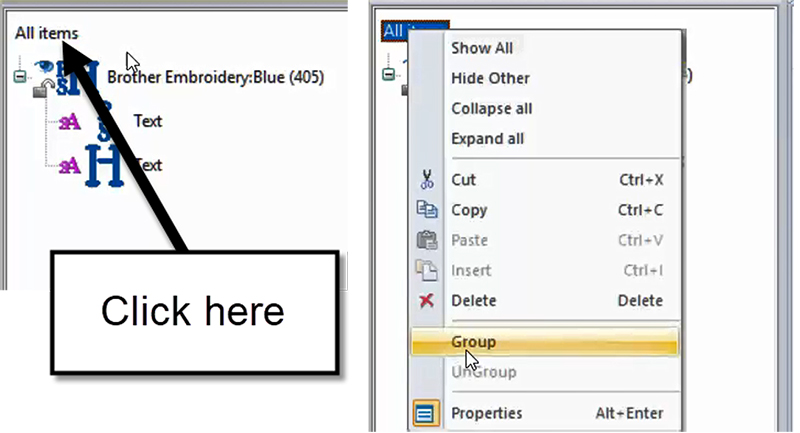
- In the Sequence View window, right mouse-click on All items. (This is an easy way to Select All.) Choose Group from the dropdown menu.
- Click on the Arrange Tab.

- Click on the design in the design window.
- Press Center to move the design to the Center of the hoop.
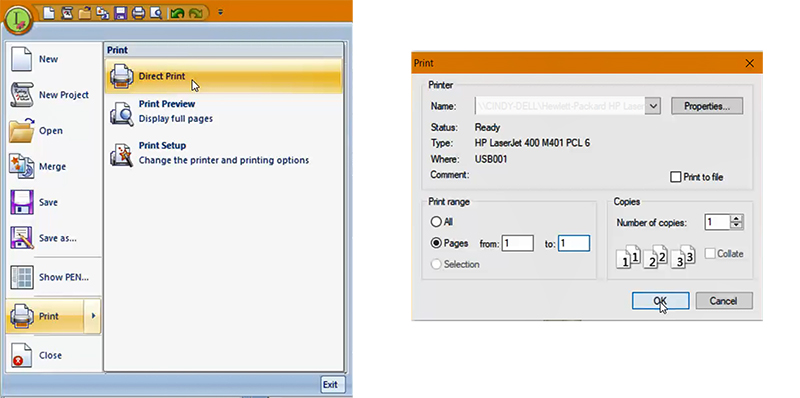
- Click on the Pacesetter button and choose Print and then Direct Print.

- Choose to Print page 1 to 1. This will print a template with crosshairs to align your embroidery.
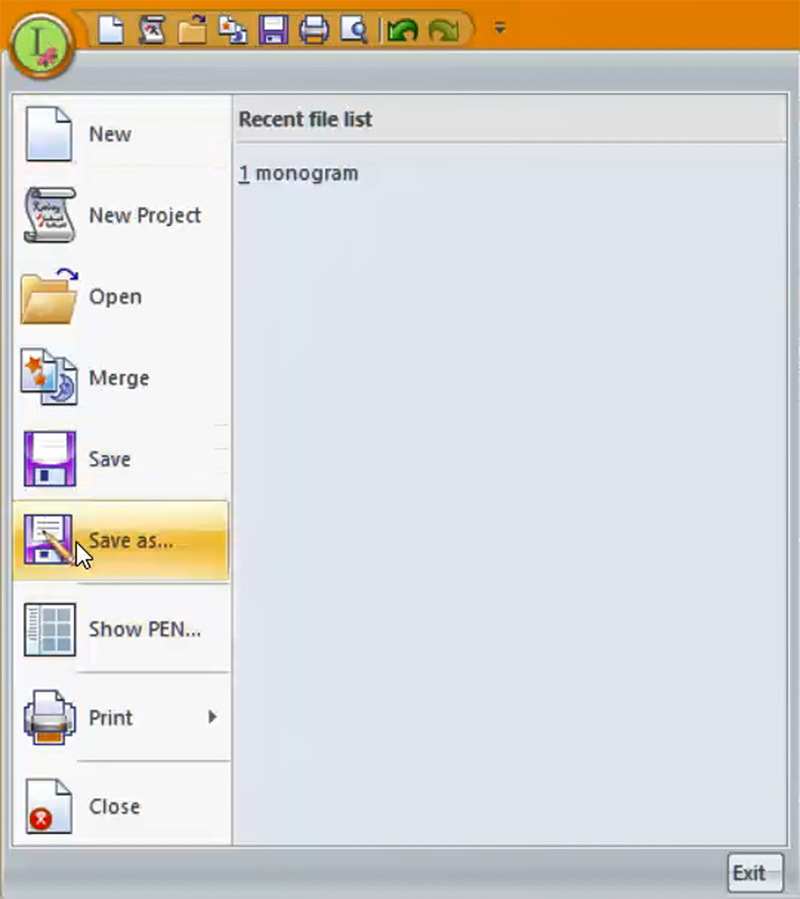
- Click on the Pacesetter button and choose Save As.

- Choose the Save location, name the design and then press Save. This will save it in the brf format to allow you to edit the design later if you need to adjust the monogram.
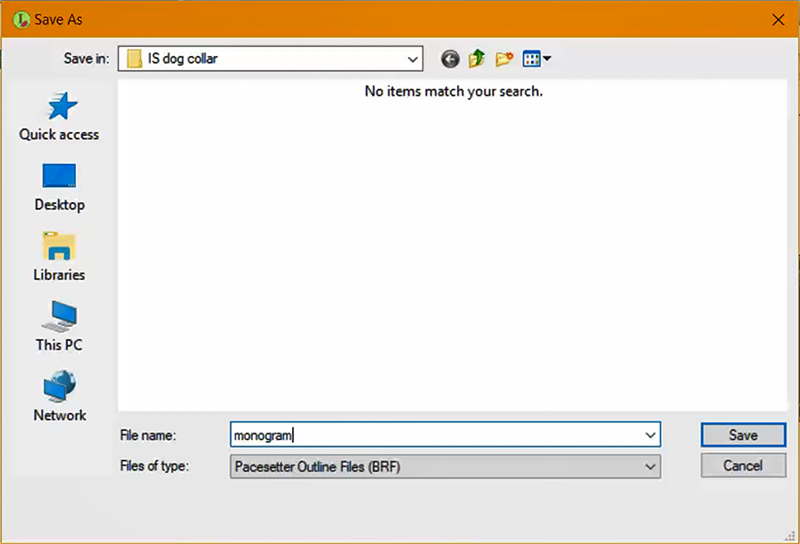
- Click on the Pacesetter button and choose Save As.

- This time Save the design in your machine format. If you want to save directly to a USB device, select the device in the Save In box. This will allow you to take the design to your embroidery machine.
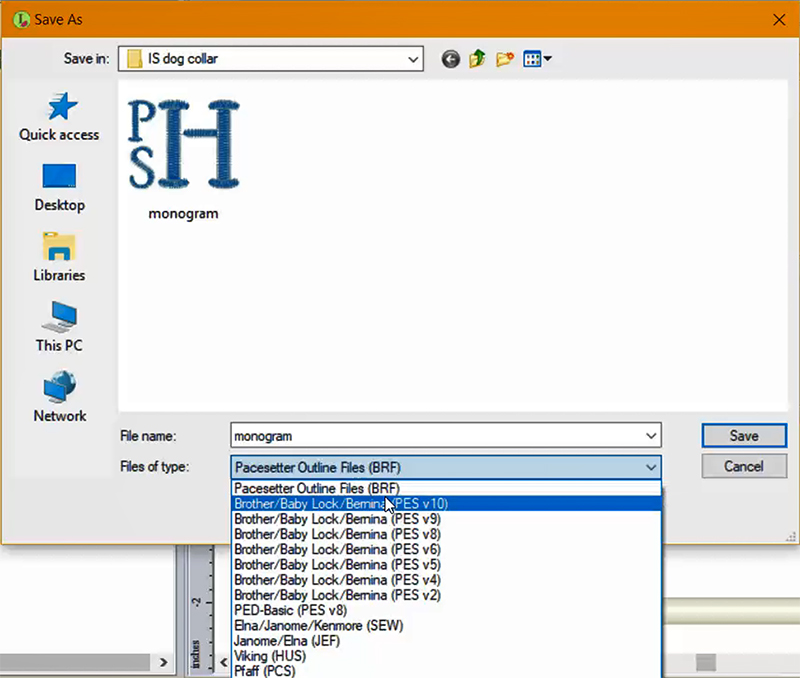
Now if you want to create a more traditional monogram, that is easy to do as well.
- Click on the Pacesetter button and choose New Project.

- Choose a fabric style from the Recipe dropdown menu. I selected Woven Fabrics since I was going to embroider on a cotton fabric.

- If you haven't set up your preferences on the View tab yet, select your machine format from the format dropdown menu and then click OK.

- The 4x4 inch hoop should still be visible in the design window unless you have restarted the program. If it isn't visible, click on the Hoop button.
- Click on the Monogram Text tool.
- Click on the design page to activate the monogram tool. Type in a 3-letter monogram and then left mouse click away from the lettering or click Apply in the Properties window.
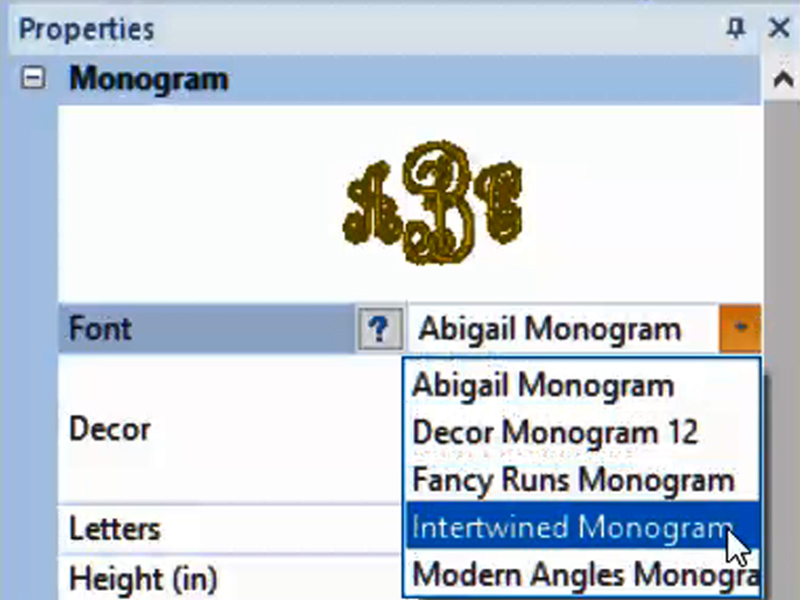
- In the Properties window, click on the Font pulldown menu and select a monogram font. Since we are going to be embroidering a small monogram, you can select any of the fonts except Fancy Runs. Fancy Runs needs to be embroidered at a large size. I selected Intertwined Monogram. Click Apply in the Properties window.
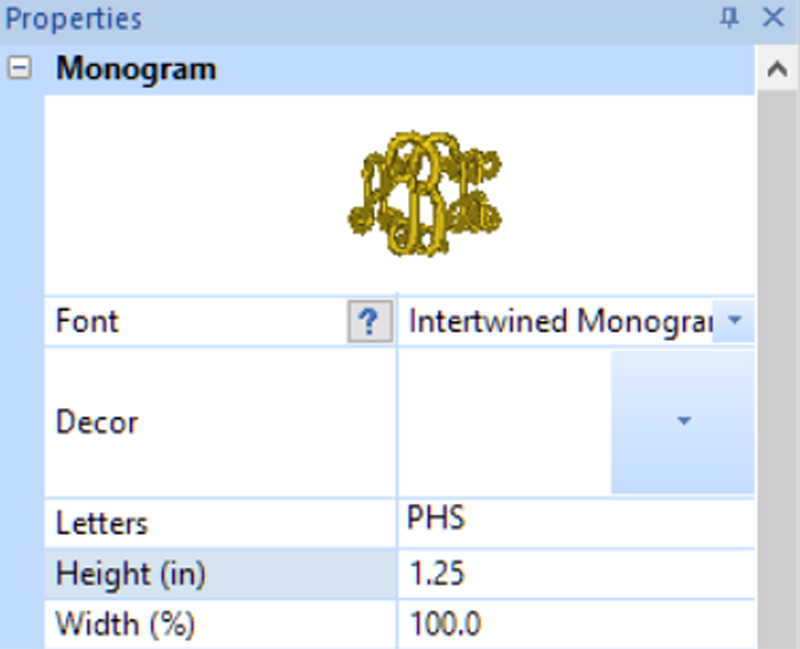
- Change the Height to 1.25 and then click Apply.
- Click on the Arrange Tab.

- Click on the design in the design window.
- Press Center to move the design to the Center of the hoop.

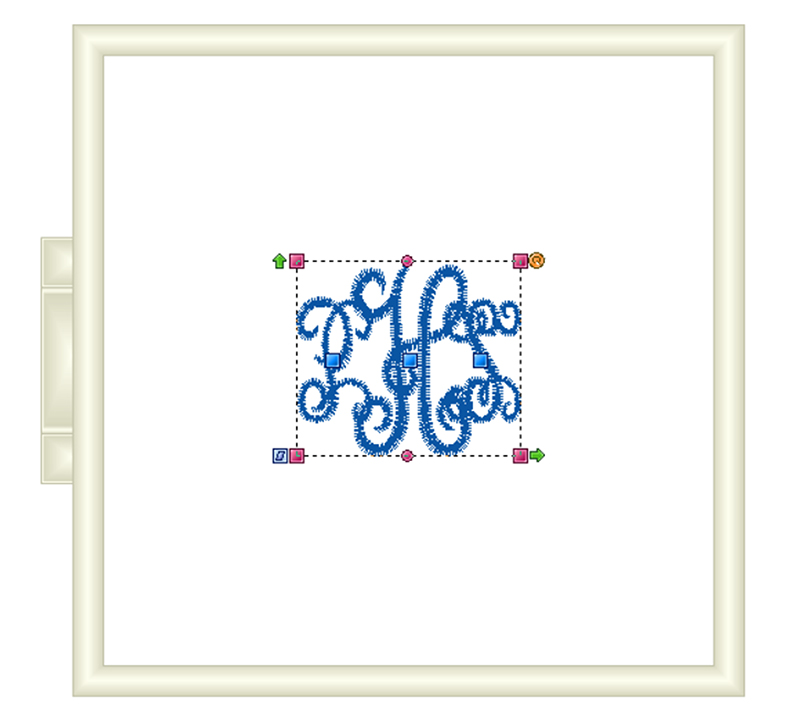
- Click on the Pacesetter button and choose Print and then Direct Print. Choose to Print page 1 to 1. This will print a template with crosshairs to align your embroidery.

- Click on the Pacesetter button and choose Save As.

- Choose the Save location, name the design and then press Save. This will save it in the brf format to allow you to edit the design later if you need to adjust the monogram.
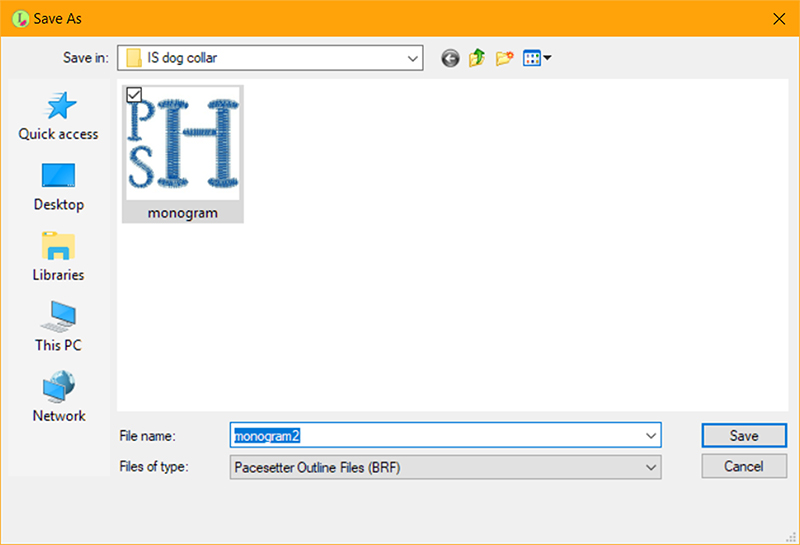
- Click on the Pacesetter button and choose Save As.

- This time Save the design in your machine format. If you want to save directly to a USB device, select the device in the Save In box. This will allow you to take the design to your embroidery machine.
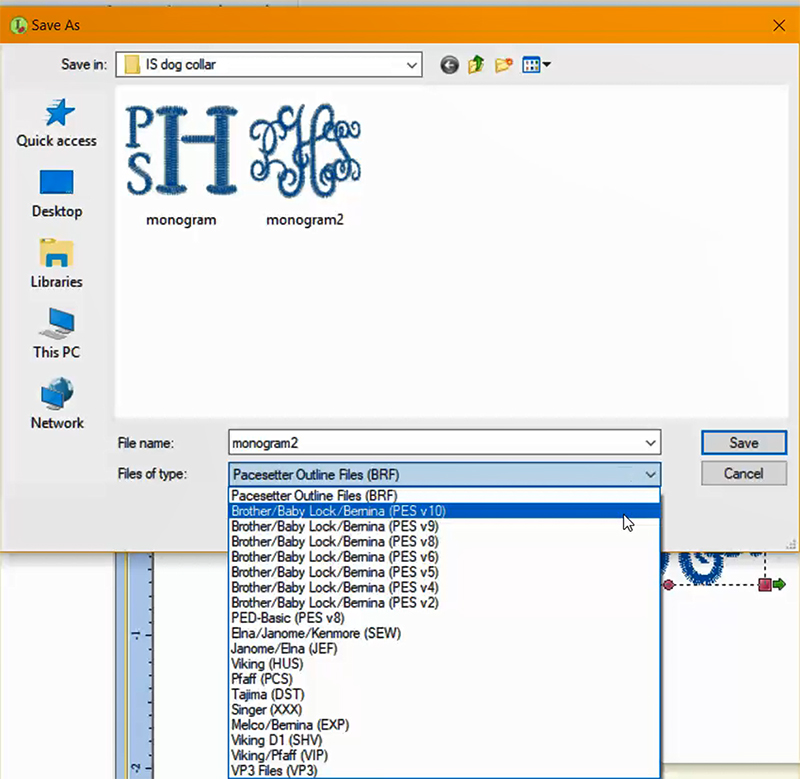
Now onto the embroidery...
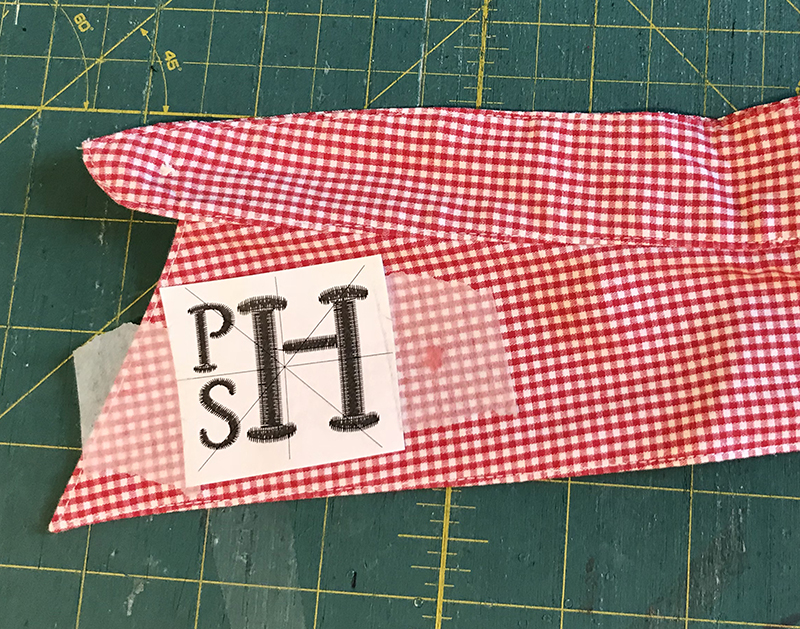
- Mark the placement for your embroidery on the collar. I printed a template and taped it to the collar. This give you a very easy way to make sure you have your project aligned. I used medical paper tape to tape the template down.
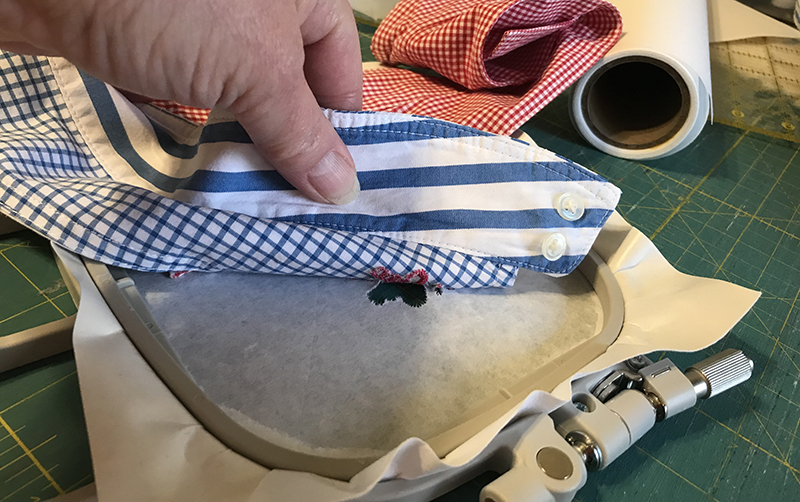
- Hoop a piece of adhesive stabilizer in the 4x4 inch hoop, shiny paper side up. Score the stabilizer and peel off the paper.
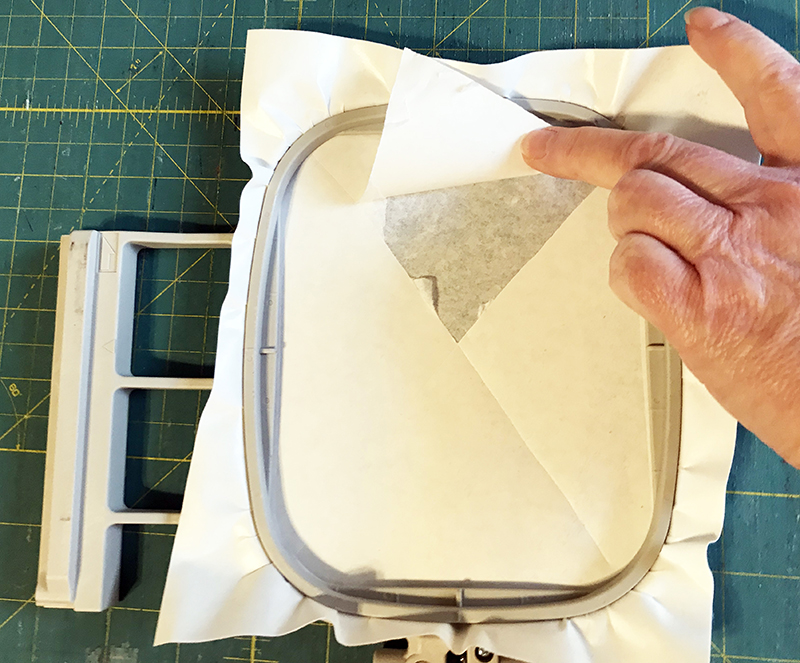
- Stick the collar onto the stabilizer.
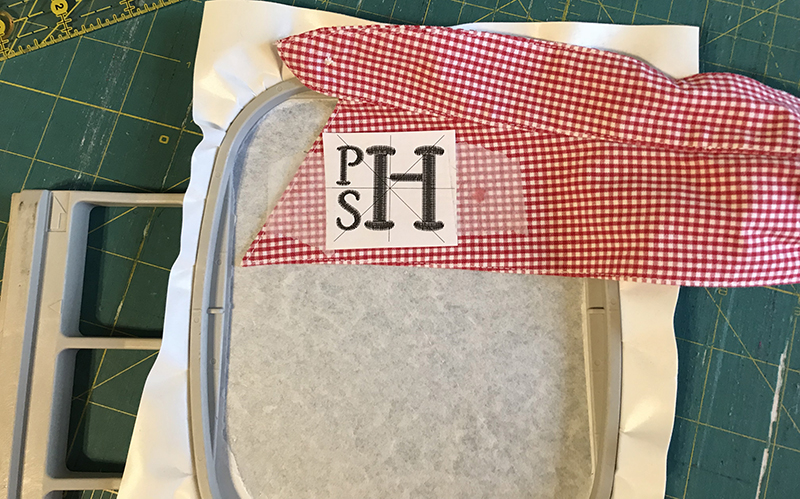
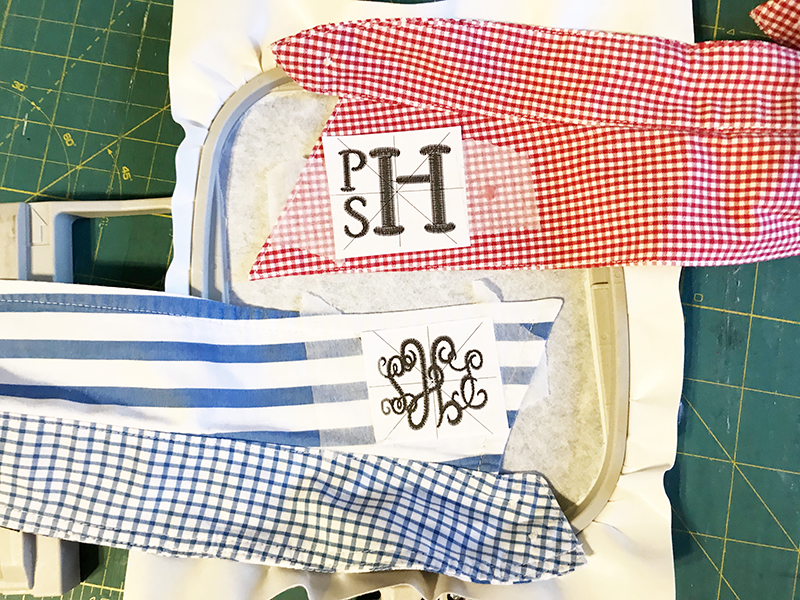
- I embroidered both projects in the same hoop, so I placed the other collar upside down onto the stabilizer. If you do this, it is important to remember to rotate the second embroidery design at the machine!
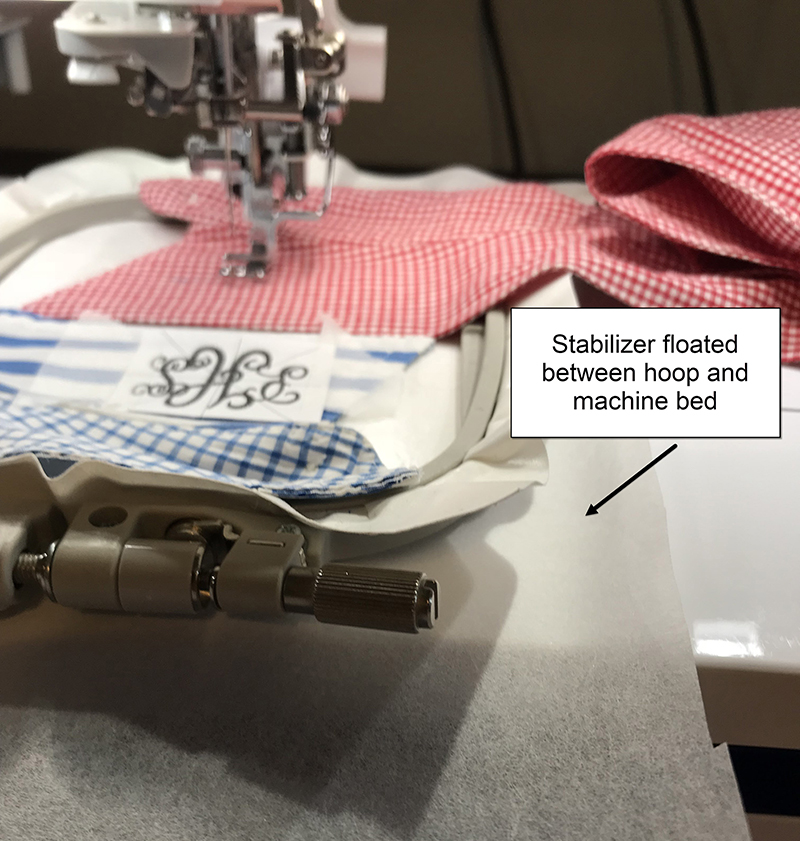
- Insert the hoop into the machine and float a piece of tearaway between the bottom of the hoop and the bed of the machine.
- Bring up the embroidery design on the machine.
- Layout the embroidery design onto the collar using the Layout menu of your embroidery machine. Every machine is different, so refer to your user manual if you aren't sure how to move a design around on your embroidery machine.
- After you have the layout correct, remove the template.
- Thread the machine and embroider the project.
- If you hooped 2 different collars in the machine, bring up the second embroidery design. Rotate it 90 degrees twice to turn it upside down, and then fine tune the alignment in the Layout menu of your machine.
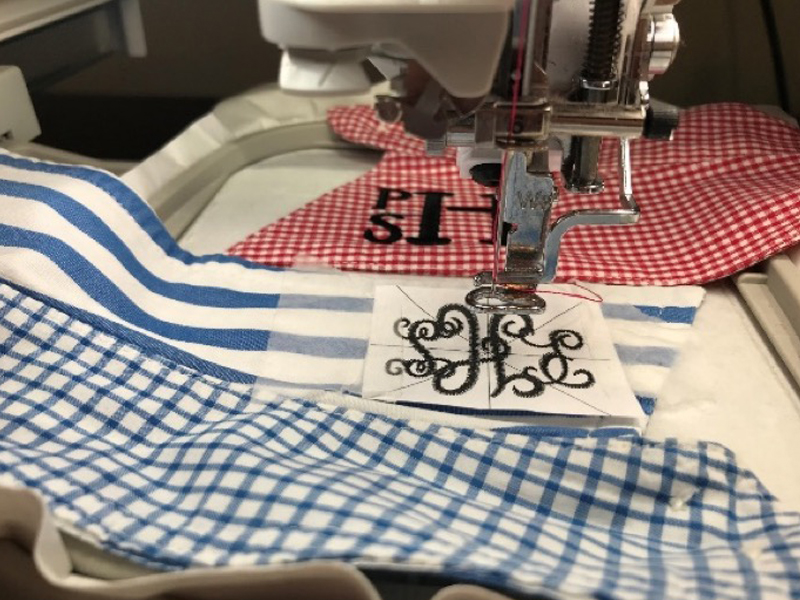
- When you are ready to embroider, remove the template. Embroider the second design. Remove the hoop from the machine, gently remove the excess stabilizers and press the collar.
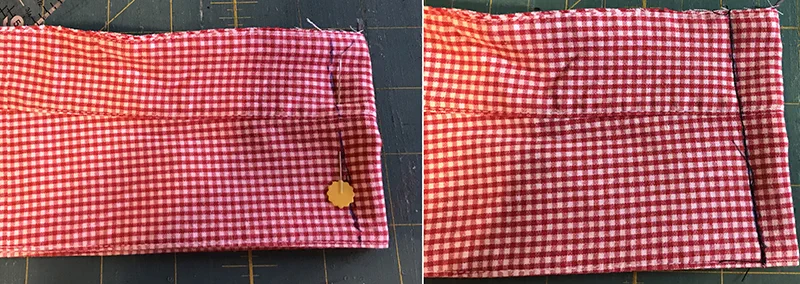
Tip If your collar is too big for your pet, you can sew a seam up the center back of the collar to take out the excess. Cut away the excess after you try it on the pet. Don't cut it until you have tested. I would sew with a long stitch (basting stitch) first and once it is the perfect size, go back over the seam with a shorter stitch. You can always take out the seam, but it is a bit harder to put fabric back.
 Ideas for uses for the leftover shirt.
- Use the cuffs to make stabilizer wraps with embroidered stabilizer names. Great for organizing your embroidery studio.
- Use the body of the shirt for fabric for appliqués if it is still in good shape and a good weight. My red and white checked fabric will definitely be making a reappearance as an appliqué fabric.
- If it is a shirt that is loved by someone in the home, make a pillow out of it. The button front makes it very easy to close. They would also make great tooth fairy pillows.

