Using a Single Quilting Pattern Four Different Ways
When we use words like "unlimited potential" to describe the THE Dream Motion Pro software,
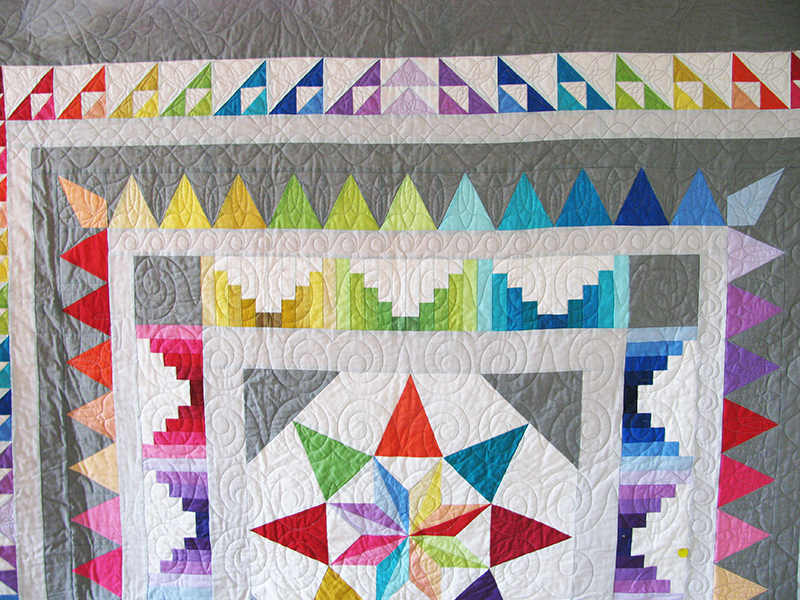
it's not just advertising! The designs that come with the program can be combined using the tools in the software to create so many combinations for a complete quilt. Sometimes an all-over quilt pattern may be just what you want and need, but what if you'd like to customize the quilting to match the piecing on the quilt top? What happens when the shapes in the piecing don't match the outlines of the quilting patterns you have on hand? Let's take a look at four different ways to shape a single motif so that it fits into all the nooks and crannies of a medallion-quilt border.
Featured pattern is a product of Craftsy and Brother International Corporation makes no representations or warranties regarding such product.
 The corners of the border are handled a little differently, and we'll come back to that below. For all of the quilting in this border, I've used pattern 14 in the Triangles tab of THE Dream Motion Pro.
Quilting the Colored Triangles
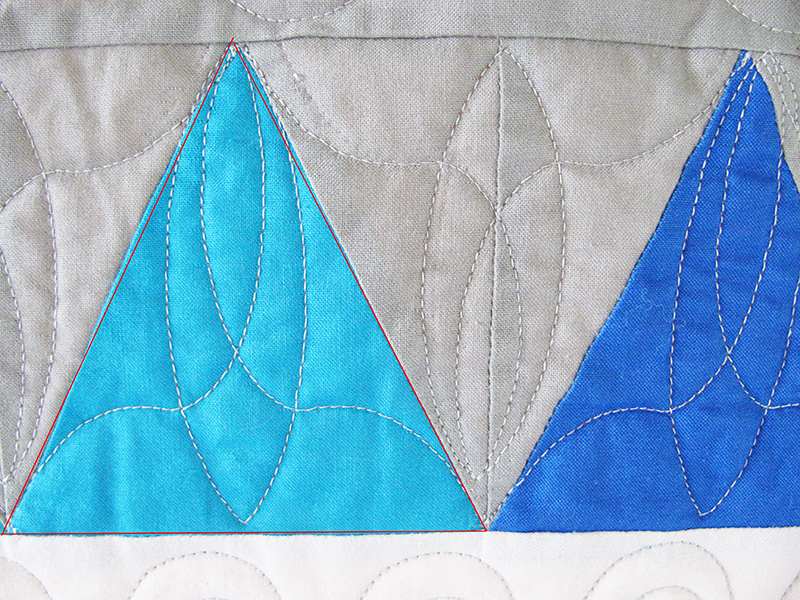
- Open the Select & Sew screen and choose triangular quilting pattern 14. Set the Placement Method to Triangle. Unlock the aspect ratio (the padlock icon) and set the size to 4" wide and 4" high.
- Move the machine over the hooped quilt to position the apex and two base points at the corners of one colored triangle. Double check the Placed Height and Width to be sure they are still at/near 4"; if not, go back into the settings screen and change them, then repeat the reference-point placement. Stitch the design.
- You may find that the design doesn't fit perfectly into your shape due to variations in piecing and layering the quilt; with the triangle method of placement, the apex will be centered over the baseline you've defined with the two points. The discrepancy can be even more obvious because we've made the quilting motif the same size as the quilt block. However, I chose to stitch the pattern in the same way on all of the colored triangles for this learning/teaching quilt.
- Move the machine to the next colored triangle and repeat placement and sewing. Work all the way along the border and then re-hoop the quilt to stitch the remaining border blocks. Save the corners for later.
Tip: If your border is longer than the safe area on your frame, it's more efficient to stitch all of the triangle types within the safe area before moving the fabric on the frame.
Quilting the Gray Triangles
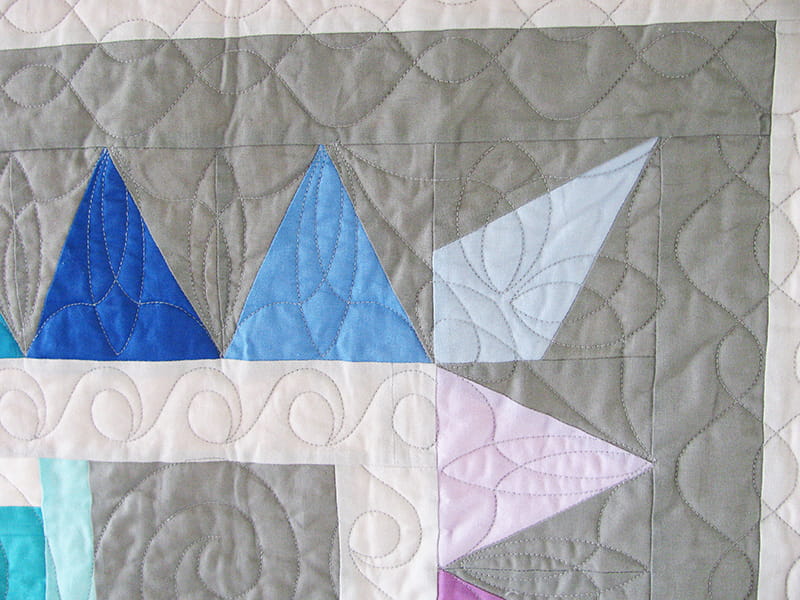
- Take another look at the pictures of this border and notice the gray triangles. In this step I'm quilting only the "full" gray triangles; that is, the ones composed from two adjacent blocks' background triangles. These full triangles are the same size as the colored triangles already quilted, but I decided to resize the quilting patterns to avoid overlaps. If I were quilting this project again, I would probably use the gray-triangle method for the colored triangles, too.
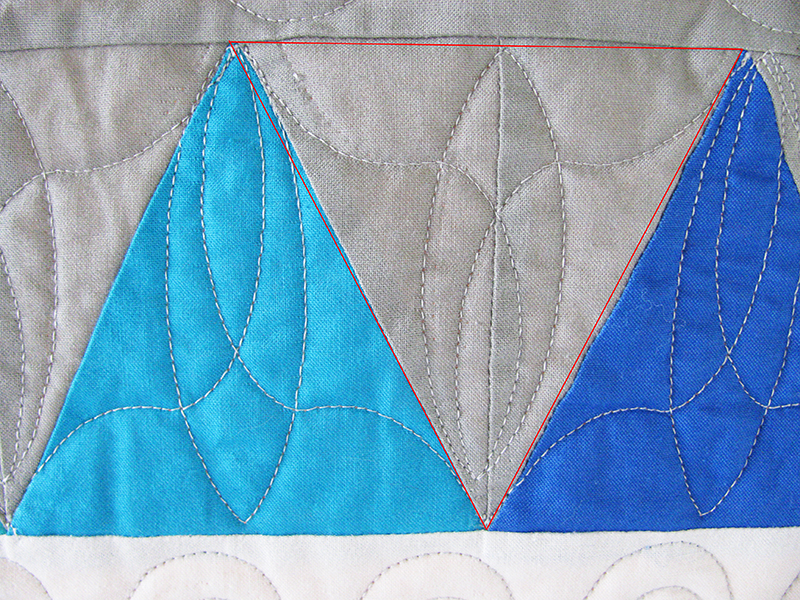
- With the triangle motif already on your workspace, open the Placement screen again. Unlock the aspect ratio (the padlock icon) and reset the Height to 3 1/2", leaving the Width at 4". This will leave a little space at the apex of the triangle.
- Mark the design placement. This time the baseline points will be at the top of the motif, so you'll need to rotate your thinking: click the lower left button to place the upper right corner and vice versa. Place the tip of the triangle about 1/2" from the stitched triangle's apex.
- Stitch the design. Work your way along the border, filling each full gray triangle.
Quilting the Corner, Part One
- Notice that the corners in this border are neither squares nor triangles because they include the corner block plus two background-fabric triangles. The result is a sort of wide diamond shape. We're going to fill the space in two parts.
- Close the workspace and open the QuiltCAD screen. Create a quilt one block across and one block down, with the block dimensions set to 6" x 6". Select triangle design 14 again and place it in the quilt block.
Tip: Why 6"? We want this design to fill the 4"-square corner block plus the 2" from the corner block to the apex of the first colored triangle.
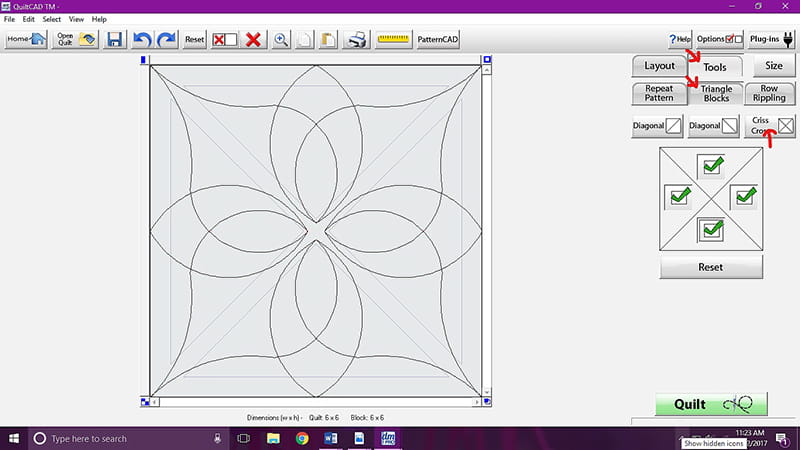
- With the block selected, click Tools>Triangle Blocks>Criss-Cross. Four repeats of the quilting design will appear, filling the block.
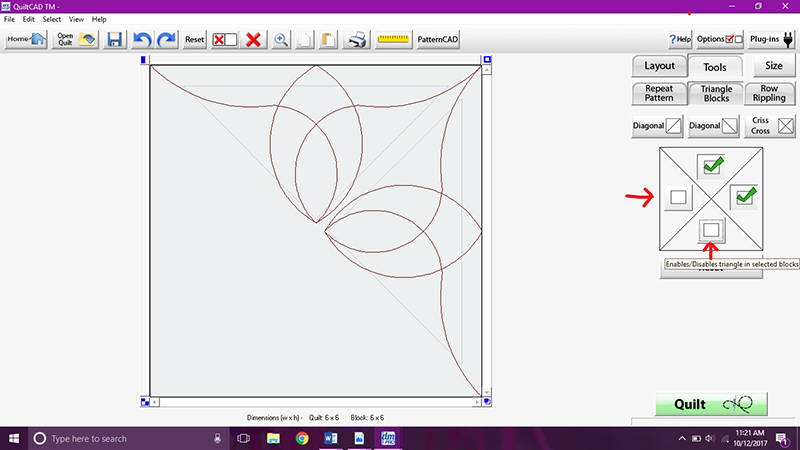
- Click two adjacent arrows to deselect those areas of the block, leaving a triangular design made from two of the original motifs. Save this design.
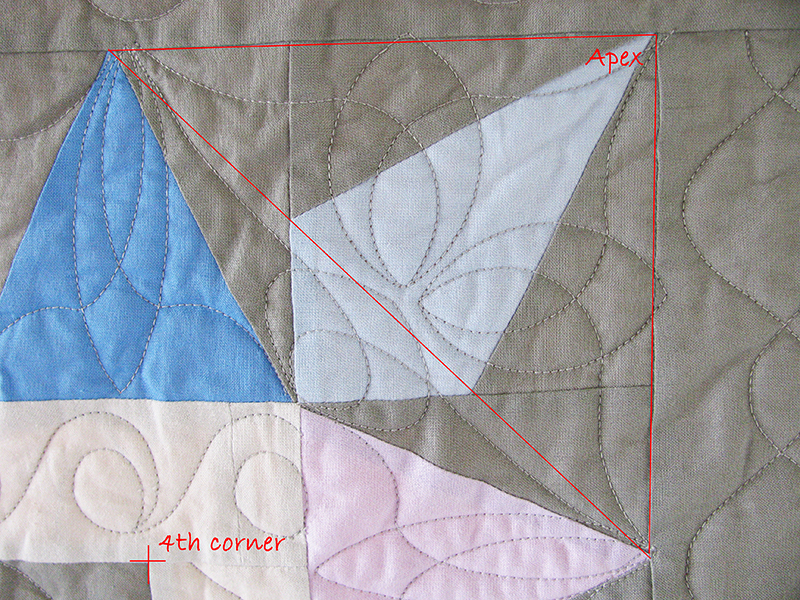
- Measure and mark the imaginary fourth corner of the 6" corner block, even though this design won't fill all of the space. Stitch the design in each corner of the border, rotating it as necessary.
Quilting the Corner, Part Two
- All that's left to complete the border is the short, wide triangle still empty across the base of each corner diamond.
- Go back to the Select & Sew screen and choose triangle 14 once more.
- Click Settings in the toolbar at the top of the workspace. Select Tilted Block and Stretch in the Placement Method box.
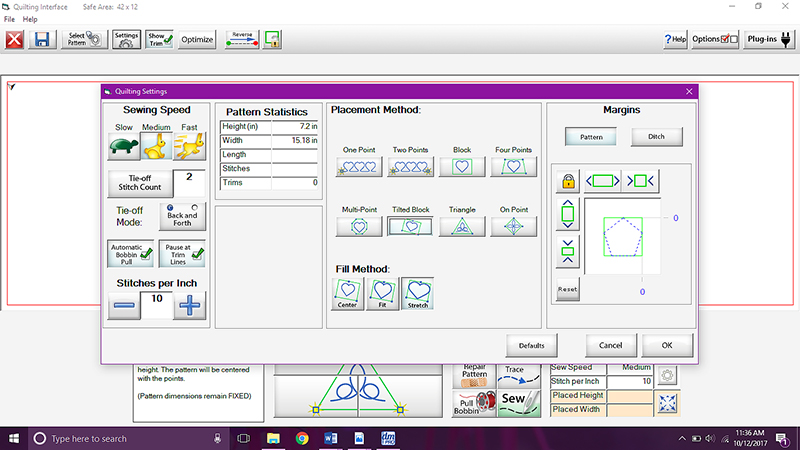
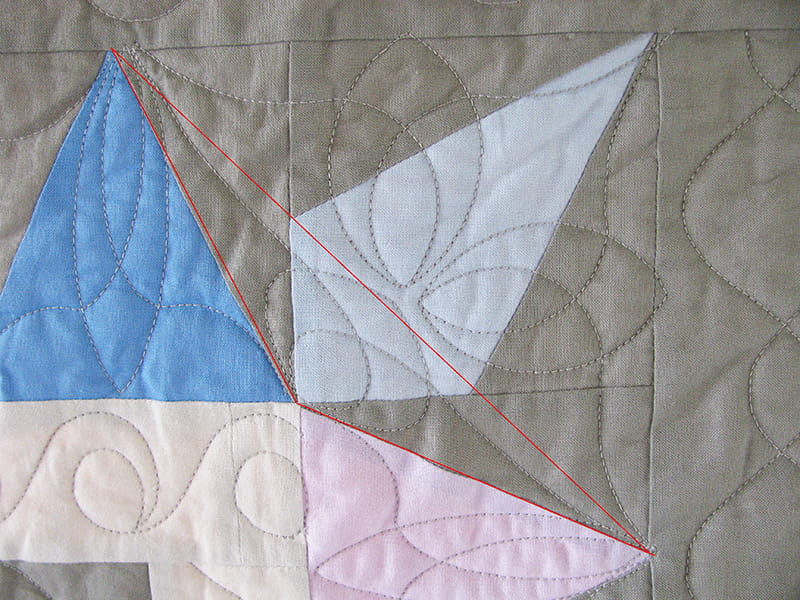
- Position the design on the quilt; the baseline endpoints are the tips of the two adjacent colored triangles, and the apex is the imaginary fourth corner of the corner block, which you marked in an earlier step. Stitch the tilted triangle and then repeat to fill the spaces remaining in the other three corners of the border.
 THE Dream Motion Pro
offers so many tools for customizing your quilting! Even if you don't stitch a border just like this one, I think you'll find some useful ideas here to spark your own creativity.
Related Projects
Stay Connected
* Required fields