Patriotic Bandana Picnic Bag
How to sew a bandana into a chic picnic bag this summer
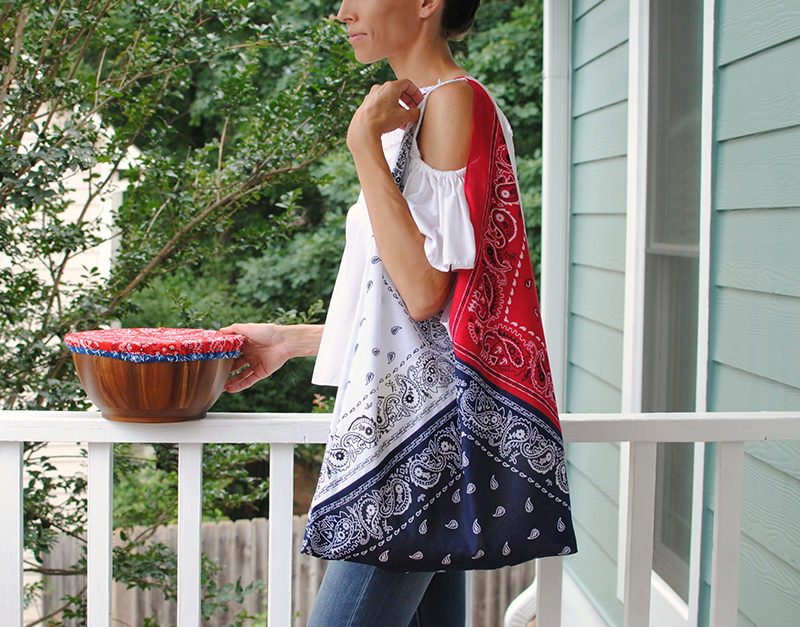
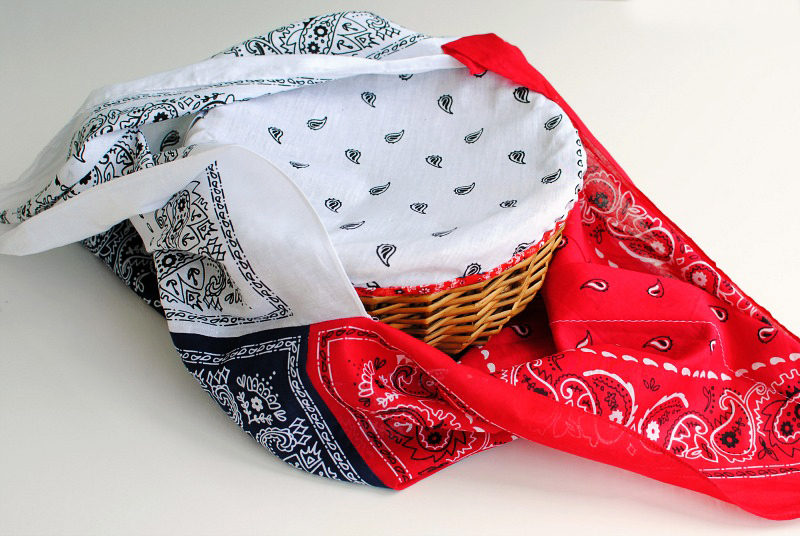
Now that we have mastered the dish covers, it’s time for some more patriotic fun! We do need something fun to carry these dishes in and why not keep the bandana theme going here. I always have a stack of them handy because they can be used for simple projects like this picnic bag. Get the details below and make your own!
Here’s what you’ll need to get started
Materials:
- Sewing machine
- 3 bandanas in contrasting colors
- general sewing supplies
3 steps to creating a bandana bag
1. Sew the bandanas together
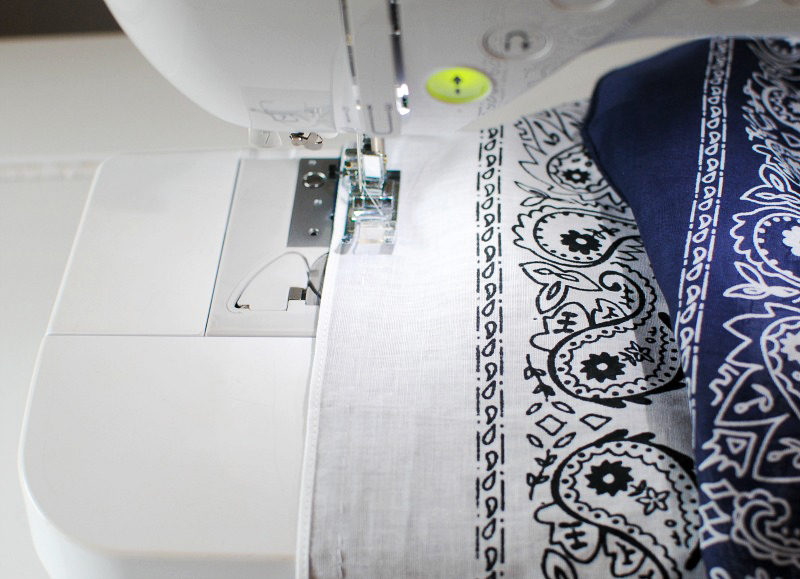
First, pick your center color and arrange the other two bandanas on either side. Then, place one of the side bandanas right sides together over the center one. Sew down the side from top to bottom, using a straight stitch. Backstitch at the beginning and end of the seam to secure it.
Repeat to attach the last bandana to the other side of the center one. You should now have a row of bandanas sewn together.

2. Fold and pin
Fold the side bandanas at 45° angles in opposite directions from each other to form points. See the arrows.
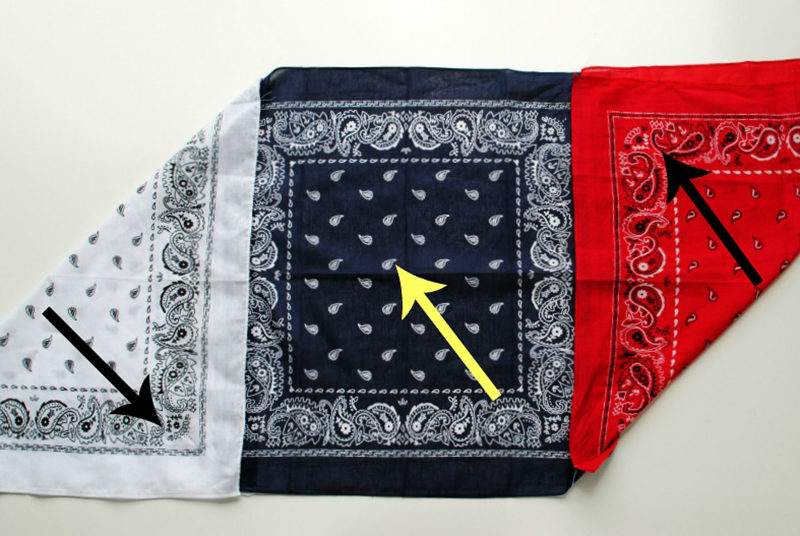

One corner will be folded down to meet the bottom of the center panel. On the opposite side, one corner will be folded up to meet the top of the center panel. Use a pin to hold the corners in place.
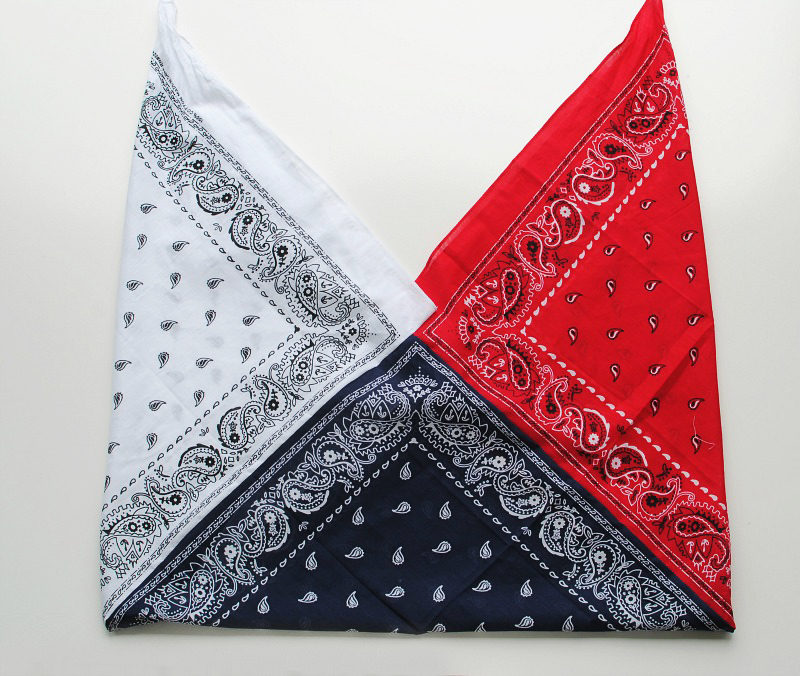
Take one of the pinned points and fold it at a 45° angle to meet the other pinned corner. The bag is starting to take shape and should look like this. Still lying flat, you will notice that one side of the center point is unsewn on both the front and the back of the bag.
Pin along the open seams, making sure that right sides are together and that you only catch a single layer of each color bandana. Sew the seams; backstitch at the beginning and end.

3. Form the bag
Once it’s done, flip the right side out, and you should see the bag should be formed. Now just knot the top corners together.

Place your dishes in, and you're good to go. This also makes a great bag in general.
You can add a leather handle over the top or strapping to add length to the arm area. Alter the sizes of the squares to get a smaller or larger bag.
This is a great project to do with fat quarters. Just make sure to finish the edges first or add a lining. You can even wrap it around the waist for an apron when serving… oh goodness, I’ll stop now!

Red, white, and sew! Upgrade your sewing game with this DIY patriotic picnic bag tote
This patriotic bandana picnic bag is fun to make, practical, and stylish. Whether you are packing sandwiches for the park or bringing a casserole to a summer BBQ, this bag will spark conversations about your sewing skills. If you’re feeling crafty, check out this DIY table runner or these 4th of July t-shirts.
If you feel inspired, don’t hesitate to share your creations with the community! Tag us with photos of your finished project on social media at @BrotherSews. Now it’s your turn to sew, create, and celebrate summer with style!
FAQs
Q: What other fabrics can I use besides bandanas?
A: You can use fat quarters or scrap fabric for this project. Just ensure the fabric is durable enough to carry your picnic essentials.
Q: How can I clean my picnic bag?
A: If using cotton bandanas, you can toss the bag in the washing machine. For lined or embellished bags, spot-cleaning is recommended.
Q: Is it possible to make the bag larger for more items?
A: Yes! Use larger square fabrics, like 22x22-inch bandanas, for a more spacious bag. If you want to sew another bag, check out this Japanese knot bag sewing tutorial or DIY tote bag from jeans.
Q: Are there other uses for this bag?
A: Definitely! Beyond picnics, use it as a lightweight grocery tote or a unique gift wrap.
Related Projects
Stay Connected
* Required fields