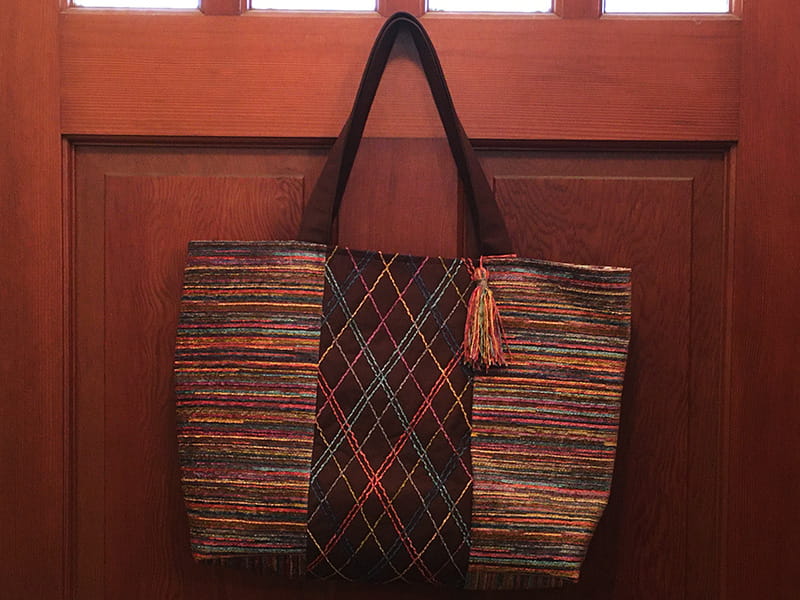
Custom Totes! Using the Couching Technique for a Stylish Look
I organize my life in totes: one for classes, one for car necessities, one for… whatever! This pattern is pieced a little differently from most, creating a central panel that's perfect for showcasing a border design: a favorite fabric print, a pieced strip leftover from your latest quilt, a continuous embroidered border, or anything you fancy.
 Eager to play with the Luminaire's
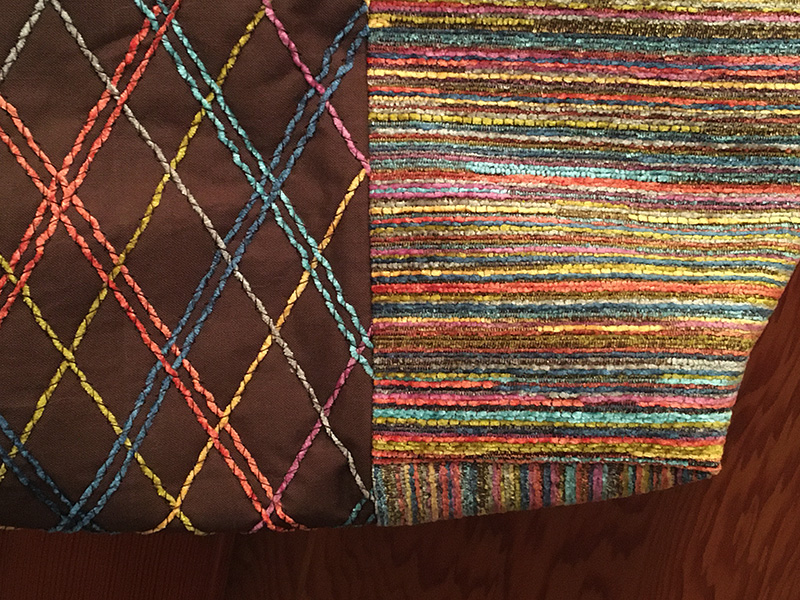
new couching tools and designs, I've opted for a couched-yarn pattern on my center panel. I'm calling it my Plan B Tote because I intended to use programmed embroidery motifs for my decorative panel, but found that my yarn is a bit too small. Turning troubles into opportunities may be cliché, but in this case I really can: keep reading for details on the differences I discovered between couching as a sewing function and couching embroidery designs. I hope you're also curious to know how I found seven yarns that match my upholstery fabric perfectly. Read on!
Couching: Sewing vs. Embroidery
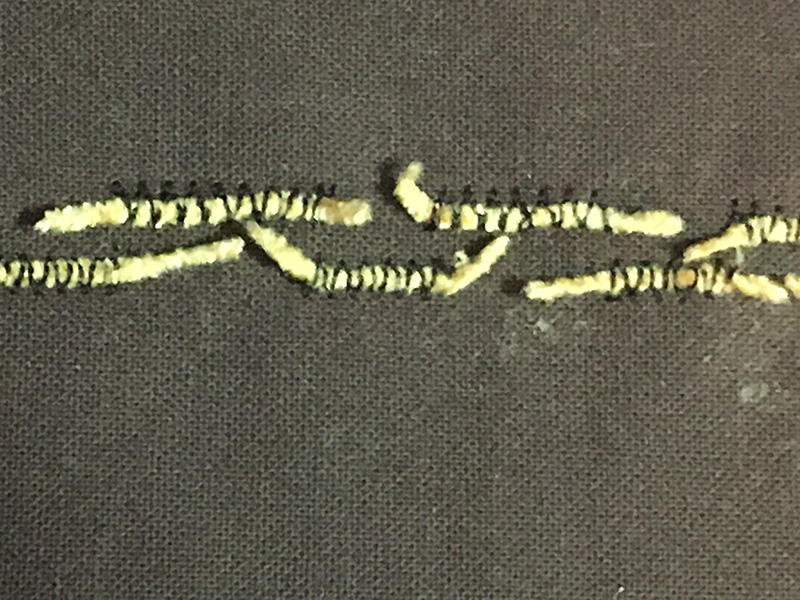
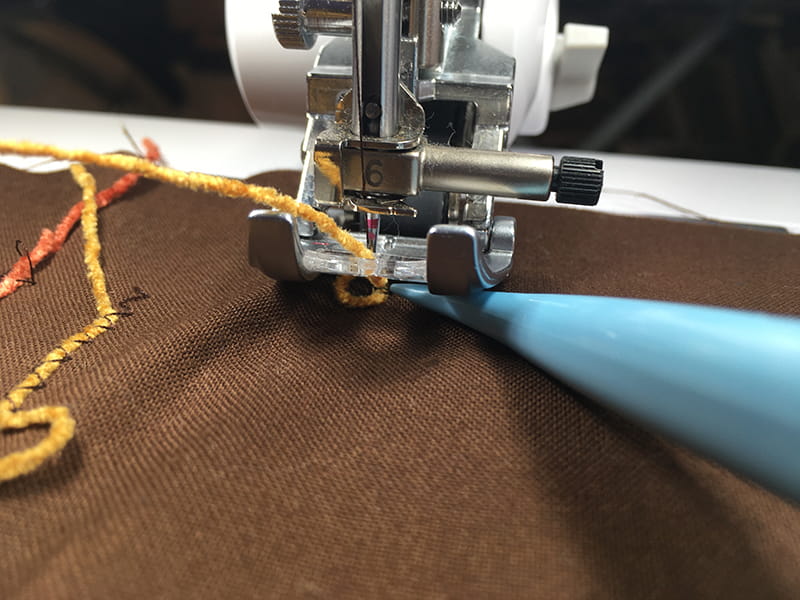
Couching accessories are available for many Brother machines, so check with your local dealer to find the right accessories for your equipment and project. The function of the accessory feet and feeders is to position the yarn precisely under the needle where it will be caught – couched – by the stitching thread. The first advice, of course, is to read and follow the instructions that come with your accessories. Here are a few highlights and lessons that I learned: 1. Be sure there is no tension or drag on your yarn as it feeds. 2. The embroidery designs and their couching accessories feed the yarn from the back and stitch through the yarn. The yarn needs to be large enough to completely fill the stitch field; it's a tiny space, but as I said earlier, my yarns for this project are just a bit too small. They lay to one side of the area under the embroidery foot, and the couching stitches landed beside the yarn rather than on top of it. When I switched to the recommended worsted-weight yarn (size 4), the equipment and designs functioned perfectly. 3. When couching with sewing stitches and the even-feed foot, the yarn feeds from the front. The recommended zigzag stitch doesn't need to pierce the yarn; it can stitch on either side of the yarn, making a sort of tunnel. You have more flexibility in yarn selection, but you'll be couching in straight or gently curving lines only. Think in terms of grids or parallel lines. 4. Be sure that the even-feed foot's roller is in the down position behind the needle so that it can help keep the couching yarn in place.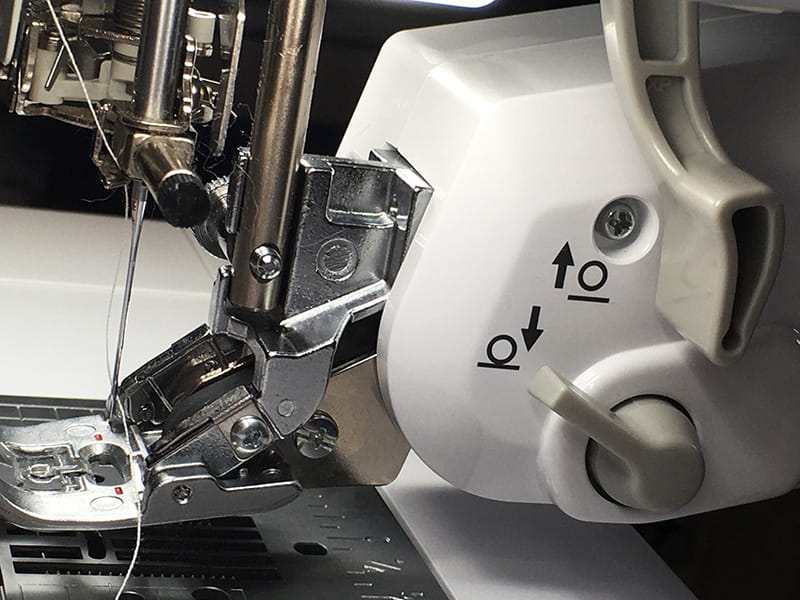 5. If you want to pierce the yarn – a nice thing if you're planning an interrupted pattern of stitching, with cut yarn ends hanging free, because the yarns won't pull free – try the multi-step zigzag (1-15 on the Luminaire) rather than a regular zigzag stitch.
 6. Match your needle thread to the yarn or the background fabric. Experiment to find the look you want – a thread that blends into the yarn or one that contrasts strongly. Use a matching thread or embroidery bobbin thread in the bobbin.
Tote Instructions
- Finished Size: 14" x 12" x 4"
- Seam allowance is 1/4"
Materials
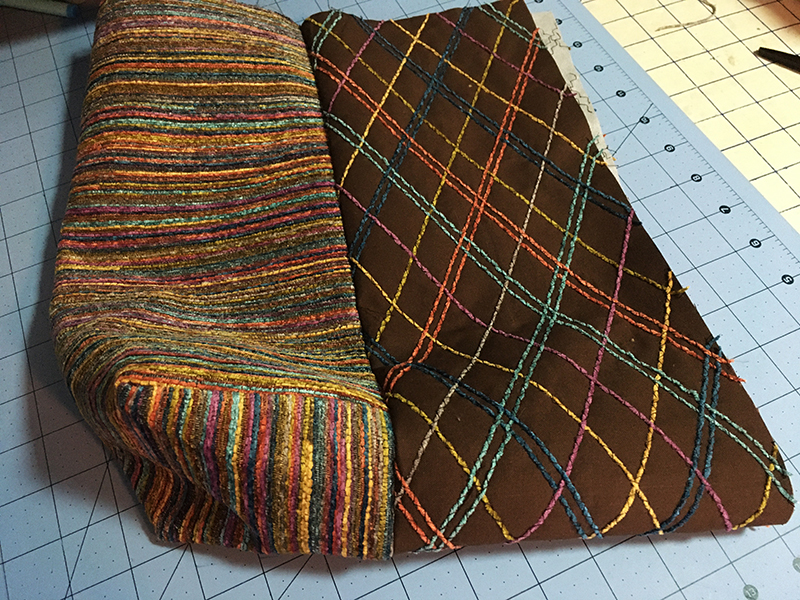
- 3/4 yard of upholstery fabric (chenille or tweed; not backed or laminated), 54"-60" wide
- 1/2 – 5/8 yard of quilter's cotton (coordinating solid color), 45" wide
- 1/2 yard of lining fabric, 45" wide
- 2 yards of fusible interfacing, 20" wide
- Threads for couching and sewing
Note: Upholstery fabrics are sometimes made from synthetic fibers not used in garments, and they may be very sensitive to heat. Check your iron settings on a fabric scrap to avoid melting the fibers. A pressing cloth may also be necessary.
Equipment
- Luminaire XP1
with upgrade kit 1 - Rotary cutting mat, ruler, and cutter
Cutting
Note: Please read through all of the instructions before cutting your pieces. From the upholstery fabric, cut: • 2 rectangles, 12 1/2" wide x 16 1/2" high From the coordinating fabric, cut: • 1 strip, 5" x WOF (about 42") • 1 rectangle, 8" x 30" From the lining fabric, cut: • 2 rectangles, 18 1/2" wide x 14 1/2" high From the interfacing, cut: • 1 strip, 1 1/4" x 42" • 1 rectangle, 8" x 30" • 2 rectangles, 12 1/2" x 16 1/2"Prepare Yarns for Couching
Take a good look at your upholstery fabric to determine which edge is cut closest to the actual grainline. Begin unraveling the fabric at that edge. You'll probably find that each row of warp (running selvage to selvage) is an individual yarn, so the maximum length of your couching yarn is about 60". As you work, wrap the warp yarns around a paper towel or toilet paper core to keep them tidy and unknotted.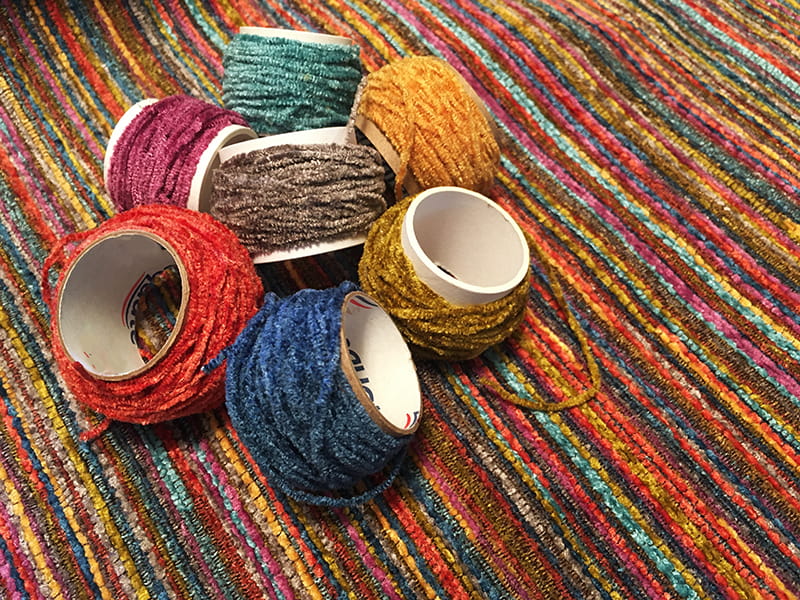 Depending on the fabric you've chosen, you may find that you have several different colors or weights of yarn from the fabric's warp. When I'm looking for upholstery fabric for this technique, I look for overall color mixes that appeal to me and then focus on how much variety there is in the warp yarns.
After you've unraveled about 2" of your fabric, use the remaining fabric to cut out the tote pieces as described above.
Depending on the fabric you've chosen, you may find that you have several different colors or weights of yarn from the fabric's warp. When I'm looking for upholstery fabric for this technique, I look for overall color mixes that appeal to me and then focus on how much variety there is in the warp yarns.
After you've unraveled about 2" of your fabric, use the remaining fabric to cut out the tote pieces as described above.
Embellish the Center Panel
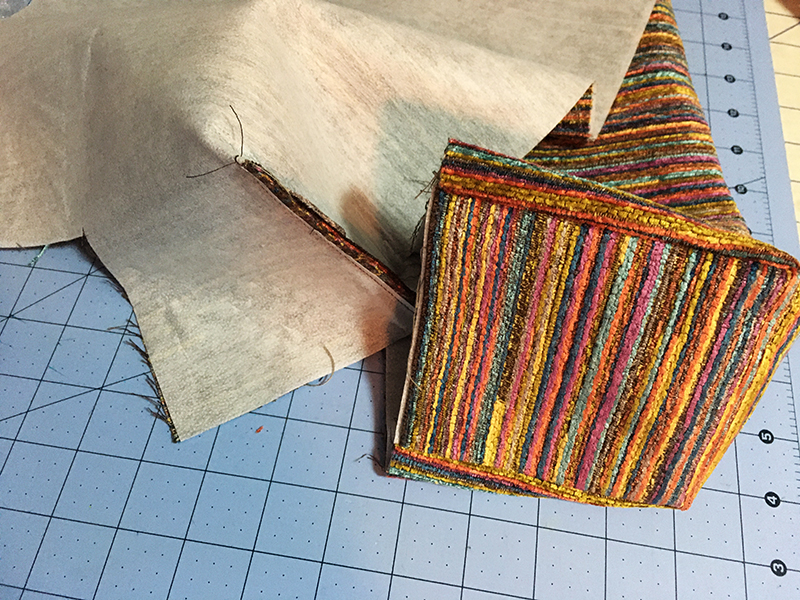
1. Set up the Luminaire for sewing with the even-feed assembly and attach the couching foot and guides for handling the yarn. Following the kit instructions, thread the needle and bobbin threads and the couching yarn into the appropriate guides. 2. Following the manufacturer's instructions, fuse the 8" x 30" interfacing to the wrong side of the corresponding fabric. 3. Using chalk or a removable marking tool, draw placement lines for the couching. For the sample I chose a vertical-diamond grid with lines 1" apart. Use the 30- and 60-lines on a rotary-cutting ruler to angle the guidelines. 4. Couch along the guidelines. For the sample, I used a zigzag stitch (1-10 on the Luminaire) set 3.0 mm wide and 4.0 mm long. The long stitch length keeps most of the couched yarn visible. I decided to double some of the lines with a second couched yarn about 1/4" away from the first. Change yarn colors as desired.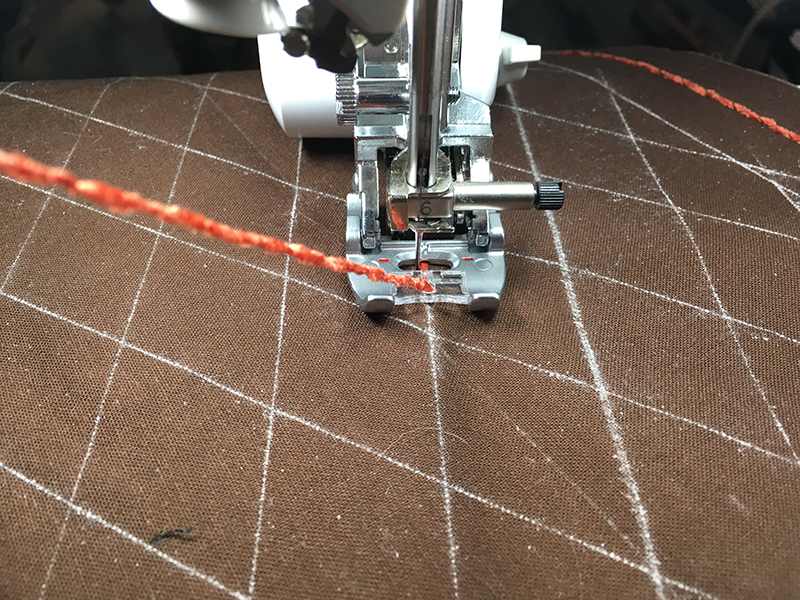 5. When the couching is complete, gently press the embellished fabric, laying it face down on a thick towel to protect the couched yarns. Trim the fabric to 6 1/2" x 28 1/2".
6. Remove the couching accessories and set up your machine for sewing. Stitch 1/8" from all four edges of the embellished fabric to keep the ends of the couched yarns in place.
5. When the couching is complete, gently press the embellished fabric, laying it face down on a thick towel to protect the couched yarns. Trim the fabric to 6 1/2" x 28 1/2".
6. Remove the couching accessories and set up your machine for sewing. Stitch 1/8" from all four edges of the embellished fabric to keep the ends of the couched yarns in place.
Make the Handles
1. Fold the 5"-wide coordinating strip in half lengthwise with wrong sides together and press. Open the folded fabric and position the 1 1/4"-wide interfacing strip, fusible side down, on the fabric wrong side, aligning one long edge of the interfacing with the center crease on the fabric, and fuse.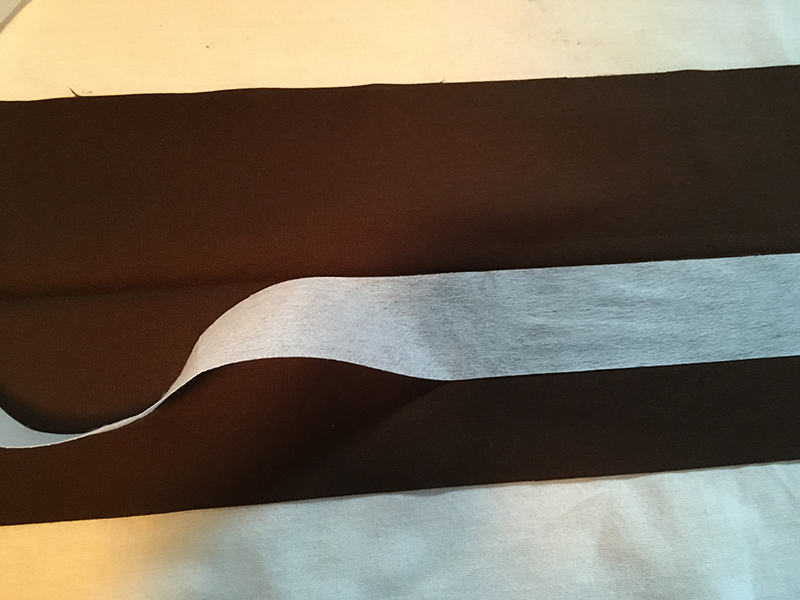 2. Fold each long edge of the fabric strip to the wrong side, matching the raw edges to the center crease, and press, enclosing the interfacing. Refold the strip along the first crease, enclosing the raw edges, and press thoroughly.
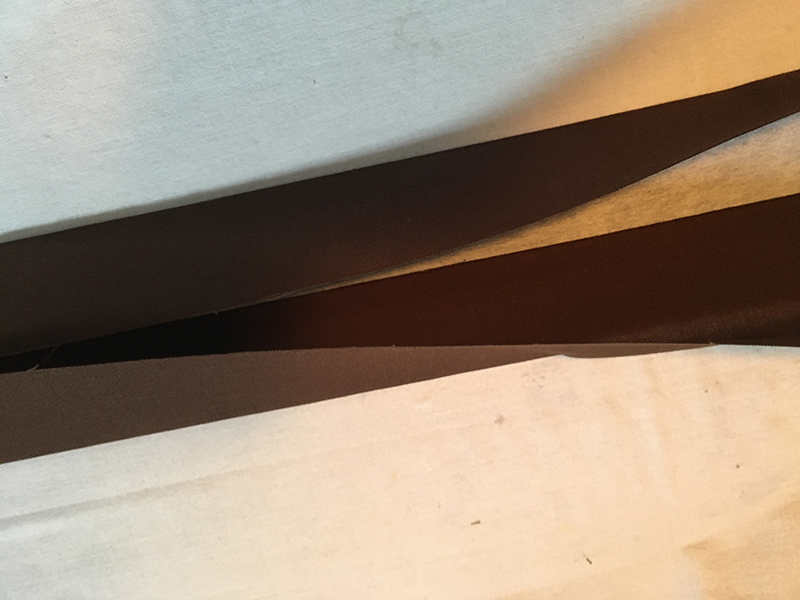
 3. Edgestitch each long edge of the handle strip. Trim off the selvage ends and any fabric that is not interfaced (if your fabric strip is longer than the interfacing). Cut the remaining strip into two equal lengths.
Shape the Sides
1. Fuse the remaining interfacing rectangles to the wrong side of the upholstery-fabric rectangles (the side panels). 2. Lay a side panel on your worktable. Be sure that the 16 1/2" dimension runs top to bottom and that any print or pattern is positioned right side up. Measure and mark a 4" square at each bottom corner and cut away the squares. Repeat for the second side panel.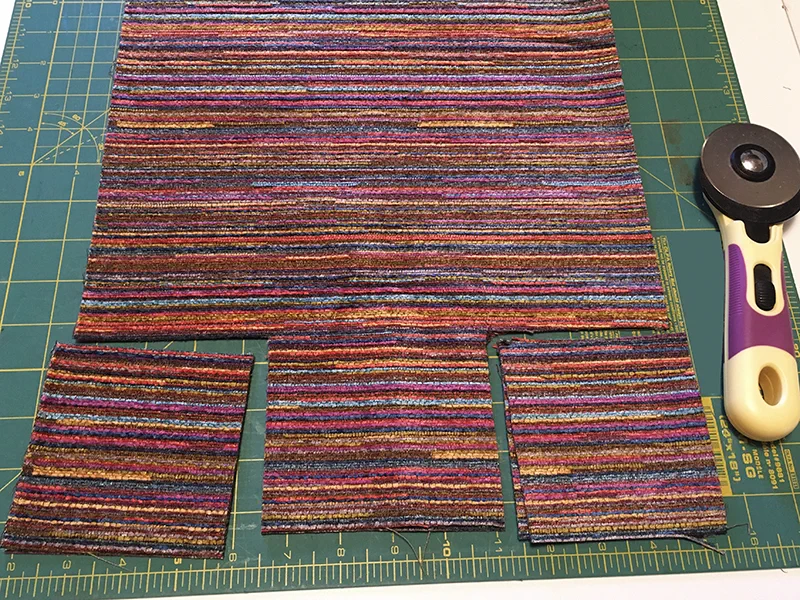 3. Fold a side panel, right sides together, matching the two newly cut edges of one square. Sew along the matched edges, backstitching at each end, to box the corner. Repeat to box all of the lower corners on the side panels. Press the seam allowances open.
 4. With right sides together, sew the side and bottom seams of the lining pieces. Leave an opening at the center of the bottom seam for turning. Press the seam allowances open, pressing the raw edges to the wrong side along the opening in the bottom seam.
5. Fold the lining to match the bottom seam to one side seam, forming a triangular point. Measure 2" from the point of the triangle and mark a line 4" long perpendicular to the seams. Sew on the marked line to box the corner. Trim the seam allowances to 1/4". Repeat to box the second corner of the lining.
4. With right sides together, sew the side and bottom seams of the lining pieces. Leave an opening at the center of the bottom seam for turning. Press the seam allowances open, pressing the raw edges to the wrong side along the opening in the bottom seam.
5. Fold the lining to match the bottom seam to one side seam, forming a triangular point. Measure 2" from the point of the triangle and mark a line 4" long perpendicular to the seams. Sew on the marked line to box the corner. Trim the seam allowances to 1/4". Repeat to box the second corner of the lining.

Assemble the Tote
1. Match the long edge of one side panel to one long edge of the center panel and stitch. Repeat to join the second side panel to the other long edge of the embellished center panel. Press the seam allowances open.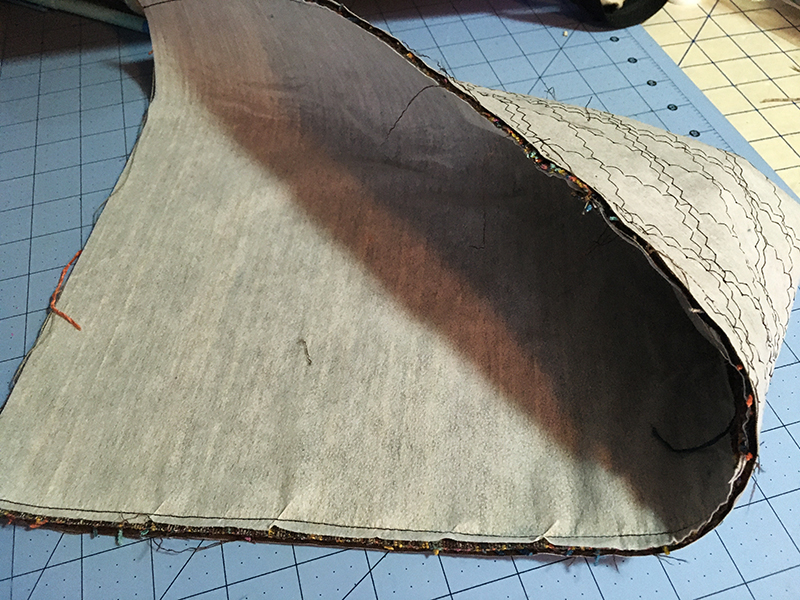
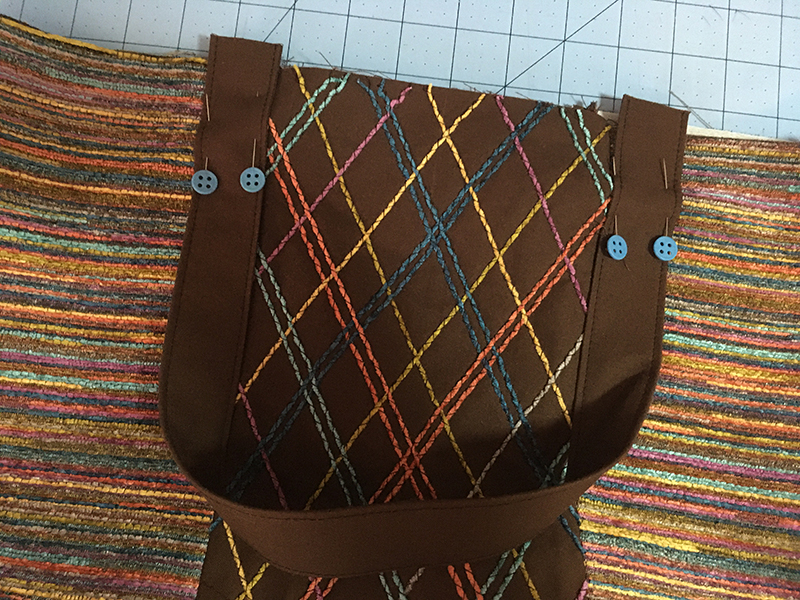
 2. Position one end of the first handle on the tote, right sides together, with the long edge of the handle along the seamline as shown. Allow the end of the handle to extend 1/2" beyond the upper edge of the tote. Stitch the handle to the tote, sewing 1/8" from the tote raw edge (within the seam allowance). Position the other end of the first handle in the same way on the other side of the center panel. Be sure that the handle is not twisted and then stitch the handle end to the tote. Position and stitch the second handle to the other side of the tote.
 3. With the tote right side out and the lining wrong side out, slide the tote into the lining (right sides together). Match and pin the raw edges at the top. Position the lining's side seams at the midpoints of the tote's side panels. The handle ends will extend above the matched edges, with the body of the handles between the fabric layers. Sew the entire top edge. Sew again across the handle ends to reinforce them.
 4. Turn the tote right side out through the opening in the lining seam. Tuck the lining into the tote and carefully press the top edge. Edgestitch or topstitch around the upper edge if desired, keeping the handles out of the stitching.
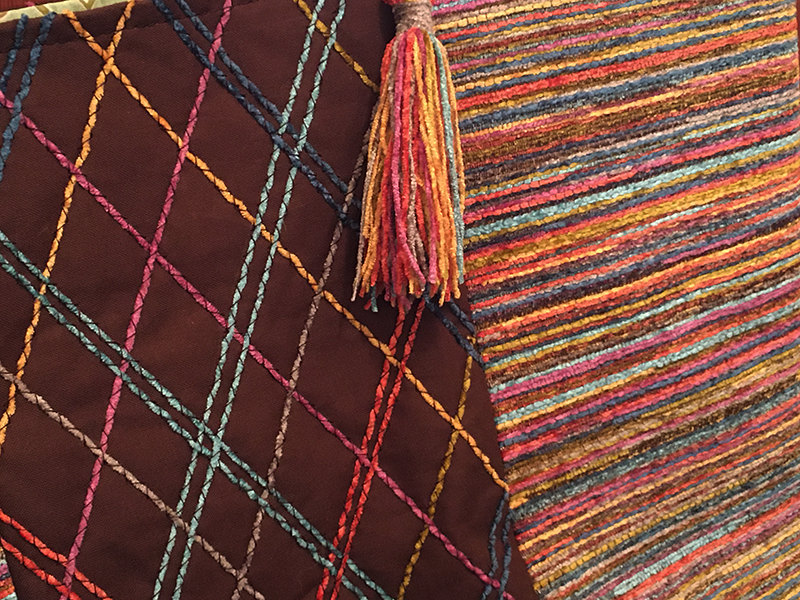
5. Close the opening in the lining with hand or machine stitches. If desired, use the leftover yarns to create a simple tassel and hang it from one of the tote's handles.
4. Turn the tote right side out through the opening in the lining seam. Tuck the lining into the tote and carefully press the top edge. Edgestitch or topstitch around the upper edge if desired, keeping the handles out of the stitching.
5. Close the opening in the lining with hand or machine stitches. If desired, use the leftover yarns to create a simple tassel and hang it from one of the tote's handles.
More Couching Ideas
- If you are making a long ruffle, use the couching accessories to couch fishing line to the fabric that you want to gather. The zigzag stitches don't catch the fishing line as the couching guide holds it in place, so it's simple to pull the fishing line afterwards, forming gathers.
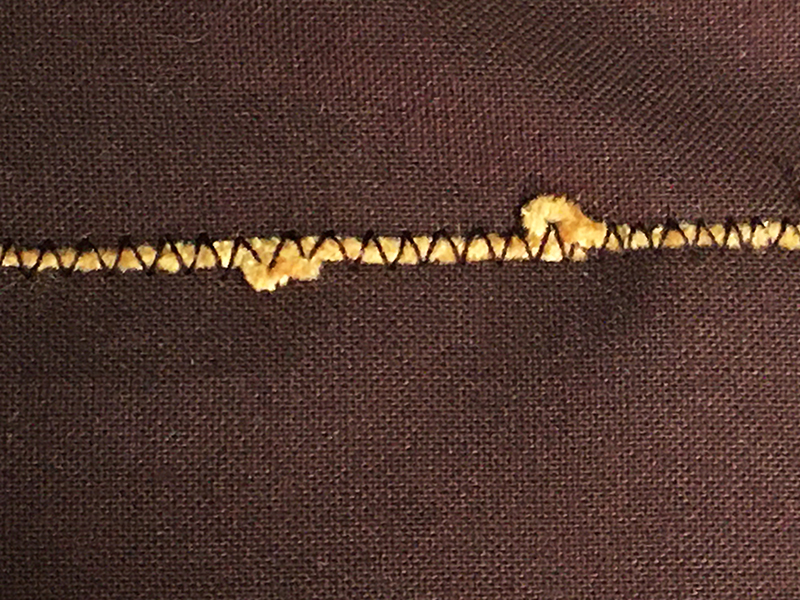
- Vary the stitch length as you couch a yarn in place, alternately hiding and revealing the couched yarn.
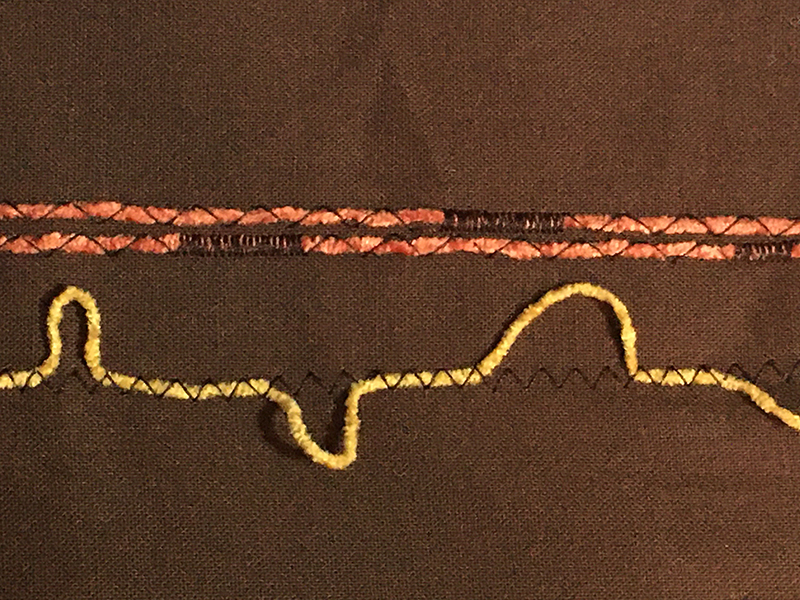
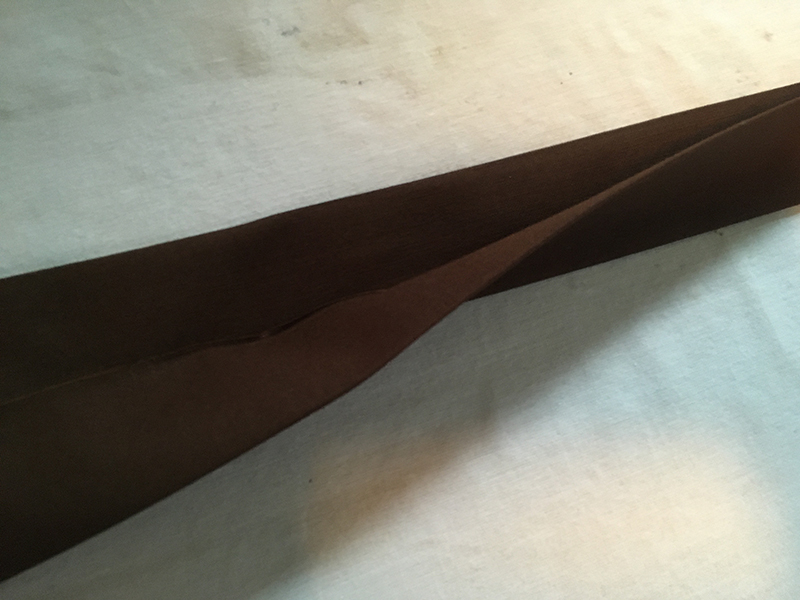
- Periodically raise the couching presser foot and use a small tool to pull and twist a short loop of yarn to one side of the stitching. It takes a bit of practice, but adds interest to a line of couching. In the photo above, you can see the alternative appearance of longer, untwisted yarn loops.
- Use water-soluble stabilizer as your background fabric. Couch a grid of yarns, stitching them securely across each other. After the grid is complete, add other couching as desired. Wash away the stabilizer to reveal a fabric made from your yarns – great for a scarf or other accessory!
 Custom Totes! Using the Couching Technique for a Stylish Look PDF File
Related Projects
Stay Connected
* Required fields