Disney Mickey Mouse & Minnie Mouse True Love Pillow
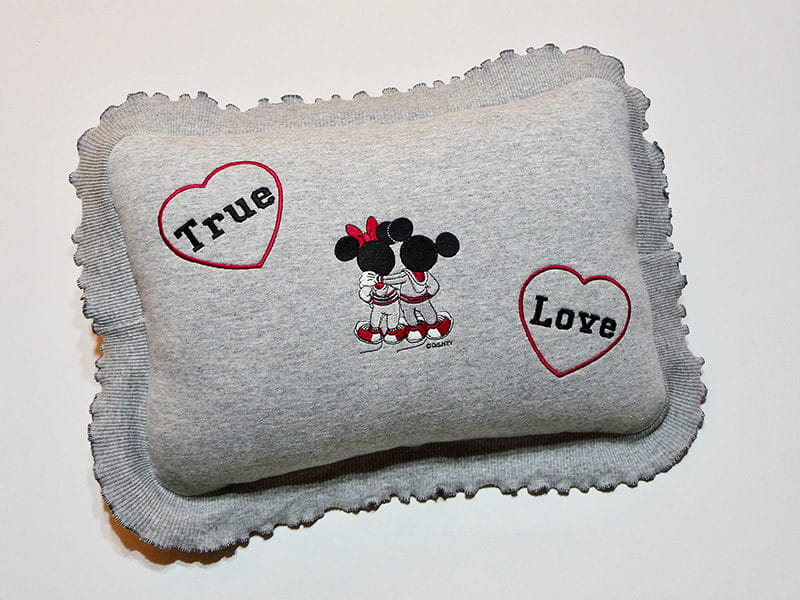
What could be sweeter than the true love of the most famous mouse couple of all? Disney's Mickey Mouse and Minnie Mouse are dressed in their casual sweats in this special design. It’s part of a coordinating group of designs that highlight the affection between these two sweethearts. After falling in love with this particular motif, I set upon the task of finding the right fabric for a soft pillow and came across a sweatshirt that was tossed aside and waiting for new life. It turned out to be perfect for this casual, comfortable pillow. The front and back of the shirt became the front and back of the pillow and I used the bottom ribbing for the ruffled trim. To tie it all together, I re-cycled a shoestring to create a laced back closure. Follow along as I take you through the steps to make your own True Love Pillow. Are you ready? Let’s go sew!
Finished pillow size is approximately 18-inches wide X 14-inches long, including trim.
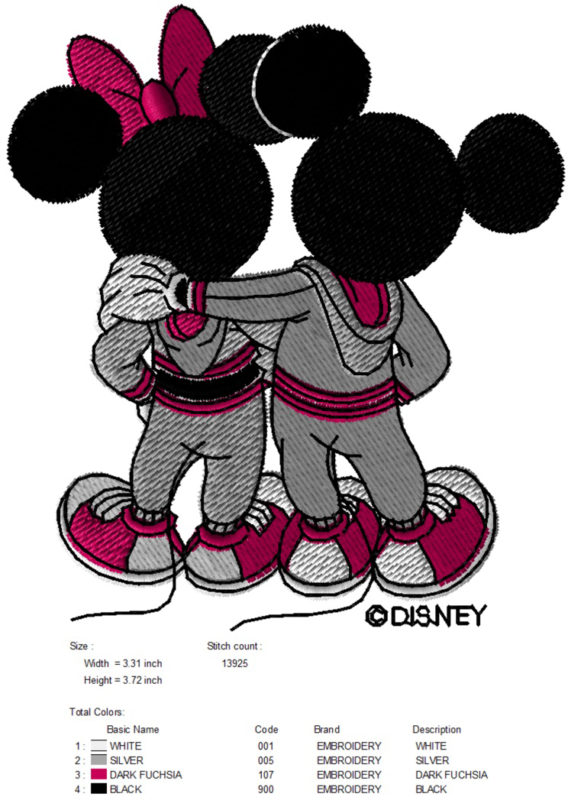 Figure #1[/caption]
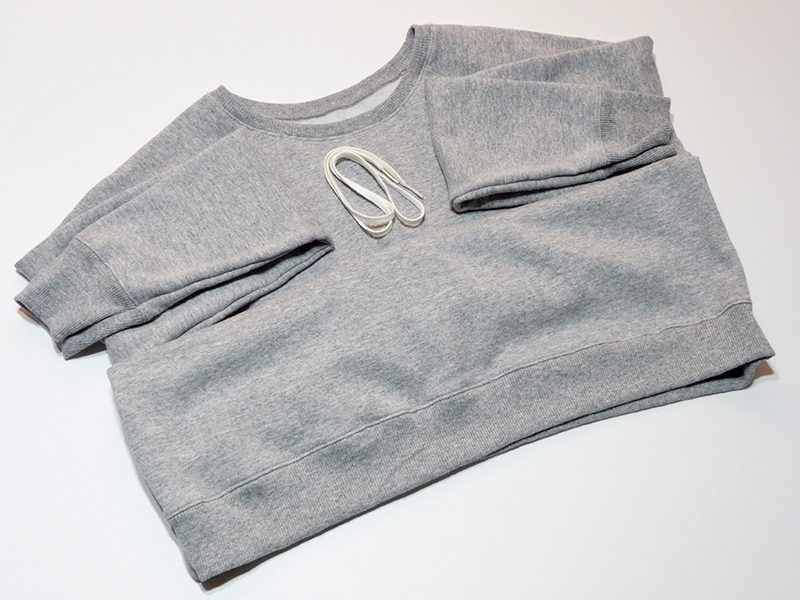 Figure #2[/caption]
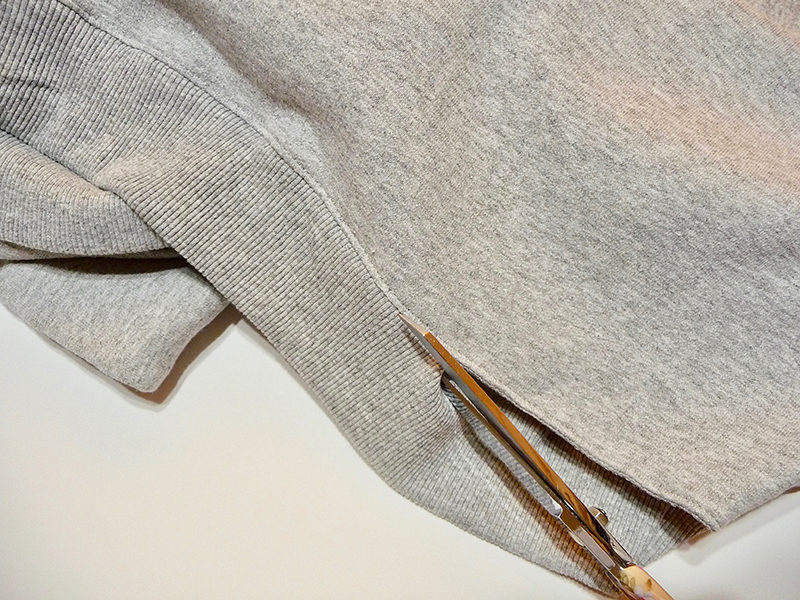 Figure #3[/caption]
Measure ribbing to see if you’ll have enough to fit outside measurement of your intended pillow size.
 Figure #4[/caption]
(Cut one piece measuring 16-inches wide X 12-inches long for front.)
(Cut two pieces measuring 9 ½-inches wide X 12-inches long for back.)
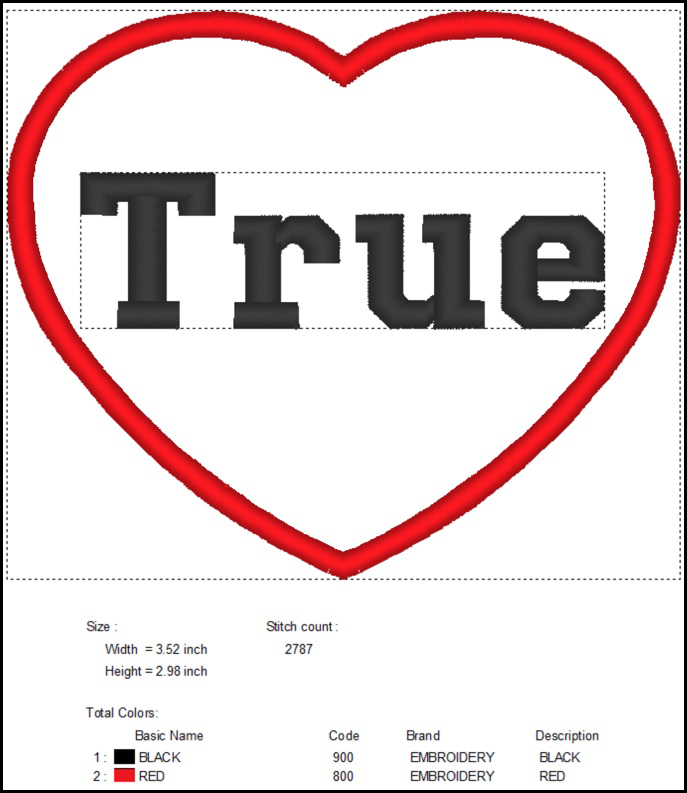
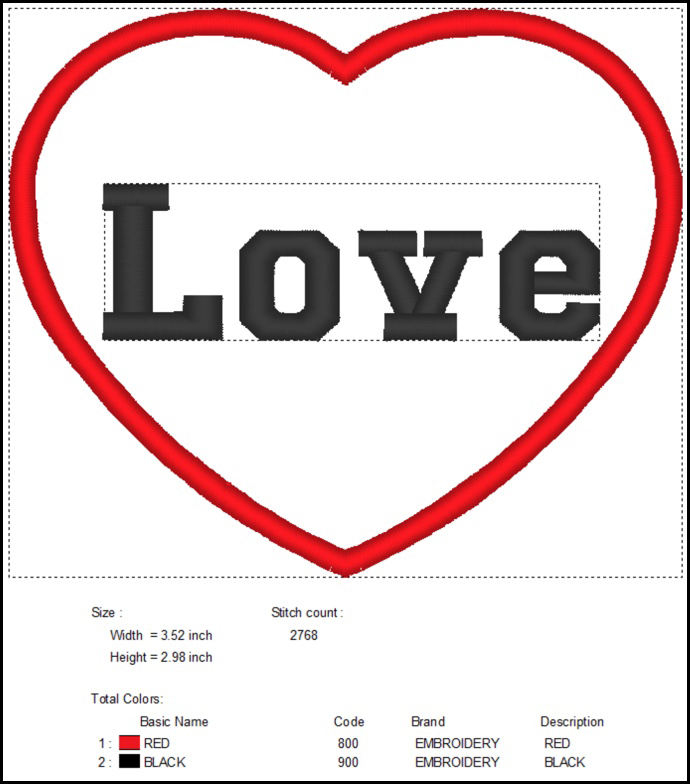
 Figure #5a[/caption]
[caption id="attachment_18611" align="aligncenter" width="800"]
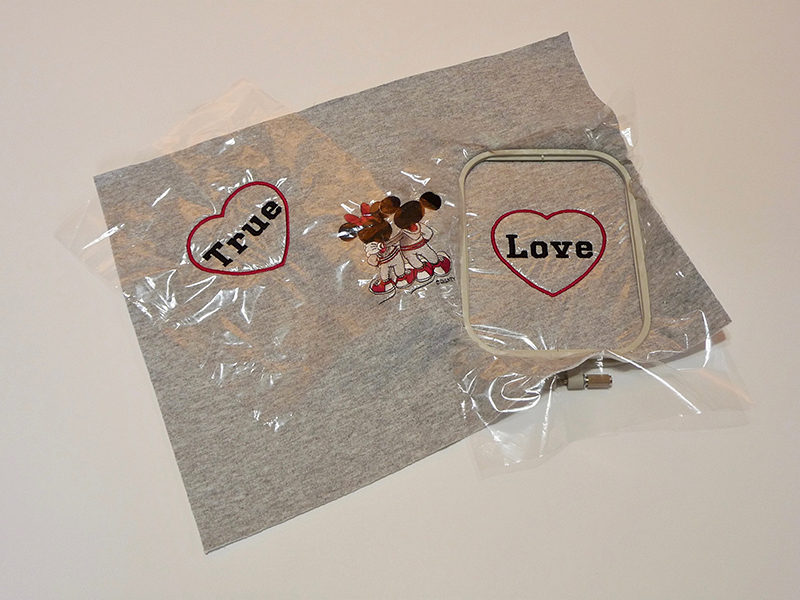 Figure #5b[/caption]
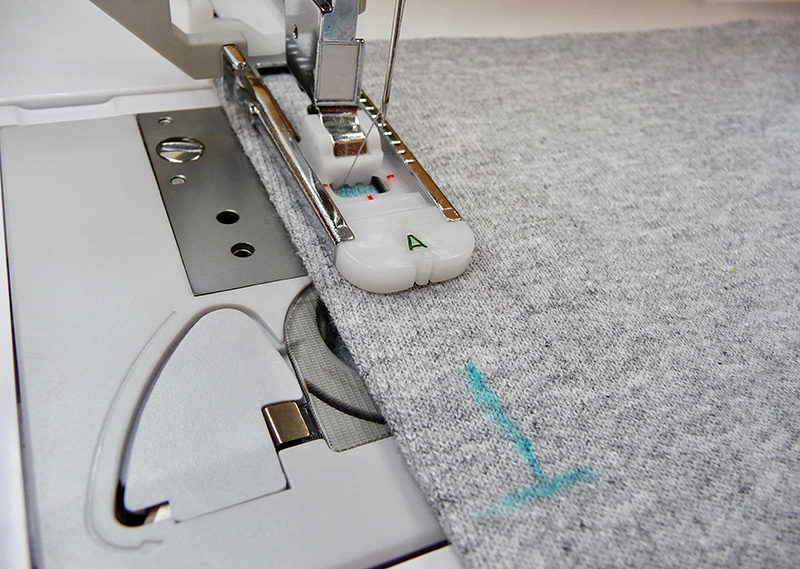 Figure #6a[/caption]
[caption id="attachment_18613" align="aligncenter" width="800"]
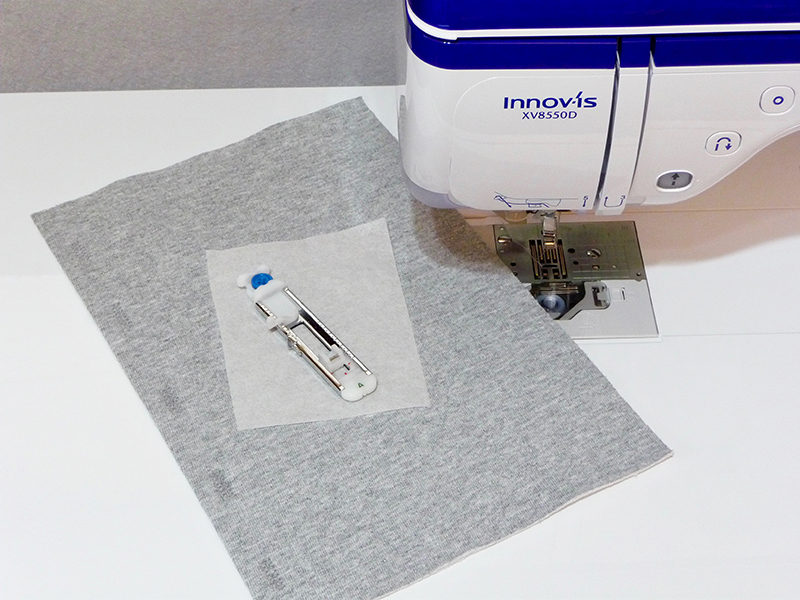 Figure #6b[/caption]
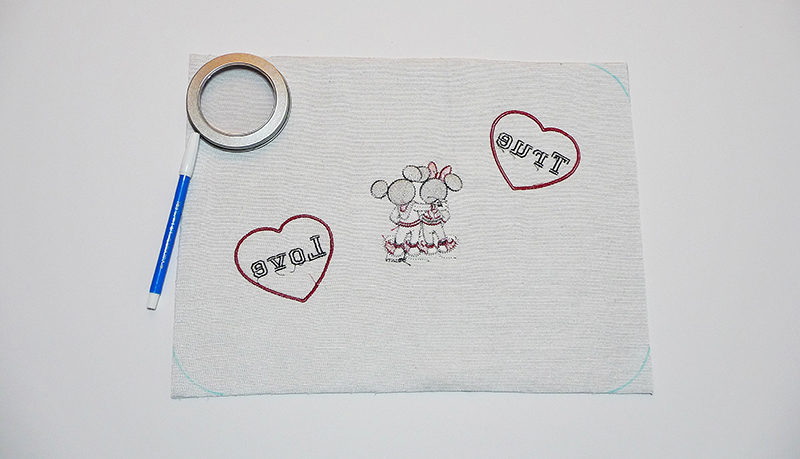 Figure #7[/caption]
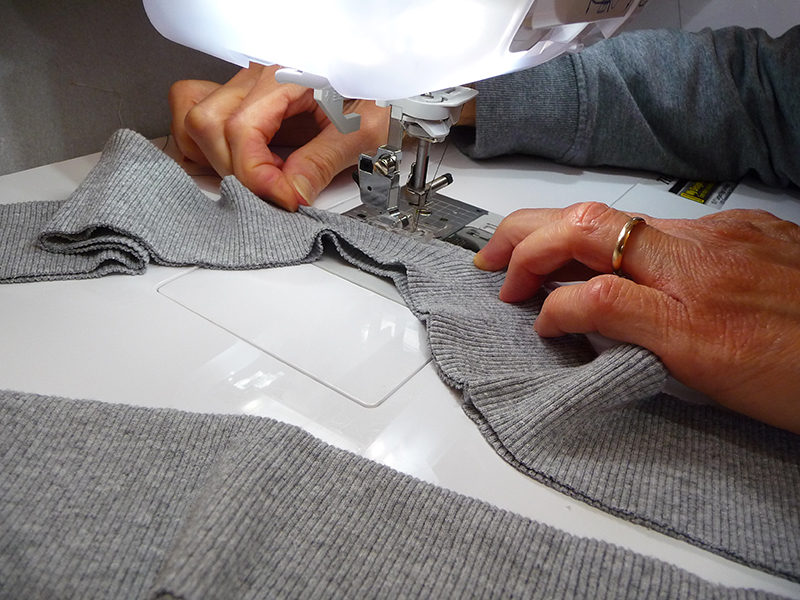 Figure #8a[/caption]
[caption id="attachment_18616" align="aligncenter" width="800"]
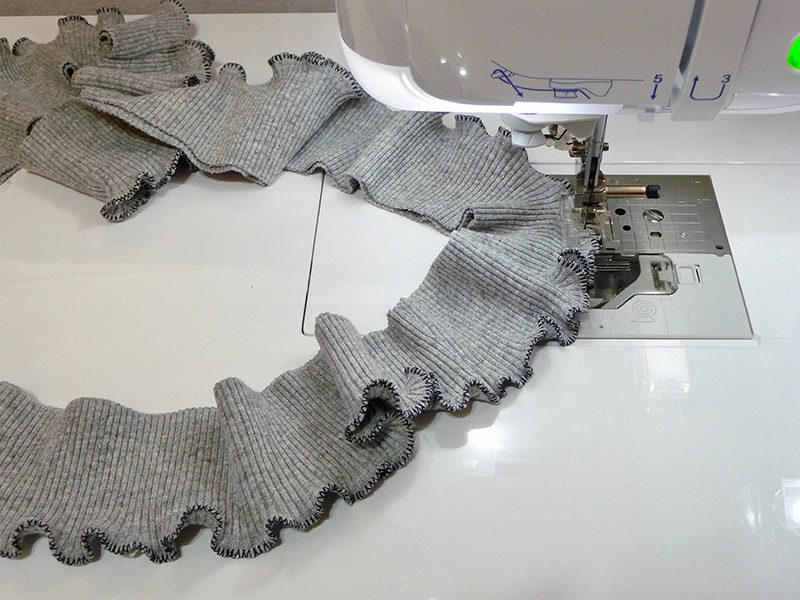 Figure #8b[/caption]
 Figure #9[/caption]
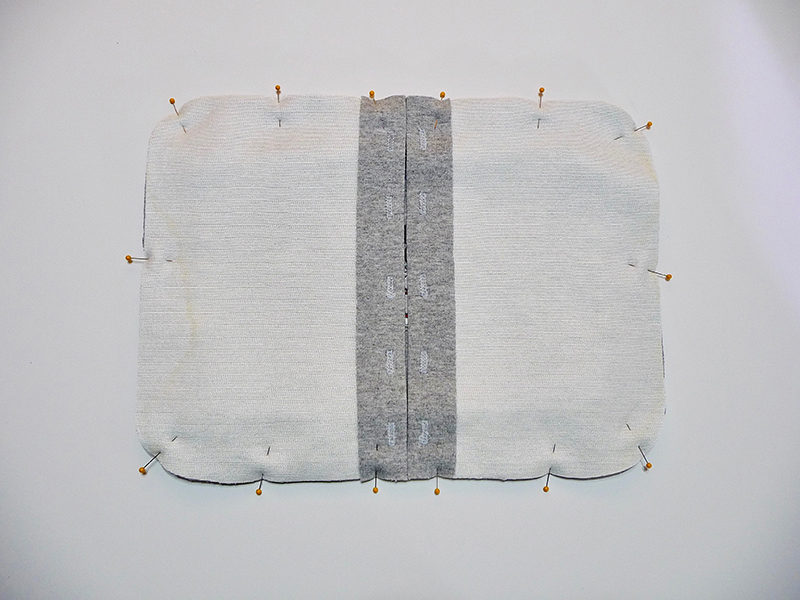 Figure #10[/caption]
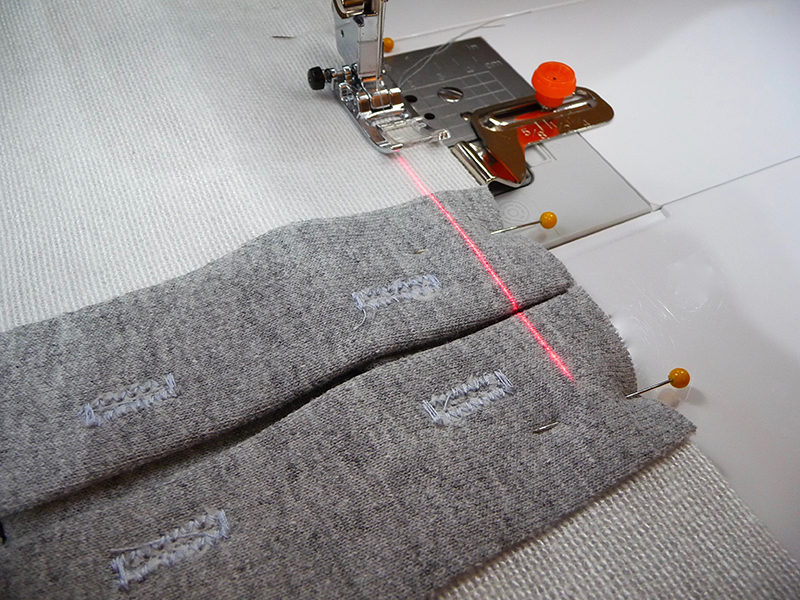 Figure #11[/caption]
Re-enforce area where buttonhole flaps meet. Trim seams and clip away bulk at corners. Turn right side out and press. Begin lacing at the bottom of the pillow back by inserting half of the lace on each side. See Figure #12.
[caption id="attachment_18620" align="aligncenter" width="800"]
 Figure #12[/caption]
Insert pillow form and finish lacing by criss crossing across the back and ending with a bow at the top. See Figure #13.
[caption id="attachment_18621" align="aligncenter" width="800"]
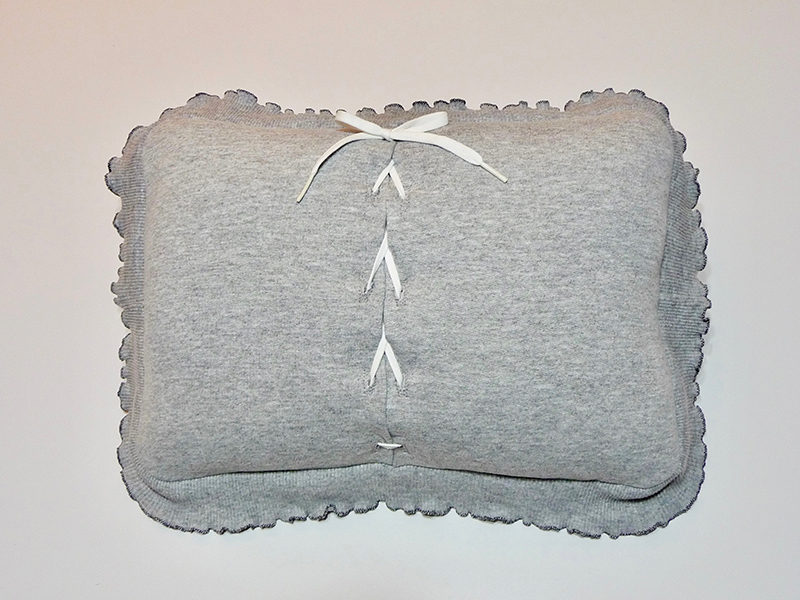 Figure #13[/caption]
You are finished! Enjoy!
Materials and Supplies
- Brother Sewing and Embroidery Machine with 4-inch by 4-inch hoop.
- Brother Embroidery Threads
- Brother Bobbin Thread
- SA5810
Brother Pacesetter Medium Weight Tear-Away Stabilizer for backing. - SA520
Brother Pacesetter Light Weight Wash-Away Stabilizer for topping. - SA145
Clear View foot for stitching lettuce edge technique on ribbing. - One button measuring ½-inch in diameter to use for making buttonholes.
- Basic notions including ball point pins, matching thread for sewing seams, and contrast thread for edge stitching on trim.
- Size 14 stretch needle for sewing.
- Sweatshirt with ribbing to use for fabric and trim.
Note: You’ll need to measure your shirt to see what size pillow you can get from the available area on the shirt. Purchase a pillow form to fit pillow size. As an alternative you can substitute fabric yardage and pre-purchased trim in place of a sweatshirt. You can also create your own pillow form with fiberfill stuffing. This project was created using a 16-inch X 12-inch pillow form. You’ll find additional information with measurements in the instructions below.
- Soft, lightweight fusible interfacing for backing each pillow piece.
- Tip: A knit, or weft insertion style of interfacing is preferred.
- 36-inch shoelace or a length of cording for lacing pillow back.
- Mickey & Minnie Sporty Love
embroidery design from the group titled Mickey & Minnie in Love,
available from the Brother iBroidery.com
download center. See Figure #1.
 Figure #1[/caption]
Steps to Create Pillow
- Wash, dry, and press sweatshirt. See shirt example in Figure #2.
Tip: Check shirt for any flaws or stained areas. It may be possible to still use the section by carefully embroidering over spots or flaws.
[caption id="attachment_18607" align="aligncenter" width="800"] Figure #2[/caption]
- Determine desired size of pillow based on size of sweatshirt. Carefully cut ribbing to use as trim, cutting just below seamline. See Figure #3.
 Figure #3[/caption]
Measure ribbing to see if you’ll have enough to fit outside measurement of your intended pillow size.
Tip: If you are a little short on length you can extend it by stretching ribbing slightly, stretching along top and bottom pillow edges. When sewing, you’ll want to be careful to avoid stretching ribbing around the corners. Trim ribbing if it is too long and sew a seam to create one continuous piece.
- Next, cut one front and two back pillow pieces with added allowance for seams, and for creating the closure on the back of the pillow. Apply fusible interfacing to wrong side of each piece. See example of pieces for a 16-inch X 12-inch pillow form in Figure #4.
 Figure #4[/caption]
(Cut one piece measuring 16-inches wide X 12-inches long for front.)
(Cut two pieces measuring 9 ½-inches wide X 12-inches long for back.)
Note: I cut my pieces to equal the same size as the form and then used a ½-inch seam allowance to sew pillow together. With this method, the pillow top ends up slightly smaller than the actual pillow form. This allows for a fully stuffed appearance to finished pillow.
- Embroider front of pillow with Mickey and Minnie in the center. Add hearts to each side using built-in frame shapes and lettering. See example of lettering style and hearts below:


Tip: For good quality embroidery layer water soluble stabilizer on top of fabric and add a layer of tear-away stabilizer under the hoop as you stitch each motif. See Figure #5a and Figure 5b.
[caption id="attachment_18610" align="aligncenter" width="800"] Figure #5a[/caption]
[caption id="attachment_18611" align="aligncenter" width="800"]
 Figure #5b[/caption]
- Prepare each of the back pieces by folding and pressing under 1 ½-inches along one 12-inch edge, forming flaps for center of pillow back. With a piece of tear away underneath, stitch five evenly spaced buttonholes close to each of the folded edges, having the first and last buttonhole positioned 1-inch from the end. See example in Figure #6a and Figure #6b.
 Figure #6a[/caption]
[caption id="attachment_18613" align="aligncenter" width="800"]
 Figure #6b[/caption]
- Carefully cut open buttonholes.
- Remove all excess stabilizer and press pillow front. Use a 3 to 4-inch round object such as a lid or a cup to round off outside corners. See Figure #7.
 Figure #7[/caption]
- Set up machine for sewing with a zigzag stitch set for 3.0 width and 1.2 length. Attach clear view foot. Create lettuce edging on ribbing by zig zagging over the folded edge, heavily stretching the edge with both hands as you stitch.
Tip: To form pretty ruffling, take care to stretch just the folded edge of the ribbing, not the entire strip. See Figure #8a and Figure 8b.
[caption id="attachment_18615" align="aligncenter" width="800"] Figure #8a[/caption]
[caption id="attachment_18616" align="aligncenter" width="800"]
 Figure #8b[/caption]
- Trim corners along marked lines on pillow front. Pin ribbing to front, gently easing the ribbing around the corners. Machine baste ribbing in place. See Figure #9.
 Figure #9[/caption]
- Layer pillow back pieces over the front. Trim back pieces to match curved corners on the front. Pin layers together with buttonholes aligned at the center back. See Figure #10.
 Figure #10[/caption]
- Sew around pillow using a ½-inch seam allowance. See Figure #11.
 Figure #11[/caption]
Re-enforce area where buttonhole flaps meet. Trim seams and clip away bulk at corners. Turn right side out and press. Begin lacing at the bottom of the pillow back by inserting half of the lace on each side. See Figure #12.
[caption id="attachment_18620" align="aligncenter" width="800"]
 Figure #12[/caption]
Insert pillow form and finish lacing by criss crossing across the back and ending with a bow at the top. See Figure #13.
[caption id="attachment_18621" align="aligncenter" width="800"]
 Figure #13[/caption]
You are finished! Enjoy!


