DIY Halloween Appliqué Pillow

How to sew a Halloween skull pillow with appliqué
Halloween is one of my family’s favorite holidays for sewing projects. My kids and I enjoy creating home projects to decorate our house. Each year, my boys enjoy designing their own costumes, and I sew them. Last October, we moved into our first house, and one of the things we couldn’t wait to do was decorate the exterior and interior of the home with Halloween décor. DIY crafts are the perfect way to bring a little extra magic to the Halloween season. We sew something new every year to add to our collection.
This year, my sons and I took our love for Halloween crafts to the next level by sewing appliqué pillows together. It’s a fun, family-friendly project that lets you celebrate the season and add something handmade to your holiday décor. If you're looking for a creative Halloween sewing project to do with your family, grab your supplies and follow this step-by-step guide! The best part? You can customize your design, from skulls to pumpkins or ghosts, to match your Halloween vibe.
Supplies:
- I used my older Brother Simplicity SB1000T Sewing Machine but I would recommend using the Brother CP100X Computerized Sewing and Quilting Machine
- ¾ yard of cotton fabric or medium-weight fabric
- Fusible interfacing
- Felt fabric or any fabric that doesn’t fray easily, enough for your appliqué or pre-cut appliqué
- Template for appliqué: Click here to download.
- Temporary spray adhesive
- General sewing supplies
7 steps to create your Halloween appliqué pillow
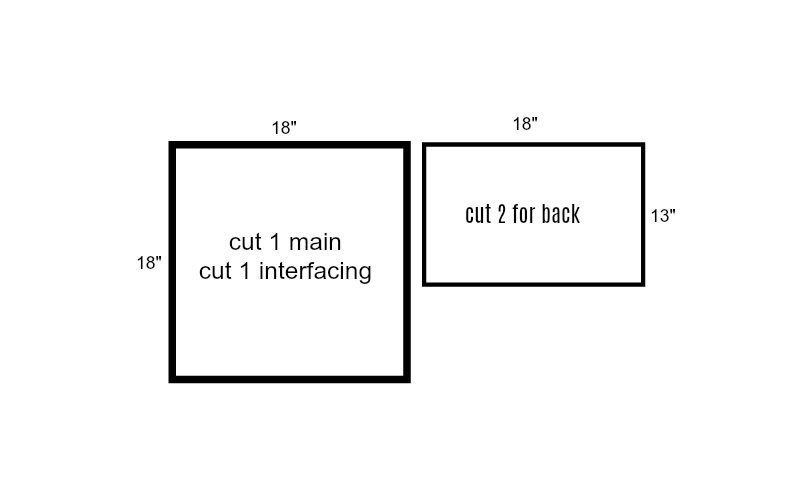
1. Prepare the fabric
I’m using a 16” throw pillow size with the template below, but you can adjust the measurements to fit the pillow you plan to cover. Just measure the pillow and add a 1” border for seam allowance. I’m also doing an envelope back, so the back measures slightly larger in length (measurement/2 + 4”).
Tip: Add extra support to your front piece by using fusible interfacing on the back
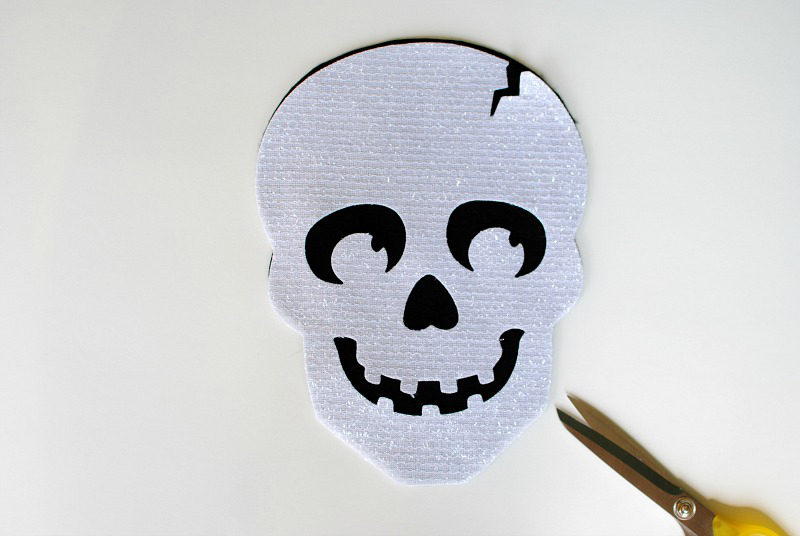
2. Cut and prepare the appliqué
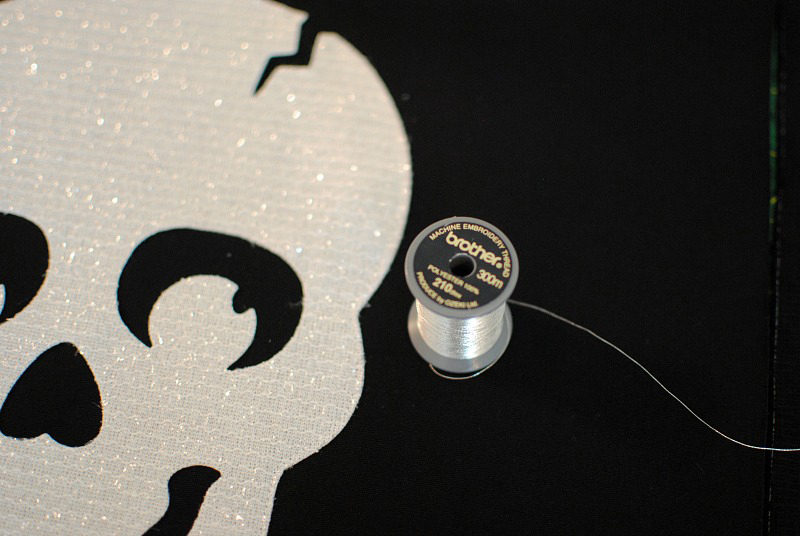
Trace the appliqué design from the template onto your chosen fabric or felt. You can also use pre-cut shapes from craft stores.I opted for a skull design made from sparkly felt.
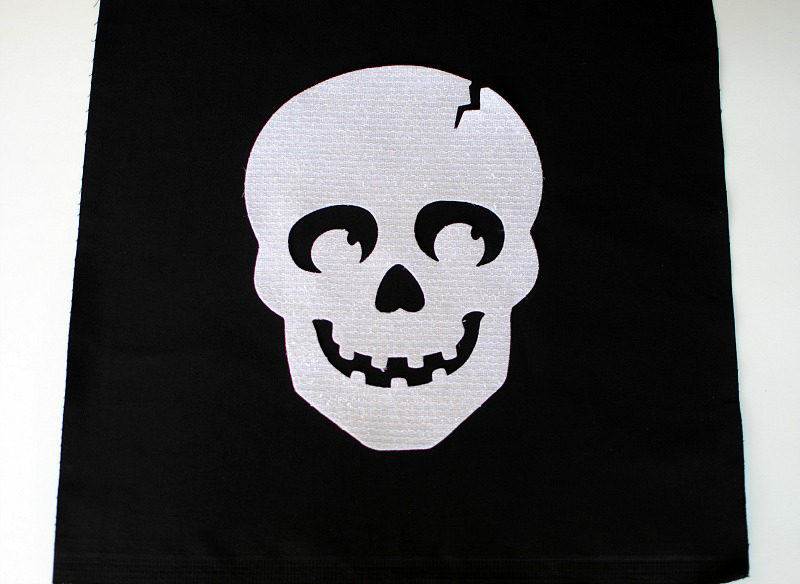
3. Position the appliqué
Find the center of the pillow's front fabric piece and mark it lightly. Spray temporary adhesive on the back of the appliqué, then position it in the center of the pillow front. Press it down to hold it in place. Add pins along the edges for extra stability.
4. Attach the appliqué
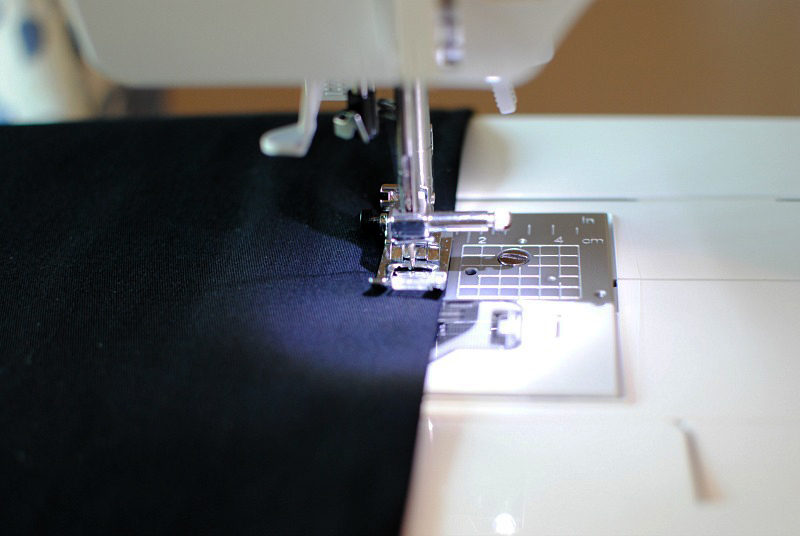
Sew the appliqué into place about 1/8” from the edge using a regular straight stitch. When sewing the curves, lift your presser foot and pivot gradually each time you turn.
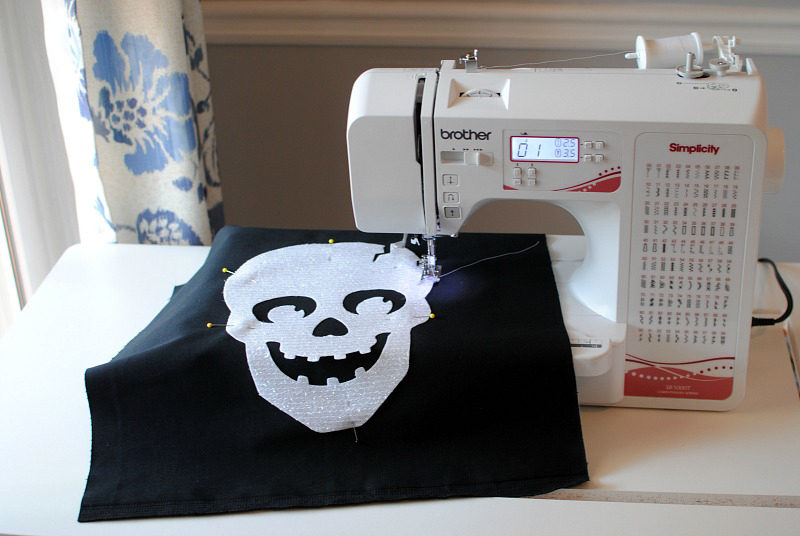
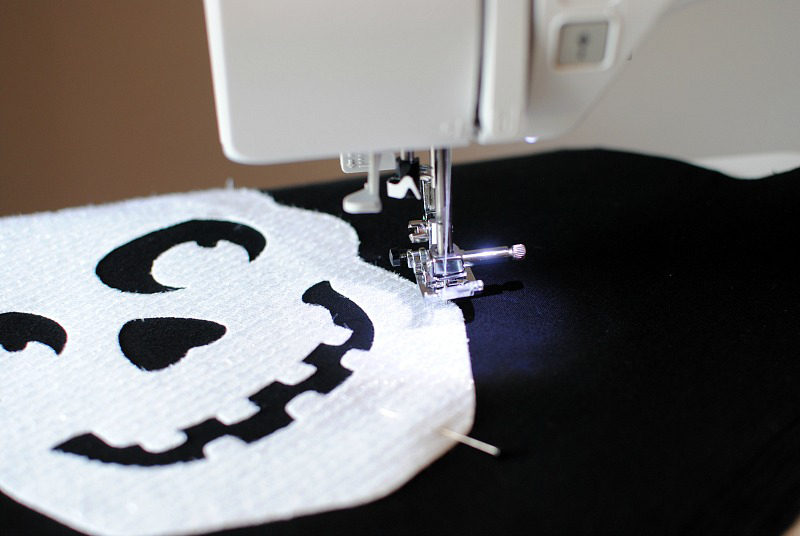
I like to add more detail around the edges of the appliqué by sewing a satin stitch with metallic thread. Choose a zigzag stitch with a length of 0.2mm and a width of 3.5mm. Place your N foot on for this.
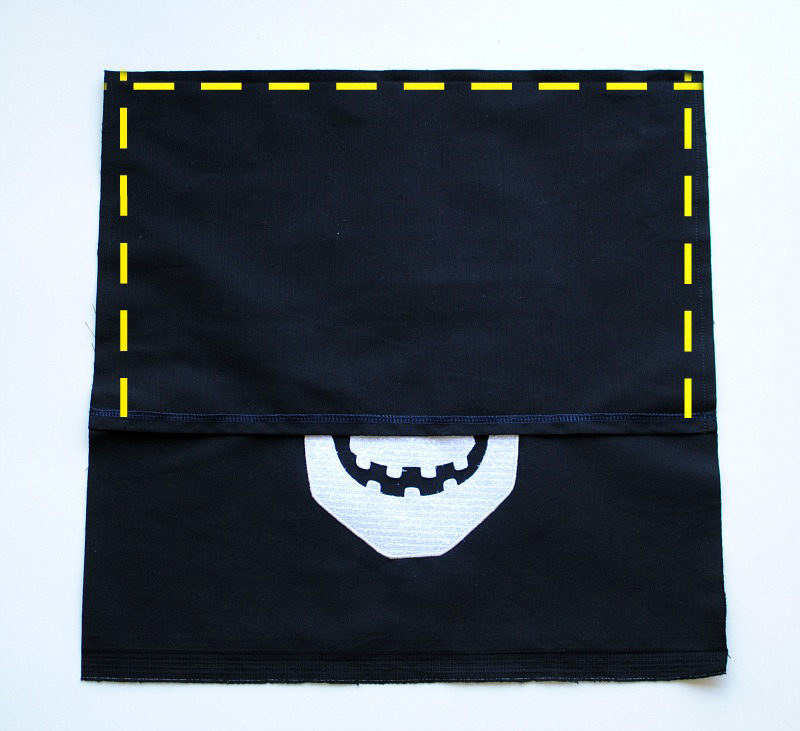
Sew around the perimeter of the appliqué. I also did this around the openings of the eyes and nose. For the mouth, I simply used a straight stitch, but you could also use a satin stitch.
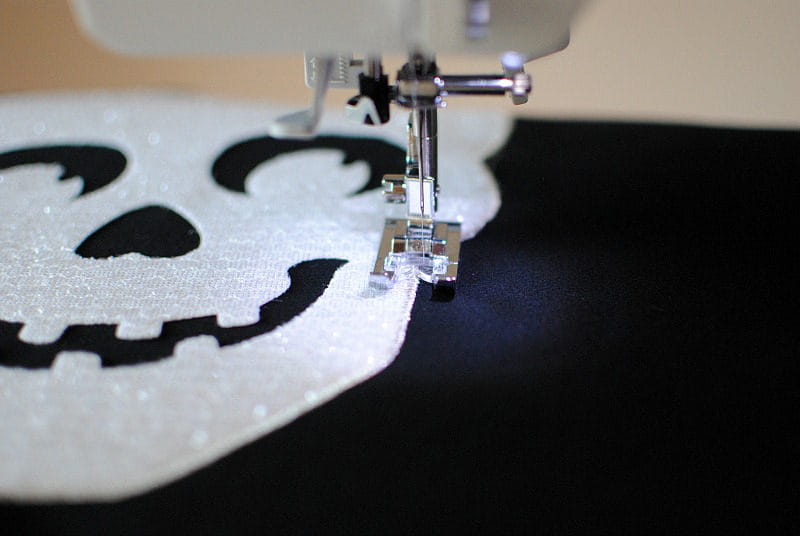
It will look like this when you’re done.
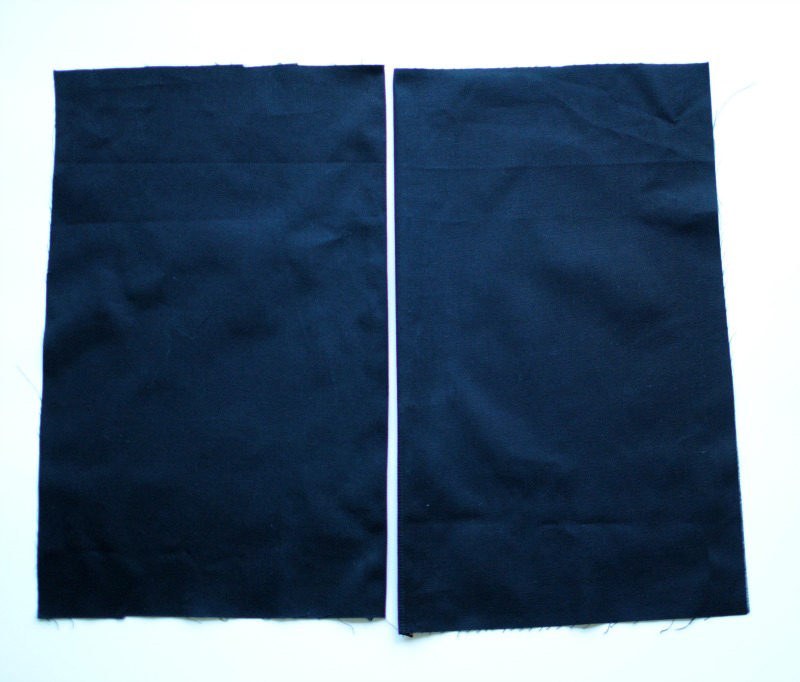
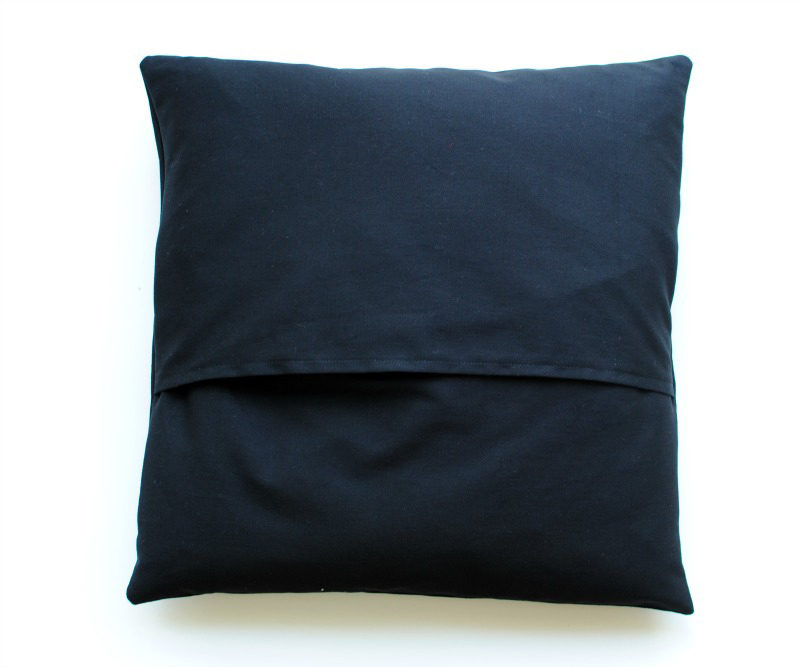
5. Prepare the back of the pillow
Hem one side of each of the two back fabric pieces by folding over the edges by ½ inch and stitching them in place.
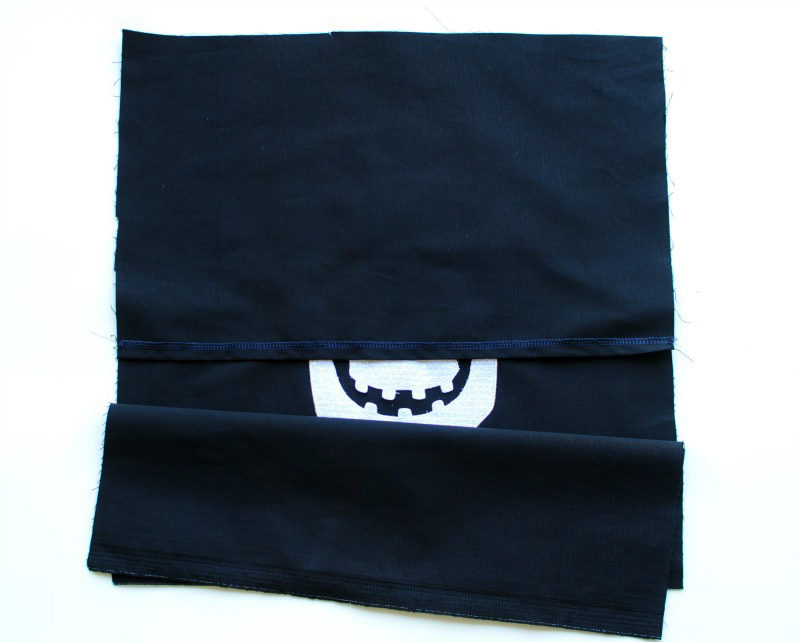
6. Assemble the pillow
Place the right sides of the front and back pieces together, with the back pieces overlapping. Pin the fabric in place and sew with a ½-inch seam allowance.
Clip the corners, flip the fabric right side out, and press it for a clean finish.
7. Insert the pillow
Stuff a pillow insert into your completed project.
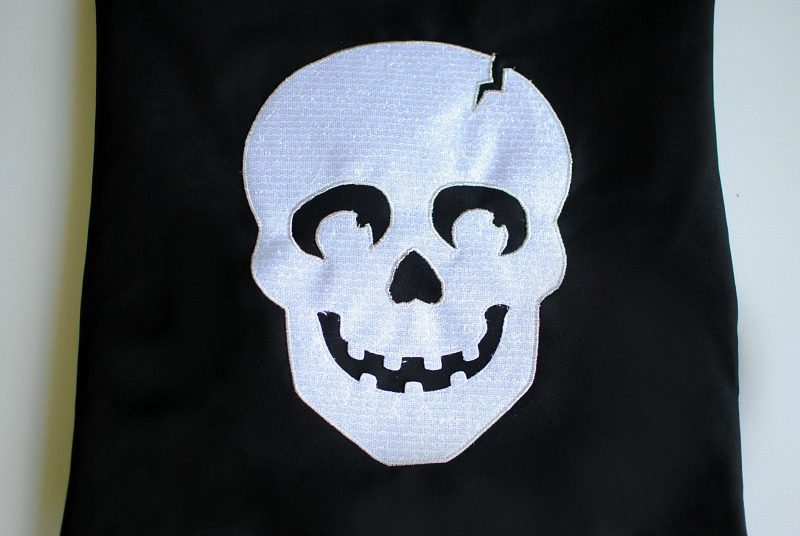
Voilà! Your Halloween appliqué pillow is ready to add a festive touch to your home.

Add a haunting touch to your Halloween
There’s something incredibly special about creating custom décor with your family. This Halloween appliqué pillow project is more than just a sewing activity; it’s a memory-making experience that brings a personal touch to your home. Whether you stick with this spooky skull design or go for other festive fun like pumpkins or witches, the key is to have fun, be creative, and enjoy the process together. Want even more festive projects? Explore our sewing tutorial on how to make a butterfly costume or learn how to make this Halloween candy bag.
Happy haunting and happy sewing!
FAQs
Q: Can I use a different sewing machine for this project?
A: Absolutely! While I used the Brother Simplicity SB1000T, any sewing machine with straight stitches and zigzag stitch options will work perfectly (but I would recommend using the Brother CP100X Computerized Sewing and Quilting Machine)
Q: What fabrics work best for appliqué?
A: Non-fraying fabrics, such as felt, vinyl, or fleece, work best. You can also use cotton or linen, but you may need to stabilize them with fusible interfacing.
Q: Can the pillow cover be washed?
A: Use a gentle hand wash or machine-wash on a delicate cycle. Turn the pillow cover inside out for added protection. Avoid harsh detergents that might damage metallic threads or delicate appliqué edges.
Related Projects
Stay Connected
* Required fields