How to Make Your Own DIY Ugly Holiday Sweater
-Brother Sews Blogger
The ugly Christmas sweater is a holiday staple! It was once worn in jest for themed Christmas parties, but over the last several years it’s become serious fashion. These specialty sweaters can be pricey if you buy them at the department store - but there’s no need to spend all your hard-earned cash when you can make your own. Let’s ‘tis the season and make a custom ugly Christmas sweater. It’s the perfect project to spread some holiday cheer.

There is no right or wrong way to make an ugly Christmas sweater. Using your Brother sewing and embroidery machine you can add embroidery and appliques to create whatever you find the most festive. I made a Grinch theme using one of my favorite embroidery files, but you can steer your design wherever you want it to go. The best part about being creative is that you get to decide everything about the design.
Supplies:
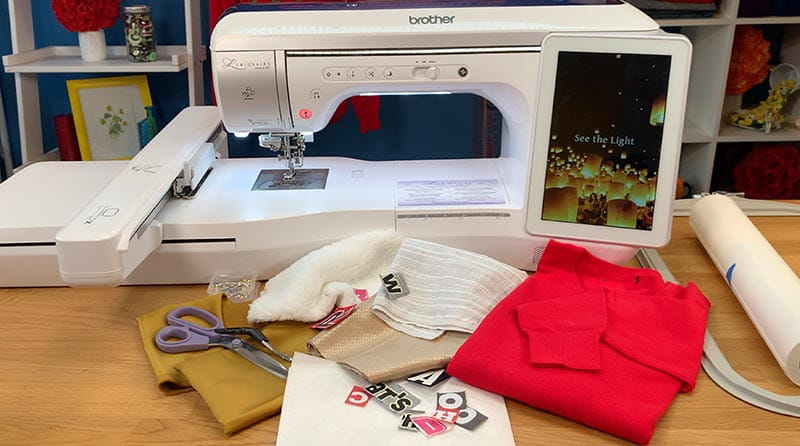
- Brother sewing and embroidery machine
- Adhesive stabilizer
- Iron-on adhesive
- Sweater or sweatshirt – I recommend anything gently used from the closet or thrift store
- Holiday themed embroidery design
- Holiday themed appliqué design
- Old t-shirts that have silk-screened words and text on them
- Fabric scraps
- Scissors
- Straight pins
Make it:
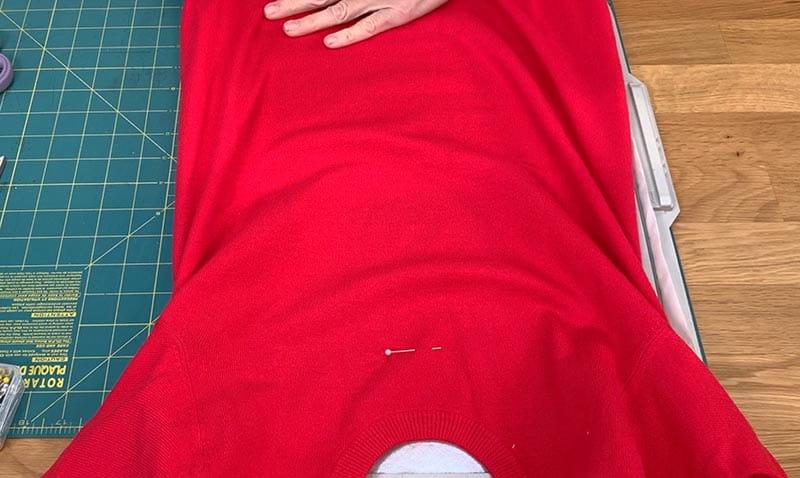
Prep the sweater by marking the location for the top of the design.
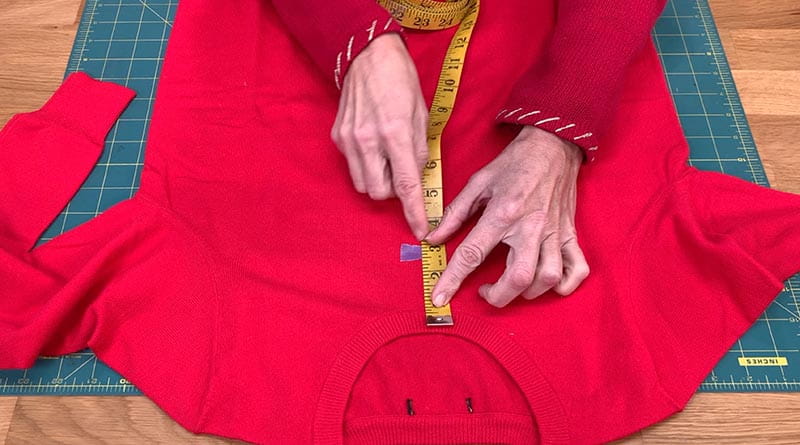
Cut the sides of the sweater open so you can use add designs to the entire front (and back) of the sweater.

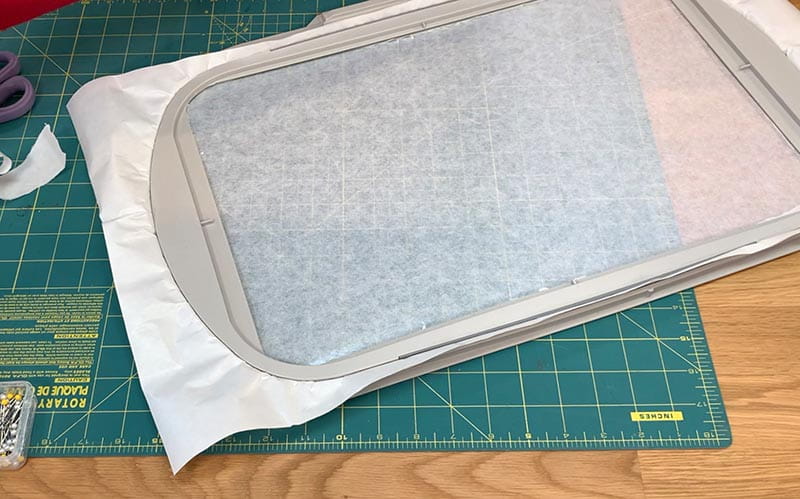
Using adhesive stabilizer in your hoop, lay the front piece of the sweater on the hoop. Secure in place.
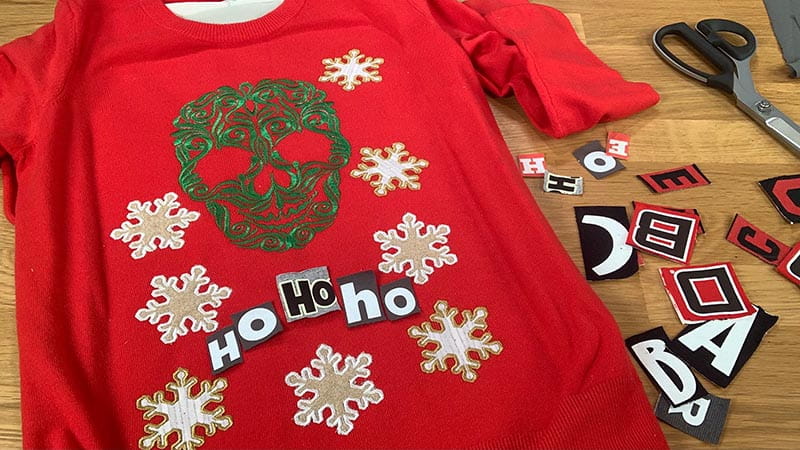
On your Brother embroidery machine, set up your selected holiday design. Start with the main feature of your design and add the smaller components to it. You can do all embroidery, or you can do all applique, but I like the idea of the different textures a mix of embroidery and applique provide to the look.
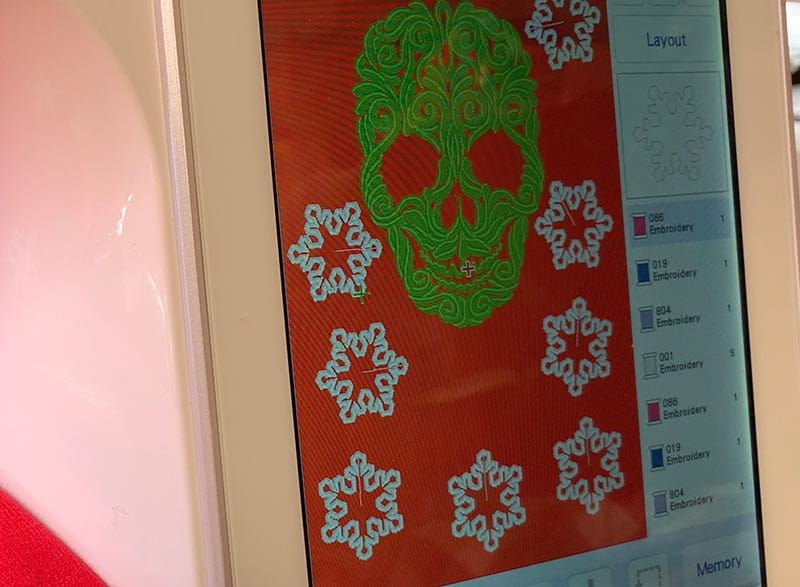
As it’s being laid out, be mindful to leave some empty space where you will add your holiday greeting to the sweater using those old t-shirts.
Start the embroidery process with the main holiday theme. I placed a piece of light stabilizer over the top of my fabric, so the design doesn’t pucker.
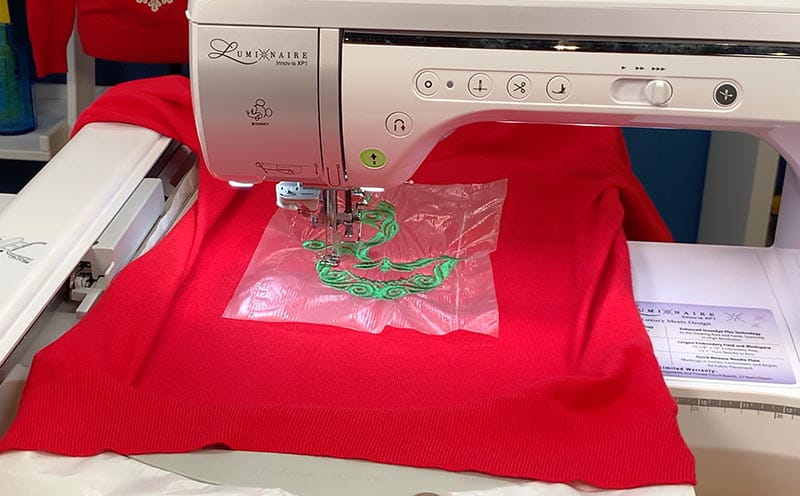
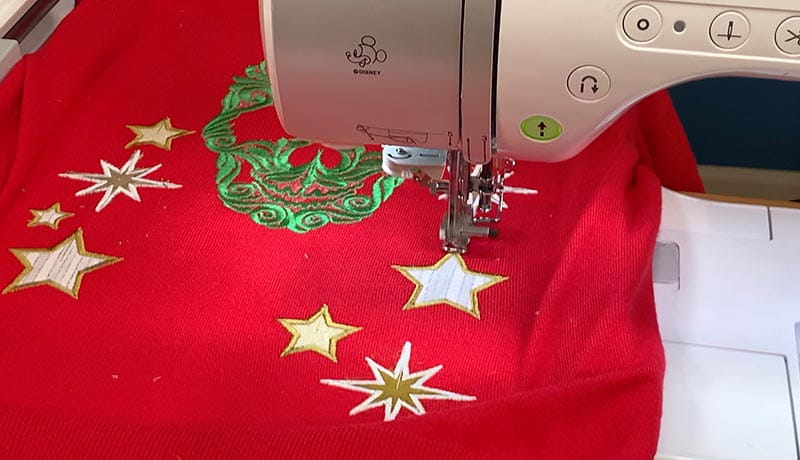
Finish the embroidery and add your appliqué pieces.

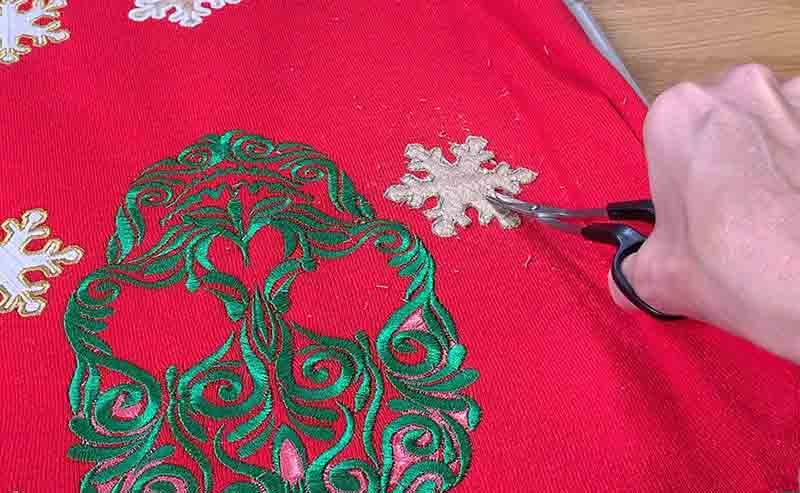
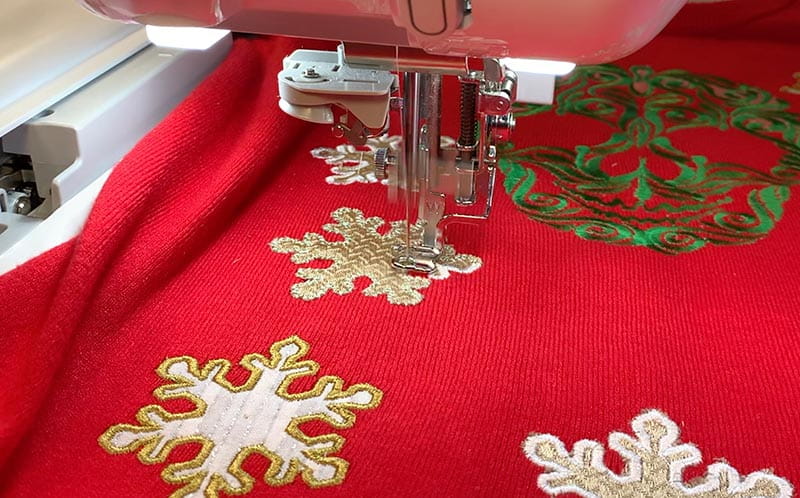
Once the embroidery and appliqué processes are complete, un-hoop the sweater and tear away the stabilizer.
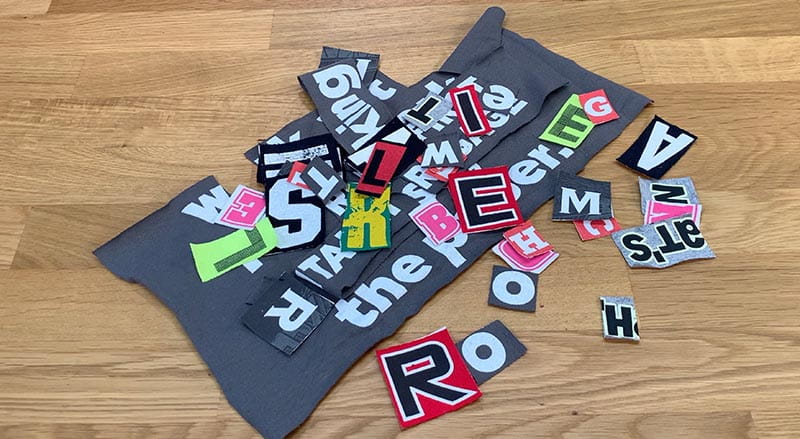
Time to add more to your “ugly” Christmas sweater using those t-shirts.
Cut out letters from the old t-shirts to spell out a greeting or phrase.
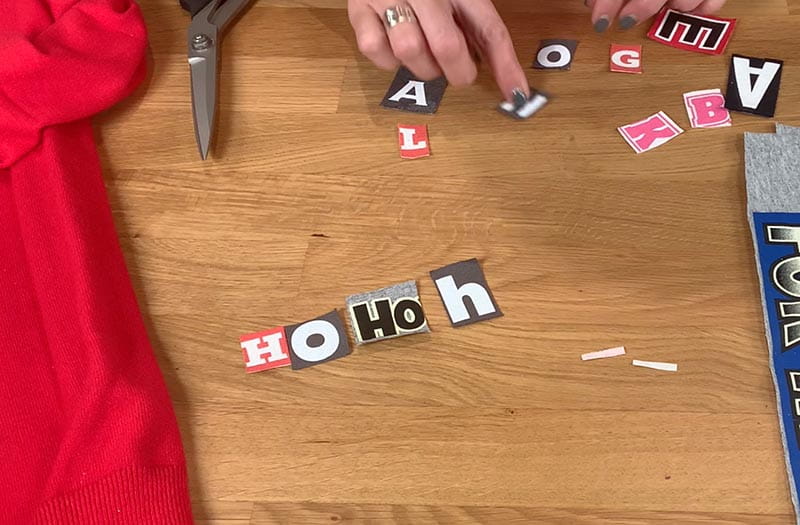
Add iron-on adhesive to each letter making sure to follow the package directions.
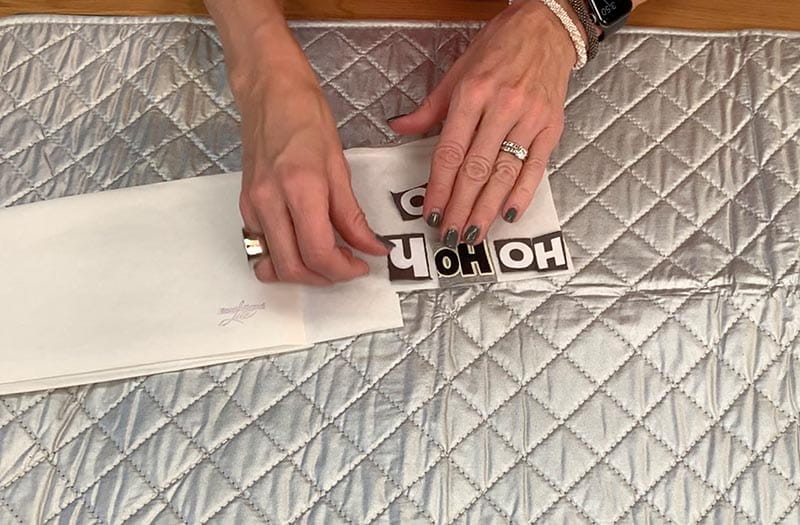
Place the letters on the sweater and iron them on, then top stitch around each letter using a brighter colored thread than the fabric and a longer stitch length.


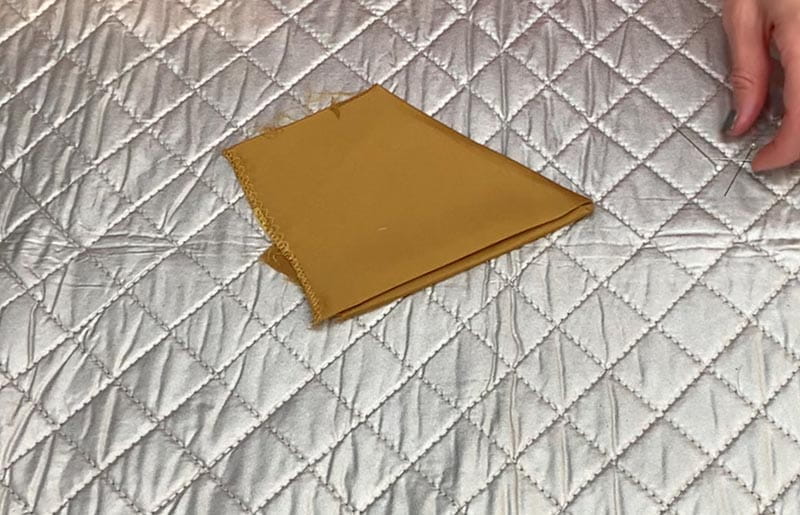
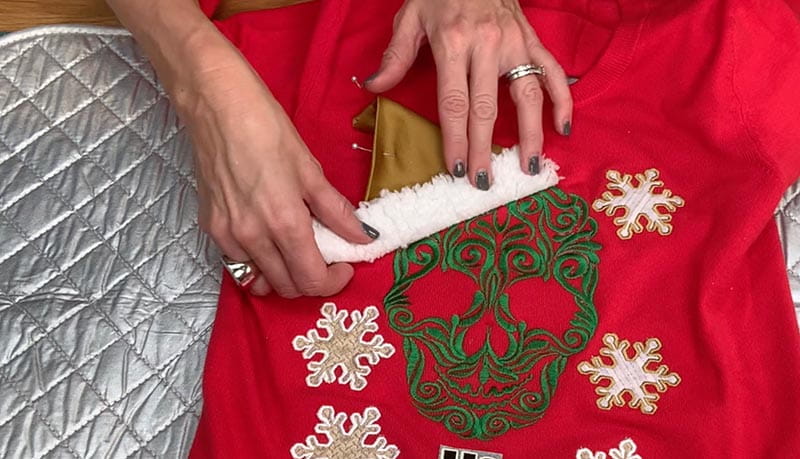
Now, add even more “ugly” décor to your sweater by adding some pop-art embellishments using your fabric scraps. I added a Santa hat to my Grinch by folding and creating the shape I want from my scraps.
Pin it on your sweater and sew it in place.

If you want extra credit, hand stitch pom-poms or jingle bells to your design.
To finish the look, pin the right sides of the sweater together and sew up the side seams.
You’re finished. With a little inspiration and some imagination, you can create a handmade, ugly Christmas sweater.
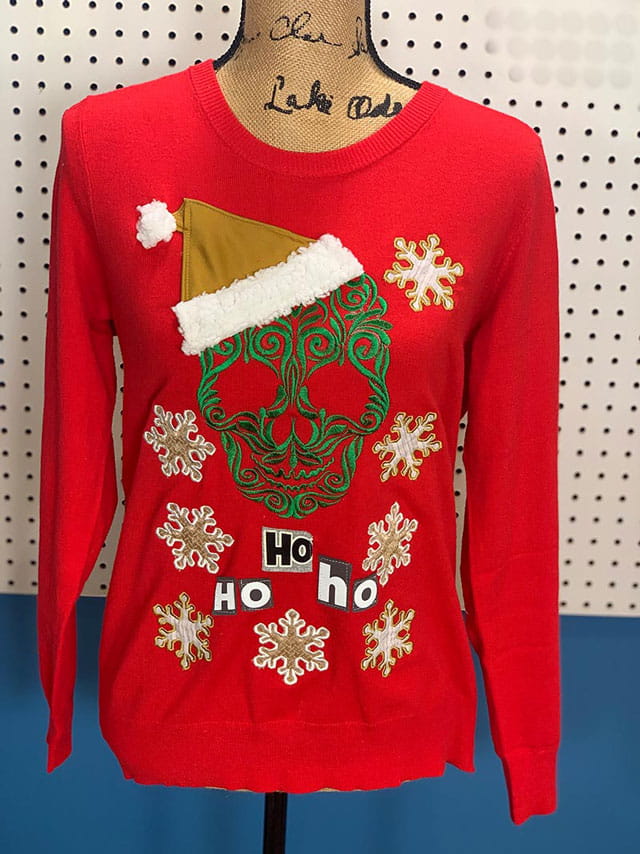

Just put it on and you’ll be ready to sleigh the holidays!
Tags
Shop this Project
No sewing machine or embroidery machine? No problem! Any products mentioned in this project are available to buy here so you can stay stitching.
Related Projects
Stay Connected
* Required fields