DIY Yoga Mat Bag

How to sew a yoga mat bag you’ll love using
Summertime is my favorite time of year for getting outdoors. I love hitting the trails and local parks around my town. Post run, I take time to cool down by doing yoga and stretching. But my yoga mat was becoming smashed in the car by the endless piles of groceries, strollers, and kids, so I decided my next sewing project was going to be a yoga mat bag.
Plus, yoga is all about self-expression and connecting with your inner self. So, carry a yoga mat in a bag that’s as unique as you are. Whether you’re heading to the studio, stretching in the park, or practicing at home, a custom DIY yoga mat bag is the perfect way to carry your yoga mat. This step-by-step guide will walk you through creating a functional, custom yoga mat bag. Even if you’re a beginner at sewing, don’t worry—I’ll cover everything you need to know!
Supplies:
- Sewing machine like our Brother CP100X computerized sewing and quilting machine, Brother CS7000X computerized sewing machine with wide table, Brother XR9550 computerized sewing machine, Brother PS300T computerized sewing machine, or our Brother PS500 sewing machine would be ideal.
- Buttonhole Foot
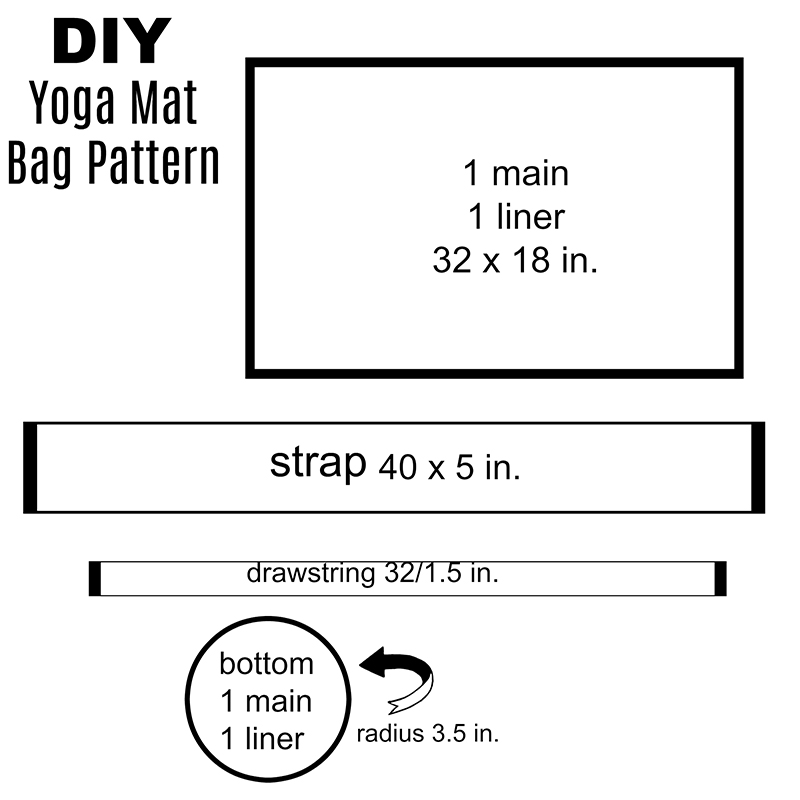
- Fabric for the main bag and lining: 32-inches x 18-inches each
- Fabric strip for strap: 40-inches x 5-inches – cotton or nylon webbing can also be used
- Fabric strip for drawstring: 32-inches x 1.5-inches – cording can also be used
- Fabric for bottom circles (both main and lining): Circle with a 3.5-inch radius
- Loop turner
- Scissors
- Pins
- Seam ripper
9 steps to sew your yoga mat carrier
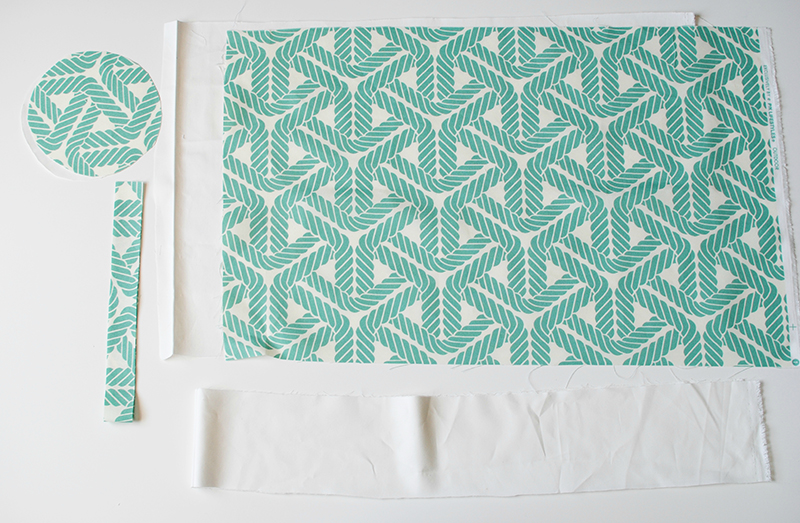
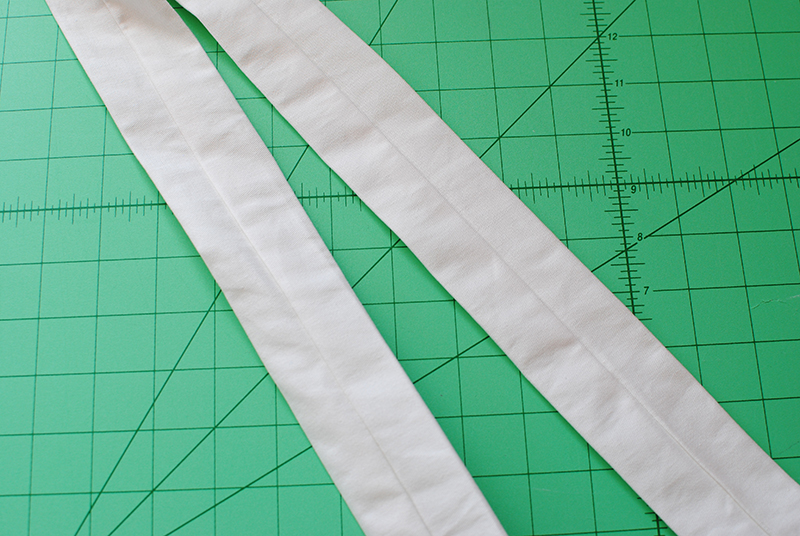
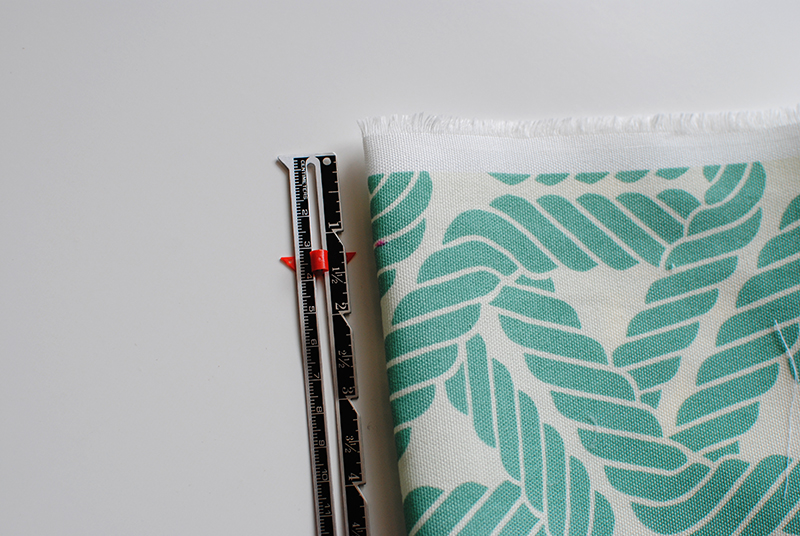
1. Cut your fabric
Start by cutting all your pattern pieces based on the measurements below. Don't forget to leave a 5/8" seam allowance unless otherwise noted.
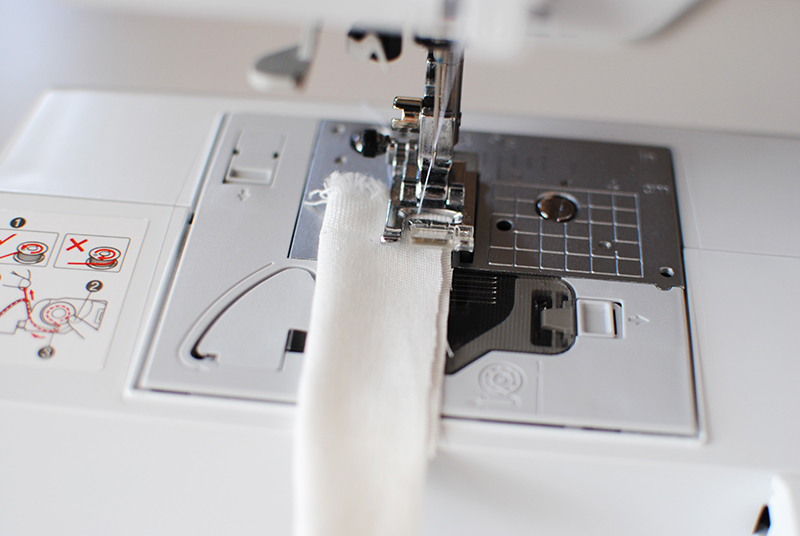
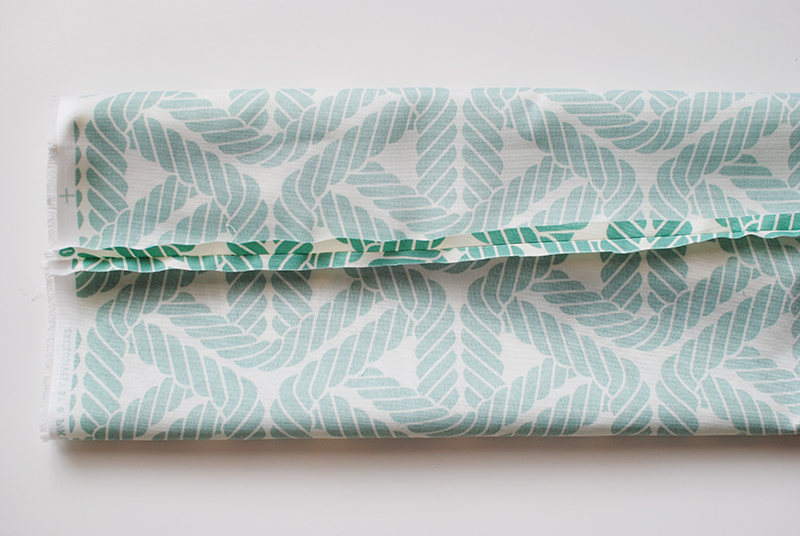
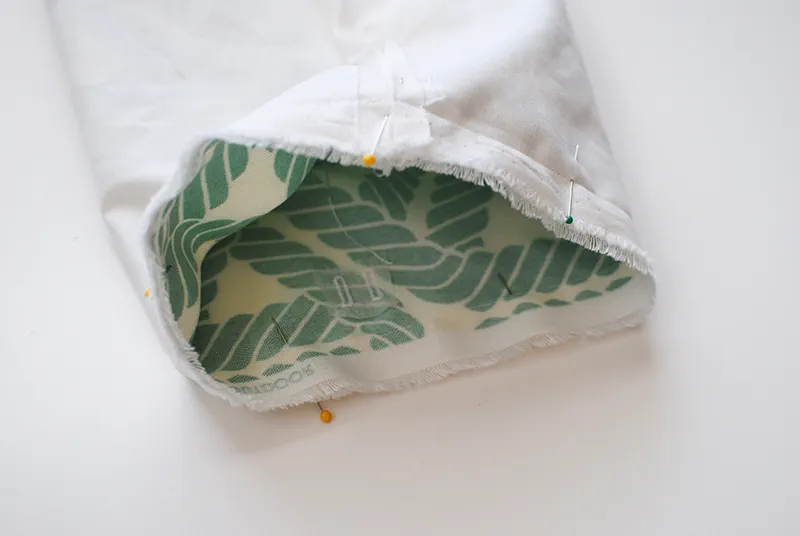
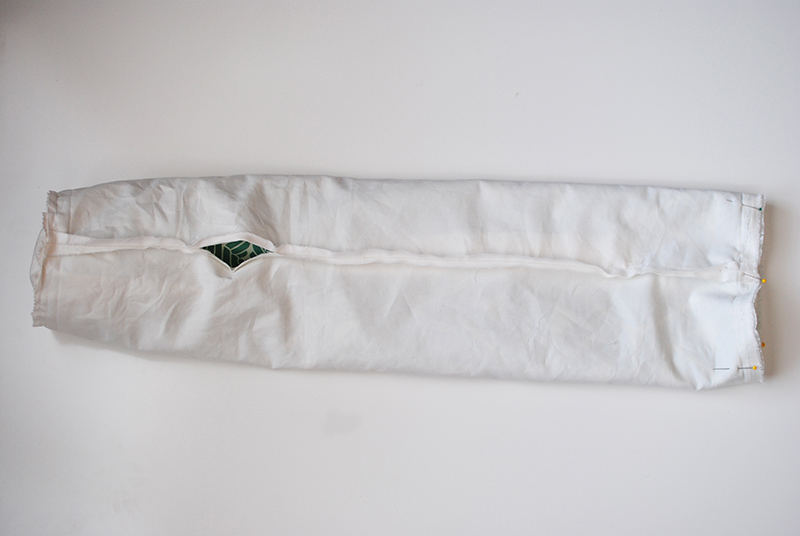
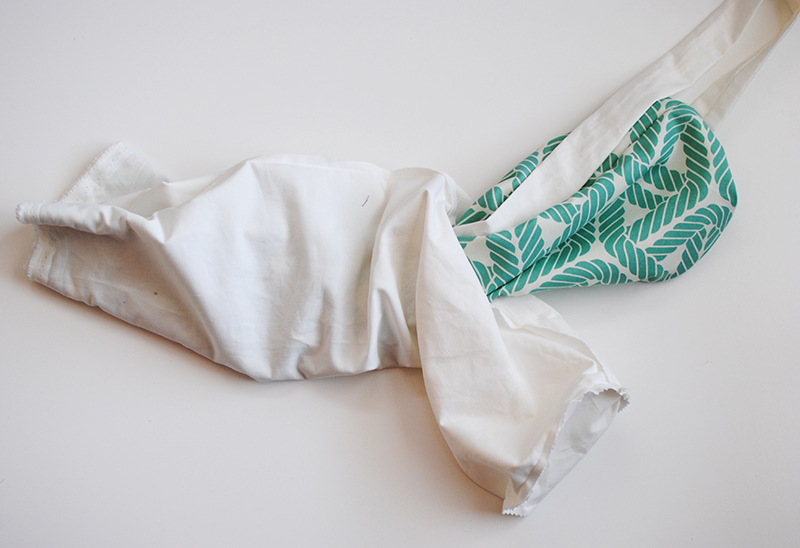
2. Sew the main tube
Fold your bag, strap, and drawstring pieces in half with right sides together as shown and sew.
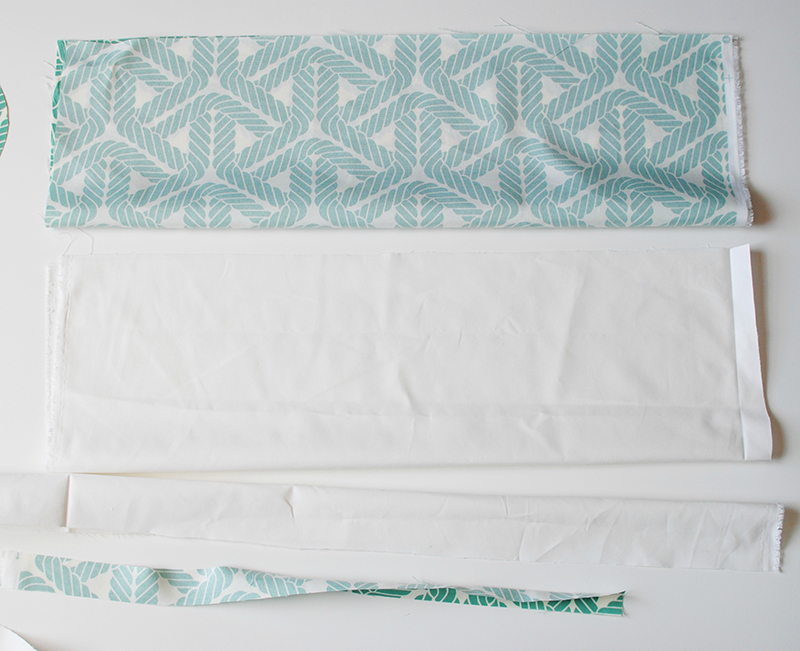
Leave a 3-inch opening in the center of the seam in the bag lining. This opening will be used to flip the project right side out in a later step.
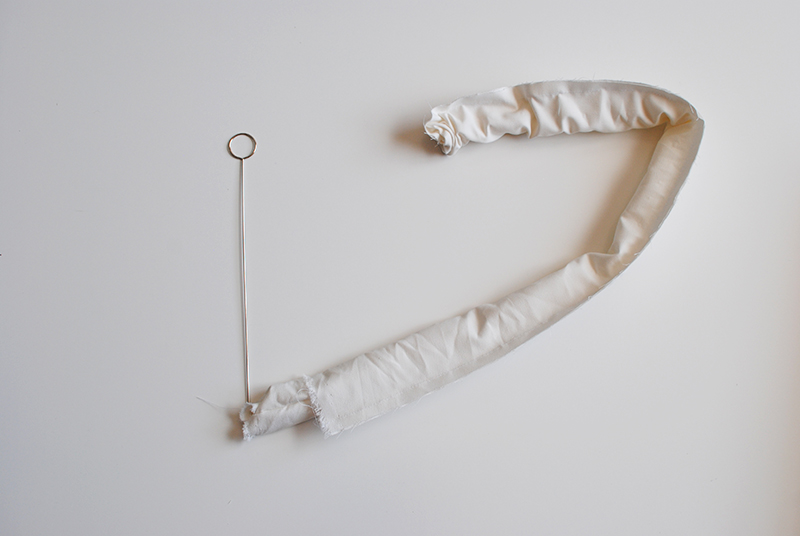
3. Prepare and flip the drawstring and straps
Fold the drawstring strip right sides together and stitch.
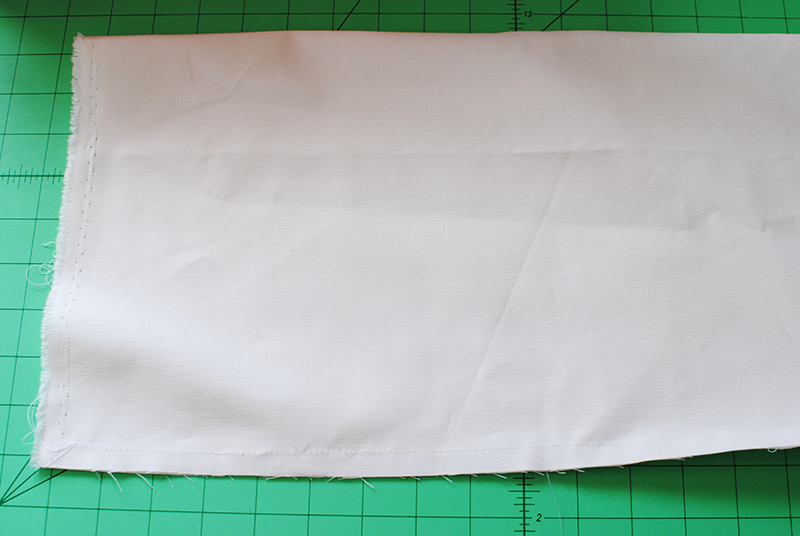
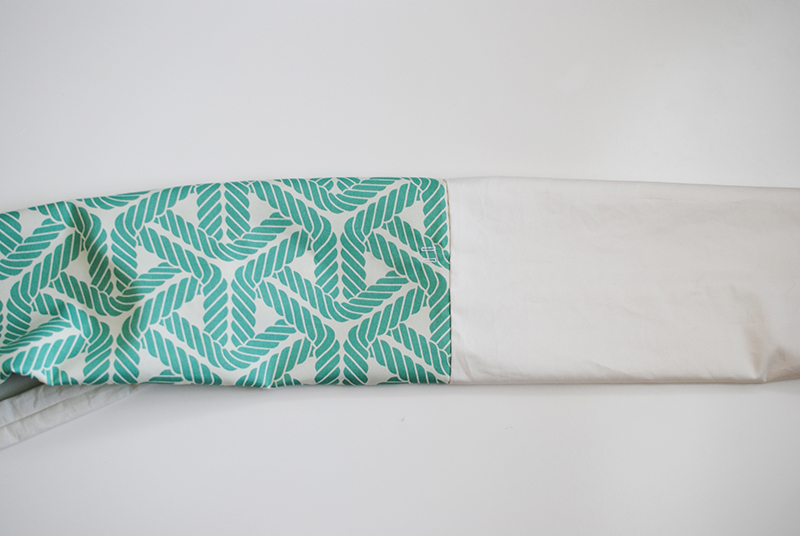
Press the seam allowance open on the main bag and bag lining pieces.
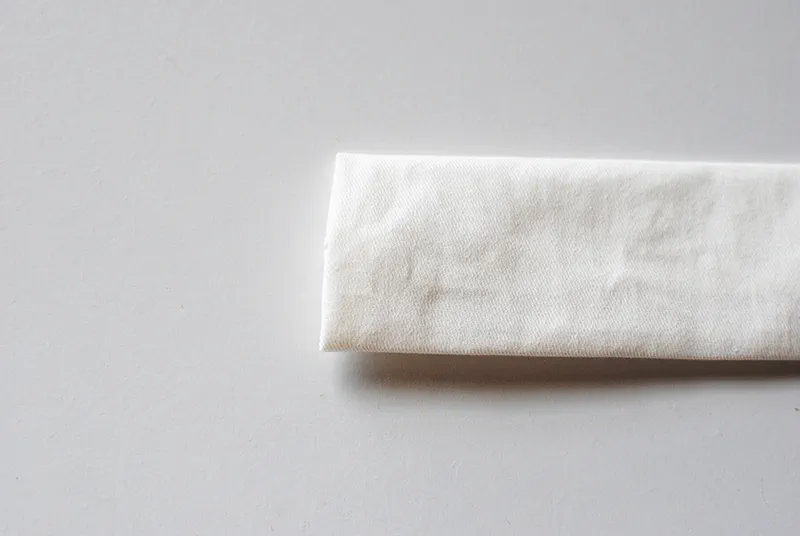
Use a loop turner to flip the strap and drawstring so that the right sides are out.
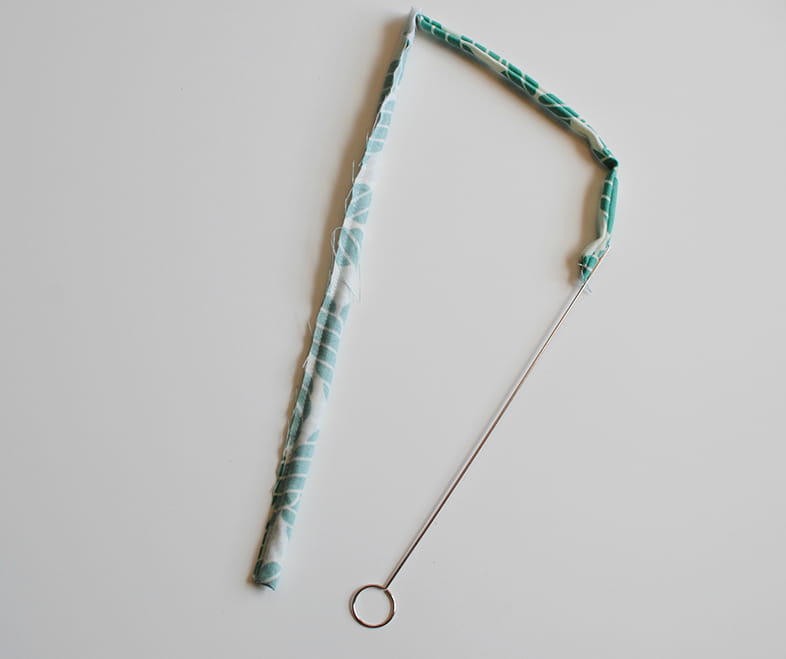
Press the strap flat so the seam is in the middle of the strap.
4. Attach the bottom
Slide the strap down inside the tube for the main fabric. Pin one end of the strap to the bottom edge of the main bag, making sure the right side of the strap is facing out and the seams are aligned. Then, pin the circular bottom piece in place with the right sides facing. Sew all the way around the bottom of the bag.
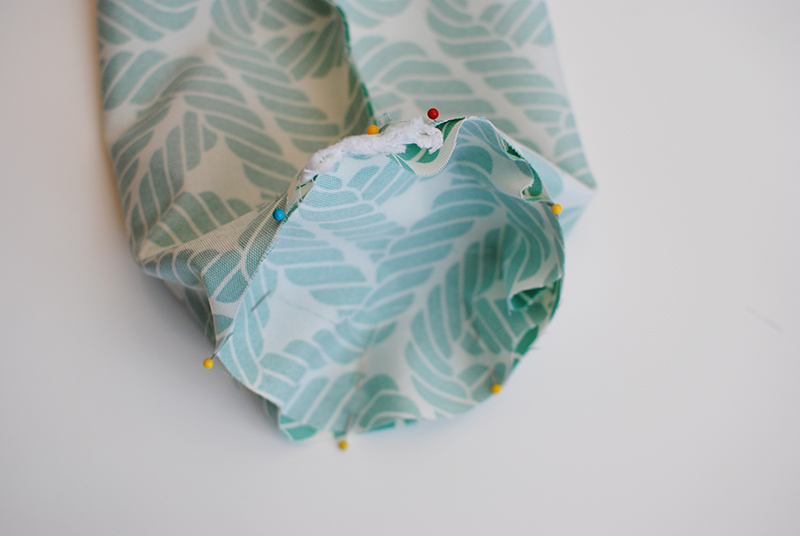
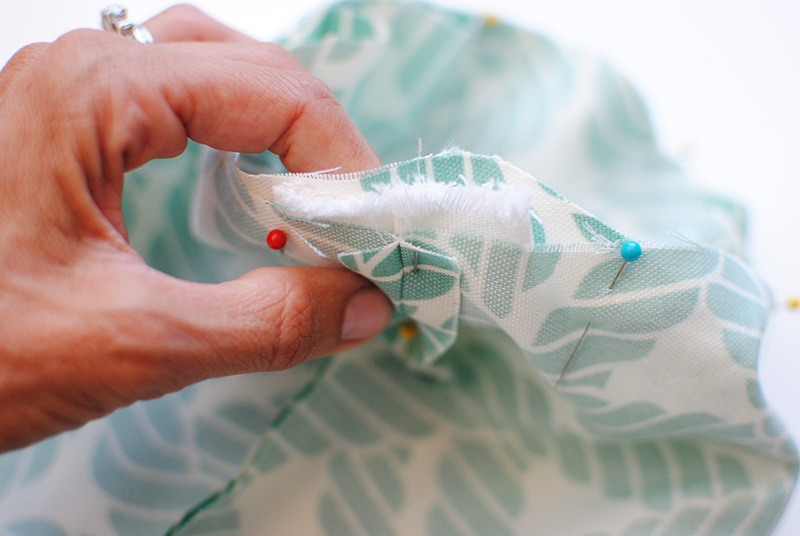
Sew the bottom piece to the bag lining as well.
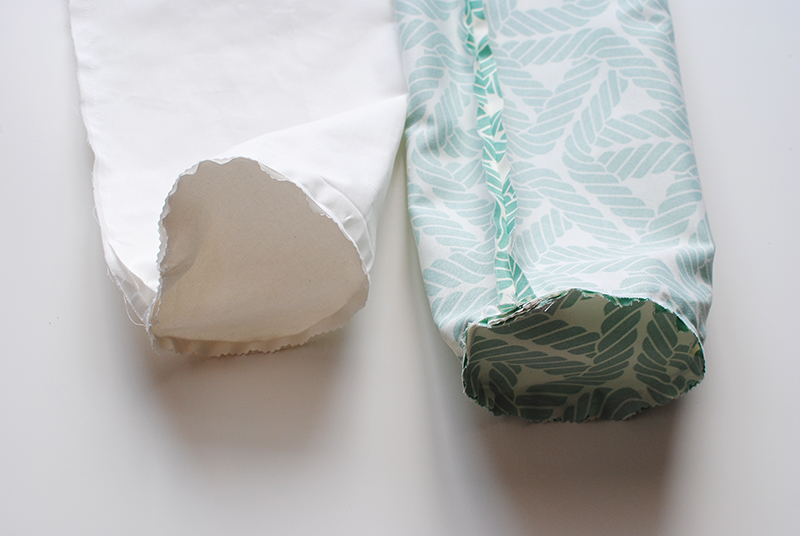
After stitching, the pieces should look like this.
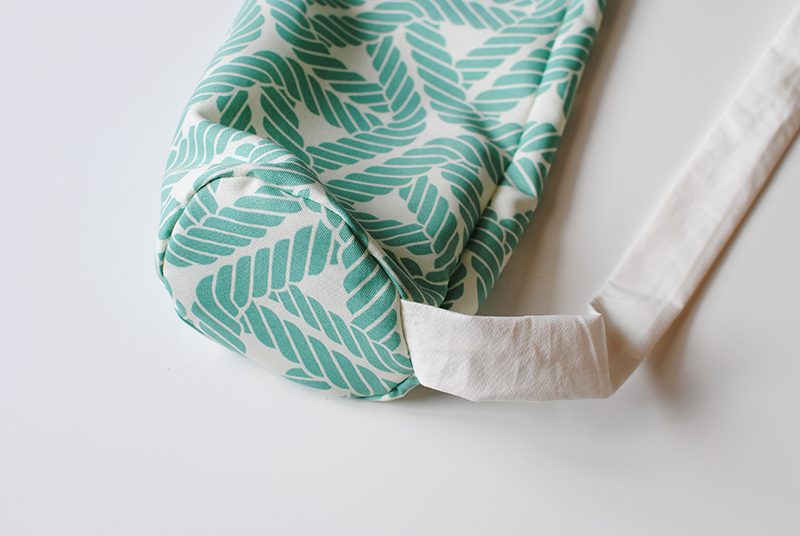
To complete the strap, fold the raw edge to the inside of the tube by at least 1/4-inch and press into place.
5. Attach the strap
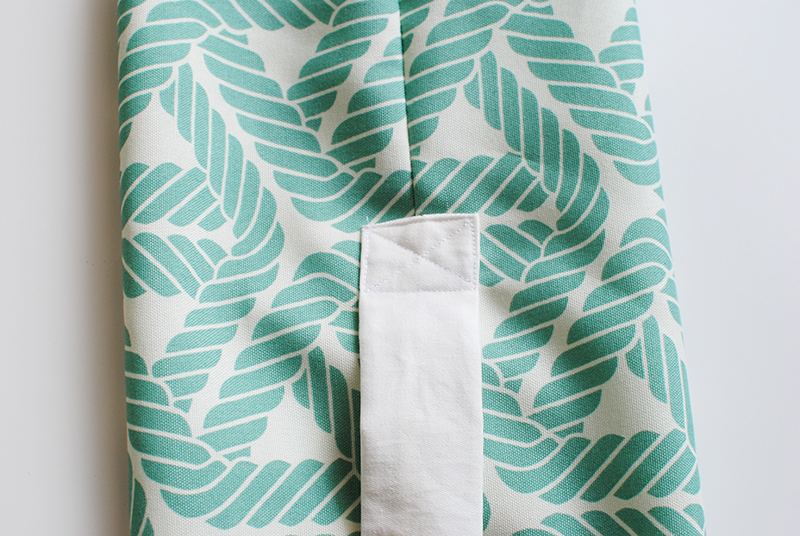
Pin the loose end of the strap to the seam line on the main bag about 4-inches down from the top edge.
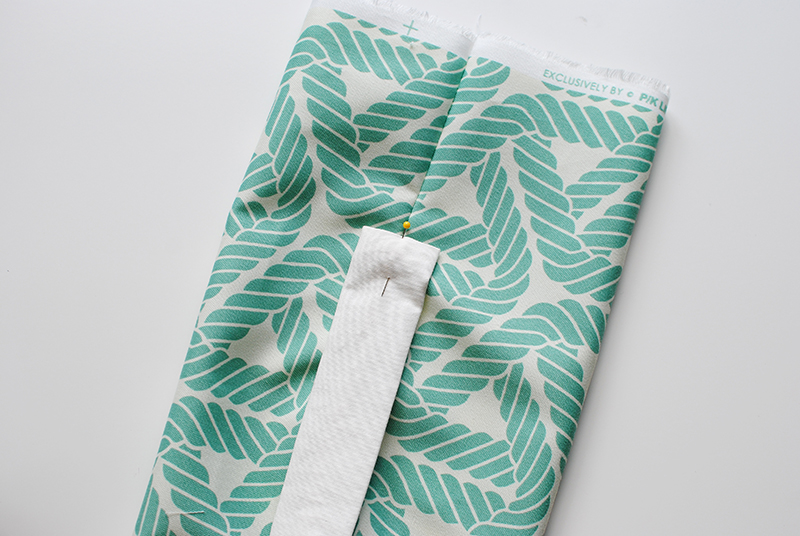
Topstitch a square and then sew an X in the middle. It should look like this when done.
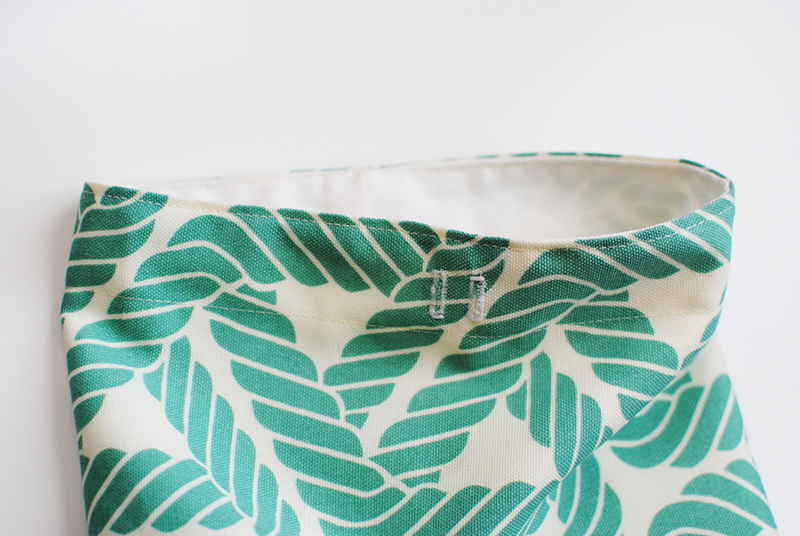
6. Add buttonholes
Next, find the center of the main bag (directly opposite the seam) and mark 1-1/4" down from the raw edge. Create two buttonholes, stitching one on either side of the center mark. The buttonholes should be large enough to fit your sewn drawstring or cording. Sew them 1/4" apart. The top of the buttonholes should start at the line you marked. Carefully open the buttonholes with a seam ripper.
7. Assemble and flip the right side out
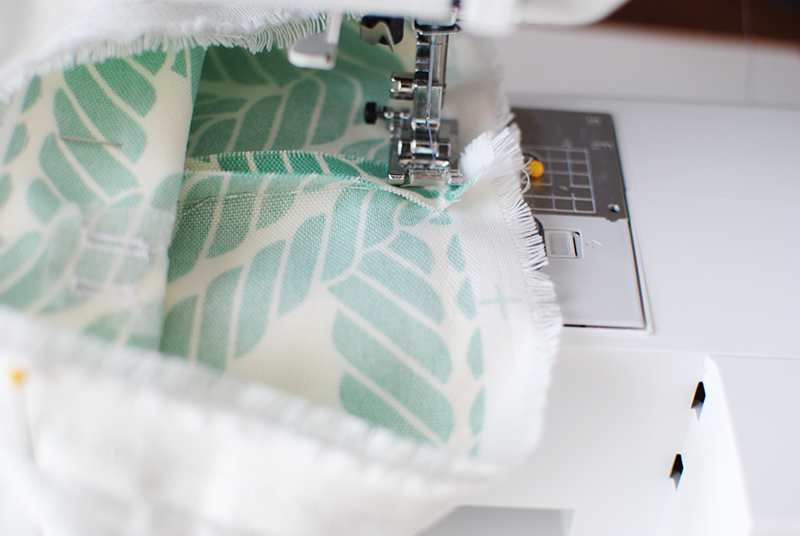
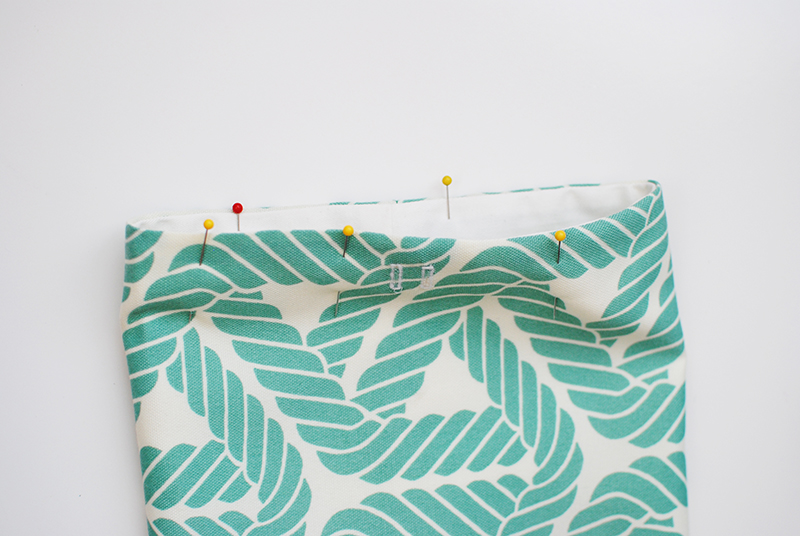
Insert the main fabric tube into the lining tube so the right sides are facing each other; align the seams.
Pin the top edges together, then sew all the way around with a 5/8” seam allowance.
Flip everything right side out through the opening in the lining. Then sew the opening in the lining closed. This can be done by hand or machine. Finally, push the lining down inside the main fabric tube.
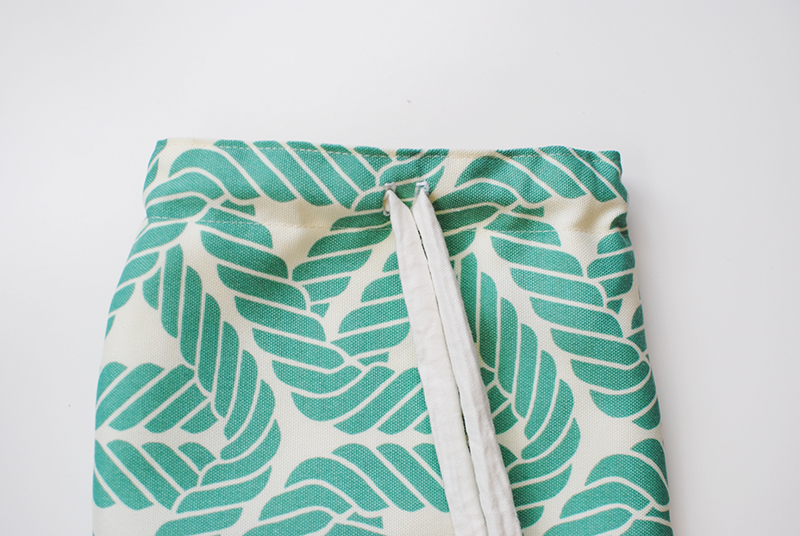
Now we will make a casing for the drawstring.
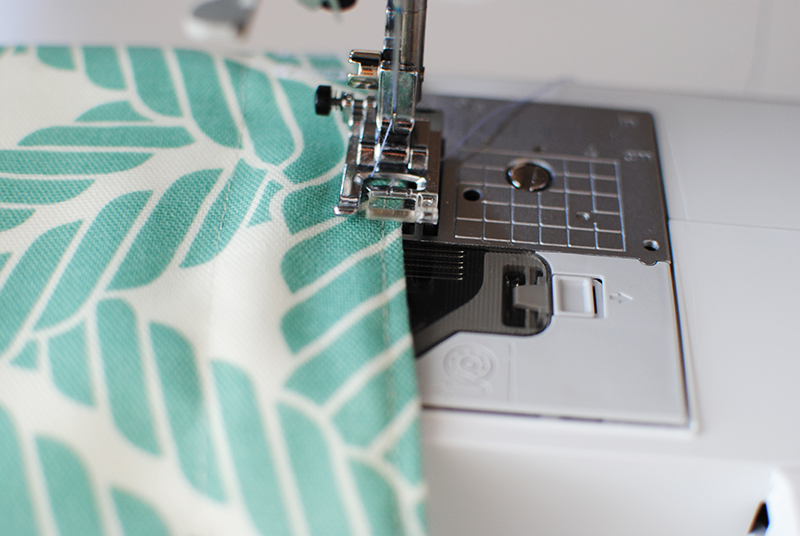
8. Sew the drawstring casing
Press the top of the bag down so that the lining is not visible on the outside of the bag. Add a few pins to secure the layers before stitching.
Stitch along the top edge close to the fold. Then, sew another line of stitching 1-inch below the first line to form the casing.
Once done, it should look like this.
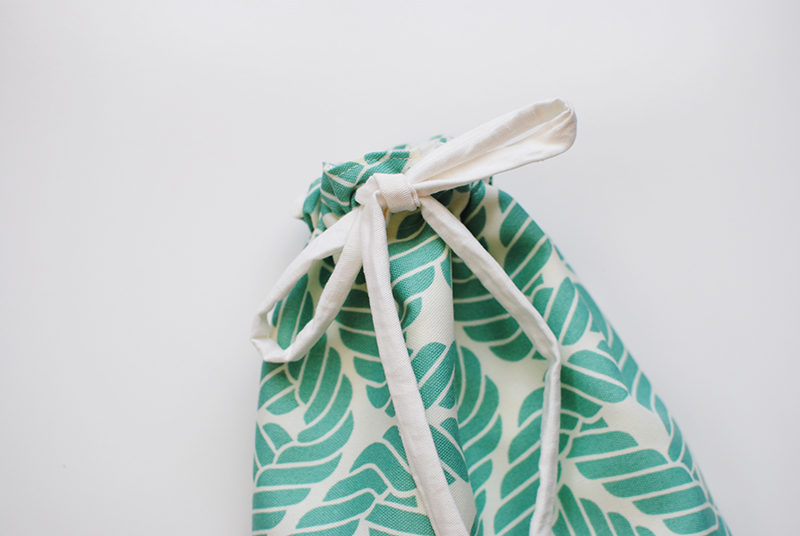
9. Add the drawstring
Use a safety pin to guide the drawstring through the casing. Knot the ends of the drawstring to finish.
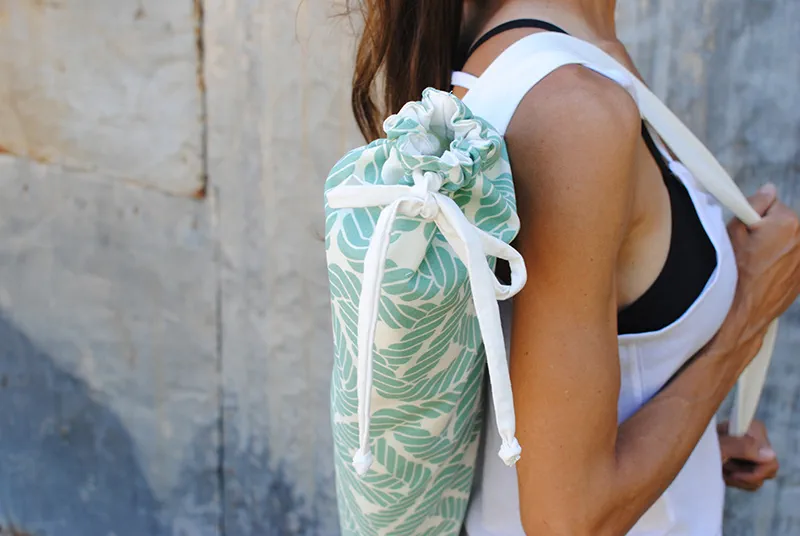
That's it! You have now completed your custom yoga mat bag in no time.
Build your perfect yoga accessory with this DIY project
Sewing your own yoga mat bag will leave you with a practical accessory you’ll love using. Whether you’re off to yoga class or enjoying a day in the park, this homemade bag is both functional and fashionable. Feeling inspired but not sure where to start? Check out beginner-friendly sewing tutorials like this DIY beach towel tote bag or learn to make these reusable dish covers. Share your finished creation on social media and tag us at @BrotherSews —we’d love to see your unique designs! Now, grab your supplies and start sewing your perfect yoga mat carrier today. Namaste!
FAQs
Q: What type of yoga mat fits in this bag?
A: The bag dimensions fit most standard yoga mats. However, if you have an extra-thick or wide mat, adjust the fabric measurements accordingly to ensure a comfortable fit.
Q: What type of fabric works best for a DIY yoga mat bag?
A: Durable yet lightweight fabrics like cotton or canvas work great. Avoid slippery or stretchy fabrics as they can be harder to sew.
Q: How can I personalize my yoga mat bag?
A: You can add embroidery, fun patches, or even use patterned fabric for a unique touch. The possibilities are endless!
Q: Is this sewing project suitable for beginners?
A: Absolutely! This project is straightforward and involves basic sewing techniques, making it perfect for beginners. Looking for more beginner sewing projects? Try this DIY jean tote bag or this custom sunglasses case.
Related Projects
Stay Connected
* Required fields