Gold Confetti Gift Bag
Brother Sews Ambassador
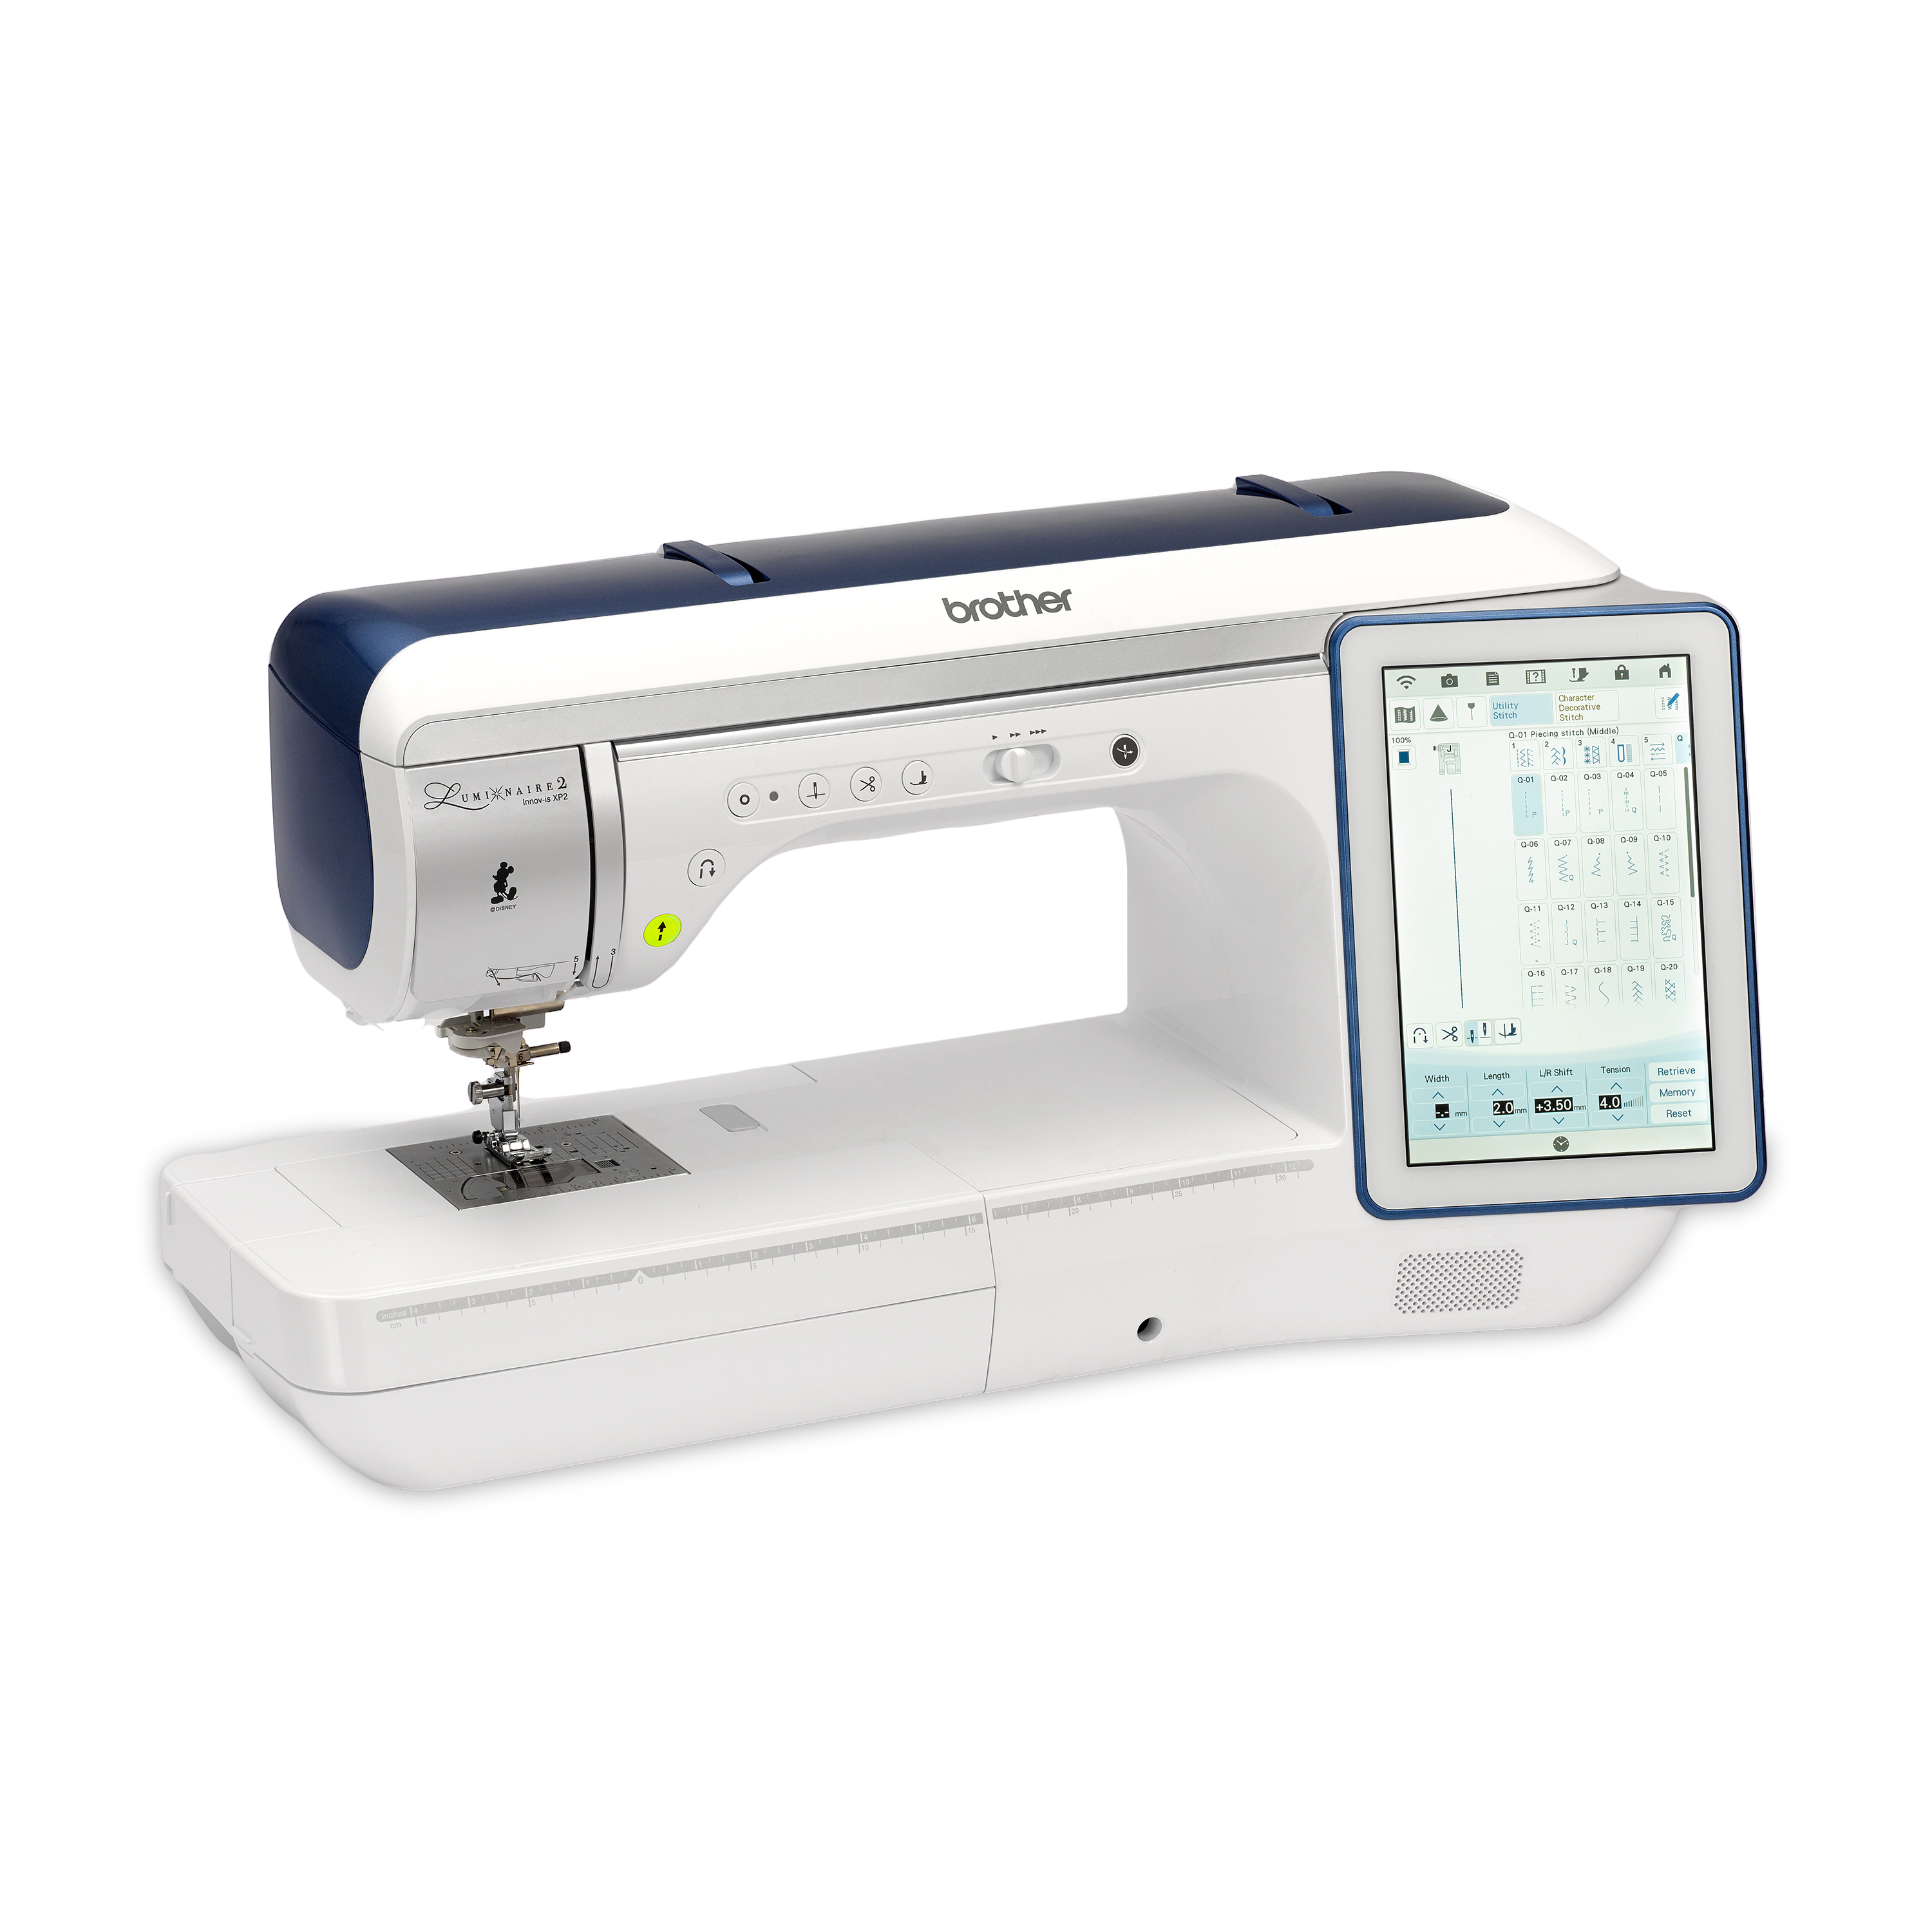
Festive fabric DIY gift bags are fun to make! They can make small presents extra special. I used sheer organza and snippets of fabric, sparkling gold ribbon, and strands of embroidery thread to make this little confetti bag. Follow along as I show you this confetti technique. Once you see how easy it is, you’ll want to make them for many occasions. Are you ready? Let’s go sew!
Materials and Supplies
sewing machine.
Steps to Create Confetti Bag 1. Begin by pressing fold lines in the organza as follows: Fold strip in half lengthwise to make a center fold, then fold each end toward the center, dividing the piece into four equal parts. See arrows showing fold lines in Figure #1. [caption id="attachment_26357" align="aligncenter" width="800"]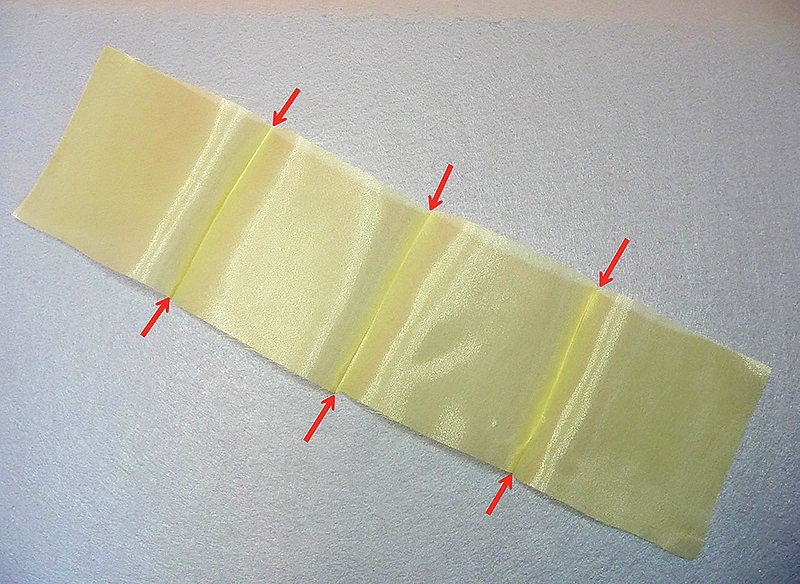 Figure #1[/caption]
2. Assemble supplies. Note the folded sections marked off on the organza. See Figure #2.
[caption id="attachment_26358" align="aligncenter" width="800"]
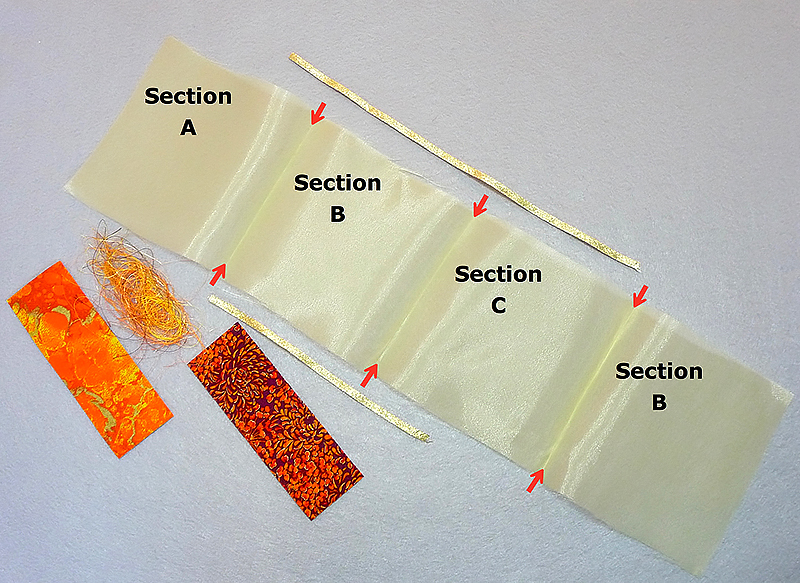 Figure #2[/caption]
3. Layer a piece of water-soluble stabilizer under the organza strip, centering it under section B. Pin in place. Cut snippets of ribbon and fabric to make confetti pieces. Scatter them across section B, placing fabric pieces with right side facing down. Add strands of embroidery thread on top. No need to be neat or even in this process, part of the fun is the random look of the confetti. Just keep bulk of confetti within section B, keeping pieces ½-inch from raw edges on the sides. See Figure #3.
[caption id="attachment_26356" align="aligncenter" width="800"]
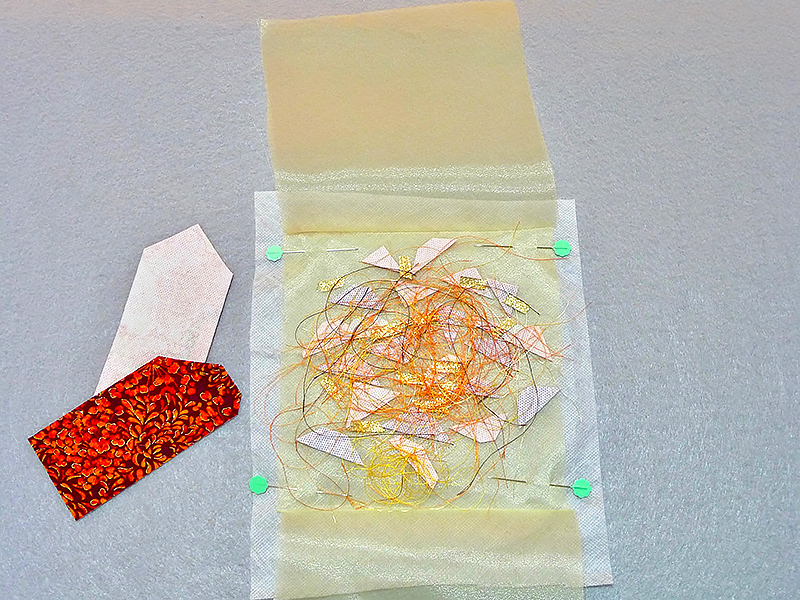 Figure #3[/caption]
4. Fold section A so it covers section B, sandwiching confetti between the two layers. Pin layers together at the sides. See Figure #4.
[caption id="attachment_26359" align="aligncenter" width="800"]
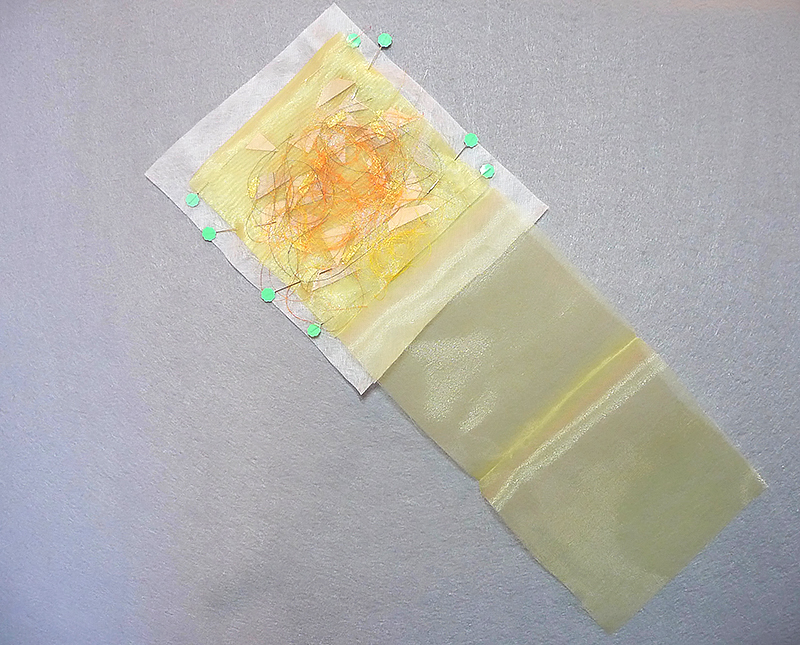 Figure #4[/caption]
5. Carefully carry the piece to the machine. Thread top and bobbin with embroidery thread. Baste ¼-inch from raw edge. See Figure #5a and Figure #5b.
[caption id="attachment_26360" align="aligncenter" width="800"]
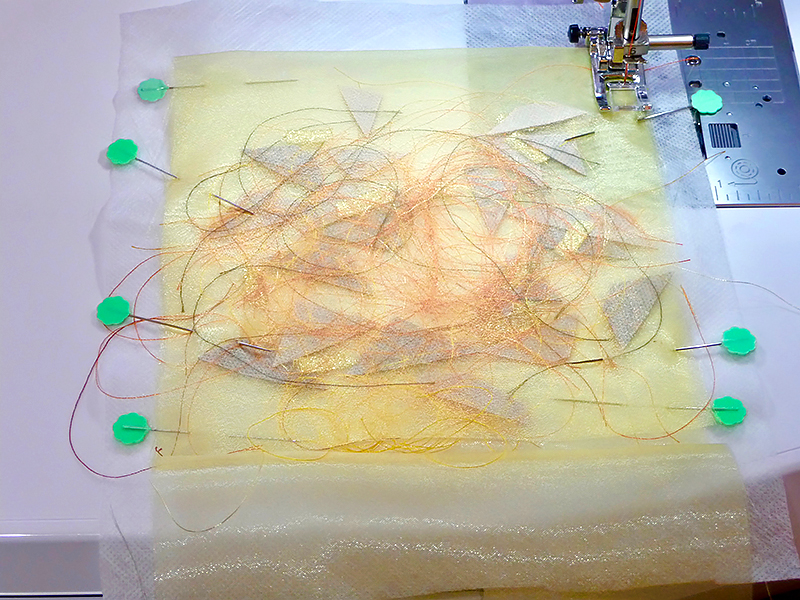 Figure #5a[/caption]
[caption id="attachment_26361" align="aligncenter" width="800"]
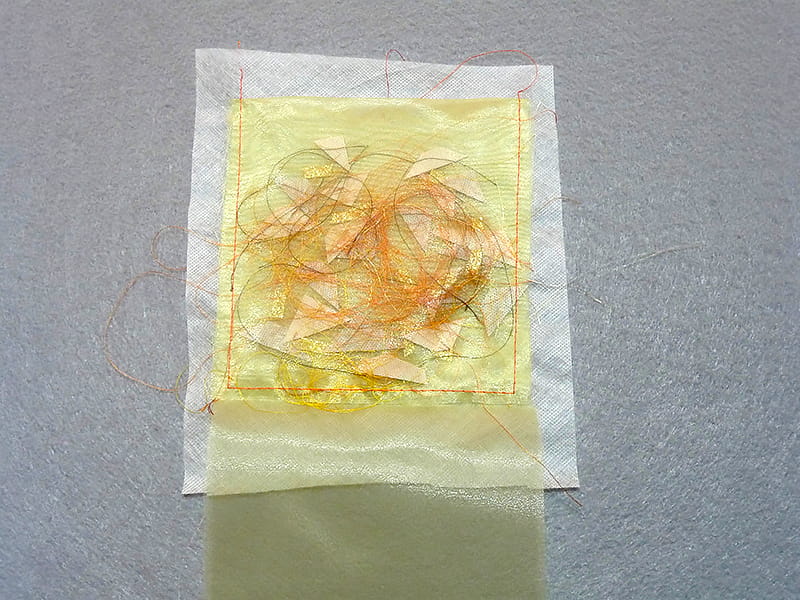 Figure #5b[/caption]
6. Select a swirling stitch such as stitch No. Q18, the Serpentine stitch (Width 7.0 – Length 2.0). To anchor the confetti, stitch multiple rows across the piece, beginning at the top folded edge and removing pins as you sew. See Figure #6a and Figure #6b.
[caption id="attachment_26362" align="aligncenter" width="800"]
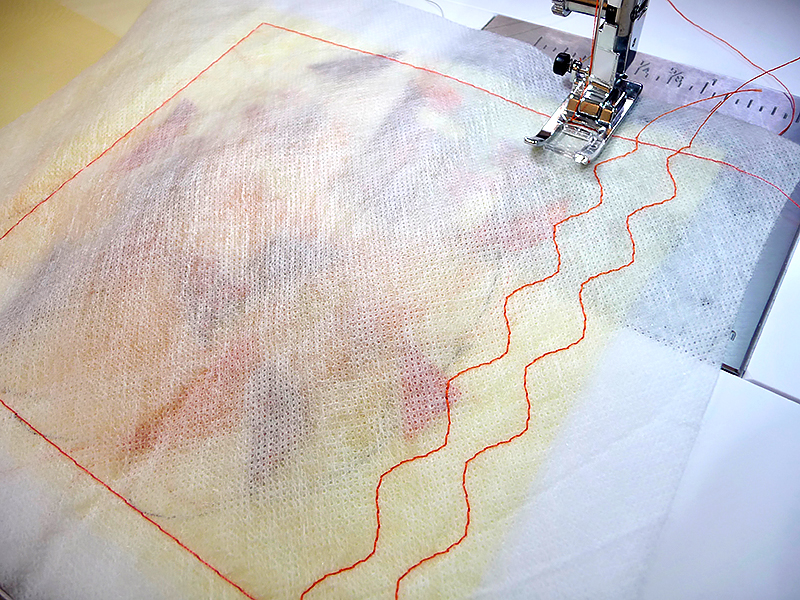 Figure #6a[/caption]
[caption id="attachment_26363" align="aligncenter" width="800"]
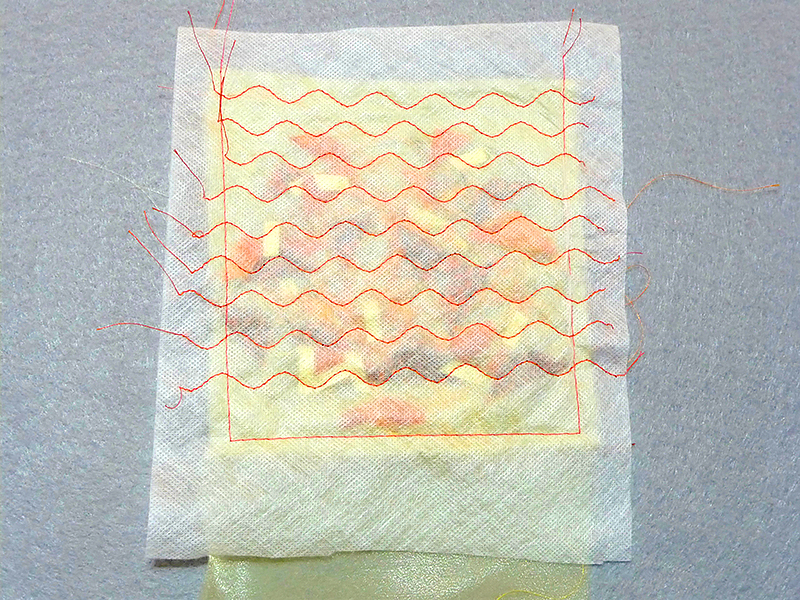 Figure #6b[/caption]
7. Trim away excess stabilizer, taking care that you don’t cut folded edge of fabric at the top. See Figure #7.
[caption id="attachment_26364" align="aligncenter" width="800"]
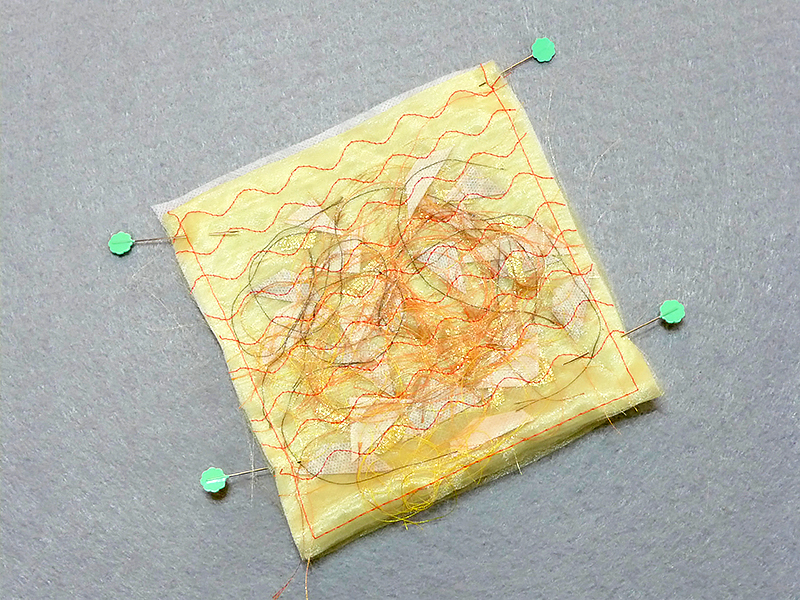 Figure #7[/caption]
8. Fold section B over section C. At this point the wrong sides are facing up. Note: Organza fabric doesn’t have a visible right and wrong side. However, once confetti is added you do have a distinct right and wrong side. Follow instructions so your bag looks pretty after seams are sewn and bag is turned right side out. See Figure #8.
[caption id="attachment_26365" align="aligncenter" width="800"]
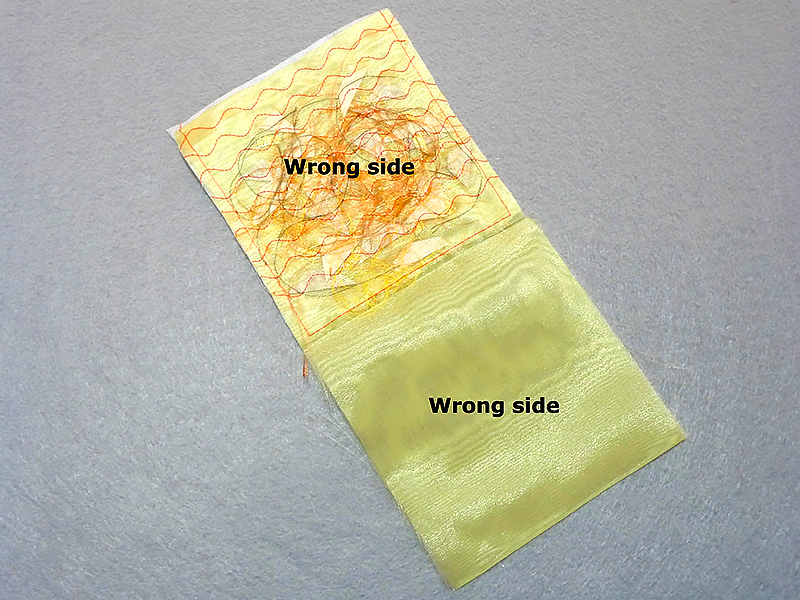 Figure #8[/caption]
9. Now, flip the fabric so right sides are facing and folded edges match at the top edge. Pin layers together. Change to matching sewing thread and sew sides and bottom using a 1/2-inch seam allowance. See Figure #9.
[caption id="attachment_26366" align="aligncenter" width="800"]
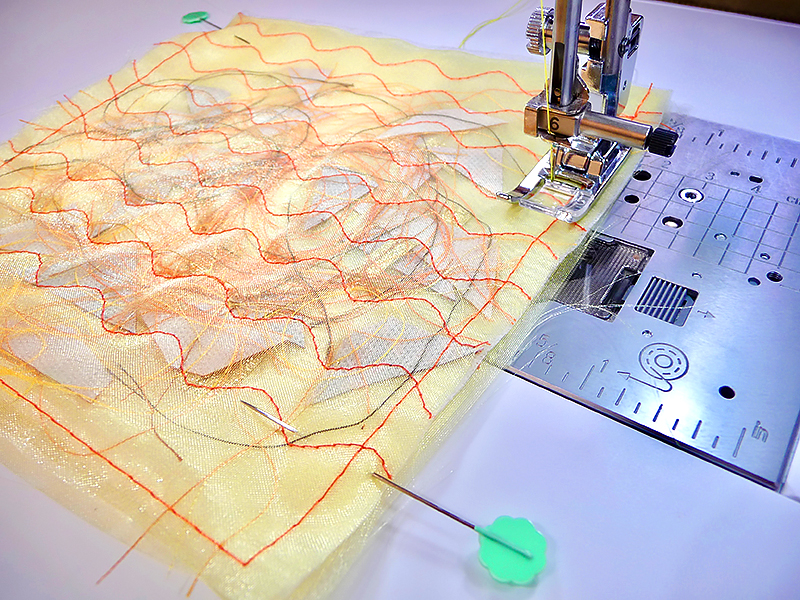 Figure #9[/caption]
10. Trim seam allowance to equal ¼-inch using pinking shears or a pinking blade on a rotary cutter. See Figure #10. Note: As an alternative, trim seam allowance and finish raw edges with a zig zag stitch.
[caption id="attachment_26367" align="aligncenter" width="800"]
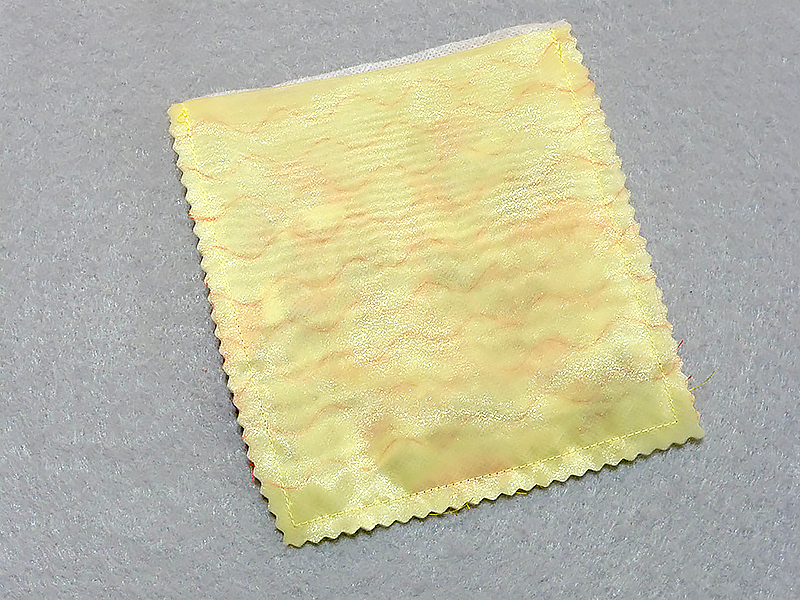 Figure #10[/caption]
11. Turn bag right side out. See Figure #11.
[caption id="attachment_26368" align="aligncenter" width="800"]
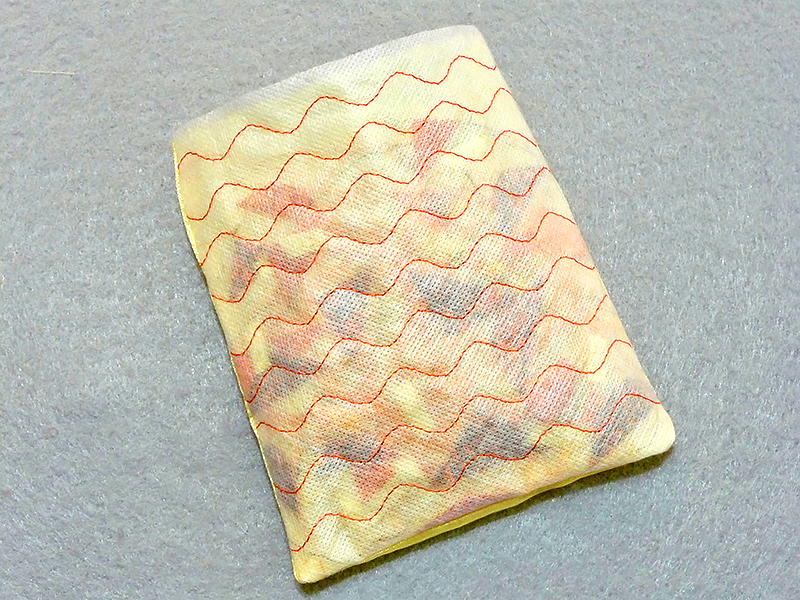 Figure #11[/caption]
12. Wash out stabilizer and let dry. Press with a low temperature if necessary. Fill with something special and tie 10-inch piece of ribbon to close the top. You are finished!
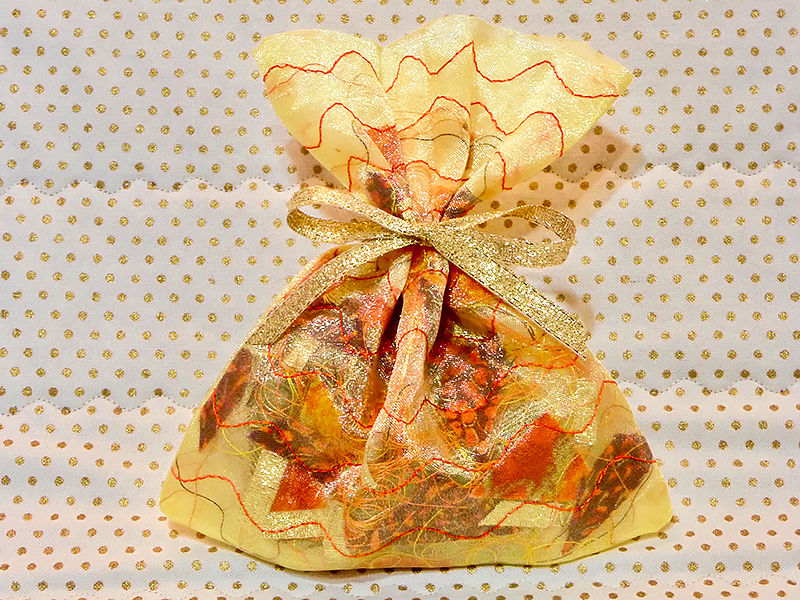 Tip: It can be difficult to tie the ribbon closed on fabric bags. Here is my method: Begin by winding a rubber band around the top. Push the rubber band slightly below the spot where you want to tie the ribbon. Tie ribbon above rubber band, then snip band with scissors to remove. Voila! Your bag is neatly tied!
Options and Ideas:
Festive fabric DIY gift bags are fun to make! They can make small presents extra special. I used sheer organza and snippets of fabric, sparkling gold ribbon, and strands of embroidery thread to make this little confetti bag. Follow along as I show you this confetti technique. Once you see how easy it is, you’ll want to make them for many occasions. Are you ready? Let’s go sew!
Materials and Supplies
- Brother Sewing machine.
- Brother Embroidery Thread
for decorative stitching on outside of bag. - SA540
Water-soluble mesh stabilizer - Basic sewing notions including thread to match fabric.
- Optional but helpful: Pinking shears or pinking blade on rotary cutter.
- Size 11 universal needle for sewing.
- One piece of sheer nylon or polyester organza fabric measuring 6-inches wide X 24-inches long.
- Small fabric remnants for confetti.
- Gold ribbon measuring ¼-inch wide, one piece 6-inches long for confetti and one piece 10-inches long for ribbon tie.
sewing machine.
Steps to Create Confetti Bag 1. Begin by pressing fold lines in the organza as follows: Fold strip in half lengthwise to make a center fold, then fold each end toward the center, dividing the piece into four equal parts. See arrows showing fold lines in Figure #1. [caption id="attachment_26357" align="aligncenter" width="800"]
 Figure #1[/caption]
2. Assemble supplies. Note the folded sections marked off on the organza. See Figure #2.
[caption id="attachment_26358" align="aligncenter" width="800"]
 Figure #2[/caption]
3. Layer a piece of water-soluble stabilizer under the organza strip, centering it under section B. Pin in place. Cut snippets of ribbon and fabric to make confetti pieces. Scatter them across section B, placing fabric pieces with right side facing down. Add strands of embroidery thread on top. No need to be neat or even in this process, part of the fun is the random look of the confetti. Just keep bulk of confetti within section B, keeping pieces ½-inch from raw edges on the sides. See Figure #3.
[caption id="attachment_26356" align="aligncenter" width="800"]
 Figure #3[/caption]
4. Fold section A so it covers section B, sandwiching confetti between the two layers. Pin layers together at the sides. See Figure #4.
[caption id="attachment_26359" align="aligncenter" width="800"]
 Figure #4[/caption]
5. Carefully carry the piece to the machine. Thread top and bobbin with embroidery thread. Baste ¼-inch from raw edge. See Figure #5a and Figure #5b.
[caption id="attachment_26360" align="aligncenter" width="800"]
 Figure #5a[/caption]
[caption id="attachment_26361" align="aligncenter" width="800"]
 Figure #5b[/caption]
6. Select a swirling stitch such as stitch No. Q18, the Serpentine stitch (Width 7.0 – Length 2.0). To anchor the confetti, stitch multiple rows across the piece, beginning at the top folded edge and removing pins as you sew. See Figure #6a and Figure #6b.
[caption id="attachment_26362" align="aligncenter" width="800"]
 Figure #6a[/caption]
[caption id="attachment_26363" align="aligncenter" width="800"]
 Figure #6b[/caption]
7. Trim away excess stabilizer, taking care that you don’t cut folded edge of fabric at the top. See Figure #7.
[caption id="attachment_26364" align="aligncenter" width="800"]
 Figure #7[/caption]
8. Fold section B over section C. At this point the wrong sides are facing up. Note: Organza fabric doesn’t have a visible right and wrong side. However, once confetti is added you do have a distinct right and wrong side. Follow instructions so your bag looks pretty after seams are sewn and bag is turned right side out. See Figure #8.
[caption id="attachment_26365" align="aligncenter" width="800"]
 Figure #8[/caption]
9. Now, flip the fabric so right sides are facing and folded edges match at the top edge. Pin layers together. Change to matching sewing thread and sew sides and bottom using a 1/2-inch seam allowance. See Figure #9.
[caption id="attachment_26366" align="aligncenter" width="800"]
 Figure #9[/caption]
10. Trim seam allowance to equal ¼-inch using pinking shears or a pinking blade on a rotary cutter. See Figure #10. Note: As an alternative, trim seam allowance and finish raw edges with a zig zag stitch.
[caption id="attachment_26367" align="aligncenter" width="800"]
 Figure #10[/caption]
11. Turn bag right side out. See Figure #11.
[caption id="attachment_26368" align="aligncenter" width="800"]
 Figure #11[/caption]
12. Wash out stabilizer and let dry. Press with a low temperature if necessary. Fill with something special and tie 10-inch piece of ribbon to close the top. You are finished!
 Tip: It can be difficult to tie the ribbon closed on fabric bags. Here is my method: Begin by winding a rubber band around the top. Push the rubber band slightly below the spot where you want to tie the ribbon. Tie ribbon above rubber band, then snip band with scissors to remove. Voila! Your bag is neatly tied!
Options and Ideas:
- Fill gift bag with a small gift. I filled mine with gourmet chocolate to use for “I appreciate you” gifts during the upcoming holiday season.
- You can easily increase bag size for larger items. Here is a simple formula: Choose finished width for bag and add 1-inch for seam allowance. Choose finished length and multiply times four. Follow basic instructions for folding the piece to divide it into sections and repeat the rest of the steps as shown.
- Use fabric and organza in any color combination you choose. You’ll find organza in the wedding/formal section of fabric stores.


