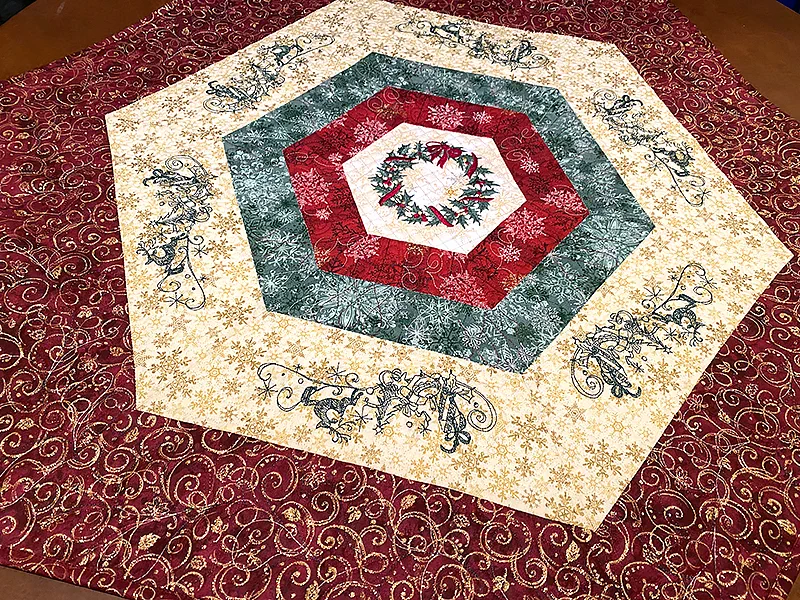
Holiday Quilted Hexagons: Table Mat, Wall Hanging, and More
-Brother Sews Ambassador
Start with just one fashionable hexagon and use the Luminaire 2's Quilting Borders to create a quick and lovely cover for a small table or a wall hanging to give your décor a holiday lift. Leave out the central hexagon to convert your project to a Christmas-tree skirt!
Materials
Note: Yardages based on woven cotton fabric with at least 42" of usable width. Finished size: 30" x 35" • 1/2 yard of fabric for outer border (4) • 3/8 yard of fabric for border 3 • 1/4 yard of fabric for central hexagon • 1/4 yard of fabric for border 2 • 1/8 yard of fabric for inner border (1) • 1 1/4 yard of fabric for backing (includes extra for hooping) • 1/4 yard of fabric for binding • 36" x 45" batting • Tear-away stabilizer • Embroidery, sewing, and quilting threads • Embroidery bobbin threadEquipment
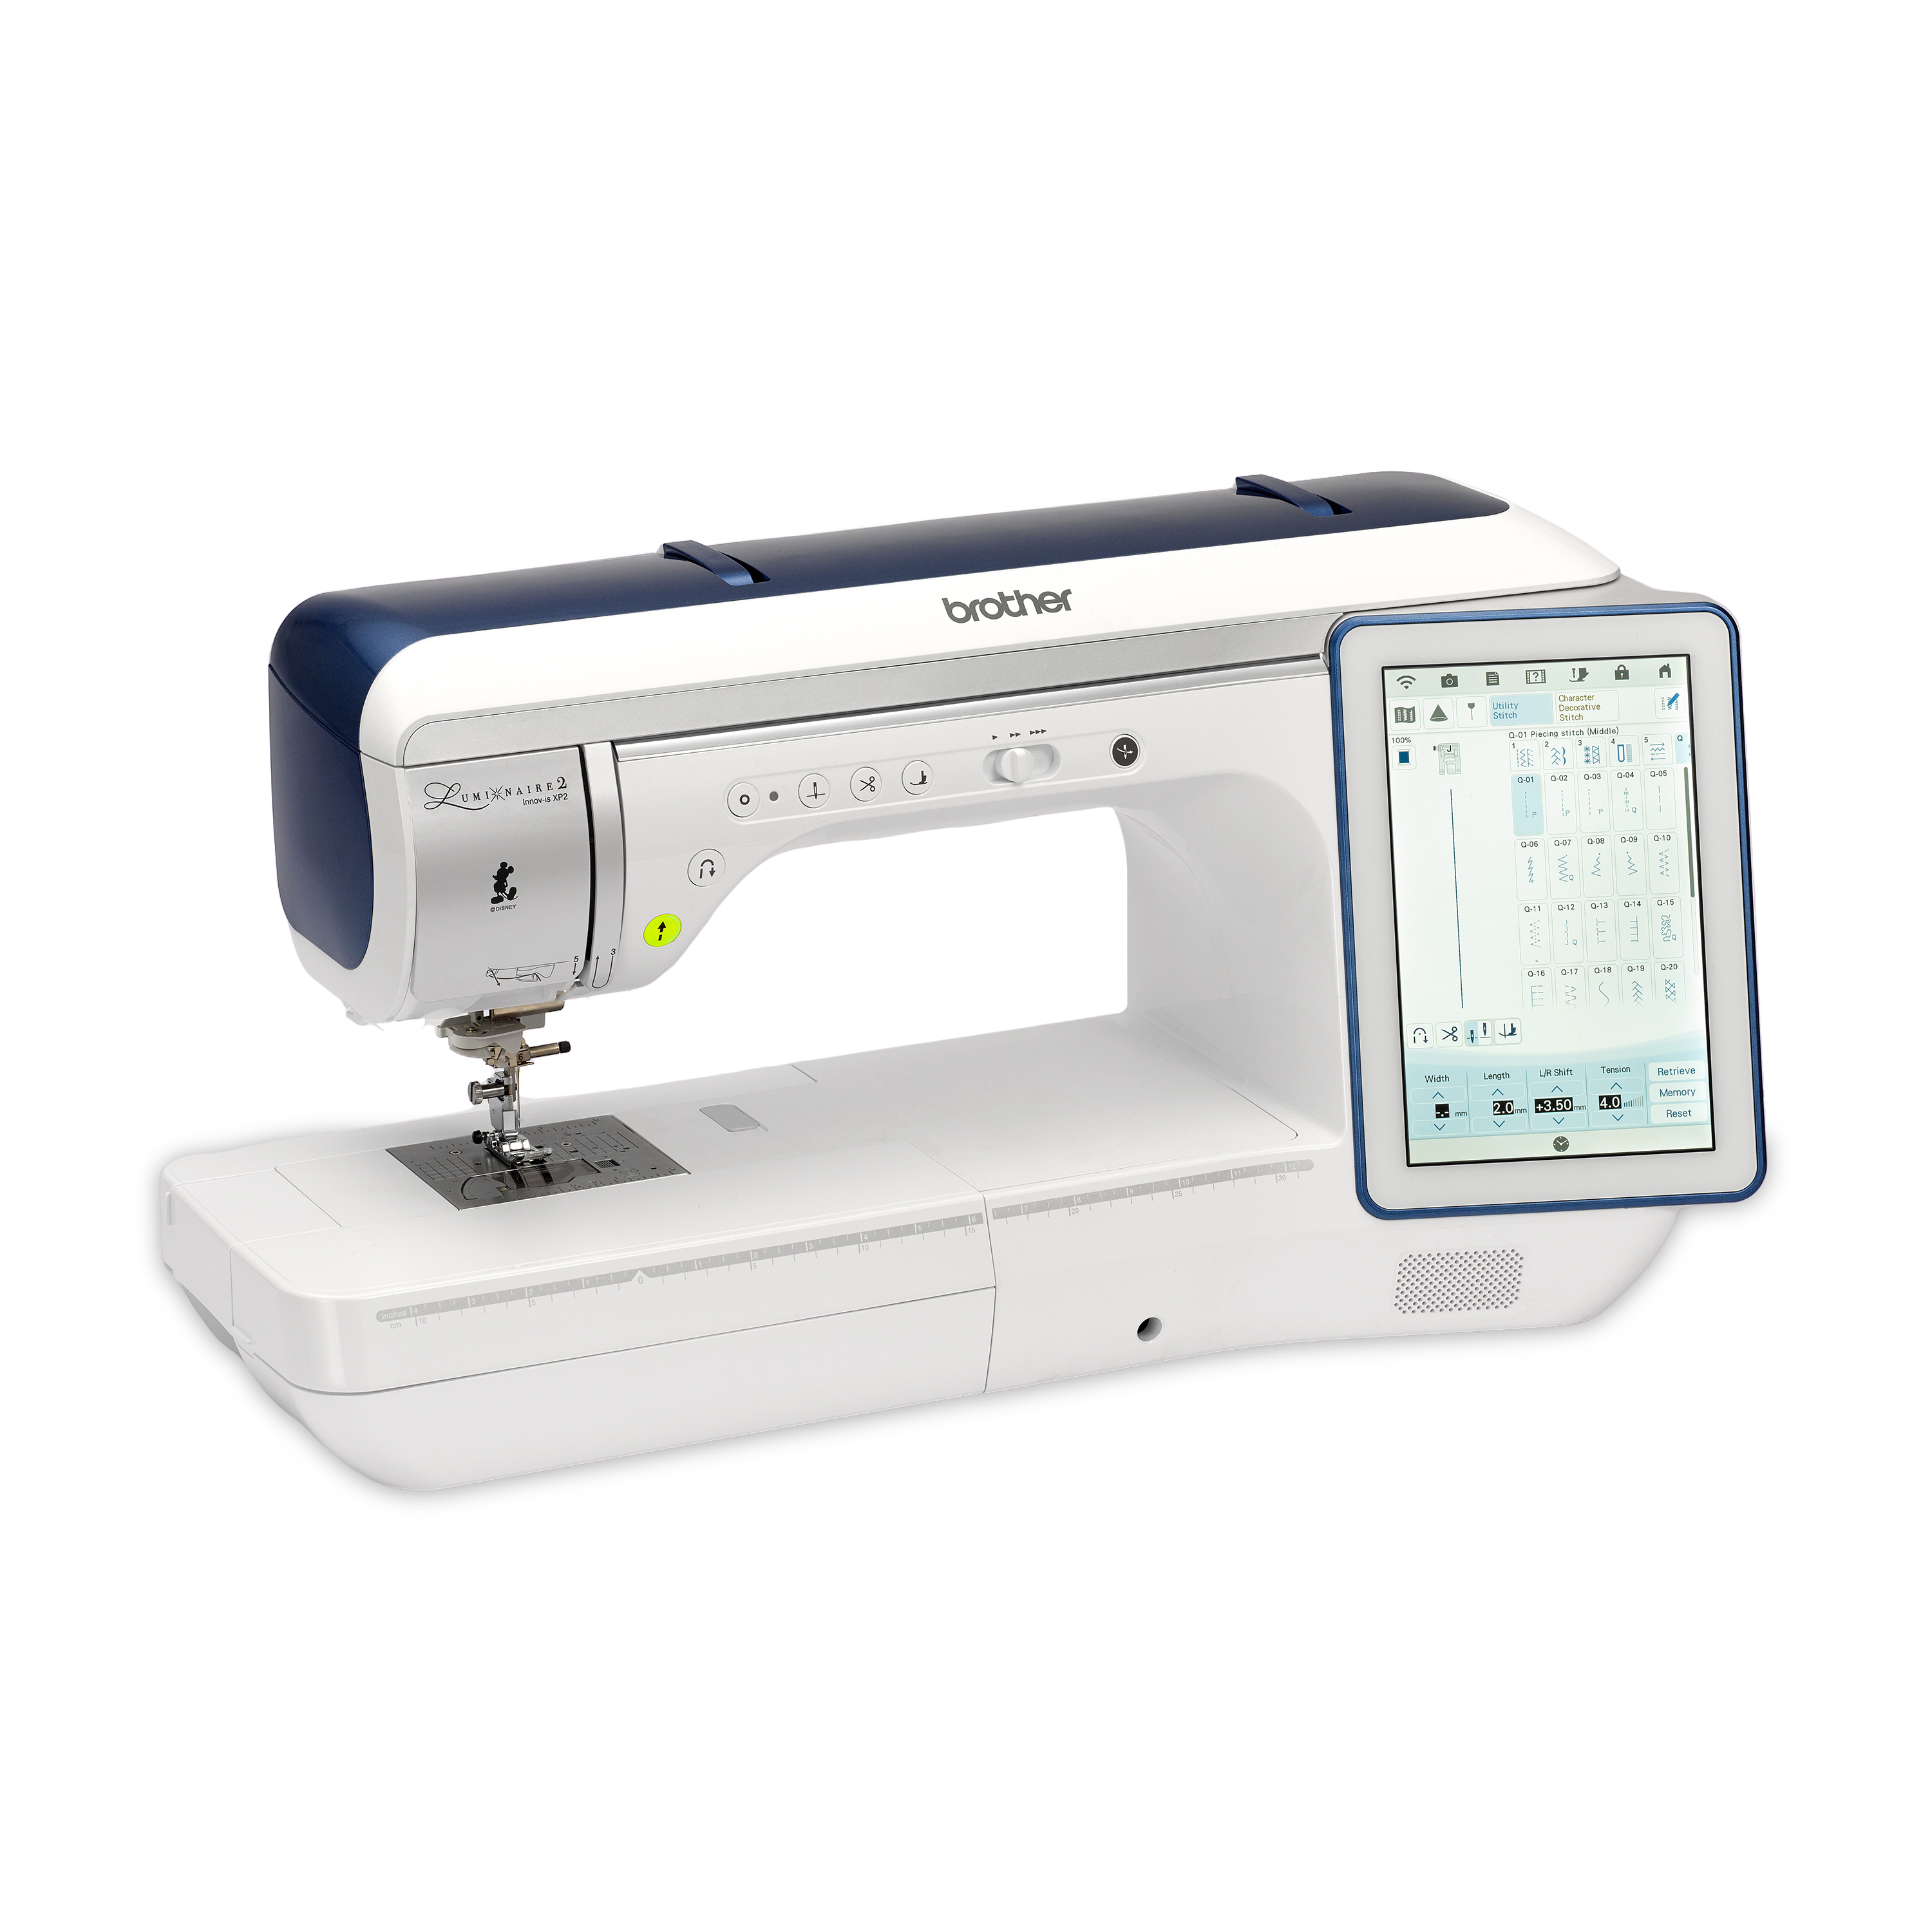
• Luminaire with upgrade pack 2, embroidery hoops, and built-in designs • 1/4" Quilting Foot(SA125) • Optional: Magnetic Sash Frame
(SAMS360) • Rotary cutter, ruler with 60°/120° angle markings, and mat • Removable marking pen
Cutting
• From the center fabric, cut: 1 hexagon from pattern • Hexagon Design• Illustrations and Pattern Hexagon Table Mat
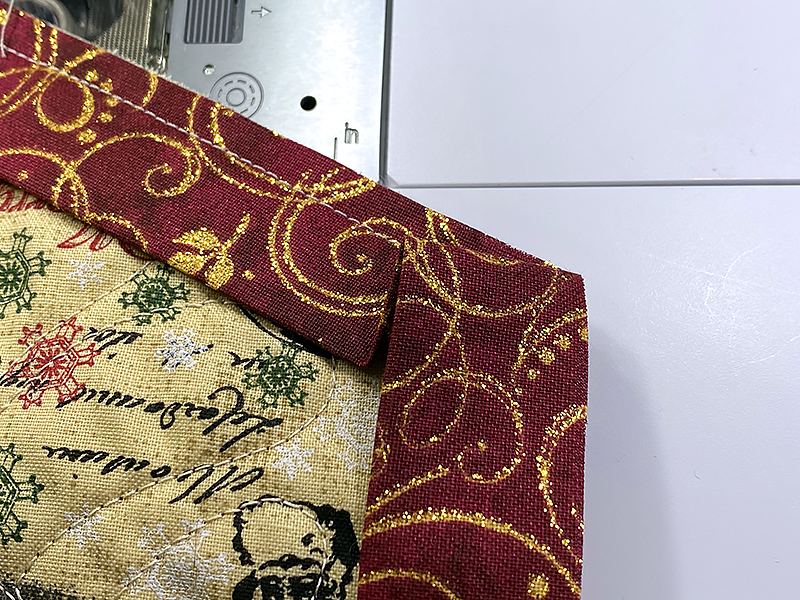
• From the border 1 fabric, cut: 6 rectangles, 2 1/2" x 6 5/8"; trim the ends at a 60° angle as shown in the photo
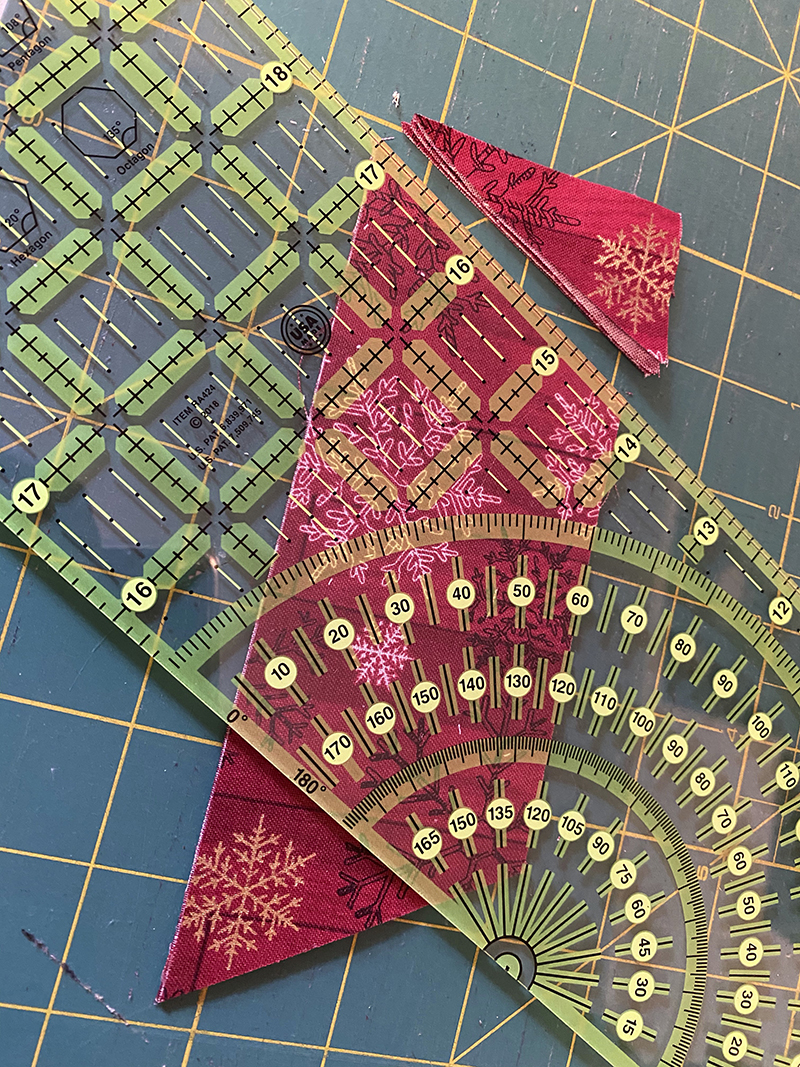 • From the border 2 fabric, cut: 6 rectangles, 2 1/2" x 8 7/8"; trim the ends at a 60° angle as shown in the photo
• From the border 3 fabric, cut: 6 rectangles, 4 1/2" x 13 1/2"; trim the ends at a 60° angle as shown in the photo
• From the border 4 fabric, cut: 6 rectangles, 4 1/2" x 18 1/8"; trim the ends at a 60° angle as shown in the photo
• From the binding fabric, cut: 3 strips, 2 1/4" x width of fabric
• From the border 2 fabric, cut: 6 rectangles, 2 1/2" x 8 7/8"; trim the ends at a 60° angle as shown in the photo
• From the border 3 fabric, cut: 6 rectangles, 4 1/2" x 13 1/2"; trim the ends at a 60° angle as shown in the photo
• From the border 4 fabric, cut: 6 rectangles, 4 1/2" x 18 1/8"; trim the ends at a 60° angle as shown in the photo
• From the binding fabric, cut: 3 strips, 2 1/4" x width of fabric
Quilt-Top Assembly
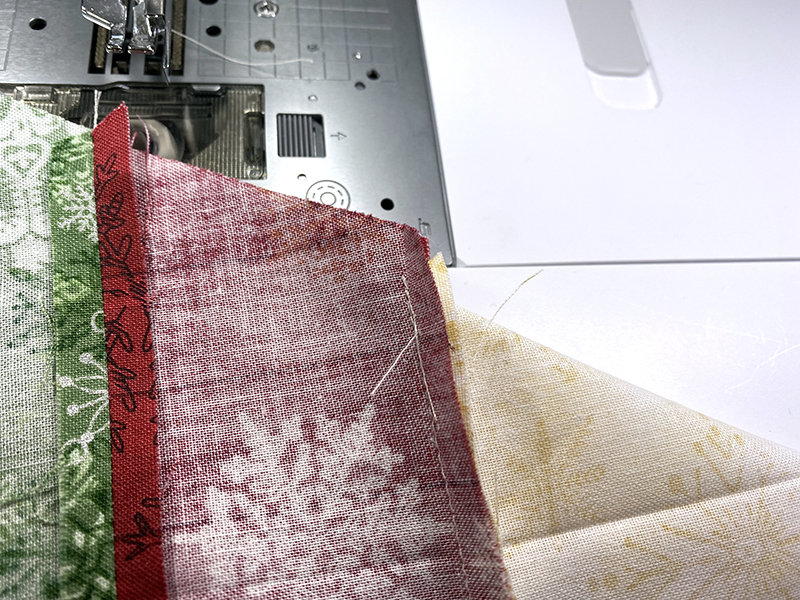
Note: Seam allowances are 1/4". 1. Sew the long edge of a border 1 piece to the short edge of each border 2 piece. The seamlines are the same length, but the corners will not match. Press the seam allowances open. 2. Sew the long edge of each border 2 piece to the short edge of a border 3 piece. Press the seam allowances open.
3. Stitch a border 4 piece to the long edge of each border 3 piece to complete six wedges. Press the seam allowances open.
4. Sewing only between the seamline intersections and backstitching at each end of the seam, attach an assembled wedge to each edge of the central hexagon.
2. Sew the long edge of each border 2 piece to the short edge of a border 3 piece. Press the seam allowances open.
3. Stitch a border 4 piece to the long edge of each border 3 piece to complete six wedges. Press the seam allowances open.
4. Sewing only between the seamline intersections and backstitching at each end of the seam, attach an assembled wedge to each edge of the central hexagon.
 5. Fold the central hexagon as necessary to match the raw edges of two adjacent wedges, right sides together, matching the intersecting seamlines. Stitch from the intersection of the seamlines around the central hexagon to the outer raw edges of the border wedges, backstitching at each end of the seam.
 6. Repeat Step 5 to join the remaining wedges. Press the seam allowances between wedges open; press the central hexagon seam allowances outward.
Embroidery
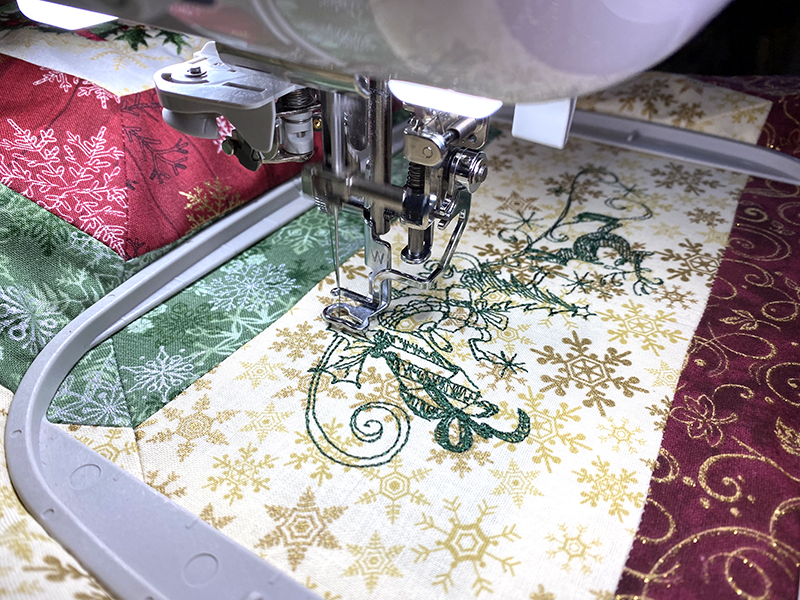
1. Stabilize the quilt top before embroidering each motif and choose an appropriate hoop size for each. The sample uses designs from the Luminaire: the wreath is design 071 from section 13, resized to the maximum; the reindeer border is design 061 from section 14 at its original size. 2. Mark the center of the central hexagon and hoop the quilt top and stabilizer. Bring your chosen design onto the editing screen and resize it if necessary. Save the design as a Stamp to use later in My Design Center. Be sure you toggle the Inside switch to ON so that the machine recognizes the wreath's open center as an area. Rotate the embroidery design if necessary to position an edge of the hexagon (not a corner/point) at the top of the design, especially if you plan to hang the finished project. Note: When you create a Stamp, you can choose the margin (Distance) to leave around the embroidered design. We used 0.052". 3. Center the design on the central hexagon. Use the projector and /or scanner to check the placement and fit of your design on the quilt top. 4. Embroider the design. Remove excess stabilizer and any location markings. 5. Mark the center of each wedge in border 3. Hoop the quilt top and stabilizer at the first location. Bring your chosen design onto the editing screen and resize if necessary. Rotate the design 90° so that it runs vertically along the length of the hoop. Save the motif as a Stamp to use later in My Design Center.
6. Move the design to the marked center of the border piece; use tiny increments of rotation to keep the design centerline parallel to the patch's long seamlines. Use the projector to confirm proper placement and fit. Embroider the design, then remove the excess stabilizer and location markings.
Note: Think about the end use of your project when deciding how the design should be oriented. If you're making a tree skirt, the top of these designs should lie toward the center of the project.
5. Mark the center of each wedge in border 3. Hoop the quilt top and stabilizer at the first location. Bring your chosen design onto the editing screen and resize if necessary. Rotate the design 90° so that it runs vertically along the length of the hoop. Save the motif as a Stamp to use later in My Design Center.
6. Move the design to the marked center of the border piece; use tiny increments of rotation to keep the design centerline parallel to the patch's long seamlines. Use the projector to confirm proper placement and fit. Embroider the design, then remove the excess stabilizer and location markings.
Note: Think about the end use of your project when deciding how the design should be oriented. If you're making a tree skirt, the top of these designs should lie toward the center of the project.
 7. With your motif still on screen, hoop the next wedge to be embroidered. If your motif is asymmetric like the one on the sample, skip a wedge between embroideries.
8. Follow the instructions in Step 6 to embroider two more repeats of the design, embroidering every other wedge around the quilt top. (For a symmetric design, embroider all six wedges and skip Steps 9-11.)
9. Clear the embroidery editing screen and then select the same motif again. Use the on-screen icon to flip (mirror) the design and then rotate it 90°. Be sure the top of the design is still pointing in the correct direction. Save the mirrored motif as a Stamp to use later in My Design Center.
10. Hoop the quilt top, centering a wedge without embroidery. Move the design to the marked center of the border piece; use tiny increments of rotation to keep the design centerline parallel to the patch's long seamlines. Use the projector to confirm proper placement and fit. Embroider the design, then remove the excess stabilizer and location markings.
11. Repeat Step 10 to embroider the last two wedges.
7. With your motif still on screen, hoop the next wedge to be embroidered. If your motif is asymmetric like the one on the sample, skip a wedge between embroideries.
8. Follow the instructions in Step 6 to embroider two more repeats of the design, embroidering every other wedge around the quilt top. (For a symmetric design, embroider all six wedges and skip Steps 9-11.)
9. Clear the embroidery editing screen and then select the same motif again. Use the on-screen icon to flip (mirror) the design and then rotate it 90°. Be sure the top of the design is still pointing in the correct direction. Save the mirrored motif as a Stamp to use later in My Design Center.
10. Hoop the quilt top, centering a wedge without embroidery. Move the design to the marked center of the border piece; use tiny increments of rotation to keep the design centerline parallel to the patch's long seamlines. Use the projector to confirm proper placement and fit. Embroider the design, then remove the excess stabilizer and location markings.
11. Repeat Step 10 to embroider the last two wedges.
Quiltbroidery Tips
• Every time you slide the hoop onto your machine, check around all the edges to be sure that the quilt hasn't become folded back under the hoop. You'll never be sorry you checked! • After you match the starting point of a quilting motif to the endpoint of the previous design, remember to check the alignment of each point around the perimeter. You can use the on-screen controls to nudge the motif as necessary for alignment all around.Quilting
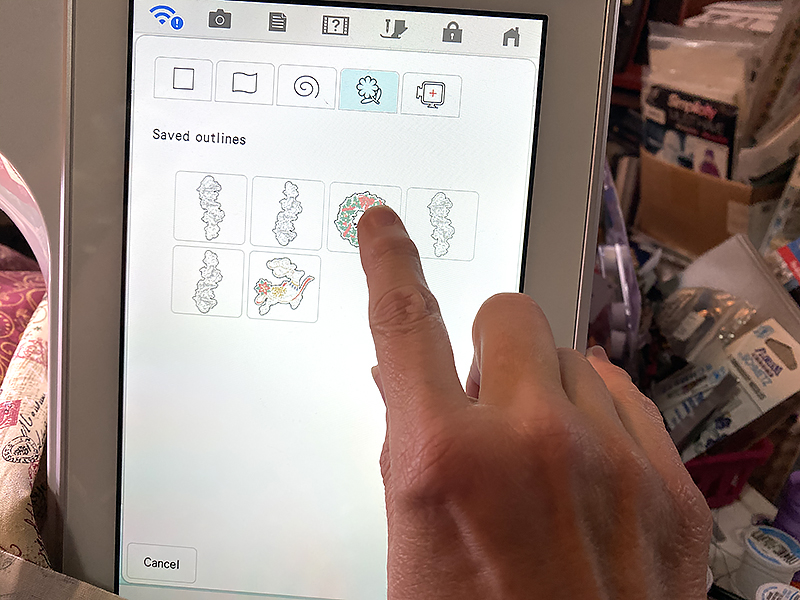
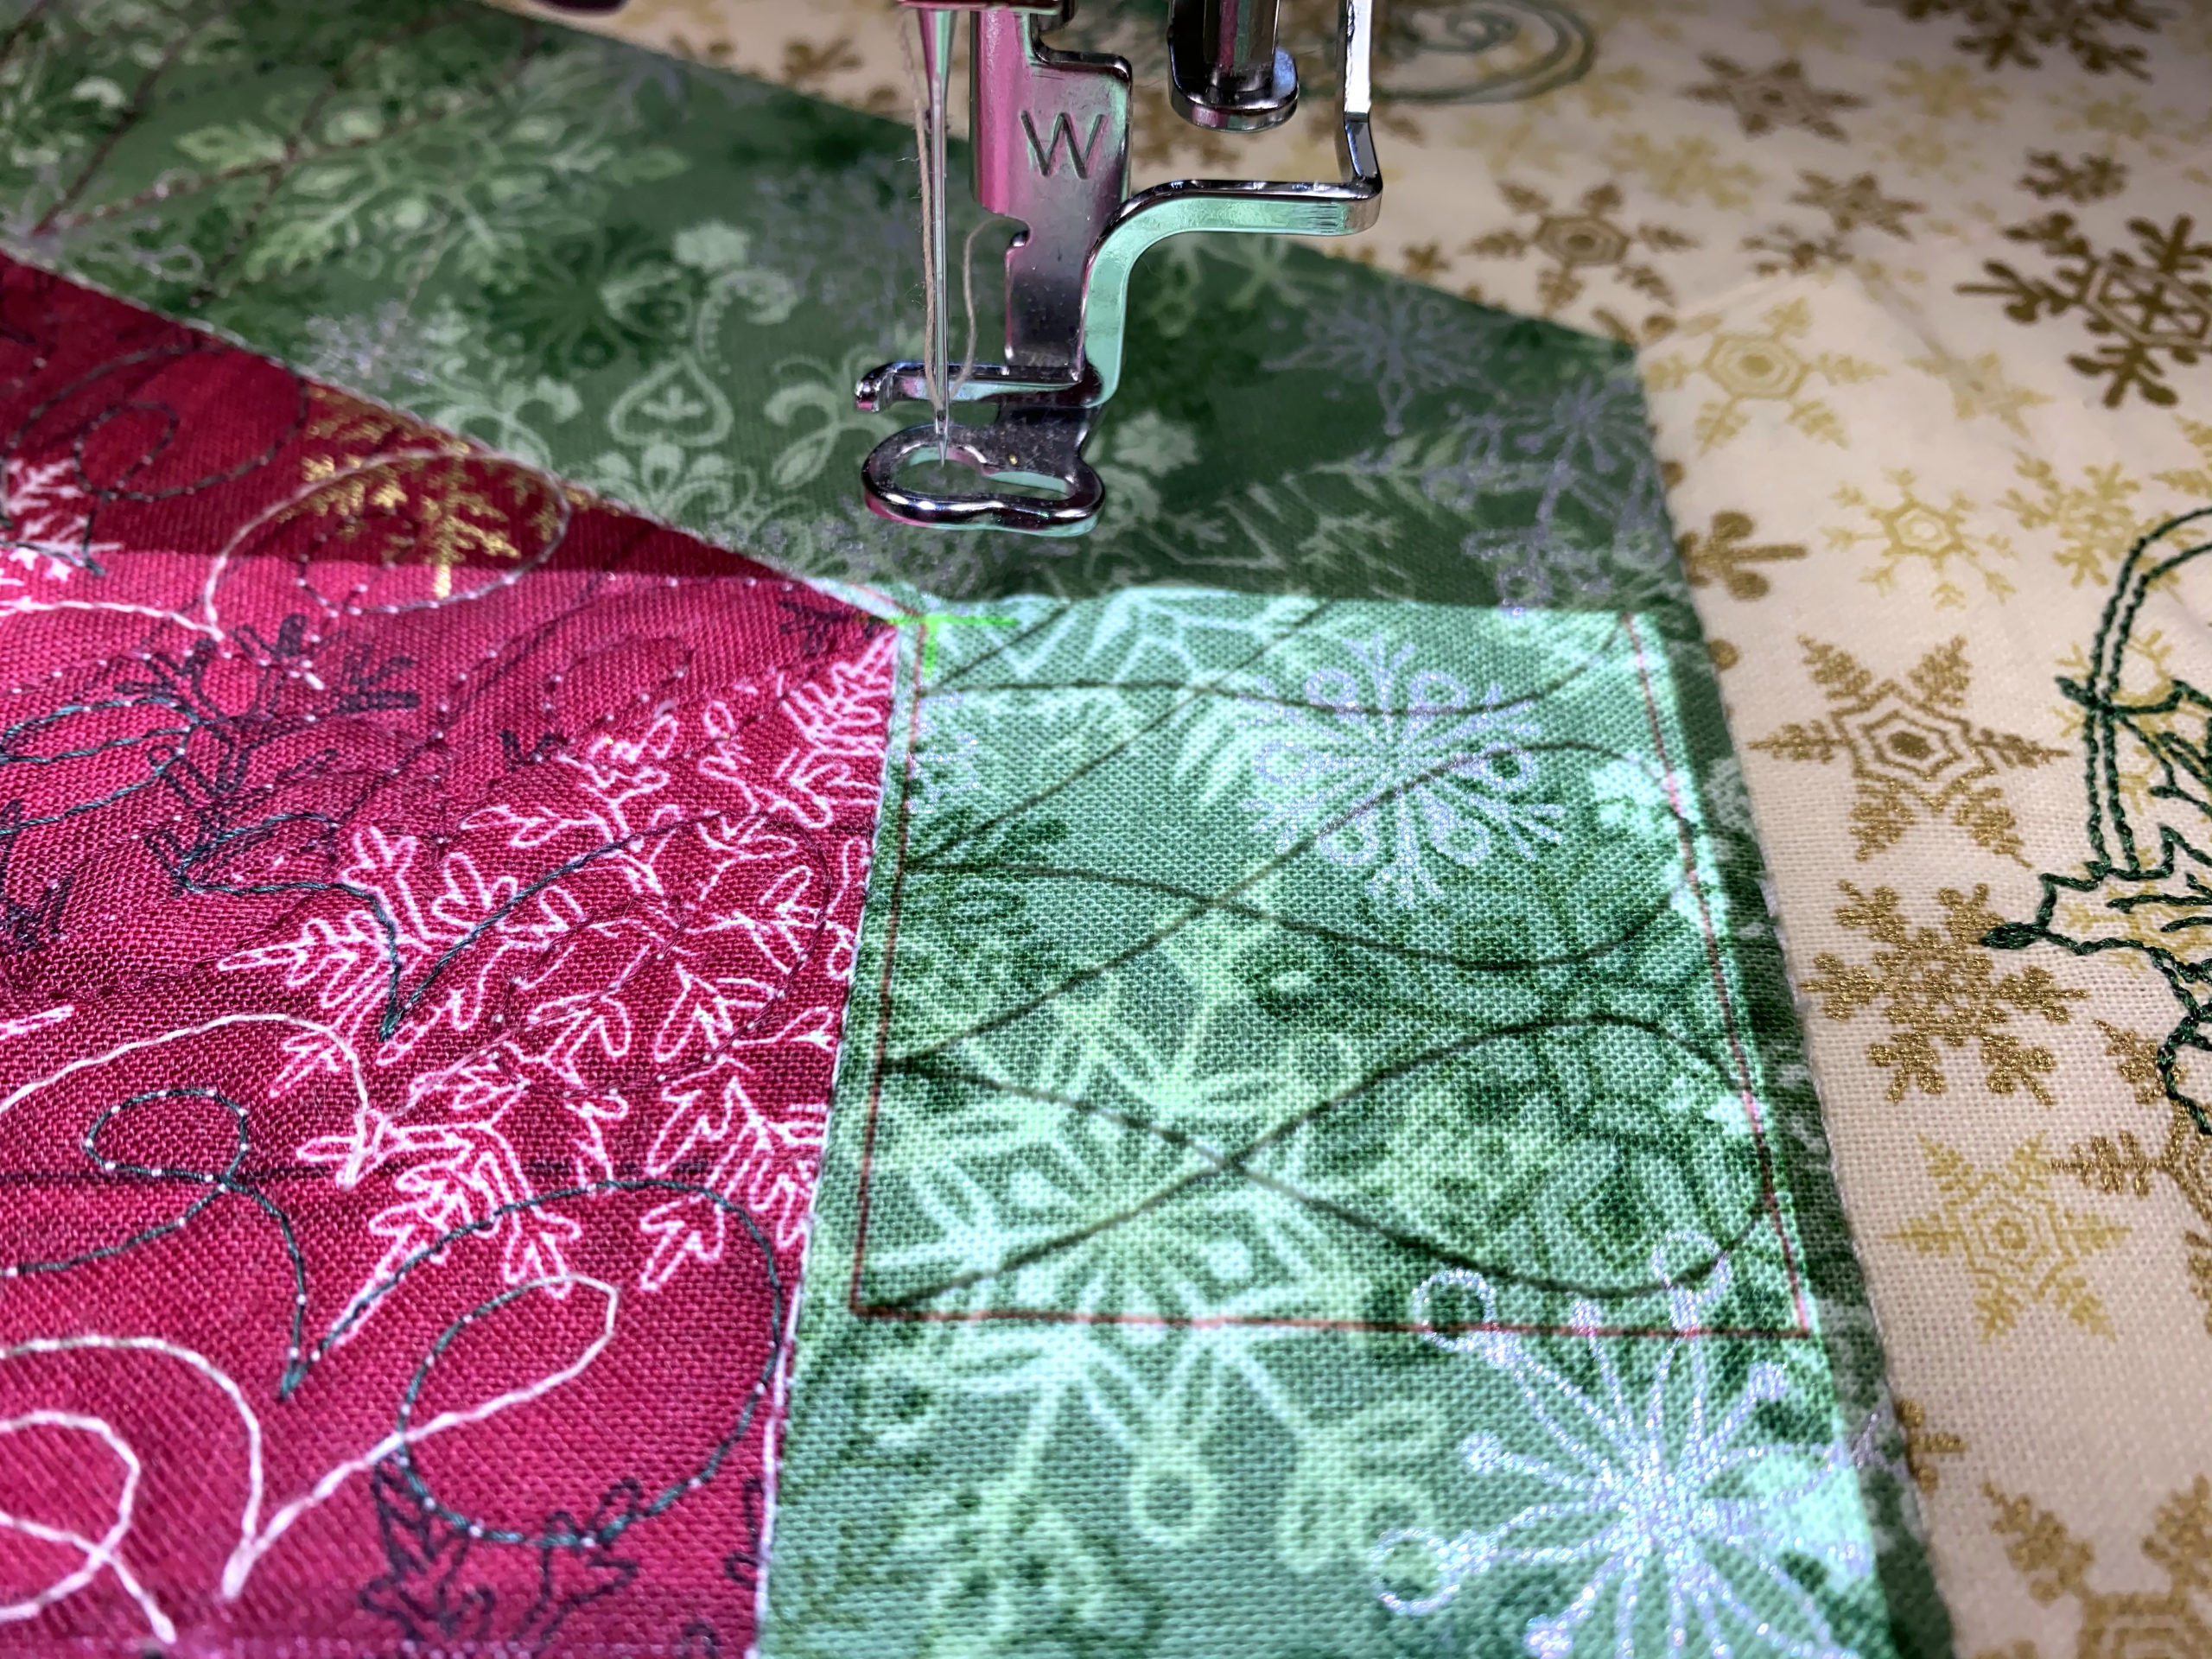
1. Layer the quilt backing, wrong side up; the batting; and the quilt top, right side up. Center the batting and top on the backing; you'll use the excess backing when hooping the project. Baste the layers with basting spray, safety pins, or thread to prevent shifting. 2. Working from the center outward, stitch in the ditch between the hexagon and each pair of borders, forming concentric hexagons. These lines of stitching will be almost invisible in the finished project, but will prevent shifting as you repeatedly hoop to stitch the quilting patterns. Remember to engage the Pivot function to breeze around the corners as you stitch. Also stitch 1/8" inside the outer raw edges through all three layers. 3. Open My Design Center on the Luminaire. Select the hexagon from the shape menu and resize it proportionately so that the width (short dimension) is 5.80"; the long dimension will resize to 6.71", maintaining the shape. Set the line properties to None so no outline will be stitched. Note that the size is a little less than the patterned dimension of the central hexagon because the fabric tends to draw up during sewing and quilting.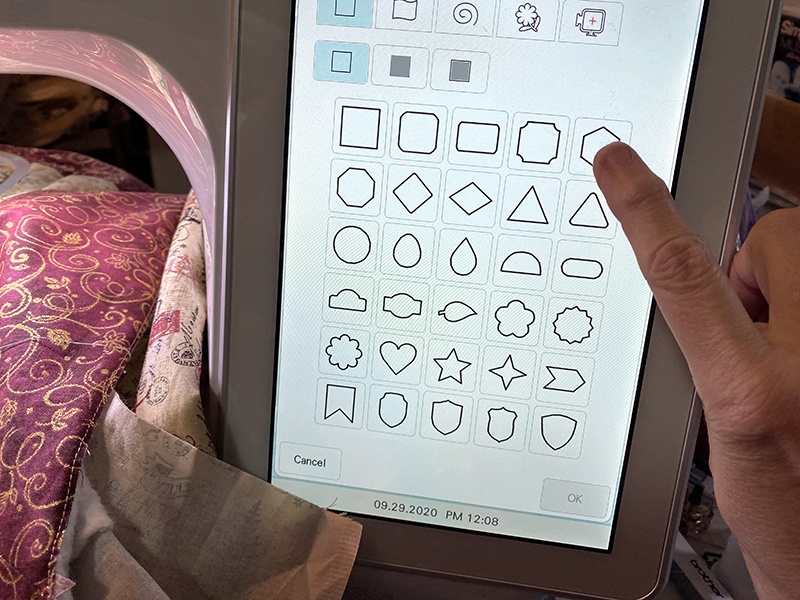 4. Go back into the Shape menu and select Stamp. Choose the saved Stamp of the wreath design. It will appear in the main screen, centered inside the hexagon. If you positioned the top of the wreath at a hexagon edge (not corner/point) when you embroidered, you'll need to rotate the Stamp 90° here.
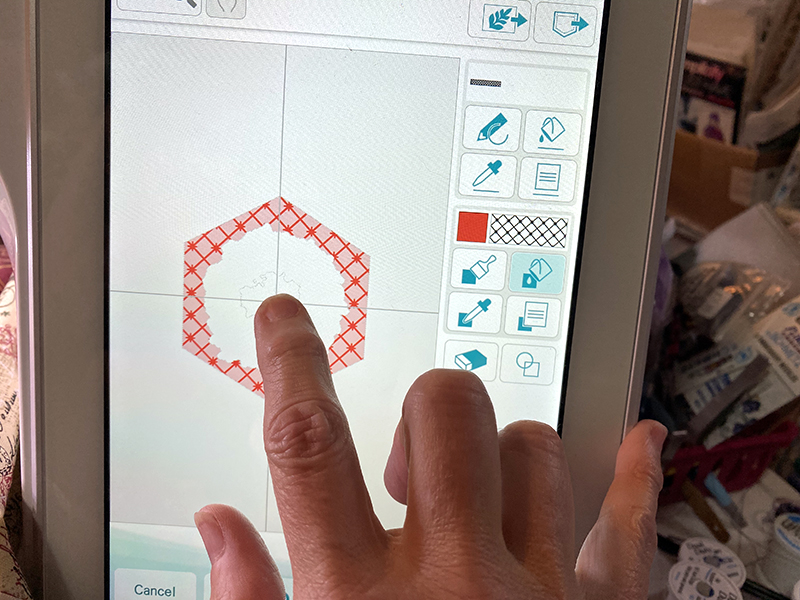
 5. Change the fill properties to your choice of quilting motif and tap the screen between the hexagon and wreath outlines. Tap again in the center area of the wreath.
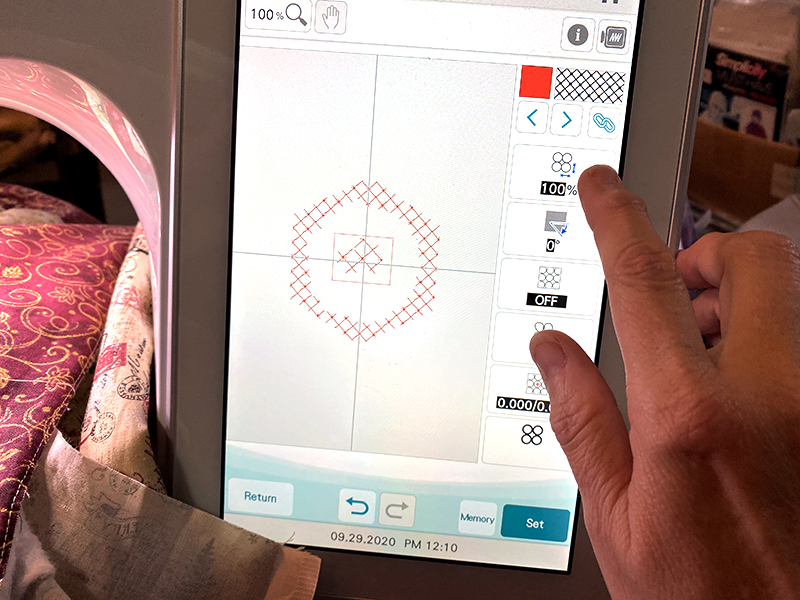
 6. Touch Next. Reduce the size of the quilted design to 75%. Also select the area inside the wreath and change the size again to align the quilting throughout.
 7. Send the edited quilting design to the Embroidery screen. Fill both needle and bobbin with your choice of quilting threads. Hoop the quilt (no stabilizer is needed) with a point of the hexagon facing upward to match the quilting design orientation, centering it in the 10 5/8" x 16" hoop. Use the projector and/or a scan of the hooped quilt to confirm placement, checking around the perimeter to be sure the edges are correctly placed and moving or rotating the quilting design as necessary. Quilt the central hexagon.
 8. Next we'll use the Luminaire 2's Hexagonal Quilting Borders to quilt three of the borders, working from the center outward. Border 1 fits entirely inside the 10 5/8" x 16" hoop, so you may choose to leave the fabric hooped when the central hexagon has been quilted and use manual commands to position the segments of the hexagonal border design.
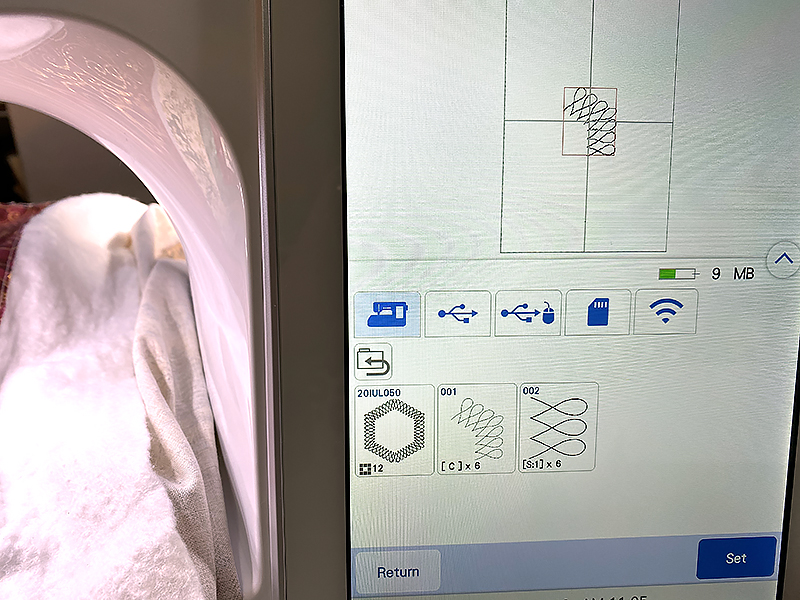
9. Working as directed in the machine guide, choose the hexagonal quilting motif you like from section Q-03 and set the design dimensions. Our central hexagon is a little smaller than the minimum size; however, it's a good idea to place the planned "inner edge" of the border about 1/8" from the seamline so that the quilted motifs on successive borders don't collide. We used 7.09" and a 1.70" border width to create the quilting in the first border. Touch Next and choose the single stitch; save the design to memory.
8. Next we'll use the Luminaire 2's Hexagonal Quilting Borders to quilt three of the borders, working from the center outward. Border 1 fits entirely inside the 10 5/8" x 16" hoop, so you may choose to leave the fabric hooped when the central hexagon has been quilted and use manual commands to position the segments of the hexagonal border design.
9. Working as directed in the machine guide, choose the hexagonal quilting motif you like from section Q-03 and set the design dimensions. Our central hexagon is a little smaller than the minimum size; however, it's a good idea to place the planned "inner edge" of the border about 1/8" from the seamline so that the quilted motifs on successive borders don't collide. We used 7.09" and a 1.70" border width to create the quilting in the first border. Touch Next and choose the single stitch; save the design to memory.

 10. To stitch border 1 manually, without rehooping:
• Send the machine to Embroidery mode and select the first corner section (not the entire quilting pattern). Use the on-screen icons as necessary to position and stitch the first section of quilting.
10. To stitch border 1 manually, without rehooping:
• Send the machine to Embroidery mode and select the first corner section (not the entire quilting pattern). Use the on-screen icons as necessary to position and stitch the first section of quilting.
 • When the first section of your Quiltbroidery is complete, delete the pattern on screen and select the first side section from memory. Position it as necessary, matching the start/end points of the motifs. Use the projector to verify placement. Stitch the side unit.
• Repeat around the first border, alternating between the corner and side units, until you have completed the quilting on the first border.
11. To stitch borders 2 and 4 (and border 1, if you choose to rehoop):
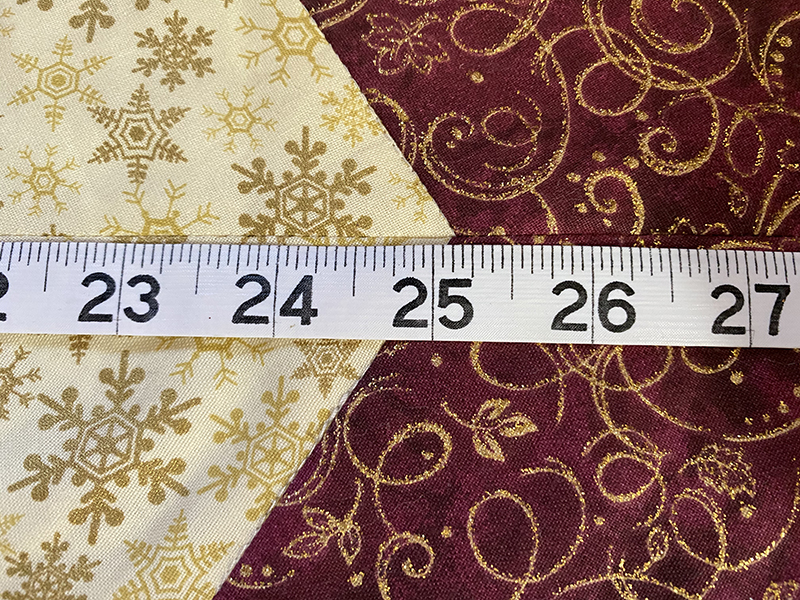
• Measure your quilt to determine the actual dimensions for the border: corner-to-corner across the center, and the width of the border. There will be some variation from the ideal pattern measurements. Remember to add about 1/4" (1/8" at each end) to the corner-to-corner measurement; you may also want to measure two or all three of the corner-to-corner dimensions in order to work with an average. We used 25 1/2" as the longest diagonal for this border. Enter a border design width that is 1/4" – 1/2" narrower than the actual measurement between seamlines.
• When the first section of your Quiltbroidery is complete, delete the pattern on screen and select the first side section from memory. Position it as necessary, matching the start/end points of the motifs. Use the projector to verify placement. Stitch the side unit.
• Repeat around the first border, alternating between the corner and side units, until you have completed the quilting on the first border.
11. To stitch borders 2 and 4 (and border 1, if you choose to rehoop):
• Measure your quilt to determine the actual dimensions for the border: corner-to-corner across the center, and the width of the border. There will be some variation from the ideal pattern measurements. Remember to add about 1/4" (1/8" at each end) to the corner-to-corner measurement; you may also want to measure two or all three of the corner-to-corner dimensions in order to work with an average. We used 25 1/2" as the longest diagonal for this border. Enter a border design width that is 1/4" – 1/2" narrower than the actual measurement between seamlines.
 • Choose the quilting motif you like and enter the dimensions for the border on the screen. Follow the on-screen instructions to stitch the pieces of the border quilting, one after another, moving the hoop as instructed. You can use the optional accessory Magnetic Sash Frame for easier rehooping.
• Remember to use the projector to check the placement and rotation of each border segment, checking all the points around the perimeter.
• Choose the quilting motif you like and enter the dimensions for the border on the screen. Follow the on-screen instructions to stitch the pieces of the border quilting, one after another, moving the hoop as instructed. You can use the optional accessory Magnetic Sash Frame for easier rehooping.
• Remember to use the projector to check the placement and rotation of each border segment, checking all the points around the perimeter.
 12. To quilt border 3:
• Hoop the quilt with the first wedge of border 3 approximately centered in the hoop.
• Open My Design Center and scan the hooped quilt. Adjust the darkness of the scanned image so that the seamlines are visible.
• Set the line properties to None. Tap the corners of the border 3 segment, one after another. You can position additional points along the sides of the patch if they aren't perfectly straight. When you come back to the beginning, tap on the first point to close the shape.
• Open the Shapes screen and choose Stamps. Select the stamp that corresponds to your border embroidery's orientation (if you have mirrored half of the motifs). You may need to reduce the darkness of the background scan in order to see the stamp on the screen. Position the stamp to surround the scanned embroidery correctly.
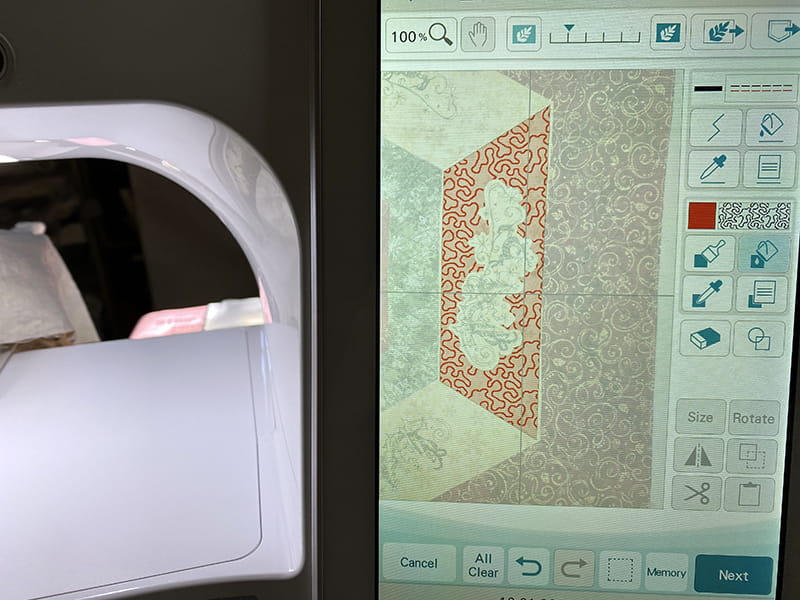
• Set the area properties to Stippling and select Flood Fill. Tap the screen between the patch outline and the stamp to fill the shape with stippling.
12. To quilt border 3:
• Hoop the quilt with the first wedge of border 3 approximately centered in the hoop.
• Open My Design Center and scan the hooped quilt. Adjust the darkness of the scanned image so that the seamlines are visible.
• Set the line properties to None. Tap the corners of the border 3 segment, one after another. You can position additional points along the sides of the patch if they aren't perfectly straight. When you come back to the beginning, tap on the first point to close the shape.
• Open the Shapes screen and choose Stamps. Select the stamp that corresponds to your border embroidery's orientation (if you have mirrored half of the motifs). You may need to reduce the darkness of the background scan in order to see the stamp on the screen. Position the stamp to surround the scanned embroidery correctly.
• Set the area properties to Stippling and select Flood Fill. Tap the screen between the patch outline and the stamp to fill the shape with stippling.
 • Proceed to the Embroidery screen. Use the on-screen controls to fine-tune the position of the quilting stitches around the embroidery. Check the perimeter of the patch as well.
• Embroider the quilting stitches.
• You may be able to reuse the stippling that you created for other border 3 patches. If not, just repeat the steps above for each patch.
• When the first three border 3 segments have been quilted, repeat the process above to program and stitch the stippling around the mirrored embroidery designs, using the mirror-image Stamp you saved earlier.
• Proceed to the Embroidery screen. Use the on-screen controls to fine-tune the position of the quilting stitches around the embroidery. Check the perimeter of the patch as well.
• Embroider the quilting stitches.
• You may be able to reuse the stippling that you created for other border 3 patches. If not, just repeat the steps above for each patch.
• When the first three border 3 segments have been quilted, repeat the process above to program and stitch the stippling around the mirrored embroidery designs, using the mirror-image Stamp you saved earlier.
Finishing
1. When the quilting is finished, trim the backing and batting to match the edges of the quilt top. 2. Remove the selvages from the binding strips and join them with diagonal seams to make one long strip. Press the strip in half lengthwise, wrong sides together. 3. Use the prepared binding to finish the edges of the quilt, mitering the binding at each corner and neatly finishing the end of the strip. Remember that the corners of this project are not right angles, so the folds necessary for mitering are a little different.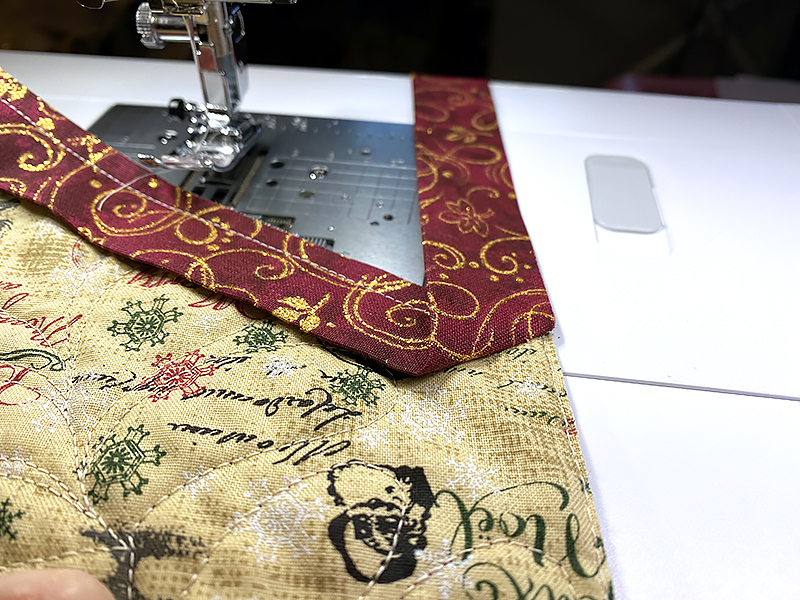
 • To hang the hexagonal quilt, sew small plastic rings from the curtain department to the quilt backing at the two top and two side corners.
• To make a Christmas Tree Skirt instead, omit the central hexagon and leave the seam between one pair of wedges open. Bind all of the raw edges after quilting, and attach ties or other fasteners along the open wedge seam.
• To hang the hexagonal quilt, sew small plastic rings from the curtain department to the quilt backing at the two top and two side corners.
• To make a Christmas Tree Skirt instead, omit the central hexagon and leave the seam between one pair of wedges open. Bind all of the raw edges after quilting, and attach ties or other fasteners along the open wedge seam.
 CLICK HERE FOR PDF!
Tags
Shop this Project
Ready to make this project your own? Well, Brother has you covered! The products in this inspiring project are available for purchase so you can click, shop, and get to sewing!
Sewing Machines
Related Projects
Stay Connected
* Required fields