Snowflake Placemats
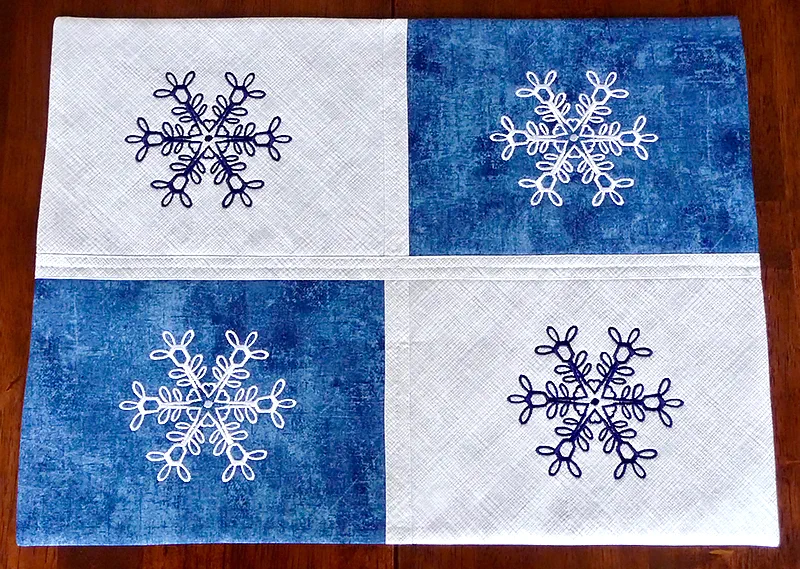
Brother Sews Ambassador Stitching fabric snowflakes is a fun way to spend a winter’s day, no matter what climate you live in. Snowflakes seem to come to life when stitched with contrasting colors on ordinary quilt-weight cotton. These single-color lacy snowflake designs are quick to stitch and fun to make. Embroidered snowflakes are a wonderful addition to rectangular fabric blocks for a winter-themed placemat. Are you ready? Let’s go sew!
Supplies:
- Brother sewing and embroidery machine. Note: Machine featured in this project is the Brother NS 1750D. You can use any machine with 4-inch hoop capability.
- Brother Embroidery Threads and Bobbin Thread for embroidering.
- SA184 Edge Joining Foot
- Basic notions, including thread to match or blend with fabrics. A rotary cutter, mat, and ruler are recommended for cutting precise rectangles after embroidering.
- Snowflake design Br-fp115 from the Brother iBroidery.com digital download site.
Fabrics for front and back of one placemat:
- Color A: Dark fabric for top of placemat: Two rectangles of quilt weight cotton measuring 9-inches wide X 7-inches long.
- Color B: Light fabric for top of placemat: Two rectangles of quilt weight cotton measuring 9-inches wide X 7-inches long.
Note: Rectangles are cut slightly oversized to allow for precisely cutting rectangles after embroidery is completed.
- Color A or B: One rectangle of light or dark fabric cut to fit the final size of the completed top piece for backing.
Tip: 3/4 yard of fabric is enough to cut backing for a set of four placemats.
- Color B: Light fabric: One strip measuring 1-inch wide X 18-inches long and one strip measuring 1-inch wide X 14-inches long for horizontal and vertical trim on placemat.
Note: Back each rectangle of fabric A and B with a layer of fusible craft fleece. This serves as padding for the placemat, as well as stabilizer for embroidering.
Steps:
This Lacy Snowflake design is perfect for this project. It’s lightweight, made up of satin stitches, and re-sizes easily using the built-in sizing feature on the machine. If you look closely, you will see tiny hearts in the center of the design. I looked at a lot of snowflakes before choosing this one and this one won me over! I used white thread on the dark fabric and dark blue thread on the light-colored fabric. See Figures #1a and #1b.
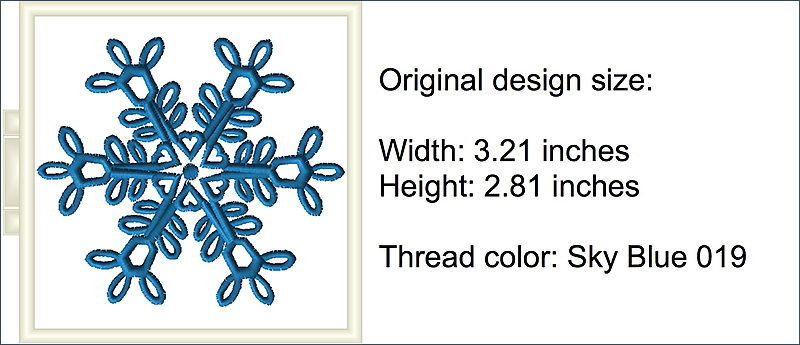
Figure #1a
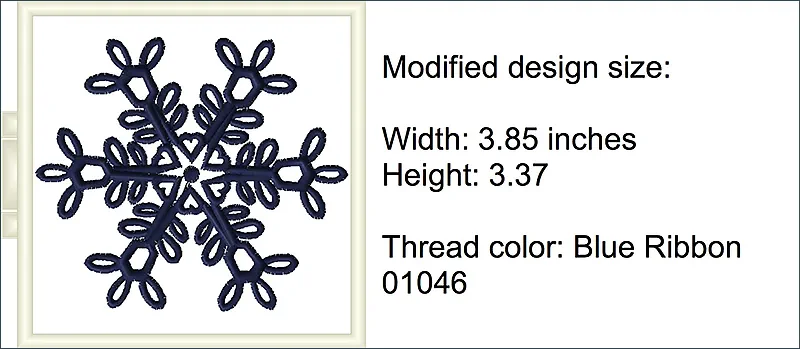
Figure #1b
Basic steps for creating placemats:
- Embroider snowflakes in the center of each rectangle.
- Join rectangle blocks using an edge-to-edge seam technique to create top of placemat.
- Add trim strips to cover raw edges.
- Cut back piece to fit front and sew layers together to finish placemat.
1. Transfer design to machine. Use the built-in sizing feature to create a design 20 percent larger than the original as follows: Touch the size key and then touch the proportional sizing key to resize design to maximum amount. Note: With this feature the stitch count of the design does not change. The resulting design is a little less dense but still stitches out beautifully. See Figure #2.
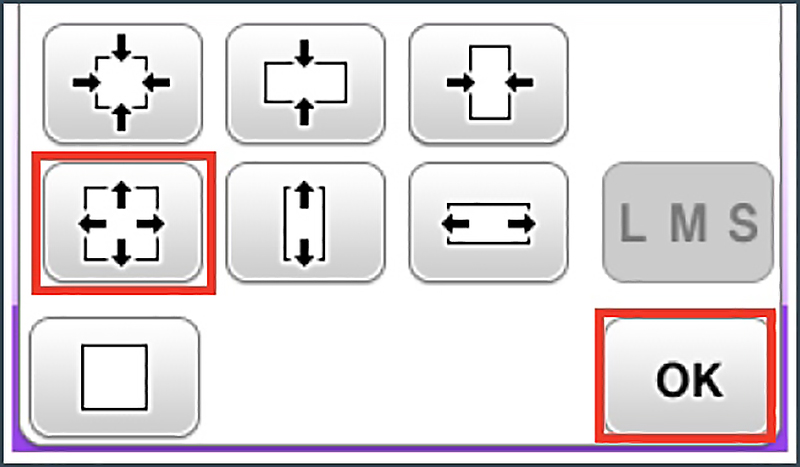
Figure #2
2. Select first oversized rectangle. Center fabric in hoop and embroider snowflake in center. See Figure #3.
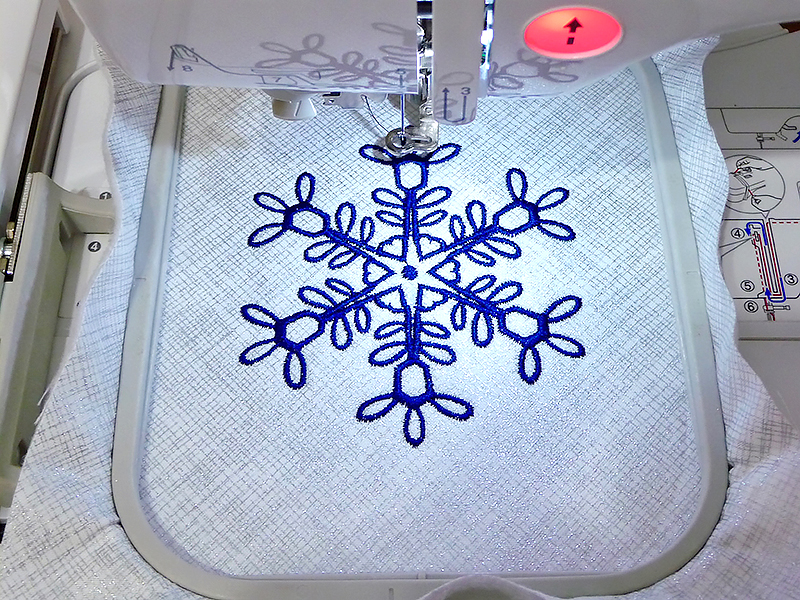
Figure #3
- Repeat embroidery process for each rectangle.After embroidery, carefully cut each block into pieces measuring 8-inches wide X 6-inches long, keeping the snowflake in the center of the block.
- Cut back piece using completed top measurement for size.
- Select the two narrow trim strips. Press long raw edges under ¼-inch to create strips measuring ½-inch wide.
- See prepared pieces in Figure #7.
- Use a third, coordinating fabric for backing and narrow strips.
- Use alternative fabric combinations and designs to embellish blocks for other seasons.
- Increase size of rectangles for a larger size placemat.
Note: It’s important to cut all edges straight and even. Arrange blocks as shown in Figure #4, with raw edges touching. See Figure #4.
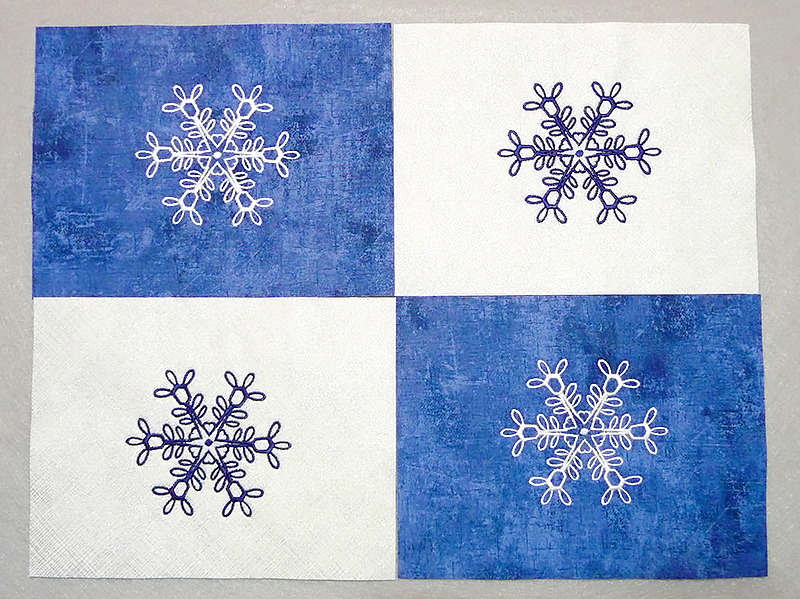
Figure #4
3. Separate blocks into two rows. Prepare to sew each set of blocks together matching short raw edges. See enhanced photo with arrows showing matching edges in Figure #5.
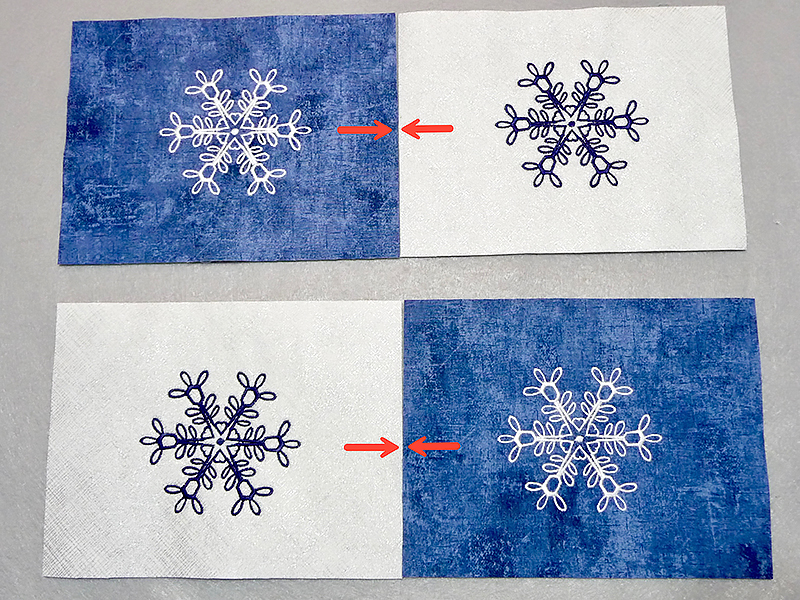
Figure #5
Set machine for sewing, attaching edge joining foot. Select a zig zag stitch set for width: 5.0, length 2.5. Stitch short ends together with raw edges touching, taking care to carefully match pieces together as you begin and end stitching on each set of rectangles. See Figure #6.
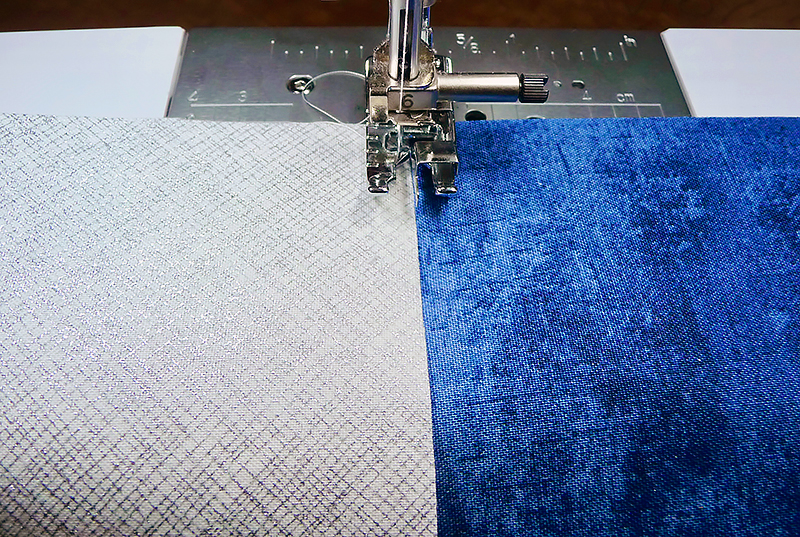
Figure #6
Next, follow the same process to sew the two rows together, taking care to carefully match long edges.
4. Prepare remaining pieces to finish placemat as follows:
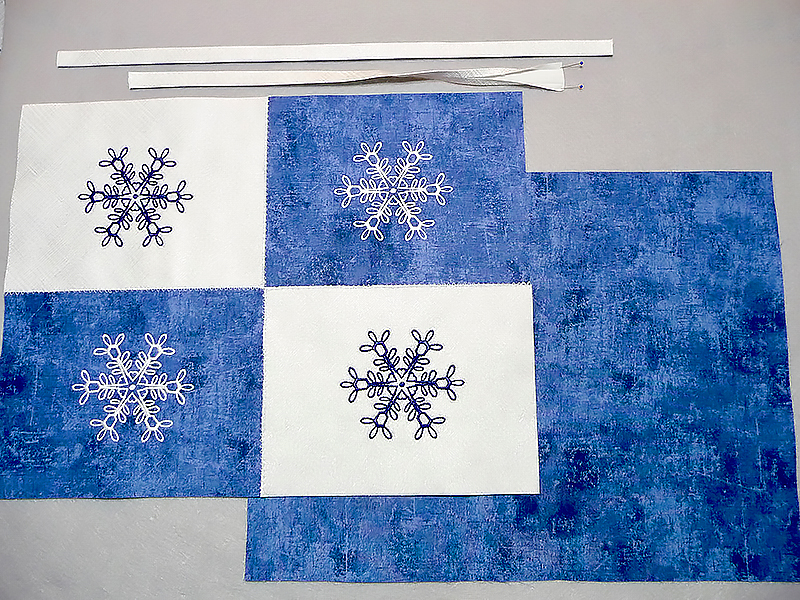
Figure #7
5. Select a straight stitch. Move the needle position slightly to the left of the blade on the edge joining foot. See settings in Figure #8.
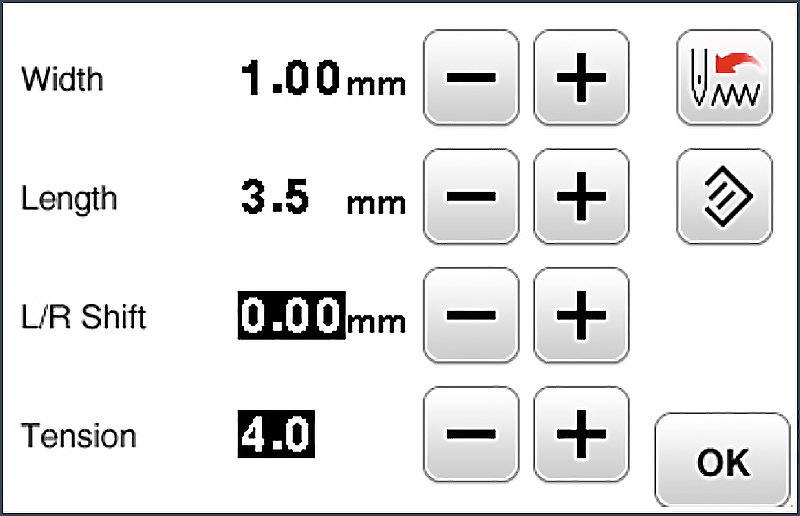
Figure #8
6. Pin 14-inch strip along the center, covering the raw edges and having 1-inch extend at each end. Sew close to each folded edge using the edge joining foot. See Figure #9a and Figure #9b.
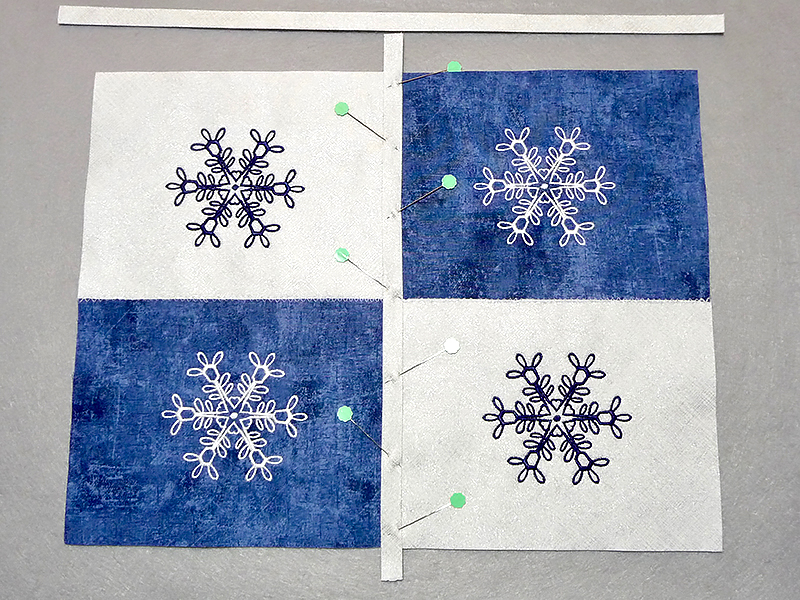
Figure #9a
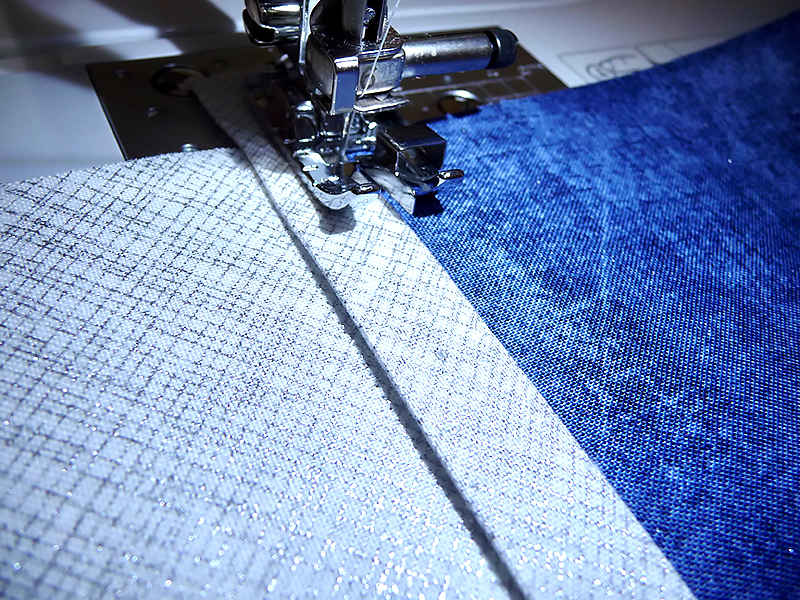
Figure #9b
Center remaining 18-inch strip over horizontal seam and repeat the process of sewing along folded edges. Trim strips even with outer raw edges.
7. To finish, layer top and bottom pieces with right sides together. See Figure #10.
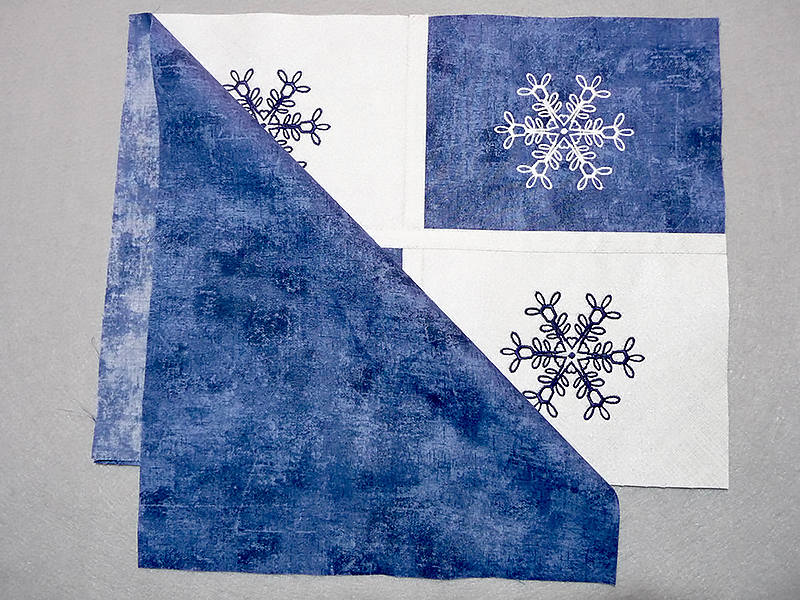
Figure #10
8. Sew each side using a 1/4-inch seam allowance. Leave a 3-inch opening on one side for turning. Turn placemat right side out and press. Fold in the seam allowance at the opening and hand stitch to close. To anchor top and bottom layers together, sew a straight stitch down the center of each strip.
Tip: Attach foot “N” for the best visibility while stitching. See Figure #11.
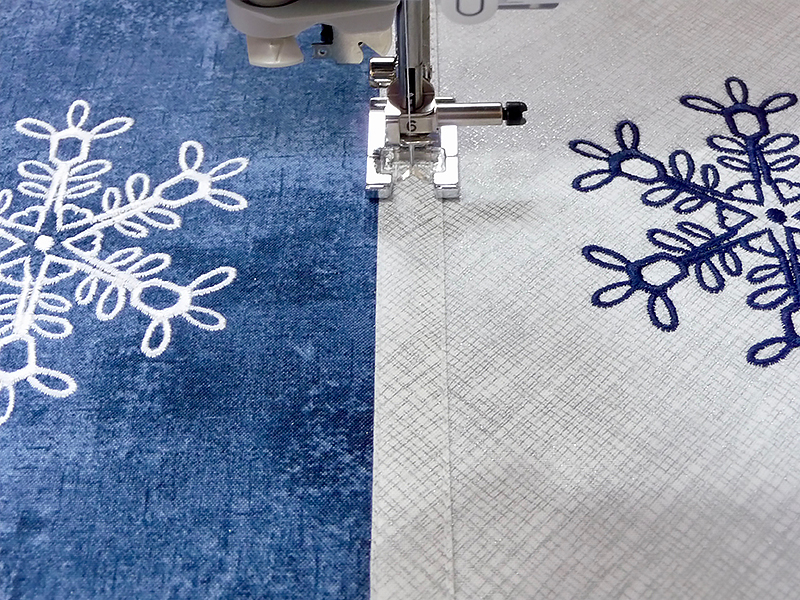
Figure #11
You are finished. Enjoy!
Inspiration and ideas:
