Stitch a Sewing Machine Shape for a Fun Tag or Appliqué
Did you know the Brother BES Dream Edition software program includes a fun sewing machine shape? I decided to celebrate National Sewing Machine Day by stitching this shape two different ways. Making the most of my Brother tools for creativity, I used BES software to make the shape, ScanNCut to cut the shape, and the Luminaire to stitch the shape. Follow along and you’ll see how to combine all three to make a key fob for your USB media or a perfect fabric appliqué. Are you ready? Let’s go sew!
Materials and Supplies:
• Brother Sewing and Embroidery MachineNote: The Brother Luminaire is featured in this project. • Brother BES4 Lettering Software
with SABES4UG1 Dream Edition Power Pack 1
is featured in this project. Visit the Brothersews YouTube channel for an overview video
, outlining new features added to the software, including the ability to send a cutting shape to a wirelessly enabled ScanNCut machine. • Brother ScanNCut
electronic cutting machine for cutting shapes. Note: Model SDX225 is featured in this project. • SA5929 Pacesetter® Cut-Away Stabilizer
. • 4-inch embroidery hoop. • Embroidery thread, bobbin thread and size 11 embroidery needle for embroidery.
Additional Materials and Supplies:
• Fabric for appliqué option: one piece of fabric measuring 4-inches square. To prepare fabric for cutting with ScanNCut, fuse medium weight interfacing to wrong side. Next, add a 4-inch piece of the Brother CASTBL1 Iron-On Fabric Appliqué Contact Sheet
to wrong side, making sure it is properly fused. Choose fabric or another item as a base for the appliqué. This example was stitched on felt. • Vinyl for key fob option: two 4-inch squares of vinyl 3mm or less in thickness. • Metal eyelet for threading ribbon tie and attachment for setting eyelets. • 6-inch piece of ¼-inch wide grosgrain ribbon. • Temporary adhesive spray used for embroidery. • Craft glue for attaching vinyl shapes. I used a clear drying glue suitable for vinyl to vinyl application. Note: Please read through all of the instructions. Some steps can be accomplished in multiple ways, depending on the set-up and tools you have on hand. Refer to your product manuals for specifics. Information with your ScanNCut includes recommendations for using the proper mat and blade with various materials. Always do a test cut for best results.
Steps to Create Sewing Machine Shapes:
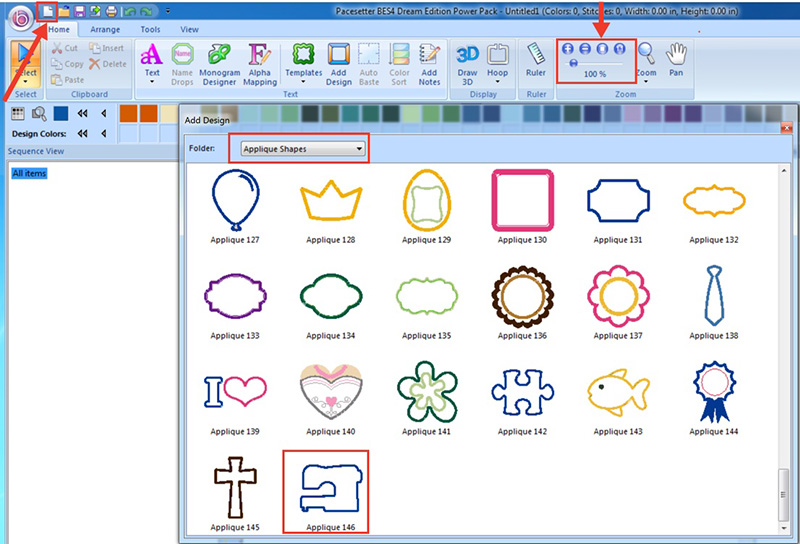
1. To begin, open a new page in BES software. Using 100% for the zoom, click Add Design. Select Appliqué shapes. Scroll down and select shape 146. See Figure #1.
2. Create the appliqué as follows:
• Click in the lower left corner of the blank workspace to generate the shape.
• To re-size, select the shape by clicking on it in the Sequence View.
• Place your curser on one of the four corners, and then click and drag until the width measures 3.50-inches.
• Next, click on the drop-down arrow for the hoop and choose 100mm X 100mm for the 4-inch hoop.
• I like to change the satin stitch width to 3.5 for a little extra coverage. See steps in Figure #2.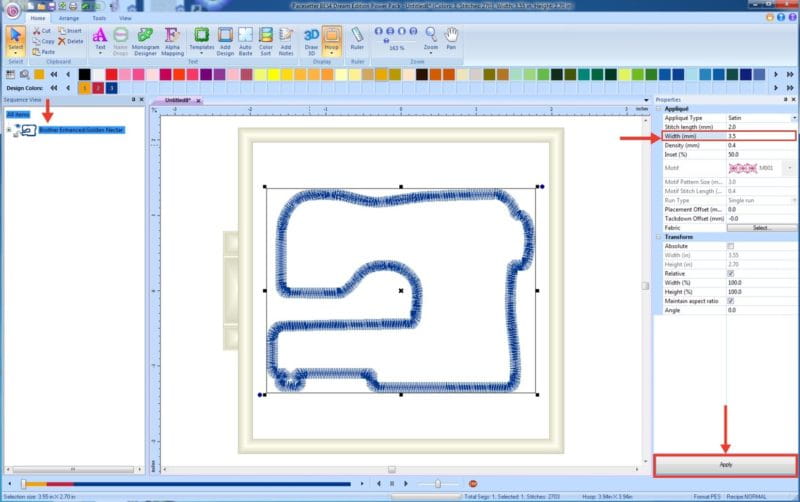
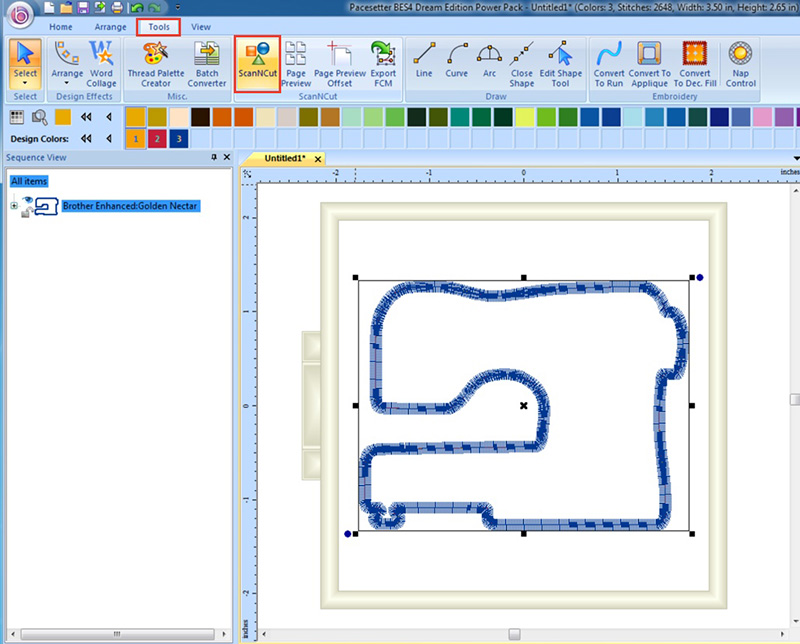
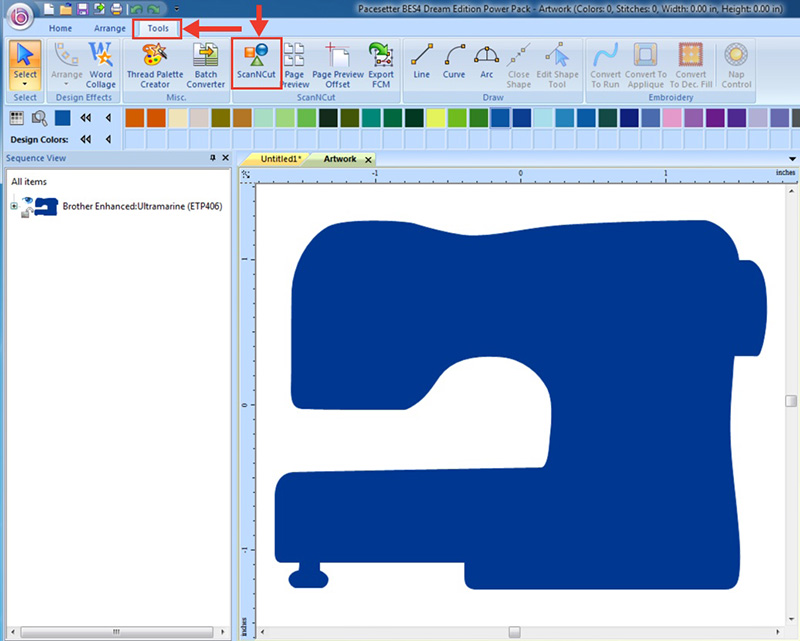
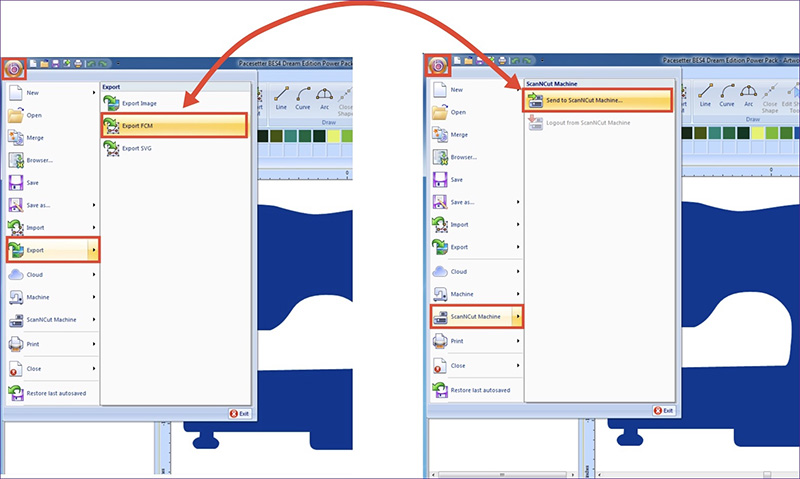
3. Create the cutting file for cutting on the ScanNCut as follows:
• Select tools from the top menu.
• Click on the ScanNCut icon to create Artwork. Rename the file if you like.
• Send artwork file to the cutting machine by naming file and exporting to portable media or send via wireless transfer if you have things set for wireless. See Figure #3a, Figure#3b, and Figure #3c.
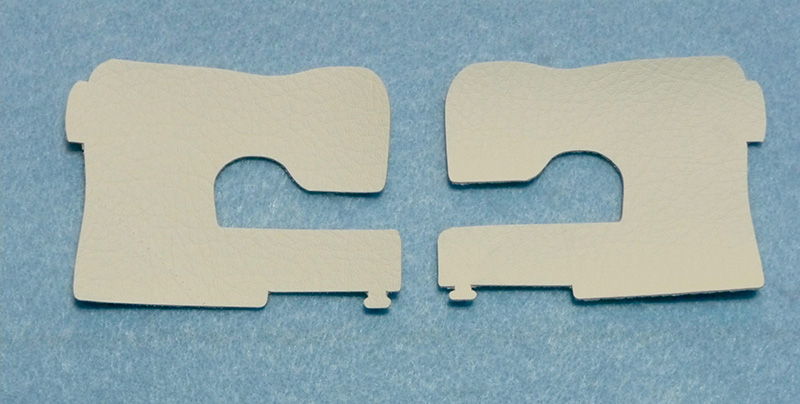
4. Prepare pieces for key fob or appliqué as follows: • Access the shape on the cutting machine. To cut vinyl for the key fob you’ll need to cut two machine shapes, one to stitch and one to leave plain. Copy, paste, and then mirror image second shape on the ScanNCut screen.
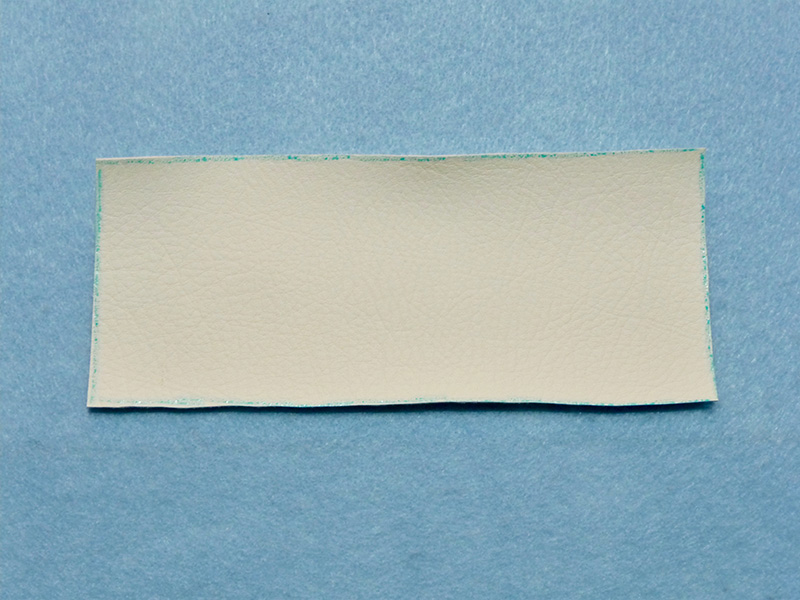
• To cut prepared fabric I used the standard mat, left the paper backing on the piece, placed the piece on the mat with paper side down on the mat, and then cut one sewing machine shape after scanning the square piece. Peel away paper backing after cutting. See Figure #5.
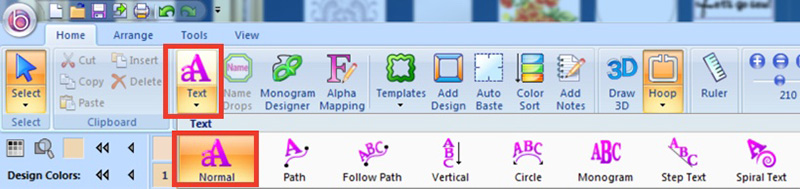
5. Add optional lettering to your sewing machine design as follows:
Select Normal from the Text menu. See Figure #6a. Choose Wrap It Up font and type lettering using settings shown in Figure #6b.

6. Save design as .pes file and transfer to your machine.
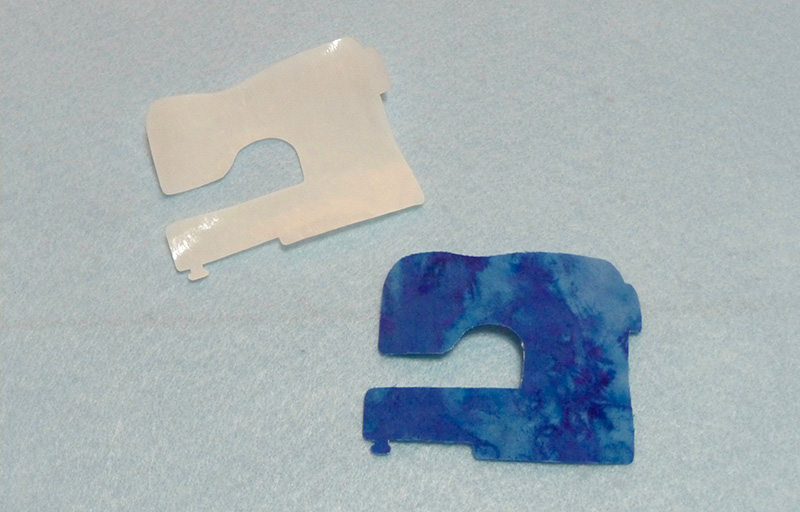
7. Complete vinyl key fob as follows:
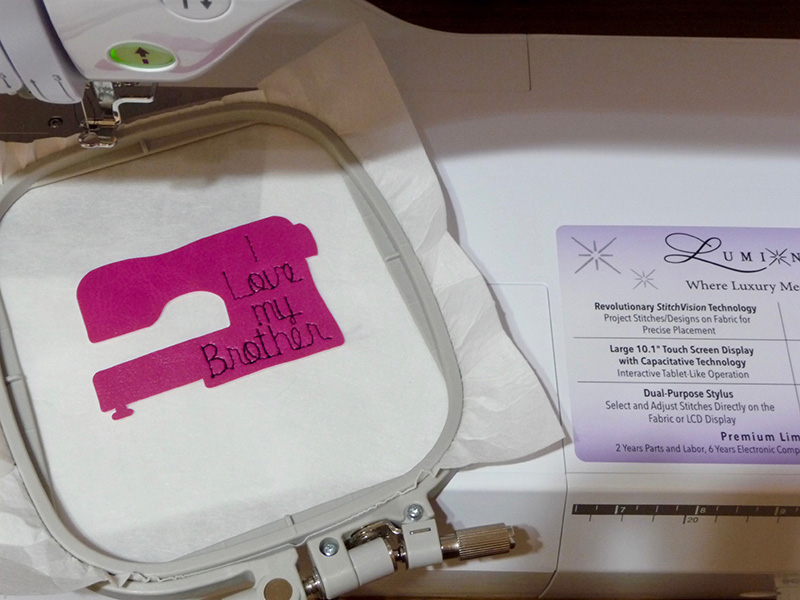
• Stitch the first color stop of the appliqué on a piece of cut away stabilizer and stop.
• Spray wrong side of vinyl machine shape with a light dose of temporary adhesive and place over outline.
• Skip to lettering and stitch lettering to finish embroidery. See Figure #7.
• Trim excess stabilizer away from shape. Carefully apply a thin layer of glue to the wrong side and secure plain vinyl shape to stitched shape, having wrong sides together.
• Add an eyelet and thread ribbon through slot in USB media. Knot ends to secure as shown in the photo of completed items.
8. Complete fabric appliqué as follows:
• Stitch first color stop on base fabric and stop. This is the placement outline for setting fabric.
• Spray wrong side of fabric machine shape with a light dose of temporary adhesive and place over outline.
• Skip to the satin stitch outline to finish the appliqué. See samples of prepared fabric and the stitching steps in Figure #8.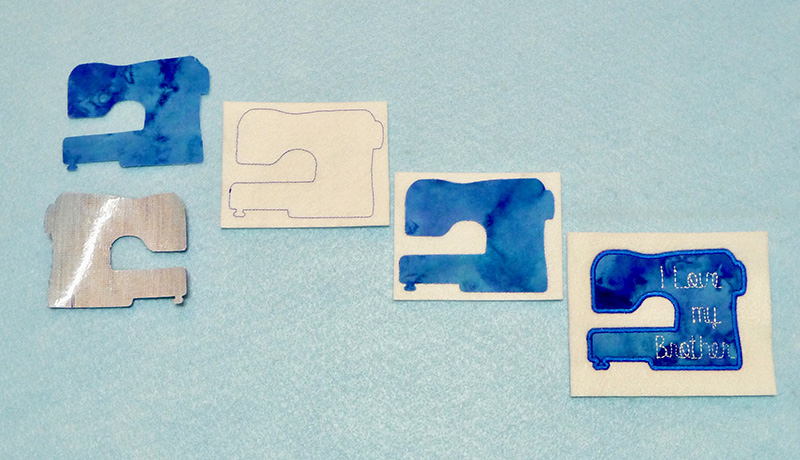
Note: If you did not have the ScanNCut to precisely cut the shape, you would position the square to cover the outline, stitch the second outline, trim the fabric manually to form the shape, and finish with the satin stitching.
[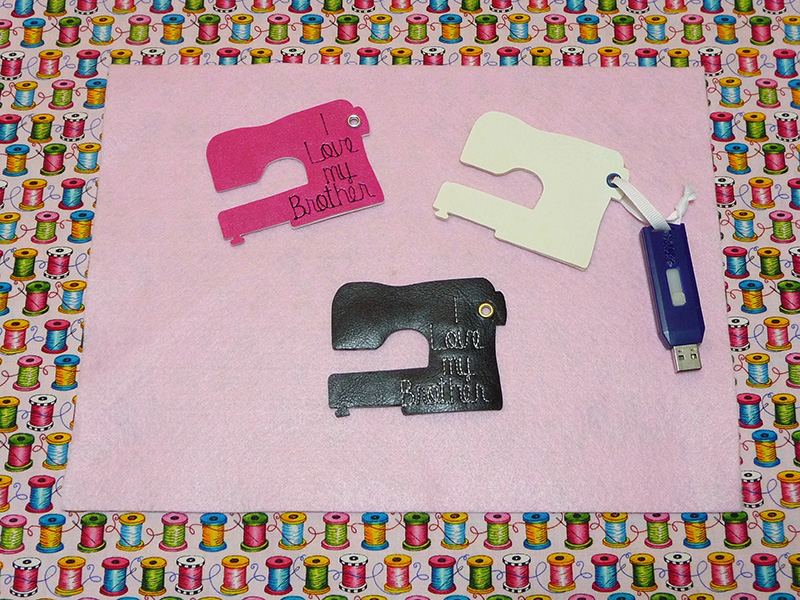 Final Product
CLICK HERE FOR PDF!
Enjoy using these basic ideas to make additional creative shapes using a combination of BES4 Dream Edition software, your Brother ScanNCut, and your Brother embroidery machine! Explore the capabilities of your Brother tools for creativity and you’ll find various models allow for the same results with BES appliqué shapes.
Related Projects
Stay Connected
* Required fields