Tips for Embroidering Lace Jewelry
Your next statement piece of jewelry is as close as your embroidery machine! With the right design it’s easy to make lace jewelry with little more than stabilizer and thread. Are you ready? Let’s go sew!
You’ll need the following supplies:
- Brother Embroidery thread
- Lace designs such as Brother SAEU1
USB lace collection - SA540
Brother light-weight water soluble stabilizer - Extra bobbins
Here are the basic steps for creating lace jewelry:
1. Choose designs that are specifically made for lace jewelry. I suggest you check the design menu of your machine, you may have lace designs already included. For another option, Brother SAEU1is a beautiful lace collection available on a USB from Brother dealers. See examples of designs from this collection in Figure #1. [caption id="attachment_20492" align="aligncenter" width="800"]
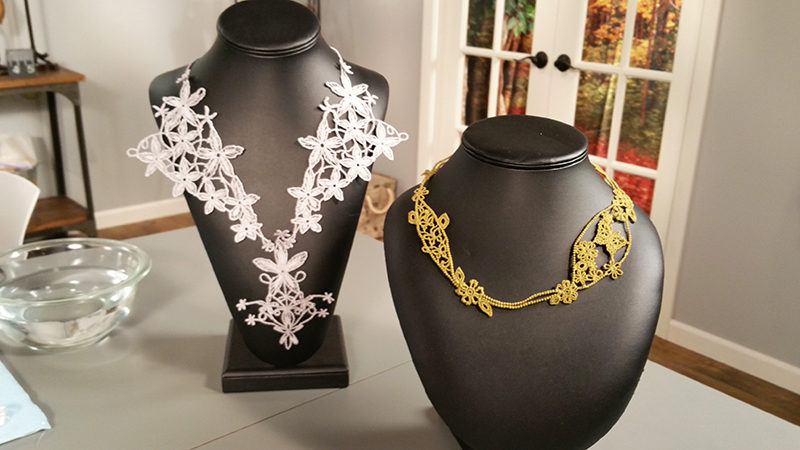 Figure #1[/caption]
Note: These designs were originally featured on the Brother sponsored PBS It’s Sew Easy TV show. Silver Lace Necklace made with designs No.eu001-41, No.eu001-42, and No.eu001-42. Gold Lace Necklace made with design No.eu001-50.
2. To start, wind one or more bobbins to match your top embroidery thread. The Brother polyester embroidery thread makes great lace! One of the best things about a making lace jewelry is the fact that you can stitch the design in any color you like.
Note: Amount of bobbin thread will vary with each design. You’ll need to change bobbin color for multi-colored lace. When doing this be sure to carefully remove the hoop without disturbing the stabilizer. Place the hoop on a flat surface while you change the bobbin and then carefully place it back on the machine without disturbing the stabilizer.
3. Select the hoop size needed for your project. For most lace jewelry it’s okay to combine designs in one hooping as long as you leave space in between and don’t crowd the hoop. I always use two layers of the stabilizer. To prepare for embroidering, tightly hoop the two layers of the stabilizer in your hoop. When I say tight, I mean tight! If your stabilizer is floppy in the hoop the threads in your design may not connect well. Start with a new embroidery needle and then embroider designs using the slowest possible speed for best results. See Figure #2a and #2b for an example of a combination of designs included with SAVRXVUGK2 XV,the XV-Series Software Upgrade Premium Pack II kit. There are additional lace designs in this kit. Download
the Pattern List from the support section of brother-usa.com. [caption id="attachment_20490" align="aligncenter" width="780"]
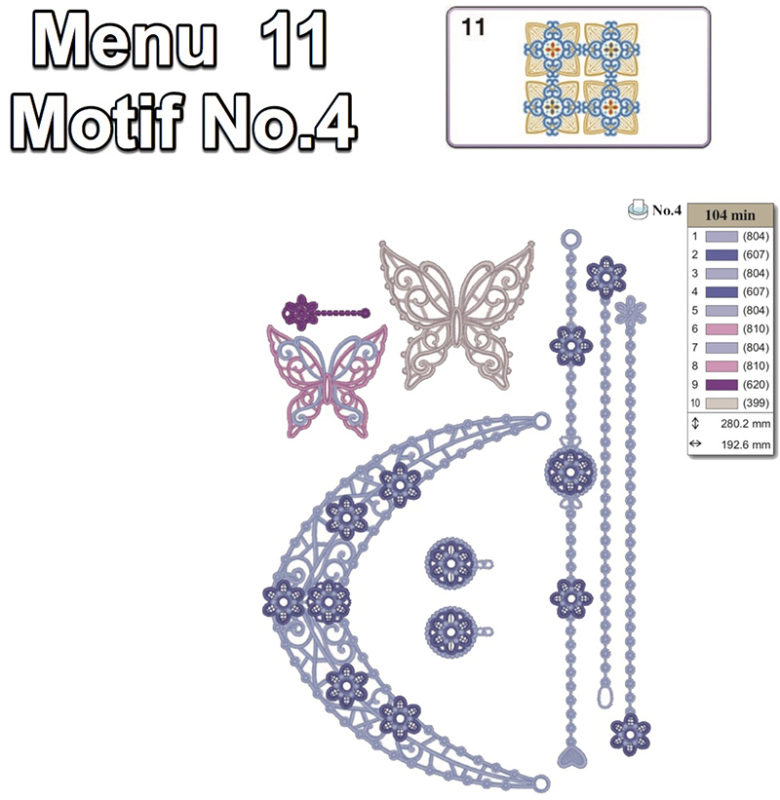 Figure #2a[/caption]
[caption id="attachment_20491" align="aligncenter" width="800"]
Figure #2a[/caption]
[caption id="attachment_20491" align="aligncenter" width="800"]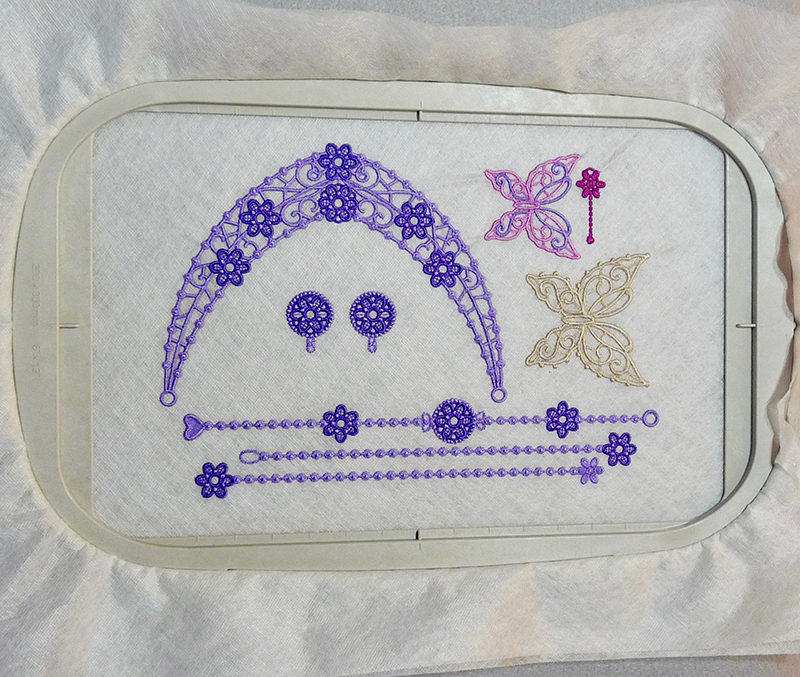 Figure #2b[/caption]
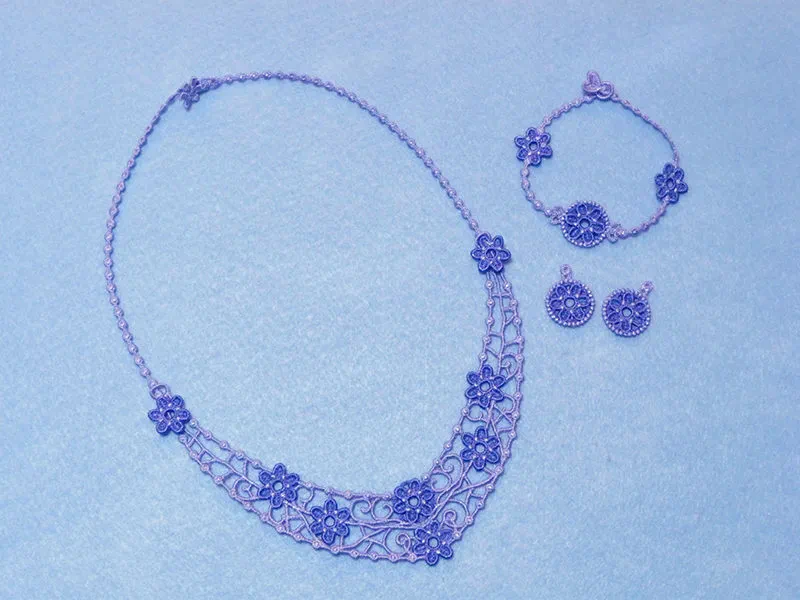
4. When embroidery is finished trim away excess stabilizer and then dip each piece in very hot water to dissolve the rest. Most of the time there is just a slight stiffness left to the design. If you feel the need to have softer lace you can continue rinsing in clear water or try this tip: Make a solution of water and liquid fabric softener, using ¼ cup of fabric softener for each half gallon of water. Soak for a few hours, then rinse and dry on a terry towel.
5. As a final step, press jewelry from the wrong side with a warm iron, pressing right on the surface of the towel. Attach any jewelry findings needed to complete the piece. Optional - Add rhinestones or beads to add sparkle and shine to your jewelry. Enjoy!
Figure #2b[/caption]
4. When embroidery is finished trim away excess stabilizer and then dip each piece in very hot water to dissolve the rest. Most of the time there is just a slight stiffness left to the design. If you feel the need to have softer lace you can continue rinsing in clear water or try this tip: Make a solution of water and liquid fabric softener, using ¼ cup of fabric softener for each half gallon of water. Soak for a few hours, then rinse and dry on a terry towel.
5. As a final step, press jewelry from the wrong side with a warm iron, pressing right on the surface of the towel. Attach any jewelry findings needed to complete the piece. Optional - Add rhinestones or beads to add sparkle and shine to your jewelry. Enjoy!
 You’ll notice that It’s Sew Easy TV is referenced in the instructions. I taped a show demonstrating how to make the Brother lace jewelry on show 1603. See the video below from my YouTube channel. Enjoy!
[youtube id="LwwsigGwDEE"]
You’ll notice that It’s Sew Easy TV is referenced in the instructions. I taped a show demonstrating how to make the Brother lace jewelry on show 1603. See the video below from my YouTube channel. Enjoy!
[youtube id="LwwsigGwDEE"]
Related Projects
Stay Connected
* Required fields