Tutorial - How to Create a Free-Standing Floral Applique With The Brother Simply Applique Software Program
- Brother Sews Blogger

Simply Appliqué is a program designed to expand your embroidery capabilities, helping you to be more creative in your sewing projects. You’ll find a multitude of appliqué shapes built into the program, with countless ways to use them in creative applications. When combined with the precise cutting of a Brother ScanNCut DX digital cutting machine, creating fun DIY sewing and embroidery projects is easier than you ever thought possible. In this tutorial you’ll learn how to create a three-dimensional free-standing flower. I’ve included instructions for cutting the embroidered appliqué both with and without the Brother ScanNCut DX. If you love embroidering appliqués and you don’t currently own a Brother ScanNCut DX, this project is sure to show you the benefits of combining Simply Appliqué with Brother ScanNCut DX and your Brother embroidery machine. Are you ready? Let’s go sew!
Materials and Supplies for Sample Flower:
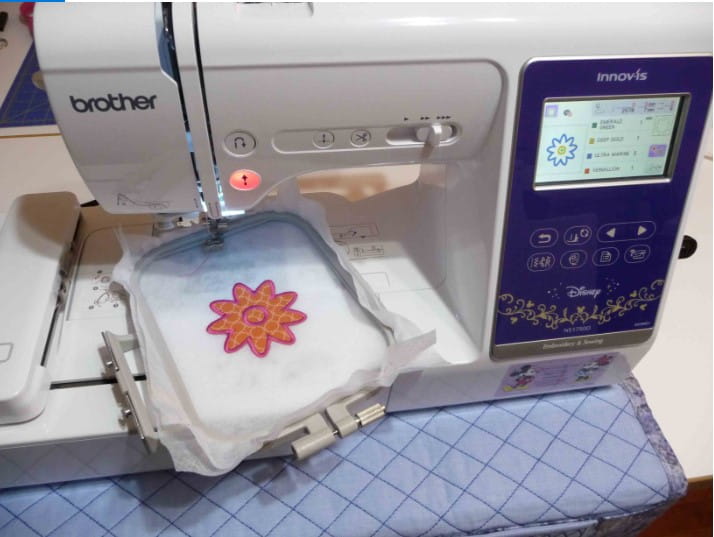
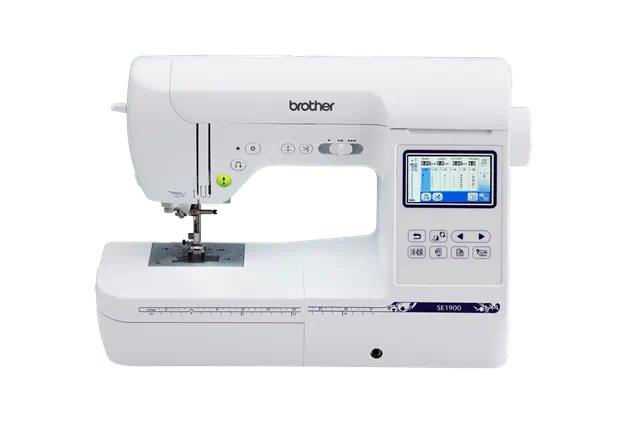
• Brother sewing and embroidery machine. Note: Machine featured in this project is the Brother NS1750D. You can use any machine with 4-inch hoop capability.
• SABESSA Brother Simply Appliqué – Creative Appliqué Software Program
• Brother Embroidery Threads to coordinate with fabric.
• SA541 Brother lightweight water-soluble stabilizer.
• Sharp curved tip scissors for trimming appliqué if you are not using the Brother ScanNCut DX.
• Embroidery needle, size 11.
• Other helpful items include low tack tape and a fabric glue stick for holding applique in place.
• Optional: Brother ScanNCut DX for cutting fabric for appliqué. Note: Model SDX225 is featured in this project.
• Fabric and fusible for each flower:
- Two pieces of quilt weight cotton measuring 3 ½-inches square.
- One 3 ½-inch square piece of fusible webbing to bond two layers of cotton fabric together.
Steps to Create the Flower:
1. Open Simply Appliqué Software. Select Add Design from the Home tab and select the folder containing Appliqué Shapes. See Figure #1.
Figure #1

2. Scroll down to select flower shape 053. See Figure #2.
Figure #2

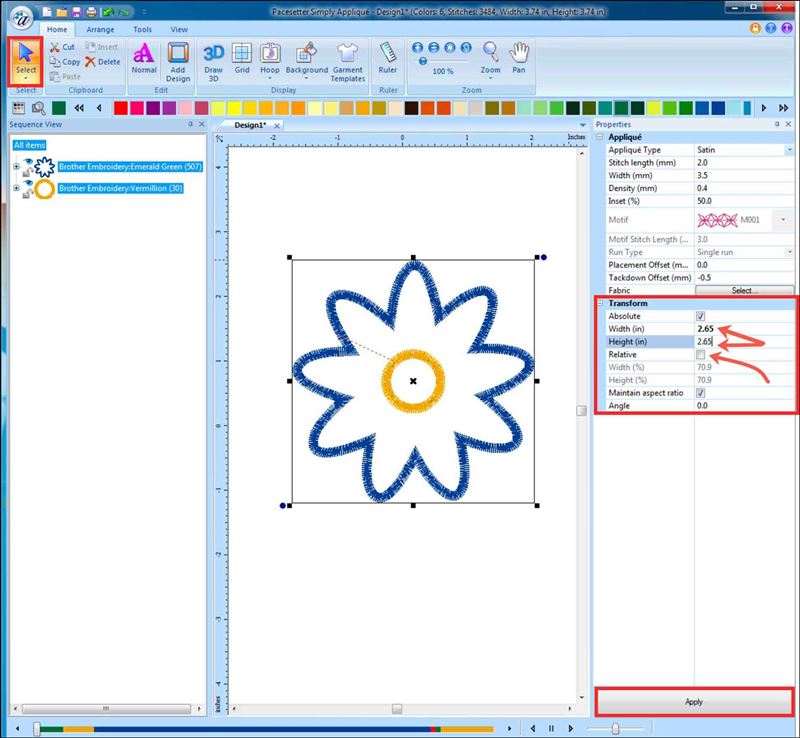
3. Click once in the blank workspace to generate the flower. Next, click on the select tool in the upper left corner and drag the flower into view. Change the size of the flower as follows: Look over at the Properties box and click the Relative box to uncheck it. To make the flower smaller, type 2.65 for the size in the width box. Click once in the Height box. The height will change to the same number because the Maintain aspect ratio box is selected. Click Apply to set the changes. See Figure #3. Note that the size may increase slightly.
Figure #3

4. Click on the “a” Simply Appliqué icon and save the design as a .pes file to transfer it to your machine. I chose to save to a portable USB media. See Figure #4.
Figure #4

5. If you plan to use the Brother ScanNCut DX to precisely cut the appliqué, now it is time to create the FCM or Fabric Cutting Machine file to use in the Brother ScanNCut DX. Create and save the file as follows: Click on Tools tab and then click on the Brother ScanNCut DX icon. The software will automatically generate the artwork for your cut file. See Figure #5.
Figure #5

We’re not going to need the yellow center appliqué shape so let’s delete it as follows: Click on the gold circle in the sequence view. Next, right click to bring up the pop-up menu and click delete. See Figure #6.
Figure #6

Click on the “a” Simply Appliqué icon and this time click Export FCM. Name the file and save. See Figure #7.
Figure #7

Note: I chose to save the file to USB media to carry it over to the Brother ScanNCut DX.
6. Gather materials for embroidering the flower. I prepared a 4-inch hoop with two layers of water-soluble stabilizer tightly hooped to stitch the free-standing flower. See Figure #8.
Figure #8

Prepare to cut the fabric on the Brother ScanNCut DX as follows: Use the fusible webbing to fuse the two layers of fabric with wrong sides together. See Figure #9.
Figure #9

Retrieve the flower FCM from saved data. See Figure #10.
Figure #10

Select the saved flower. Note: If your flower name shows on the screen without the full image simply select the file and it will show up on the layout screen. Touch OK. See Figure #11.
Figure #11

We’re going to increase the size of the cut piece slightly to account for the extra fabric thickness. Re-size as follows: Touch Edit on the layout screen. Touch Object Edit. Touch Size Key. Touch percentage key and proportionally increase size to 102 percent. See Figure #12a through Figure #12d.
Figure #12a

Figure #12b

Figure #12c

Figure #12d

Touch OK until you reach the page for selecting fabric cutting. Secure fabric to the mat, load and scan fabric mat, position flower on scanned piece and then cut flower from the fused double layer of fabric. Note: I used the Black Auto Blade due to the added thickness of the fabric layers. See Figure #13.
Figure #13

7. Set up machine for embroidery with the saved flower embroidery design. Wind a bobbin with the top embroidery thread so top and bottom match. Embroider design. Note: Embroidery steps will vary slightly if you have pre-cut your flower with the Brother ScanNCut DX. See method #1 and #2 below:
Method #1: Creating applique with pre-cut, Brother ScanNCut DX flower. Stitch the first color, the appliqué material line on the water-soluble stabilizer. Place cut flower piece so it covers the stitching line and go ahead and stitch the second color, the appliqué position over the fabric. Note: Since the piece is already cut you could choose to skip forward to the final satin stitching. Tip: I like to apply fabric glue to the piece, let it dry, and then proceed with stitching. This helps keep the applique from shifting. Finish by stitching the satin appliqué stitching on the flower.
Method #2: Creating applique without pre-cutting flower with Brother ScanNCut DX. Stitch the first color, the appliqué material line on the water-soluble stabilizer. Place fabric square so it covers the placement line and tape in place with low tack tape. Stitch the second color, the appliqué position over the fabric. Next, use sharp curved tip scissors to trim away excess fabric close to the stitching line. Finish by stitching the satin applique stitching on the flower. Tips: Lay the hoop on a hard, flat surface when cutting. Be sure to avoid distorting the fabric in the hoop or your stitches will be misaligned. This flower has sharp inner points. For ease in trimming, cut into each corner with the scissors before trimming around outside of petals.
See example of stitching the flower appliqué using method #2 below in Figure 14a through Figure 14f below:
Figure #14a

Figure #14b

Figure #14c

Figure #14d

Figure #14e

Figure #14f

8. Trim excess stabilizer from edges. Wash away remaining stabilizer following package instructions. You are finished! See completed flowers below:

Options and ideas:
Use free-standing flowers to decorate a wide variety of accessories such as hairbands, purses, hats, shoes, and more! You’ll see me attach these flowers to a pair of flip flops in a future blog post. Ideal for garments and home décor items as well! Use your imagination combined with Brother machines and software to brighten up your life with free-standing flowers! Enjoy!


