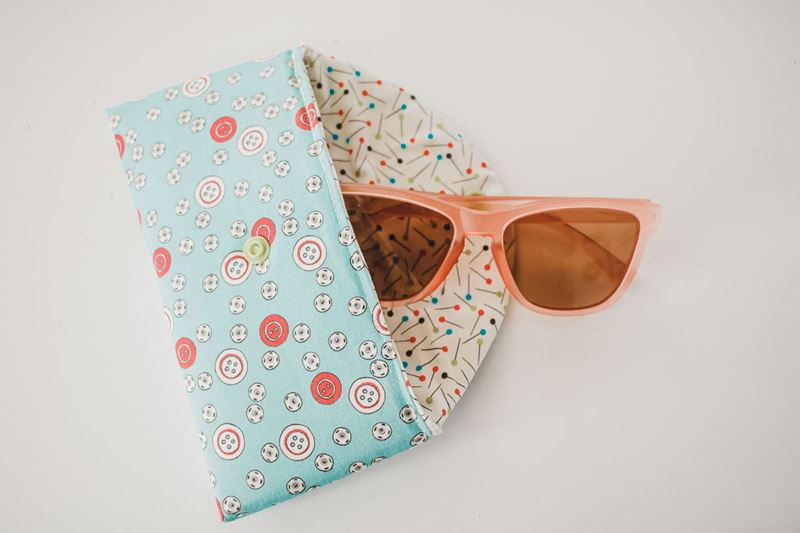
How To Make A DIY Sunglass Case
Keep your sunnies safe, sew your own DIY sunglasses case.
Tired of scratched lenses and broken frames? Me too.
I live in the sunny city of Denver, so I always keep a pair of sunglasses close by. However, I'm terrible at keeping my glasses protected and often end up with broken or scratched glasses due to carelessness. A few years ago, I was tired of having to buy new sunglasses, so I created a padded sunglass case to keep my glasses safe and protect them from scratches. Whether you're heading out on a weekend adventure or just commuting under sunny skies, keeping your sunglasses safe is essential.
This simple sewing project is perfect for beginner sewists, stylish, and practical. With just a few supplies and some basic steps, you can create a custom case to protect your favorite shades.
Here’s what you’ll need to get started sewing your sunglasses case!
Materials:
- Brother sewing machine and/or serger like our Brother CS7505 computerized sewing machine with wide table or our Brother CE1155 computerized sewing machine with auto stop/start
- Free glasses case pattern
- Fabric {fat quarters work great for this project. You can use one or two fabrics for this case}
- Fusible or non-fusible foam stabilizer
- Snap or hook and loop tape for closure
- Snap setting tool
- Thread to match your fabrics
Learn how to sew a padded sunglasses case in 9 easy steps
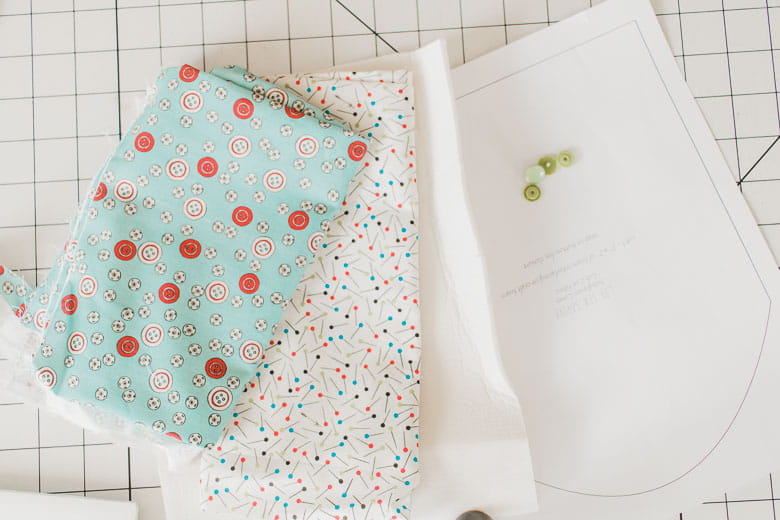
1. Download and print the pattern.
Get your free glasses case pattern and print it out. It’s your template for cutting the fabric and foam pieces to the perfect size.
2. Cut the materials
Using the printed template, cut out two shapes from your chosen fabric and one shape from the foam. For a snug fit, cut the foam about ⅜” smaller on all sides.
3. Prepare the pieces
Fold and sew the sides of both the lining and outer fabric pieces. This creates the foundation of your sunglasses case. With the right side of the fabric facing up, fold the bottom straight edge up to meet the base of the curved top edge; secure each side with pins. Set your machine for center needle straight stitch. Align the raw edge of the fabric with the outer edge of the presser foot and sew. Backstitch at the beginning and end of the seam.
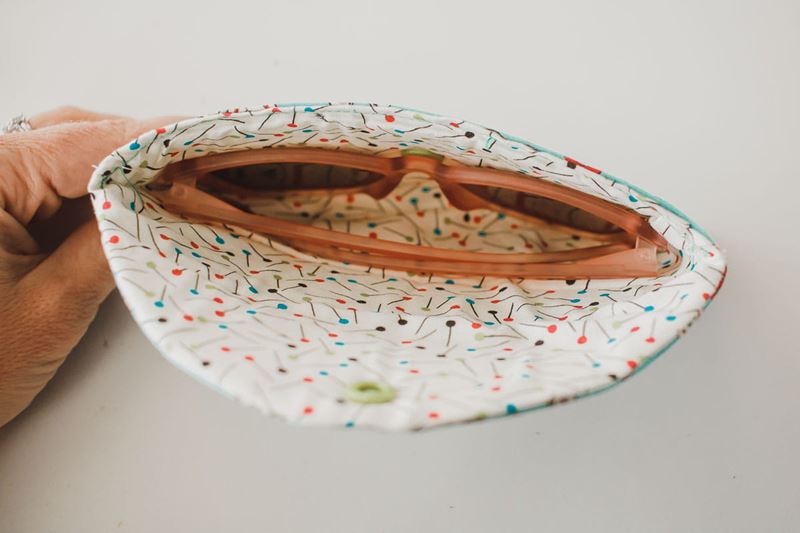
4. Sew the curve

Turn the lining piece right side out and fit it inside the outer fabric. With the right sides facing together, sew the two fabric pieces along the curved top edge. It should now look like a case.
5. Insert the padding
Insert the foam between the two layers of fabric through the opening at the top of the pocket. If the foam feels too tight, trim it slightly until it fits comfortably.
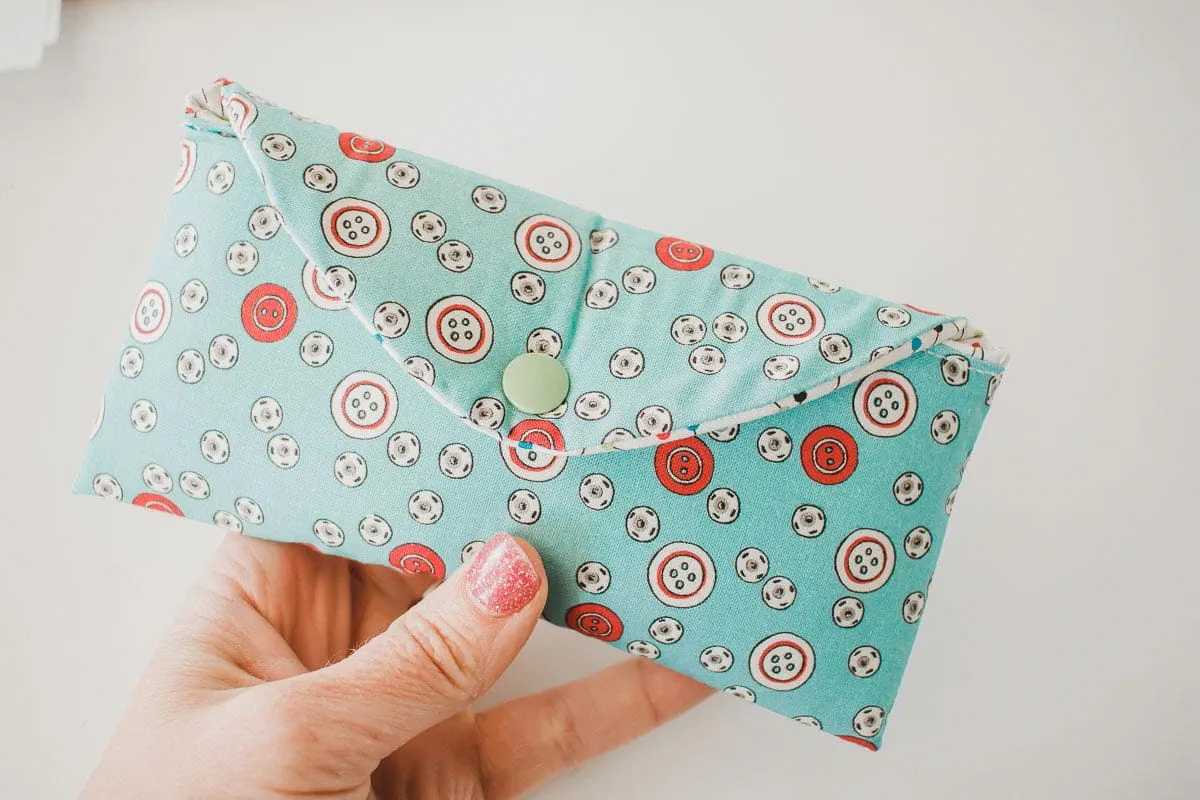
6. Finish the raw edge
Fold the seam allowance of the straight edge at the top of the pocket inward and topstitch it closed to lock everything in place.
7. Use fusible foam (optional)
If you used fusible foam, you can use a small iron at this point to fuse the foam.
8. Add your closure
Attach a snap or hook-and-loop fastener for easy access that keeps your sunglasses securely in place.
9. Enjoy and protect your shades
Pop your sunglasses into the case, and you’re all set for sunny days ahead!
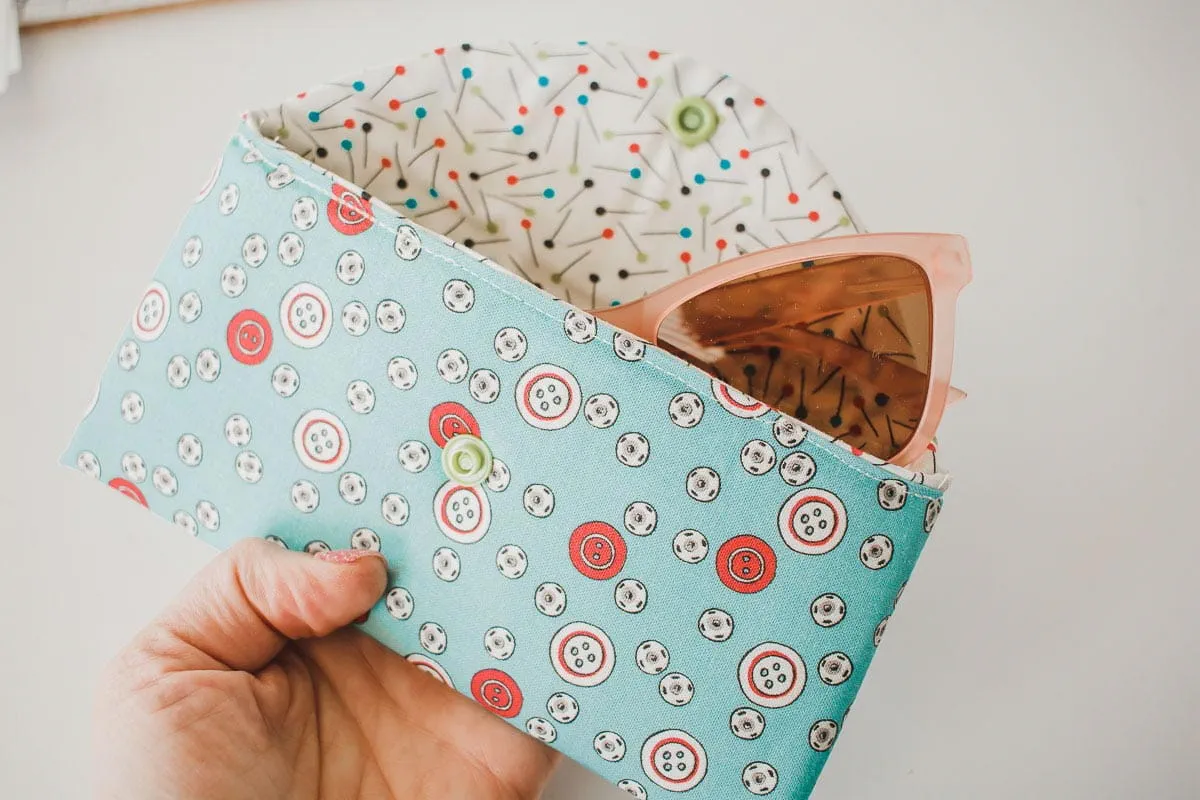
Enjoy your custom sunglasses case with this sewing tutorial!
Your sunglasses deserve better than scratches and smudges! By sewing your own DIY padded sunglasses case, you’re protecting your investment and showcasing your personal style. Plus, it’s an easy beginner sewing project to improve your skills! For even more creative ideas and sewing inspiration, browse more sewing tutorials on our blog, like this DIY bucket hat or this outdoor pillow sewing project.
FAQs on your DIY sunglasses case
Q: Can I use different fabrics, like leather or denim?
A: Yes! Just ensure the fabric is easy to sew and complements the structure provided by the foam.
Q: What if I don’t have fusible foam?
A: Non-fusible foam works just fine! You’ll just need to insert and adjust it during step 5.
Q: How much fabric do I need for this project?
A: A fat quarter of fabric works perfectly for most cases, but if you’re doubling up on colors or patterns, plan on using one fat quarter per design.
Q: What’s the best way to clean the case?
A: If washable, you can spot clean, or hand wash your case using gentle detergent. Air dry to maintain its shape.
Q: How long does it take to complete this?
A: This quick project typically takes about 30 minutes to an hour, depending on your sewing experience. If you’re looking for more easy sewing tutorials, check out this beginner-friendly apron sewing tutorial or this DIY beach cover-up.
Tags
Shop this Project
No sewing machine? No problem! Any products mentioned in this project are available to buy here so you can stay stitching.

Related Projects
Stay Connected
* Required fields